Published Date : 2019年7月16日9:24
Deep Manzai Part 9 〜 AIML Web App 〜
This article has an English translation.
前回の簡単なあらすじ
A brief summary of the previous article.
AIMLを使ったPythonのチャットアプリを作りました。以上!
We've gone as far as creating a Python chat app using AIML.
Heroku
さて、今回は前々回に失敗したHerokuでのデプロイを行っていきます。
Now we're going to deploy on Heroku, which failed two times before.
前々回のHerokuの内容はこちらを参照してくだちぃ。
Please refer to the content of Heroku of the previous episode.
そして参考にしたコードはこちらの記事です。
AIが流行ってる今だからこそルールベースのチャットボットをAIMLで作ってみる【Python】その2
貴重な情報、サンキューです!
This is the code I used.
Now that AI is in vogue, it's time to build a rule-based chat bot with AIML [Python] Part 2
Thank you for the valuable information.
それではさっそくコードを書いていきます。
I'll write the code now. Let's get started!
アプリ構築 -building an application-
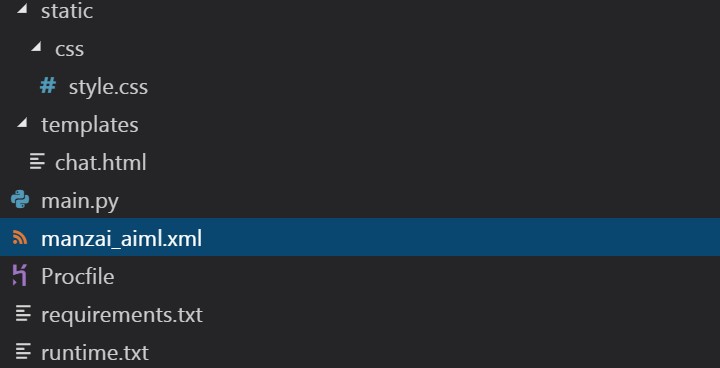
まず、ファイルの構造はこんな感じにします。 各自適当な作業用フォルダを作って、この記事を参考に必要なファイルを作っていってくだちぃ。
First, the file structure looks like this. Create your own working folder and use this article as a guide for creating the files you need.
本体のコードです。 ポートエラーが出るので、Herokuに合わせてポート番号を取得するように変えてあります。
The code of the body. I got a port error, so I changed it to get the port number for Heroku.
main.py
from flask import Flask, render_template, request, jsonify
# AIMLはXMLなので、XMLを操作するのに必要なモジュールをインポート。
# Because AIML is XML, you import the modules you need to work with the XML.
import xml.etree.ElementTree as ET
import os
import time
# AIMLの操作に必要なモジュールをインポート。
# Import the modules required for AIML operations.
import aiml
app = Flask(__name__)
global k
k = aiml.Kernel()
k.learn("manzai_aiml.xml")
time.sleep(1)
@app.route("/")
def chat():
return render_template('chat.html')
@app.route("/ask", methods=['POST'])
def ask():
# メッセージを取得
global k
message = str(request.form['messageText'])
while True:
if message == "quit":
exit()
else:
bot_response = k.respond(' '.join(list(message)))
# チャットボットの返答を返す
return jsonify({'status':'OK','answer':bot_response})
# ユーザーが求める応答文を作らせる関数。
# A function that allows the user to create the response statement they want.
@app.route("/generator", methods=['POST'])
def generator():
global k
# メッセージを取得。
# Get Message.
requestText = str(request.form['requestText'])
responseText = str(request.form['responseText'])
# AIMLファイルを作っていく。
# Create an AIML file.
tree_ = ET.ElementTree(file="manzai_aiml.xml")
root = tree_.getroot()
category = ET.SubElement(root, 'category')
pattern = ET.SubElement(category,'pattern')
pattern.text = ' '.join(list(requestText))
template=ET.SubElement(category,'template')
template.text = responseText
tree_.write("manzai_aiml.xml", encoding='utf-8', xml_declaration=True)
time.sleep(1)
# 保存後、ファイルの内容を反映させる。
# Reflect the contents of the file after saving.
k = aiml.Kernel()
k.learn("manzai_aiml.xml")
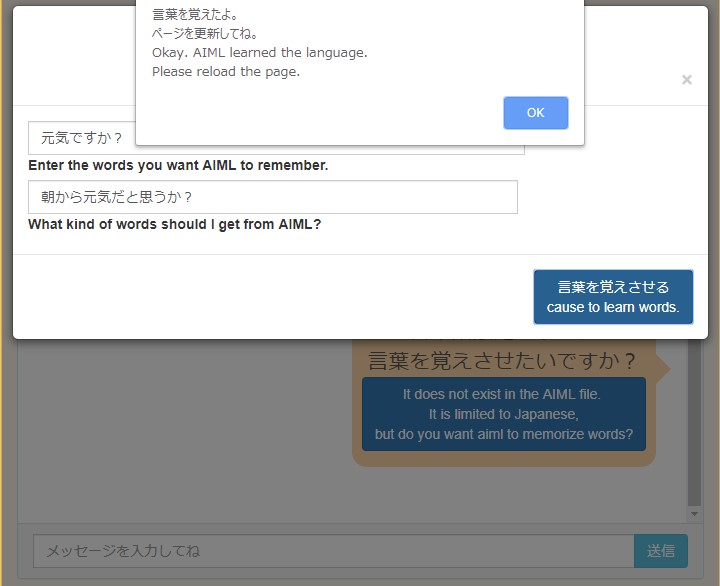
return jsonify({'status':'OK','result':'言葉を覚えたよ。\nページを更新してね。\nOkay. AIML learned the language.\nPlease reload the page.'})
if __name__ == "__main__":
# Herokuからポート番号を取得するようにする。
# Get the port number from Heroku.
port = int(os.getenv("PORT"))
app.run(host='0.0.0.0', port=port, debug=True)
お次はGunicornの設定です。 ポート番号と設定を少し変えました。
Next is the Gunicorn configuration. I changed the port number and settings a little.
Procfile
web: gunicorn hello:app --preload --timeout 10 --max-requests 1200 --log-file=-
お次はHTMLファイルです。 変更部分はユーザーの入力を受け付けて、処理をする部分。
Next is the HTML file. The change is the part that accepts user input and processes.
<!DOCTYPE html>
<html>
<head lang="ja-jp">
<meta charset="UTF-8">
<meta name="viewport" content="width=device-width, initial-scale=1.0">
<meta http-equiv="X-UA-Compatible" content="ie=edge">
<title>変な会話 チャットボット</title>
<link rel="stylesheet" href="{{ url_for('static', filename='css/style.css') }}" >
<script src="https://ajax.googleapis.com/ajax/libs/jquery/3.2.1/jquery.min.js"></script>
<link href="https://maxcdn.bootstrapcdn.com/bootstrap/3.3.6/css/bootstrap.min.css" rel="stylesheet">
<link href="https://maxcdn.bootstrapcdn.com/font-awesome/4.6.3/css/font-awesome.min.css" rel="stylesheet">
</head>
<body>
<div class="container background-color: rgb(255,0,255);">
<div class="row">
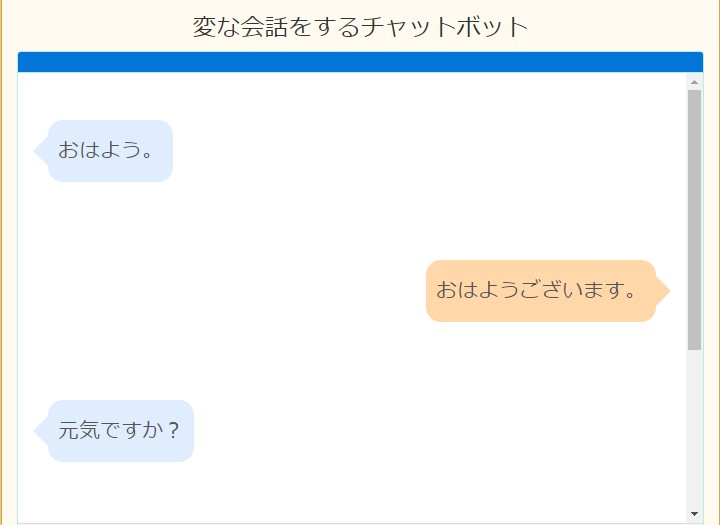
<h3 class="text-center header_text">
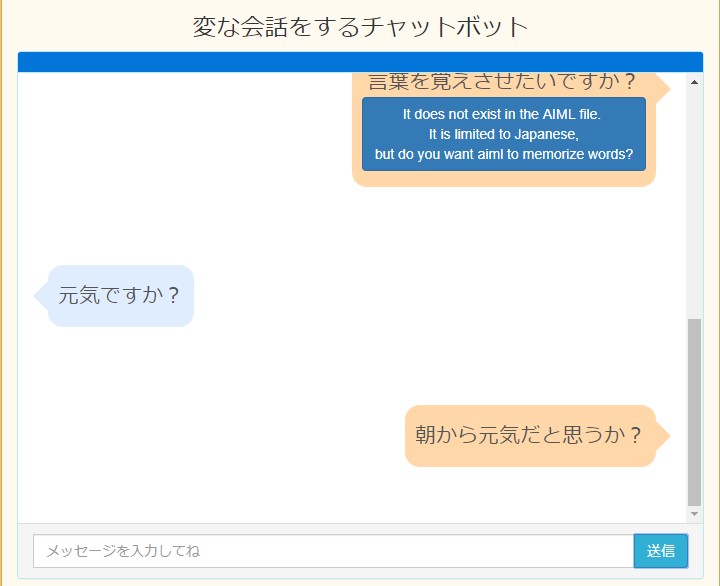
変な会話をするチャットボット
</h3>
<div class="col-md-4 col-md-offset-4">
<div id="chatPanel" class="panel panel-info">
<div class="panel-heading" style='background-color: #0275d8 !important;'>
<!--<strong>変な会話スタート</strong>-->
</div>
<div class="panel-body fixed-panel" style='background-color: #fff !important; height:80%;'>
<ul class="media-list">
</ul>
</div>
<div class="panel-footer">
<form method="post" id="chatbot-form">
<div class="input-group">
<input type="text" class="form-control" placeholder="メッセージを入力してね" name="messageText" id="messageText" autofocus/>
<span class="input-group-btn">
<button class="btn btn-info" type="button" id="chatbot-form-btn">送信</button>
</span>
</div>
</form>
</div>
</div>
</div>
</div>
</div>
<!-- Modal -->
<div class="modal fade" id="modalGenerateResponse" tabindex="-1" role="dialog" aria-labelledby="myModalLabel" aria-hidden="true">
<div class="modal-dialog modal-dialog-centered" role="document">
<div class="modal-content">
<div class="modal-header text-center">
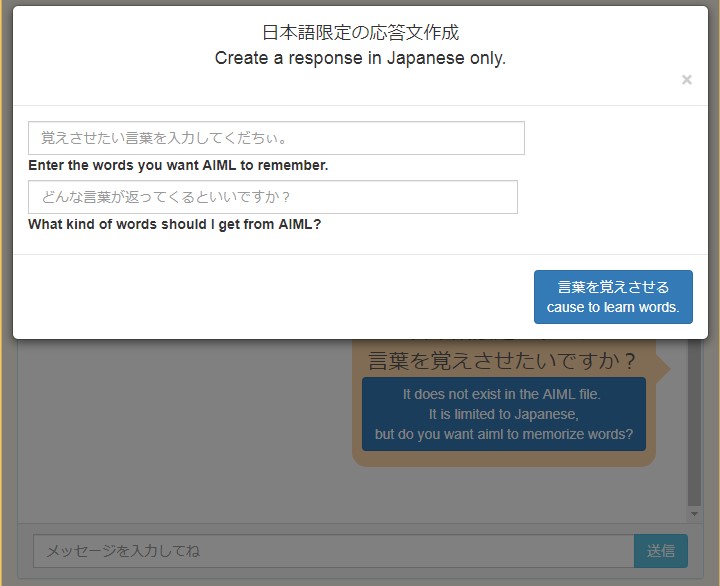
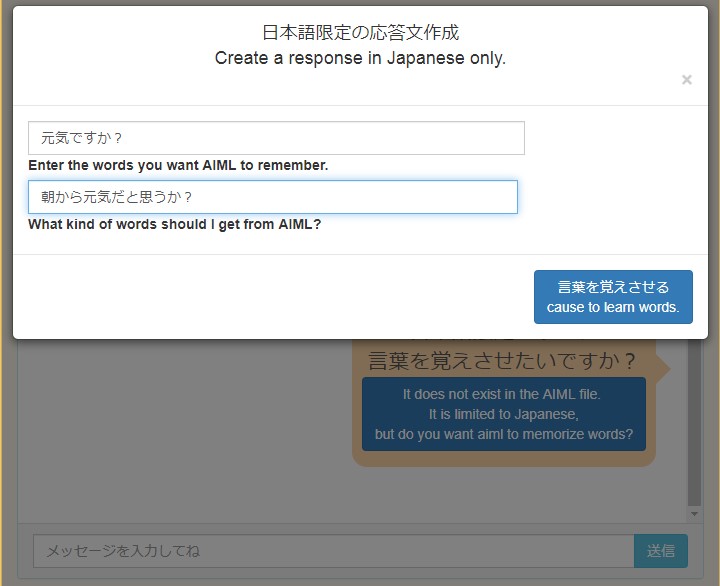
<h4 class="modal-title" id="exampleModalCenterTitle">日本語限定の応答文作成<br>Create a response in Japanese only.</h4>
<button type="button" class="close" data-dismiss="modal" aria-label="Close">
<span aria-hidden="true">×</span>
</button>
</div>
<div class="modal-body">
<form method="post" id="generator-form">
<div class="input-group">
<input type="text" class="form-control" placeholder="覚えさせたい言葉を入力してくだちぃ。" name="requestText" id="requestText" autofocus/>
<label data-error="wrong" data-success="right" for="defaultForm-pass">Enter the words you want AIML to remember.</label>
</div>
<div class="input-group">
<input type="text" class="form-control" placeholder="どんな言葉が返ってくるといいですか?" name="responseText" id="responseText" autofocus/>
<label data-error="wrong" data-success="right" for="defaultForm-pass">What kind of words should I get from AIML?</label>
</div>
</form>
</div>
<div class="modal-footer d-flex justify-content-center">
<button class="btn btn-primary" type="button" id="genrate-aiml-btn">言葉を覚えさせる<br>cause to learn words.</button>
</div>
</div>
</div>
</div>
<div class="modal fade bd-example-modal-sm" tabindex="-1" role="dialog" id="small-dialog" aria-labelledby="mySmallModalLabel" aria-hidden="true">
<div class="modal-dialog modal-sm">
<div class="modal-content">
</div>
</div>
</div>
<script src="https://code.jquery.com/jquery-3.3.1.slim.min.js" integrity="sha384-q8i/X+965DzO0rT7abK41JStQIAqVgRVzpbzo5smXKp4YfRvH+8abtTE1Pi6jizo" crossorigin="anonymous"></script>
<script src="https://cdnjs.cloudflare.com/ajax/libs/popper.js/1.14.7/umd/popper.min.js" integrity="sha384-UO2eT0CpHqdSJQ6hJty5KVphtPhzWj9WO1clHTMGa3JDZwrnQq4sF86dIHNDz0W1" crossorigin="anonymous"></script>
<script src="https://stackpath.bootstrapcdn.com/bootstrap/4.3.0/js/bootstrap.min.js" integrity="sha384-7aThvCh9TypR7fIc2HV4O/nFMVCBwyIUKL8XCtKE+8xgCgl/PQGuFsvShjr74PBp" crossorigin="anonymous"></script>
<script src="https://code.jquery.com/jquery-1.9.1.min.js" integrity="sha256-wS9gmOZBqsqWxgIVgA8Y9WcQOa7PgSIX+rPA0VL2rbQ=" crossorigin="anonymous"></script>
<script src="https://maxcdn.bootstrapcdn.com/bootstrap/3.3.6/js/bootstrap.min.js"></script>
<script>
$(function () {
$('#chatbot-form-btn').click(function (e) {
e.preventDefault();
$('#chatbot-form').submit();
});
$('#chatbot-form').submit(function (e) {
e.preventDefault();
var message = $('#messageText').val();
$(".media-list").append(
'<li class="media"><div class="media-body"><div class="media"><div class="media-body"><div class="balloon1-left"><p>' +
message + '</p></div></div></div></div></li>');
$.ajax({
type: "POST",
url: "/ask",
data: $(this).serialize(),
success: function (response) {
$('#messageText').val('');
var answer = response.answer;
const chatPanel = document.getElementById("chatPanel");
if (answer != '') {
$(".media-list").append(
'<li class="media" style="text-align: right;"><div class="media-body"><div class="media"><div class="media-body"><div class="balloon1-right"><p>' + answer +
'</p></div></div></div></div></li>');
$(".fixed-panel").stop().animate({
scrollTop: $(".fixed-panel")[0].scrollHeight
}, 1000);
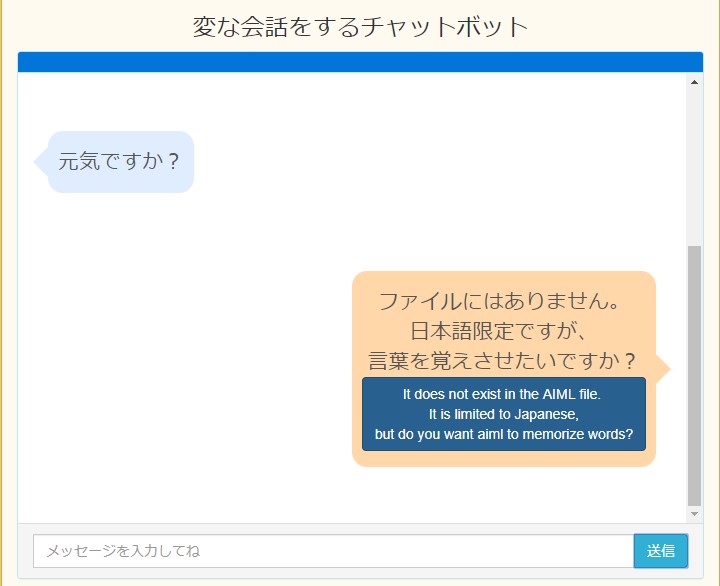
} else {
$(".media-list").append(
'<li class="media" style="text-align: right;"><div class="media-body"><div class="media"><div class="media-body"><div class="balloon1-right"><p>' + "ファイルにはありません。" +
'<br>' + "日本語限定ですが、<br>言葉を覚えさせたいですか?<br>" + '<button type="button" class="btn btn-primary" data-toggle="modal" data-target="#modalGenerateResponse">It does not exist in the AIML file. <br> It is limited to Japanese,<br> but do you want aiml to memorize words?</button>' +
'</p></div></div></div></div></li>');
}
},
error: function (error) {
console.log(error);
}
});
});
});
$('#genrate-aiml-btn').click(function (e) {
e.preventDefault();
$('#generator-form').submit();
});
$('#generator-form').submit(function (e) {
e.preventDefault();
var requestText = $('#requestText').val();
var responseText = $('#responseText').val()
$.ajax({
type: "POST",
url: "/generator",
data: $(this).serialize({
"requestText":requestText,
"responseText":responseText
}),
success: function (response) {
$("#modalGenerateResponse").css("display","none");
alert(response.result);
console.log(response.result);
},
error: function (error) {
console.log(error);
},
});
});
</script>
</body>
</html>
変更箇所の詳細は、 BootstrapのModalを使用して、入力を受け付ける。 JQueryを使用して、Flask APIに値を渡し、AIMLファイルを作成、反映させる。
For more information about changes, see Use Bootstrap's Modal to accept input. Use JQuery to pass values to the Flask API to create and populate the AIML file.
JQuery部分の詳しい説明はこちらの記事を参照してくだちぃ。
You can read more about the JQuery part in this article.
Herokuへデプロイ -Deploy to Heroku-
それではコマンドラインからHerokuへデプロイしていきます。
Now deploy to Heroku from the command line.
$ heroku login
$ git init
$ heroku create (アプリの名前) --buildpack heroku/python
$ heroku git:remote -a (アプリの名前)
$ git add .
$ git commit -m "my first app"
$ git push heroku master
それでは、無事アプリがデプロイされているかみてみましょう。
Let's see if the app is deployed successfully.
$ heroku open
とりあえず終了 -Let's finish-
このアプリは例のごとくナビバーに設置してあるので、使ってください。
This application is installed in the Navi bar as an example, so please use it.
Deep Learningを使った漫才生成は勉強しておきます。 とりあえずこのシリーズはここで一旦打ち切り。
I will study Manzai generation using Deep Learning. For the time being, this series will be discontinued.
See You Next Page!