Published Date : 2019年11月8日14:54
Keras公式のcifar10_cnnを利用した画像認識学習スクリプト
Python script for Learning Image Recognition with Keras cifar10_cnn
This blog has an English translation
画像認識シリーズ第5弾です。前回のブログ記事。
This is the fifth image recognition series. Last blog post.
前回はGoogle ColaboratoryとPythonを使い、画像データを水増ししました。
Last time I used Google Colaboratory and Python to augumentation the image data.
この手のものはやり尽くされていますが、ただ一から全部やってみたかった。それだけです。 つーことでお次はKeras公式で用意されている画像認識学習用Pythonスクリプトcifar10_cnnを使って、実際の学習を進めて行きたいと思いMASU。
This kind of thing is done by many people, but I just wanted to do it all from scratch. That's all. The following step is to I'll use the Python script cifar10_cnn.py. This is provided by Keras official for image recognition learning.
目次
Table of Contents
概要 Overview |
Keras公式サイトへアクセス Access to the Official Keras Site |
cifar10_cnn.pyの若干の変更 Make some changes to cifar10_cnn.py |
ページの最後へ Go to the end of the page. |
概要
Overview
Keras公式サイトへアクセス。 今回使用するスクリプトを拝借。
First, I visit the offcial keras site. And copy paste the script I want to use this time.
スクリプトに若干の変更を加え学習スタート。
Start DeepLearning by making some chenges to the script.
最後に学習データをh5形式で保存する。
Finally, the learning data is saved in the h5 format.
Keras公式サイトへアクセス
Access to the Official Keras Site
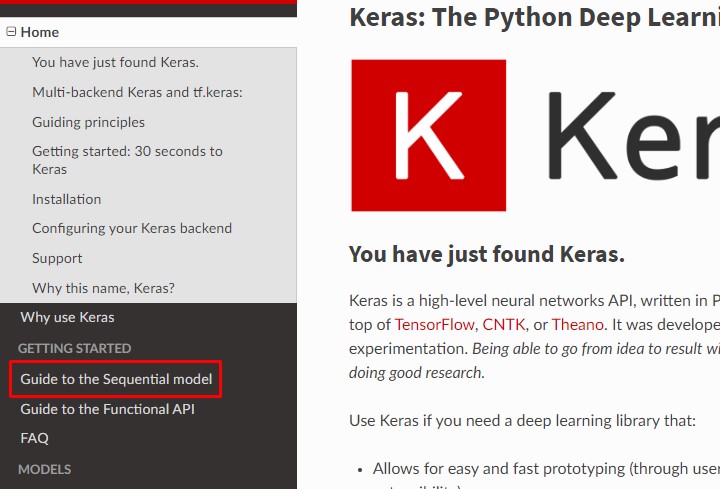
Keras.ioへアクセスします。
Access the Keras.io.
検索窓に「keras.io」と入力
Enter [keras.io] in search window.

左のサイドバーから「Guide to the Sequential model」を選択。
Selct「Guide to the Sequential model」from the left sidebar.
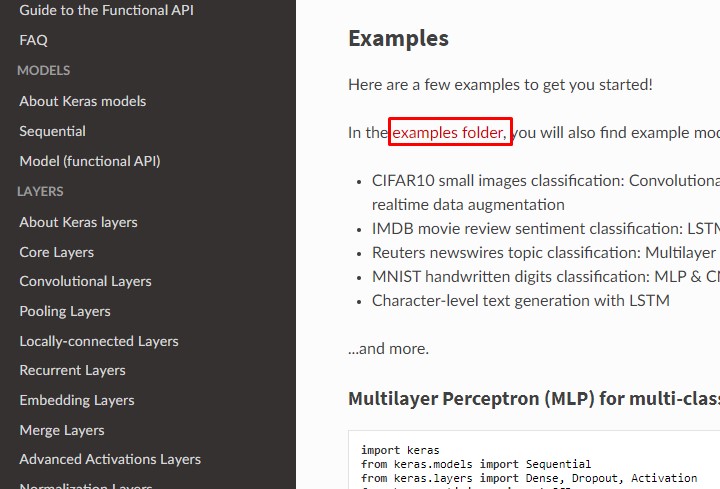
下にスクロールしていき、「examples folder」を選択。
Scroll down and select [examples folder].
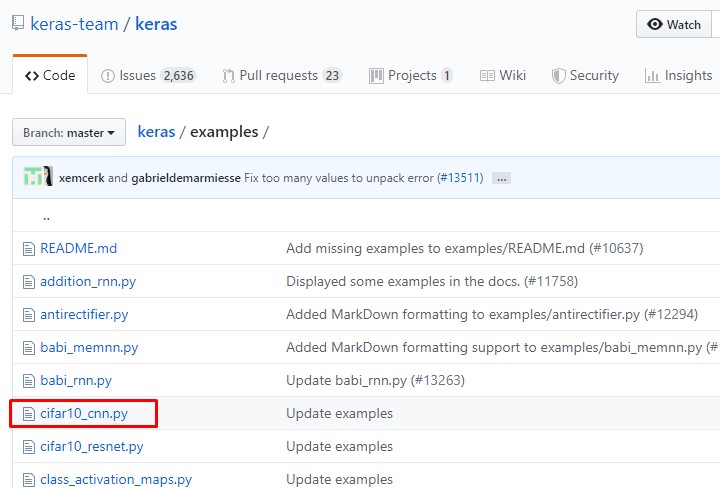
GitHubのページに飛ぶので、一覧から「cifar10_cnn.py」を選択。
Go to the GitHub page and select [cifar10_cnn.py] from the list.
必要な箇所をコピペします。
Copy and paste the source code we need.
cifar10_cnn.pyの若干の変更
Make some changes to cifar10_cnn.py
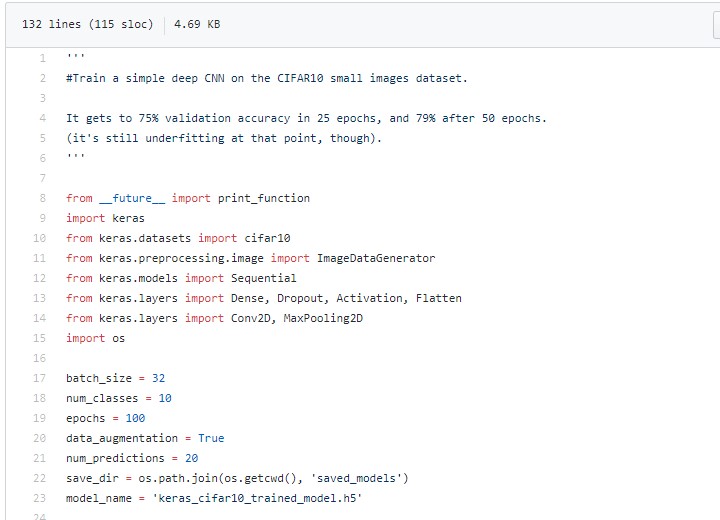
取り敢えず全体のコードは以下になります。
For now, the whole script is as follows.
Improved version of cifar10_cnn.py
imp_ver_cf10cnn.py
import keras
from keras.models import Sequential
from keras.layers import Dense, Dropout, Activation, Flatten
from keras.layers import Conv2D, MaxPooling2D
from keras.utils import np_utils
import numpy as np


labels = ["dogs", "cats", "monkeys", "birds", "fish", "lizards"]
total_num = len(labels)
image_size = 100

batch_size = 32
epochs = 100

def main():
  X_train, x_test, Y_train, y_test = np.load("data/augumented_images.npy")
  X_train = X_train.astype("float") / 256
  x_test = x_test.astype("float") / 256
  Y_train = np_utils.to_categorical(Y_train, total_num)
  y_test = np_utils.to_categorical(y_test, total_num)

  model = model_train(X_train, Y_train)
  model_eval(model, x_test, y_test)

def model_train(X, y):
  model = Sequential()
  model.add(Conv2D(32, (3, 3), padding='same',
                  input_shape=X.shape[1:]))
  model.add(Activation('relu'))
  model.add(Conv2D(32, (3, 3)))
  model.add(Activation('relu'))
  model.add(MaxPooling2D(pool_size=(2, 2)))
  model.add(Dropout(0.25))

  model.add(Conv2D(64, (3, 3), padding='same'))
  model.add(Activation('relu'))
  model.add(Conv2D(64, (3, 3)))
  model.add(Activation('relu'))
  model.add(MaxPooling2D(pool_size=(2, 2)))
  model.add(Dropout(0.25))

  model.add(Flatten())
  model.add(Dense(512))
  model.add(Activation('relu'))
  model.add(Dropout(0.5))
  model.add(Dense(total_num))
  model.add(Activation('softmax'))

  opt = keras.optimizers.adam()

  model.compile(loss='categorical_crossentropy',
              optimizer=opt,
              metrics=['accuracy'])

  model.fit(X,y,batch_size=batch_size, epochs=epochs)

  model.save("data/creatures_cnn.h5")

  return model

def model_eval(model, X, y):
  scores = model.evaluate(X, y, verbose=1)
  print('Test Loss', scores[0])
  print('Test Accuracy', scores[1])

if __name__=="__main__":
  main()
GPUでの実行結果は以下になります。
The results of running with GPU are as follows.
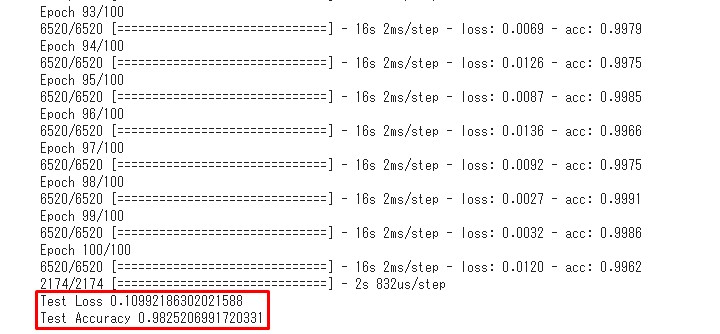
正解率98%。過学習の匂いが漂いますが、後々分類器に画像を入れて試してみたいと思います。
The test accuracy was 98%. There is a possibility that it is overlearning. but I would like to insert images and check later.
総学習時間は平均16秒×100回なので、約27分。
The total learning time is 16 seconds on average × 100, about 27 minutes.
続いて、変更した箇所と簡単なスクリプトの説明。
Next, I'll explain the changes and a brief script.
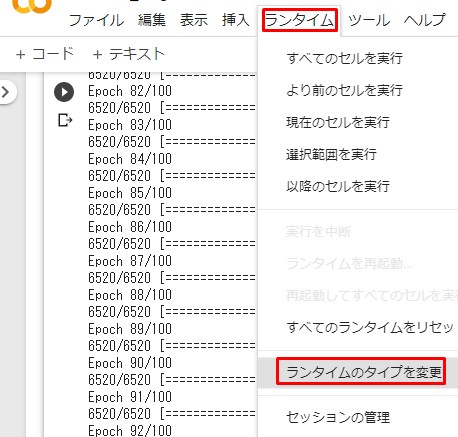
その前に、Google ColaboratoryをGPUで動かす為の操作方法を説明します。
Before we get started, let's talk about how to run Google Colaboratory on GPU.
上にあるメニュー一覧から「ランタイム」ー>「ランタイムのタイプを変更」をクリック。
Click [runtime] ー> [Change runtime type] from the menu list above.
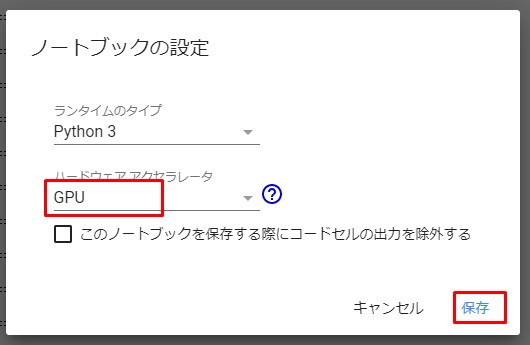
Notebookの設定からGPUを選択して保存。
Select GPU the Notebook settings and save.
GPUに変更したら、次にGoogle Driveへアクセスできるようにします。
After switching to GPUs, the next step is to access to Google Drive.
from google.colab import drive
drive.mount('/content/drive')
上記のコードを入力したら、後は前々回の通りに設定する。
After entering the above code, follow the previous blog post and move up the Data folder in Drive.
変更箇所の説明。
Description of the change.
labels = ["dogs", "cats", "monkeys", "birds", "fish", "lizards"]
total_num = len(labels)
image_size = 100
前回使用したパラメーターをそのまま貼り付ける。
Paste the previously used parameter as is.
batch_size = 32
epochs = 100
バッチとは束のこと。この場合全部の学習データを32個のデータに分割します。
Batch size is 32. In thes case, all the learning data is divided into 32 pieces of data.
バッチサイズが大きくなると学習時間が短くなる代わりに、メモリー量が増大します。
As the batch size increases, the learning time decreases, but the amount of memory increases.
なぜなら、1エポックあたりの計算回数がバッチサイズが32と時と64の時では単純計算をすると2分の1に減るからです。 データセットの総枚数が128だとすると、バッチサイズが32なら1エポックあたりの計算回数は4回、バッチサイズが64なら1エポックあたりの計算回数は2回。
This is because when the number of calculations per 1 epoch is 32 and the batch size is and 64, the simple calculation reduces it to one half. If the total number of data sets is 128, the number of calculations per 1 epoch is 4 for a batch size of 32 and 2 for a batch size of 64.
同時に、バッチサイズが32の時メモリーに32個のデータを一度に入れることになり、これが64ならまた単純計算で2倍メモリーを消耗することになります。
At the same time, a batch size of 32 would put 32 pieces of data in memory at once, and a batch size of 64 would put 64 pieces of data in memory at once. It consume 2 times the memory for simple calclulations.
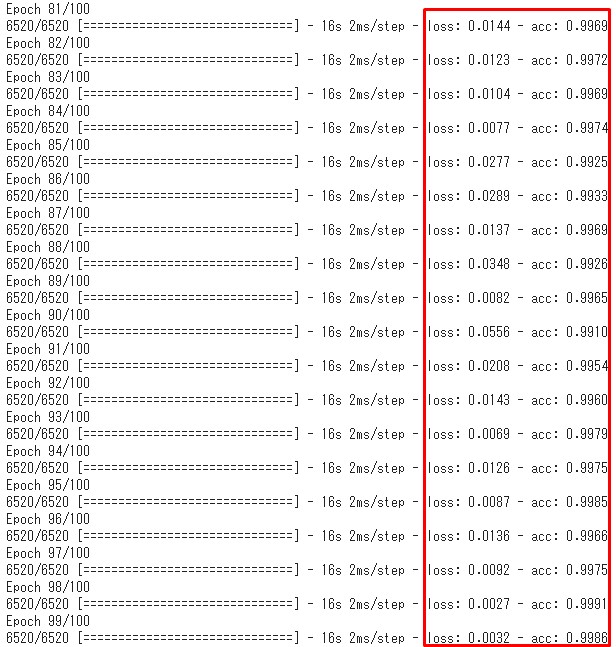
ただ、バッチサイズと学習精度との相関関係ははっきりと分かっていません。 学習をしていくうえで、適切なパラメーターの設定をしなければなりません。 エポックも同様に、回数が多いからといって学習精度が上がるとは限りません。 上の学習結果の画像を見ても分かる通り、計算の終わりの方になると損失値や正解率が上がったり下がったりしています。 これも結果を見て、適切なエポック数にしなければ、無駄に計算時間を消費することなるぜぇ。
However, the correlation between batch size and learning accuracy is not clear. As you learn, you must set the appropriate parameters. In the case of epochs, just because the number of times is high does not necessarily mean that the learning accuracy improves. As you can see from the iamge above, the loss value and correct answer rate increase or decrease towards the end of the calculation. Again, look at the results, and if you don't get the right number of epochs, you're wasting computation time.
opt = keras.optimizers.adam()
最適化アルゴリズムを変えました。 「RMSprop」は急激な学習率の低下に対応するためのアルゴリズムです。 「Adam」は平均的に良い結果をもたらすので、とりあえず今回は「Adam」を選択しましたとさ。
I changed the optimization algorithm. [RMSProp] is an algorithm for coping with rapid decrease in learning rate. [Adam] generally gives good results, so I chose [Adam] this time to see how it goes.
長くなってきたので、スクリプトとCNNの詳細な説明は次回にします。
It's getting longer, so I'll explain the script and CNN in detail next time.