Published Date : 2019年8月14日1:38
Python学習者のためのNim Part 1
Learning Nim for Python Users Part 1
This blog has an English translation
何故Nimなのか?
Why Nim?
ある日のこと、 Pythonの次にどんな言語を勉強しようか考えていて、 Goが無難かなと思っていた矢先、 ネットでこんな記事を見ました。
One day, I was thinking about which language to study next to Python, and I thought Golang was better, but I saw this blog on the Internet.
「へぇ、Fortranって速いんだなぁ… ん?Nim?」 聞き慣れない言語。 Nimとはどんな言語なんだろうかと 色々と調べて見ました。(日本語の記事が少ない…) Goで検索をかけても、Nimで検索をかけても この記事がでてきます。
"Oh, Fortran is fast... Nim? What is it?" It's an unfamiliar language. I researched a lot about what kind of language Nim is. (There is so little information in Japanese...) I searched Go and Nim and found this blog.
「辛口だなぁ…、でも、Nimか…」 ちょっと触ってみて、 「ああPythonの書き方そっくりでやんす。これはイケるなぁ。」 さらに同じ人のブログ記事。
"That's a pretty harsh comment on Golang. but Nim... looks interesting." So I did some research, and I said, "Oh, it's just like how Python is written. This might be cool." I also decided to read another blog post by the same person.
「辛辣ではあるが、なんか面白い」 ということで、今更ながらNimという言語に興味を持ち (Nimは2008年にアンドレアス・ランプフによって作られた) (Goより先輩なんですね!)
"I think what is written in the blog is extreme, but it seems interesting." So now I'm going to study the language Nim. (Nim is ahead of Golang.) (Nim was made by Andreas Lampf in 2008.) (Golang was announced in 2009.)
さらにこんな面白いブログ記事もありました。
There was also this interesting blog.
なにはともあれ、 自分なりに考えたPython学習者のためのNim勉強法は、 PythonのコードをNimに変換してみるという方法が一番良いかなと思ったので、 適当なPythonコードを作っていくことから始めます。
Anyway, I thought the best way to learn Nim for Python learners was to convert Python code to Nim. So, I'll start by writing the appropriate Python code.
なにより、新しい言語を勉強するのは楽しい! ということで、日本では芸歴11年ながら超絶マイナーなNimさんをPythonを使って学んでいきます。
Above all, it's fun to study a new language! So, I'm going to use Python to learn about Nim, a language that is not well known in Japan even though it has been 11 years since it was born.
テキストファイル
Text file
つーことで、テキストファイルを読み込んで、なんらかの処理をして、 テキストファイルで書き出す。といったシンプルなコードを作ってみます。
In other words, it reads a text file, processes it in some way, and writes it out as a text file. Let's create a simple code like this.
Python Code [example.py]
# 30万行くらいのCSVかJsonかtxtファイルを読み込んで、Forループで文字の処理を行っていく。
# It reads a 300,000 line CSV, Json or txt file and uses the For loop to process the characters.

import urllib.request
import zipfile
import csv

# 前回使った日本全国の住所の情報があるCSVファイルをダウンロードして解凍する。
# Download and extract the CSV file with the address information of all over Japan that you used last time.

url = "http://jusyo.jp/downloads/new/csv/csv_zenkoku.zip"
save_path = "csv.zenkoku.zip"

urllib.request.urlretrieve(url, save_path)

with zipfile.ZipFile(save_path) as existing_zip:
    existing_zip.extractall('zenkoku')

# CSVファイルを読み込む。文字コードはcp932
# Imports a CSV file with the character code cp 932
with open('zenkoku/zenkoku.csv', 'r', encoding='cp932') as f:
    reader = csv.reader(f)
    header = next(reader)

    zenkoku = [row for row in reader]

# 7行目から12行目に
# 交互に「都道府県名」「都道府県の読み方」「市区町村」「市区町村の読み方」「町・字」「読み方」が格納されている。
# 今回は別々に名前と読み方を繋げて、「住所」と「住所の読み方」の2列のCSVファイルにして保存する。

# "Prefctures", "How to read prefectures", "City", "How to read city, ward, town or village", "town and azana" and "How to read" are stored alternately in lines 7 to 12.
# This time, names and readings are connected separately, and the file is saved as a 2-column CSV file of "Address" and "Reading an address".

"""
In [10]: zenkoku[10][7:13]
Out[10]: ['北海道', 'ホッカイドウ', '札幌市中央区', 'サッポロシチュウオウク', '旭ケ丘', 'ア
サヒガオカ']
"""
ここまでをNimのコードに直してみます。参考にさせて頂いたサイトは以下に貼り付けます。
Let's change this to Nim code. The following is the website I referred to.
Nim module for working with CSV files
その前にNimのインストール方法を解説しているサイトを紹介します。 WindowsもLinux/Macも簡単です。
Before you write Nim code, install Nim. Windows and Linux/Mac are easy.
こちらの記事も参考になります。Nimを導入しよう!
This blog is also helpful. Nimを導入しよう!
それから今回Nimのコードでは、 Zipファイルを簡単に解凍するためにコマンドラインと連携するコードを(多分すごく無駄)書きましたが、 その際、UNIX系、つまりMacとLinuxは標準で解凍するためのシェルコマンドがありますが、 ウィンドウズは無いため、Winユーザーは有名な7zipをインストールしたほうが良いと思います。
Now, in Nim's code, I wrote code to work with the command line (It's probably useless.) to easily unzip the Zip file. At that time, there is a shell command for unzipping the UNIX system, that is, Mac and Linux by default. Windows users should install the famous 7zip because there is no Windows.
7zipのリンクはこちら、https://sevenzip.osdn.jp/
Download the 7zip here. https://sevenzip.osdn.jp/
ここからダウンロードして、インストールしたら、 「コントロールパネル」ー>「システム」ー>「環境変数」ー>「PATHの編集」で 「(最初に書いてあるパス)C:\User〜〜〜」のすぐ後ろに「;」をつけて、 「;C:\Program Files\7-Zip」と加えてください。
Download and install from here. In "Control Panel" -- > "system" -- > "Environment Variables" -- > "Edit PATH" right after "(the first written pass) C: \User 〜〜〜"; " Add "; C: \Program Files \7-Zip".
そうしたら「コマンドプロンプト」から「7z (オプションコマンド)「解凍したい圧縮ファイル」「解凍後のファイル名」で使えるようになります。
Then, from "command prompt", you can use 7z (Option Commands) "Compressed file you want to decompress" "Unzipped file name".
Nim Code [example.nim]
# コメントはPythonと一緒で、#でつけられます。
# Comments are similar to Python and can be appended with #.

# PythonのUtllibにあたるライブラリです。
# The equivalent of Python's Utllib library.
import httpclient


# osproc(os周りのプロシージャ(関数)、Pythonのsubprocess,osみたいなもの
# 例えばこんなPythonでこんな感じでコマンドプロンプトやシェルを実行するのと同じことができる。
# 今回これを使ってZipを解凍する。
# このあたりはPythonのライブラリの充実さを実感する
"""
import subprocess

cmd = 'dir .'
returncode = subprocess.Popen(cmd, shell=True)
"""
# osproc (procedures around os (functions.), something like Python
# Like running a command prompt or shell in Python like this.
# This time I will use this to unzip the zipfile.
# You can feel the richness of Python libraries here.

import osproc

# これは標準のCSV管理より使いやすいので、
# nimbleというパッケージ管理ツールでインストールする。
# コマンドライン上で、nimble install csvtools と入力すればいい。
# pipとかnodeとほぼ一緒。

# This is easier to use than standard CSV management library.
# Install with a package management tool called Nimble.
# On the command line, type nimble install csvtools.
# Like pip or node.
import csvtools


let urlpath = "http://jusyo.jp/downloads/new/csv/csv_zenkoku.zip"
let filename = "zenkoku.zip"

# ウインドウズの人はこちら
# for windows users
let cmd = "7z e "
# MacやLinux系の人はこちら
# for mac and linux users
# let cmd = "unzip "

# 「proc」 とはPythonの「def」だと思ってね
# Think of "proc" as Python's "def"

# 「archive: string」archiveという名前のString型(文字列)の変数を引数にしますよーと。
# そして「: string =」String型(文字列)を関数の結果として返しますよと最初に宣言してやらないと駄目!絶対!
# "archive: string" Argument should be a String type variable named archive.
# and then you have to declare the ": string =" String type as the function result first.
proc extractFromZip(archive: string): string =
  # 先程説明したコマンドラインシェルを実行する関数。
  # & は文字列内に変数の内容を反映できるようにするため。
  # 例 :var string = "World!"
  # echo ”Hello ” & string
  # ー> Hello World!
  # This function executes the command line shell described earlier.
  # so that & can reflect the contents of the variable in the string.
  # For example, var string = "World!"
  # echo "Hello" & string
  # — > Hello World!
  result = execProcess(cmd & archive)

# Cのvoid main()のようなもの。引数も返り値もvoidつまり何も受け取らない、何も返さない。
# Like C's void main (). void, that is, take nothing, return nothing.
proc main()=

    # クライアントオブジェクト作成
    # Create a client object.

    # letとはこの変数は後から変更ができませんよという意味。Pythonのイミュータブルな値と一緒。
    # その逆、ミュータブル(変更可能)な値はvarを使う。
    # let means that this variable cannot be changed later. Same as immutable values in Python.
    # Conversely, mutable (Modifiable) values use var.
    let client = newHttpClient()

    # ダウンロードしたいファイルのURLのパスと、どんなファイル名で落とすかを指定する。
    # Specify the URL path and filename of the file you want to download.
    client.downloadFile(urlpath, filename)

    # Zipファイルを解凍する。エラー等が起これば、その値が返されるので変数に保存して、表示させる。
    # Extract the zip file. If an error occurs, the value is returned and stored in a variable for display.
    let status = extractFromZip(filename)
    echo status

    # linesに読み込んだCSVファイルを一行ずつ格納していくので、var(変更可能)なseq(配列)[seq[string](さらに配列の中にストリング型の配列が入りまっせと明示する)] = @[](これは動的に作成できる空の配列であることを明示している。)
    # 動的な配列として空の配列linesを作る
    # Create an empty array lines as a dynamic array to store the CSV files read into lines line by line.
    # var (Modifiable), seq (array) [seq (It also specifies that an array of string types should be included in the array.) [string]] = @ [] (It specifies that this is an empty array that can be created dynamically.)
    var lines: seq[seq[string]] = @[]
    for row in csvRows("zenkoku.csv"):
        let line = @[row[7..12]]
        lines.add(line)

    # このあたりはPythonと似ている。
    # range(0、11)を 0..10 とだけで表現していたり、(しかも10と書いたら10までいく。
    # Pythonの場合は10と書いたら、9までしかいかないので注意)
    # 配列のスライスの頭に@をつけたりと若干の違いはあるけど。

    # This is similar to Python.
    # Range (0, 11) can be expressed simply as 0.. 10 (and 10 means 10).
    # If you write 10 in Python, you can only go to 9.)
    # There are a few differences, like the @ on top of the array slice.
    for i in 0..10:
        echo lines[i]

# あとはメイン関数を起動してあげるだけ。
# All you have to do is start the main function.
main()
上のNimコードを保存したら、コマンドライン上で以下のように入力してコンパイルする。
After saving the above Nim code, compile it by typing the following on the command line.
nim c -r example.nim
nim c -r -d:release example.nim
CはコンパイルのC、RはRunのR、速めにコンパイルさせたいなら -d:release オプションをつける。
Use the -d: release option if you want faster compilation.
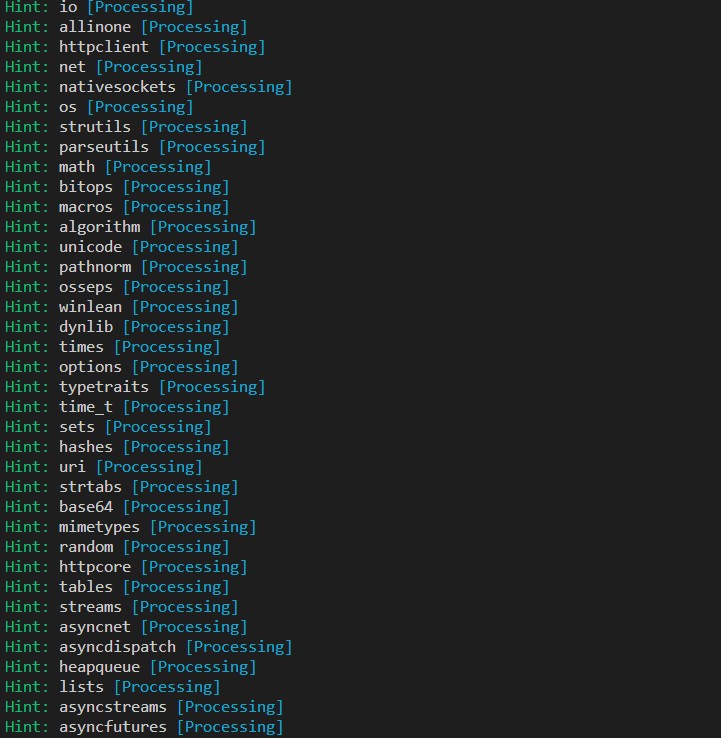
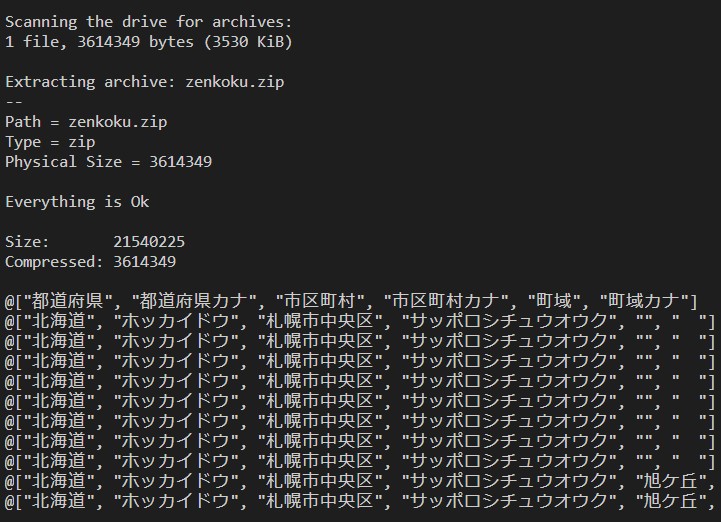
このようにズラズラっと情報が出て、 大体1.63秒でコンパイルが終了して、 CSVの0行目(ヘッダー情報)から 10行目までを出力させることができました。
And when the information comes out like this, It takes about 1.63 seconds to compile, From the 0 CSV line (Header Information) You could print up to line 10.
パンダちゃん
Pnadas
さて、どうやらNimにはPandasと同じようなことができるライブラリがあるとのこと。
あとプロジェクト進行中ですが、NumpyとTensorflowの代わりになるものや、Blockchainのライブラリまであるそうです。
すごい!
詳しくは下記のリンクを見てね!
Well, it looks like Nim has a library that can do something similar to Pandas.
There's also a project in progress, but there's a replacement for Numpy and Tensorflow, as well as a Blockchain library.
Wow!
See the link below for more information!
あと、C#のBlazorぐらいの機能は欲しいけど、どうなんだろうか。 使ってないから分かりませんが、SPA、シングルページアプリケーションのライブラリもあります!
Also, I would like to have a function like C # 's Blazor, but what do you think? I don't know because I don't use it, but there are libraries of single page applications!
ではこれからCSVファイルを編集、操作していくために、Pandasライクなライブラリ、 NimDataをインストールして使っていこうと思います。 まずはnimbleでインストール!
provides a Pandas-like library for editing and working with CSV files. I will install and use Nimdata. First, install it using nimble!
nimble install nimdata
後半へ続く
Follow in the second half
Nimを一日勉強してみての感想は、「良いねこの言語!」
GoやRust、Julia等も試してみましたが、やっぱり言語にも相性があるみたいで、自分はNimが使いやすかったです。
とりあえず後半へ余力を残しておきます。
After studying Nim for 1 day, I thought, "I like this language!"
I also tried Go, Rust, and Julia, but they seem to work well with language, and I found Nim easy to use.
I'll leave some time for the second half.
次回はNimDataを使って色々とやってみたいと思います。
Next time, I will try various things with NimData.
See You Next Page!