Published Date : 2021年6月2日19:48
Part 5 - ドルと円の為替レートを使った簡単な計算アプリのアンドロイドバージョン
Part 5 - Android version of a simple calculation
app that uses the dollar-yen exchange rate
This blog has an English translation
ニコニコ動画にアップした動画のまとめ記事です。
This is a summary blog post about a video I uploaded to NicoNico.
細かい部分は動画を参考にしてください。
Please refer to the video for details.
目次
Table of Contents
① 動画の説明
① Video
Description
警告:
このアプリは大雑把に大体の見積りを計算して楽しむ為のツールです。
計算の詳細や、端数の処理等は各金融機関等によって異なります。
このアプリを使って何かしらの損害が発生したとしても、私は一切の責任を負いません。
Warning:
This application is used to calculate rough estimates and enjoy them.
The details of calculations and the treatment of fractions differ depending on the financial institution.
I will not be liable for any damage caused by using this app.
ドルと円の為替レートを使った簡単な計算アプリのアンドロイドバージョンPart 5
Android version of a simple calculation app that uses the dollar-yen exchange rate Part 5
前回の続きです。
Continued from last time.
次に売却の入力フォームを作成していきましょう。LinearLayoutを配置します。
Next, let's create an input form for the sale. Place the LinearLayout.
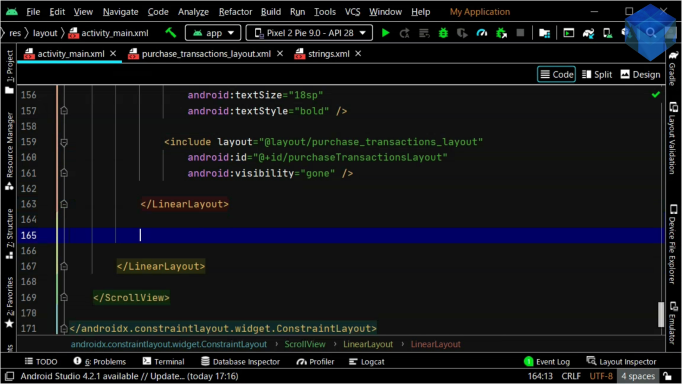
購入作業が終われば売却入力フォームが表示されるように、visibilityをGONEに設定して、初期表示は見えない状態にします。
Set visibility to GONE to hide the initial display so that the sales entry form is visible when the purchase is complete.
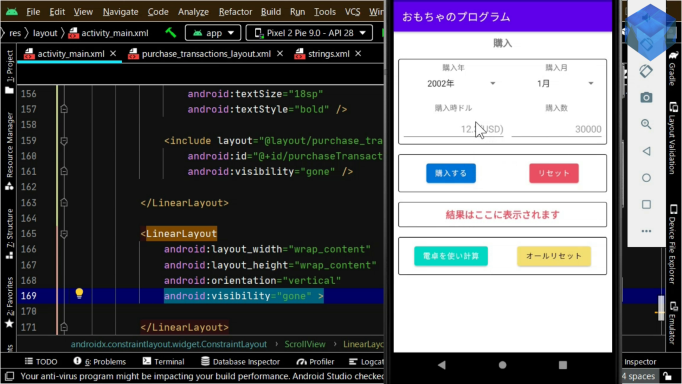
アプリの挙動を確かめてみましょう。
Let's see how the app works.
売却の入力フォームを作成していきましょう。
Let's create an input form for the sale.
ここでは一々コードを書いていますが、購入用の入力フォームと同じコードなので、コピペして再利用することをお勧めします。
I am writing the code here, but it is the same code as the input form for purchase, so I recommend that you copy and paste it and reuse it.
ID名やテキストの表示は異なるで、そこだけ変更していきましょう。
The ID names and the text displayed are different, so just change them.
購入用のレイアウトと同様に売却ボタンとリセットボタンを配置しましょう。
Position the sell and reset buttons as you would for a purchase layout.
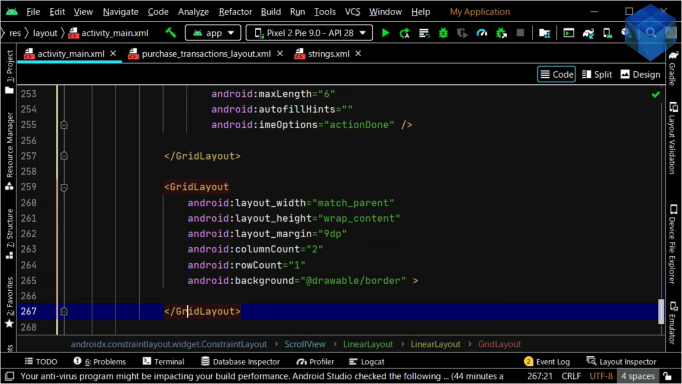
売却した時の結果を表示させるレイアウトを作成していきましょう。
Let's create a layout that shows the results of the sale.
購入結果を表示させるレイアウトの時と同様にコードを書いていきましょう。
Write the code as you did for the layout that shows the purchase result.
<?xml version="1.0" encoding="utf-8"?>
<GridLayout
    xmlns:android="http://schemas.android.com/apk/res/android"
    xmlns:tools="http://schemas.android.com/tools"
    android:layout_width="match_parent"
    android:layout_height="wrap_content"
    android:columnCount="2"
    android:rowCount="13"
    android:background="@drawable/border"
    android:useDefaultMargins="true"
    tools:ignore="UselessParent">

    <!--  row 1 -->

    <TextView
        android:layout_width="wrap_content"
        android:layout_height="wrap_content"
        android:layout_column="0"
        android:layout_columnWeight="1"
        android:layout_row="0"
        android:layout_gravity="center"
        android:text="@string/stxTitle1"
        android:textStyle="bold"
        />

    <TextView
        android:id="@+id/tv1"
        android:layout_width="wrap_content"
        android:layout_height="wrap_content"
        android:layout_column="1"
        android:layout_columnWeight="1"
        android:layout_gravity="center"
        android:layout_row="0"
        android:textStyle="bold"
        />

    <!--  row 2 -->

    <TextView
        android:layout_width="wrap_content"
        android:layout_height="wrap_content"
        android:layout_column="0"
        android:layout_columnWeight="1"
        an
strings.xmlにこのレイアウトで使う文字列を登録していきましょう。
Let's register the string used for this layout in strings.xml.
<string name="saleText">売却</string>

<string name="year_of_sale">売却年</string>
<string name="month_of_sale">売却月</string>

<string name="price_at_the_time_sale">売却時ドル</string>
<string name="hint_price_at_the_time_sale">23.1(USD)</string>

<string name="quantity_sale">売却数</string>
<string name="hint_quantity_sale">30000</string>
後は前回の時と同様にコードを記述していくだけです。
All you have to do is write the code as you did last time.
コードをコピペしていきましょう。
Let's copy and paste the code.
それではいつも通りに画面下部に電卓ボタンとオールリセットボタンを配置しましょう。
Let's place the calculator button and all reset button at the bottom of the screen as usual.
そしていつも通りにスペースを画面下部に配置します。
And place the space at the bottom of the screen as usual.
ではMainActivity.javaにコードを書いていきましょう。
Let's write the code in MainActivity.java.
パート6へ続く。
Continue to Part 6.
以上です。お疲れ様です。
That's all. Thank you for your hard work.