Published Date : 2021年5月26日14:00
Part 2 - ドルと円の為替レートを使った簡単な計算アプリのアンドロイドバージョン
Part 2 - Android version of a simple calculation
app that uses the dollar-yen exchange rate
This blog has an English translation
ニコニコ動画にアップした動画のまとめ記事です。
This is a summary blog post about a video I uploaded to NicoNico.
細かい部分は動画を参考にしてください。
Please refer to the video for details.
目次
Table of Contents
① 動画の説明
① Video
Description
警告:
このアプリは大雑把に大体の見積りを計算して楽しむ為のツールです。
計算の詳細や、端数の処理等は各金融機関等によって異なります。
このアプリを使って何かしらの損害が発生したとしても、私は一切の責任を負いません。
Warning:
This application is used to calculate rough estimates and enjoy them.
The details of calculations and the treatment of fractions differ depending on the financial institution.
I will not be liable for any damage caused by using this app.
ドルと円の為替レートを使った簡単な計算アプリのアンドロイドバージョンPart 2
Android version of a simple calculation app that uses the dollar-yen exchange rate Part 2
前回の続きです。
Continued from last time.
動画の再生時間が10分を超えてしまっているので、倍速で見ることをお勧めします。
The video playback time is more than 10 minutes, so i recommend watching at double speed.
それではPythonとPandasを使ってのデータ前処理の続きを行っていきます。
We'll continue with data preprocessing using Python and Pandas.
前回の動画シリーズで使用したCSVファイルを読み込んで、データフレームに直し、Datetimeオブジェクトに変換した後の続きです。
This is the continuation after the CSV file used in the previous video series is read, converted into a data frame, and converted into a Datetime object.
年や月や日毎に値を取り出して別々の変数に分けていきます。
We extract the values for each year, month, and day and divide them into separate variables.
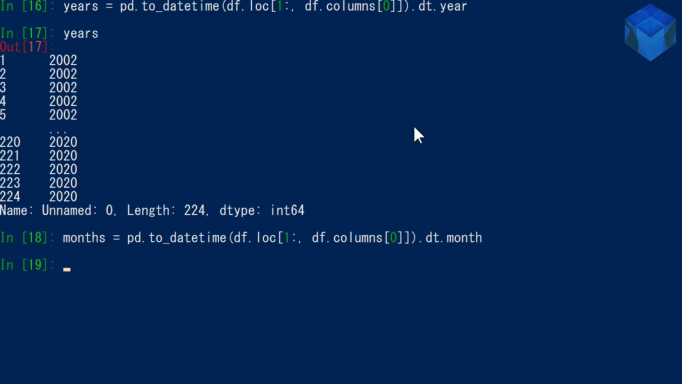
各年の月毎の1ドルあたりの円の平均の値も同じように取り出して別の変数に代入します。
The average value of the yen per dollar per month for each year is also retrieved and assigned to another variable.
動画内で使用されているメソッドの使い方や仕組みは過去のPythonのチュートリアル動画シリーズで頻繁に出ていますので、詳しい説明はそちらを参考にしてください。
The usage and workings of the methods used in the video have been mentioned frequently in the Python tutorial video series I uploaded in the past, so you can read more about them there.
動画を見てるだけでもその仕組みは十分理解できると思います。
I think you can fully understand the mechanism just by watching the video.
なので、長々とした無駄な説明は省きます。
So I'll skip the lengthy and useless explanation.
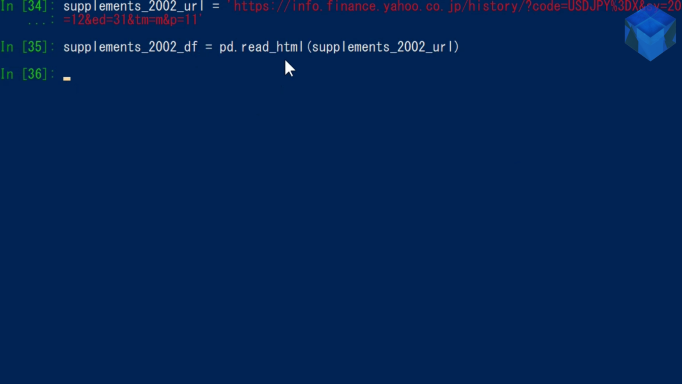
今回データの足りない部分を補うのに使わせて頂いたサイトはYahooファイナンスです。
This time I used Yahoo Finance to supplement the missing data.
このようにテーブルタグがはっきりしているサイトでは前回のPandasを使用したスクレイピングのチュートリアル動画シリーズでも説明した[read_html]メソッドを使って値を抽出しましょう。
For sites where the table tags are obvious, you can extract the values using the [read_html] method described in the previous Pandas scraping tutorial video series I uploaded.
おっと、2002年からのデータを取り出すのを忘れてました。2002年からのデータに設定し直して、これまでの作業を繰り返してください。
Oops, I forgot to retrieve the data from 2002. Please reset the data to 2002 and repeat the previous steps.
それでは足りないデータを追加して整理したCSVファイルをAndroidStudioのプロジェクトのAssetsフォルダにコピペしましょう。
Then, Copy and paste the CSV file organized by adding missing data into the Assets folder of your Android Studio project.
それでは、いつもどおりにCSVファイルの読み込みとデータの操作を行うクラスファイルの中身のコードを書いていきましょう。
Now let's write the code for the contents of the class file that reads and manipulates the data in the CSV file as usual.
CsvDriver.java
public class CsvDriver {

    private final List<List<String>> dollar_yen_list;

    public List<List<String>> getDollar_yen_list() { return dollar_yen_list; }

    public CsvDriver(){ dollar_yen_list = new ArrayList<>(); }

    public void csvReader(Context context) {
        String filename = "平均ドル円.csv";
        AssetManager assetManager = context.getResources().getAssets();
        try {
            InputStream inputStream = assetManager.open(filename);
            InputStreamReader inputStreamReader = new InputStreamReader(inputStream);
            BufferedReader bufferReader = new BufferedReader(inputStreamReader);

            String line;


            while ((line = bufferReader.readLine()) != null) {
                String[] rows = line.split(",");
                ArrayList<String> rowList = new ArrayList<>(Arrays.asList(rows));

                dollar_yen_list.add(rowList);
            }
            bufferReader.close();
        } catch (IOException e) {
            e.printStackTrace();
        }
    }
}
パート3へ続く。
Continue to Part 3.
以上です。お疲れ様です。
That's all. Thank you for your hard work.