Published Date : 2021年5月27日19:06
Part 3 - ドルと円の為替レートを使った簡単な計算アプリのアンドロイドバージョン
Part 3 - Android version of a simple calculation
app that uses the dollar-yen exchange rate
This blog has an English translation
ニコニコ動画にアップした動画のまとめ記事です。
This is a summary blog post about a video I uploaded to NicoNico.
細かい部分は動画を参考にしてください。
Please refer to the video for details.
目次
Table of Contents
① 動画の説明
① Video
Description
警告:
このアプリは大雑把に大体の見積りを計算して楽しむ為のツールです。
計算の詳細や、端数の処理等は各金融機関等によって異なります。
このアプリを使って何かしらの損害が発生したとしても、私は一切の責任を負いません。
Warning:
This application is used to calculate rough estimates and enjoy them.
The details of calculations and the treatment of fractions differ depending on the financial institution.
I will not be liable for any damage caused by using this app.
ドルと円の為替レートを使った簡単な計算アプリのアンドロイドバージョンPart 3
Android version of a simple calculation app that uses the dollar-yen exchange rate Part 3
前回の続きです。
Continued from last time.
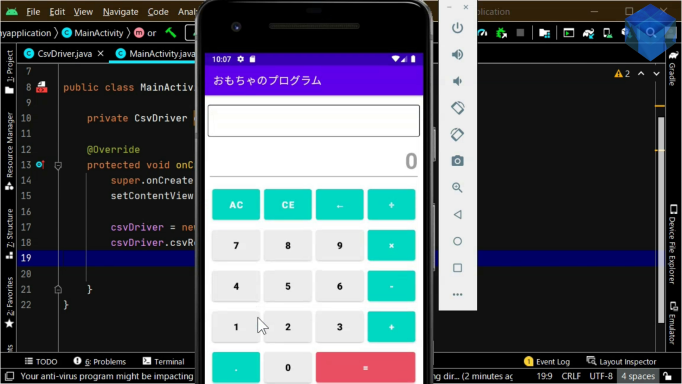
いつもどおりに電卓アクティビティを作成していきましょう。
Create the calculator activity as usual.
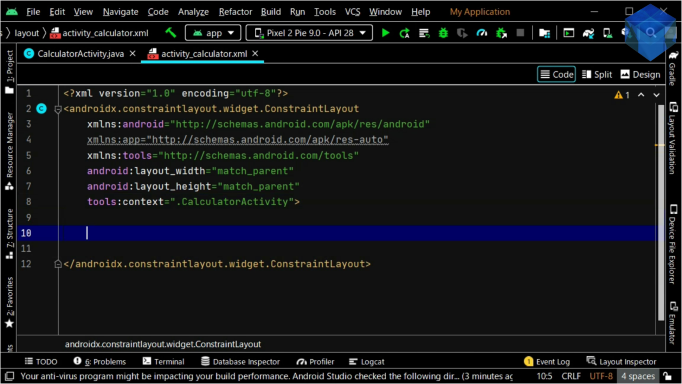
まずはレイアウトファイルから作成していきましょう。
Let's start by creating the contents of a layout file.
電卓アプリの作り方は以前の動画シリーズでも何度も出てきたので詳しい説明は以前の動画を参考にしてください。
The details of how to make the calculator application have been mentioned many times in the previous video series I uploaded, so please refer to the previous video for the detailed explanation.
文字数が多くなっても見えやすいように右方向に自動でスクロールさせるようにして表示させるようにします。
To make it easier to see even when the number of characters increases, scroll it to the right automatically.
今度は[border.xml]ファイルを[res]フォルダ内の[drawable]フォルダ内に作成して外枠表示ができるようにします。
Now create a [border.xml] file in the [drawable] folder in the [resources] folder so that the border can be displayed in the layout.
シェイプ属性にレクトアングルを指定します。
Specifies a rectangle as the attribute value for the shape.
ストロークに線の太さや色を指定します。
Specifies a line weight or color for the stroke.
border.xml
<?xml version="1.0" encoding="utf-8"?>
<shape xmlns:android="http://schemas.android.com/apk/res/android"
    android:shape="rectangle">
    <stroke
        android:width="1dp"
        android:color="#000" />

    <padding
        android:top="3dp"
        android:bottom="3dp"
        android:left="3dp"
        android:right="3dp" />

    <corners
        android:radius="3dp" />
</shape>
スクロールビューの下に計算結果を表示させるエディットテキストビューを配置します。
Position the edit text view below the scroll view to display the result of the calculation.
エディットテキストなら文字をコピぺすることが可能です。
You can copy and paste characters in edit text.
ヒントに使われている文字を[strings.xml]に登録しましょう。
Register the characters used in the hint in [strings.xml].
そして、電卓で使われるボタンの文字もついでに登録してしまいましょう。
Also, let's register the letters of the buttons used in the calculator.
[activity_calculator.xml]に戻りGridLayoutを配置して、行列数を5行4列に指定しましょう。
Return to [activity_calculator.xml] and position the GridLayout, specifying 5 rows and 4 columns.
~~~~~~~~~~~~~~~~~~~~~~~~~~~~~~~~~~~~~~~~~~~~~~~~~~~~~~~~~~~~~~~~~~~~~~~~~~~~

<GridLayout
    android:layout_width="wrap_content"
    android:layout_height="wrap_content"
    android:layout_gravity="center"
    android:layout_marginTop="6dp"
    android:columnCount="4"
    android:rowCount="5"
    android:useDefaultMargins="true" >
    <!--AC-->
    <Button
        android:id="@+id/cancelBtn"
        android:layout_width="90dp"
        android:layout_height="69dp"
        android:layout_row="0"
        android:layout_column="0"
        android:text="@string/cancelBtntText"
        android:textSize="18sp"
        android:textStyle="bold"
        android:backgroundTint="@color/teal_200"
        android:onClick="onCalculatorBtnClicked" />

        ~~~~~~~~~~~~~~~~~~~~~~~~~~~~~~~~~~~~~~~~~~~~~~~~~~~~~~~~~~~~~~~~~~~~~~~~~~~~
[useDefaultMargins]をtrueにすると自動で要素同士の間にスペースを設けてくれます。
If you set [useDefaultMargins] to true, it will automatically add space between elements.
電卓アプリの作り方は以前の動画シリーズでも何度も出てきたので詳しい説明は以前の動画を参考にしてください。
The details of how to make the calculator application have been mentioned many times in the previous video series I uploaded, so please refer to the previous video for the detailed explanation.
パート4へ続く。
Continue to Part 4.
以上です。お疲れ様です。
That's all. Thank you for your hard work.