Published Date : 2021年2月10日18:45
2. 期待値を計算するAndroidアプリケーションの作成
2. Creating an Android Application to Calculate
Expectations
This blog has an English translation
ニコニコ動画にアップした動画のまとめ記事です。
This is a summary blog post about a video I uploaded to NicoNico.
細かい部分は動画を参考にしてください。
Please refer to the video for details.
目次
Table of Contents
① 動画の説明
① Video
Description
前回の続きです。
This is a continuation of the previous video.
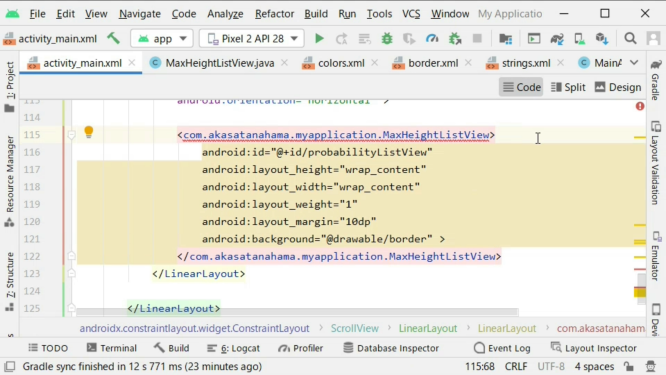
前回作成したカスタマイズリストビューをリニアレイアウト内に水平に配置します。
Places the previously created customized list view horizontally in the linear layout.
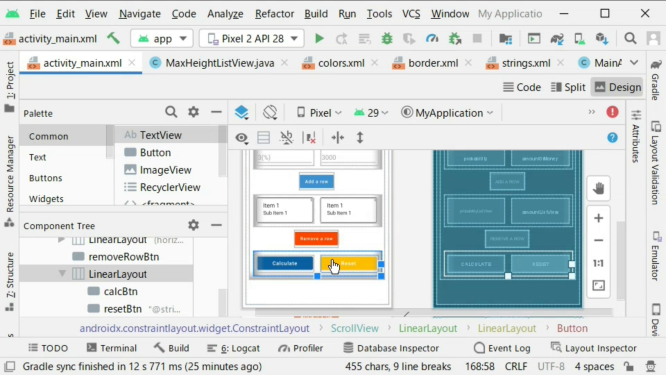
確率と金額が加えられたリストから項目を行ごと削除するボタンを配置します。
Put a button to remove each line of items from the list with probability and amount added.
リストの各行から期待値を計算した後に、その結果を表示するアクティビティへ移動させるボタンをリニアレイアウト内に水平に配置します。
Place a button horizontally in the linear layout that will move the user to the activity that calculates the expected value from each row of the list and displays the result.
全ての値をリセットするボタンを配置します。
Place a button to reset all values.
では[MainActivity.java]に移動して、コードを書いていきましょう。
Now go to [MainActivity.java] and start writing code.
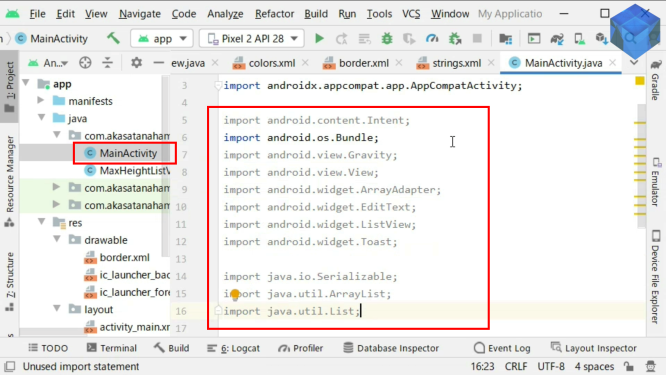
必要なライブラリをインポートします。
Import the required libraries.
アレイリストやアダプター等、必要な変数を定義します。
Define the required variables, such as array lists and adapters.
そして、onCreateメソッド内で変数を初期化していきます。
You then initialize the variables in the onCreate method.

リスト内に配置する各項目のレイアウトはアンドロイドに標準で組み込まれているXMLレイアウトを使用します。
The layout of each item that will be placed in the list uses the standard Android built-in XML layout.
これらの変数の使い方や説明は前の動画を参考にしてください。
For more information on using these variables, see my previous video.
それではリストに項目を追加するボタンのonClickイベントに実際の処理内容を書いていきましょう。
Now let's write the actual action in the onClick event of the button that adds the item to the list.
まず各EditTextに入力された値を取り出します。
It first retrieves the value entered for each EditText.

空文字でないかどうか、Floatバリューに変換できるか、サイズは9個を超えないかどうかを判定します。
Determines if it is not an empty string, can be converted to a Float value, and does not exceed 9 sizes.
if(!probabilityValue.matches("") && !valueOfAmount.matches("")) {
if (Float.valueOf(probabilityValue) != null && Float.valueOf(probabilityValue) > 0) {
if (listOfProbabilities.size() < 9 && listOfAmounts.size() < 9) {
テキスト表示用、期待値の計算用にそれぞれの変数を用意して配列に格納します。
Each variable is stored in an array for text display and for calculating expected values.
アダプターに値の変更を知らせて、ListViewに値を追加して、追加された項目を画面に表示させます。
Informs the adapter of the value change, adds the value to the ListView, and displays the added item on the screen.
この確率の値の処理と同じ様に、金額の値の処理を行います。
The value of the amount is processed in the same way as the value of this probability.
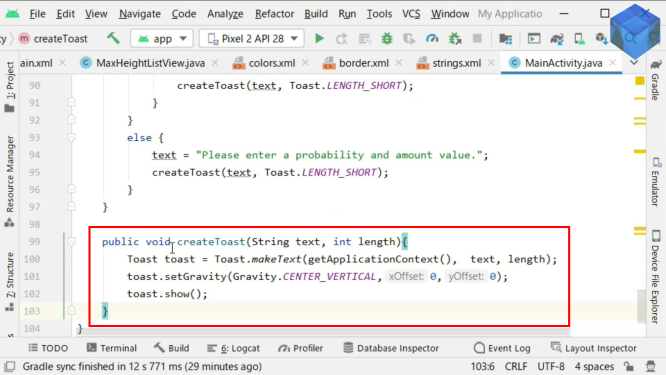
不正な値等が入力されていたら、Toastを使って警告文を画面に表示させるようにします。
If an incorrect value is entered, use Toast to display a warning message on the screen.
Toastを使ったエラーメッセージの処理は複数の場所で何度も同じ内容を実行するので、その一連の処理をまとめてメソッドにしておくことを勧めます。
Because error message handling with Toast does the same thing over and over in multiple places, it's a good idea to combine the processes into a method.
続いて、リストビューから項目を行ごと削除するボタンのonClickイベントに実際の処理内容を書いていきましょう。
Next, you'll write the actual action in the onClick event of the button that removes each row of items from the listview.
基本的な処理内容は追加ボタンの時とさほど変化はありません。
The basic process is not much different from the Add button.
配列に値を加える代わりに指定した値を削除するだけです。
Instead of adding a value to the array, you just delete the specified value.
配列サイズから一を引いた数がその配列の一番最後の値のインデックス番号になるので、削除する時はそのインデックス番号を使用して配列の最後の値を削除するようにします。
Since the array size minus one is the index number of the last value in the array, use that index number when deleting to delete the last value in the array.
不正な値等が入力されていたら、Toastを使って警告文を画面に表示させるようにします。
If an incorrect value is entered, use Toast to display a warning message on the screen.
ではリストの各行から期待値を計算した後に、その結果を表示するアクティビティへ移動させるボタンのonClickイベントの内容を記述していきましょう。
Next, you'll write the onClick event for the button that calculates the expected value from each row in the list and moves the user to the activity that displays the result.
public void calculate(View view) {
    -
    -
    -

    Intent intent = new Intent(this, ProbabilityDistributionTable.class);
    List<ArrayList<Float>> sendData = new ArrayList<>();
    sendData.add(listOfProbabilityResults);
    sendData.add(listOfAmountResults);
    intent.putExtra("sendData", (Serializable) sendData);
    startActivity(intent);

    -
    -
    -
}
配列が空かどうか、二つの配列のサイズの数が合っているかどうかをIf文を使って判定します。
Use If statement to determine if an array is empty and if the two arrays have the same number of sizes.
Intentを使用して二つの配列を移動先のアクティビティへ渡します。
Use Intent to pass the two arrays to the destination activity.
ここで行われている一連の作業内容は前回の時とほぼ変わりはありません。
The sequence of work done here is almost the same as last time.
不正な値等が入力されていたら、Toastを使って警告文を画面に表示させるようにします。
If an incorrect value is entered, use Toast to display a warning message on the screen.
続いて、リセットボタンの処理の内容を書いていきましょう。
Next, let's write the process of the reset button.
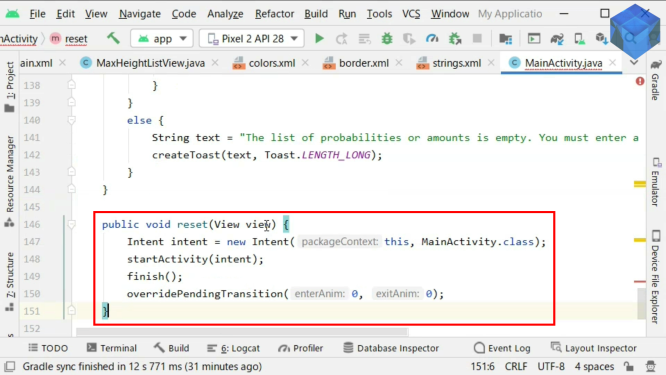
メインアクティビティ自身へインテントを使用して移動するようにします。
Use intent to navigate to the main activity itself.
この時、画面の初期化の際に画面が一瞬暗くなって切り替わるので、それを防ぐため、[overridePendingTransition]を使用します。
In this case, [overridePendingTransition] is used to prevent the screen from momentarily turning dark when initializing the screen.
では移動先のアクティビティを作成しましょう。
Now create the destination activity.
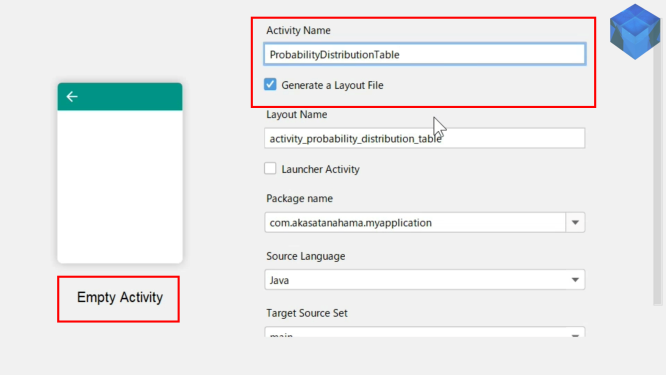
いつも通りに空のアクティビティとレイアウトファイルを作成してください。
Create empty activities and layout files as usual.
この段階でアプリが正常に動くかどうかテストしてみましょう。
At this point, let's test the app to see if it works.
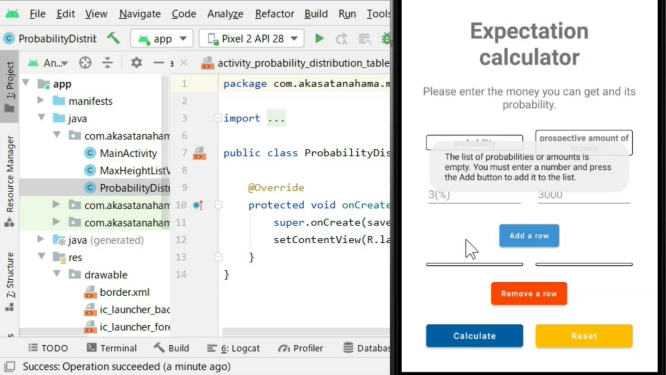
アプリが正常に動いていいることを確認したら、アクティビティの処理を書いていきましょう。
Once you've confirmed that your app is working properly, Let's start writing the activity.
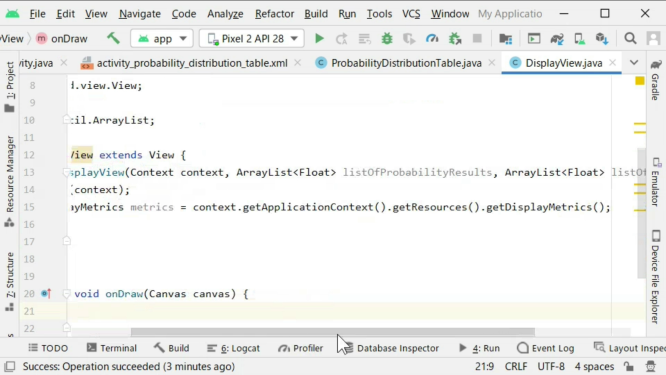
移動元のメインアクティビティから渡された二つの配列を格納するための変数を宣言します。
Declare two variables to store the two arrays passed from the source main activity.
二つの配列の値を受け取り、用意した配列に格納します。
Take the values of the two arrays and store them in the two arrays we just prepared.
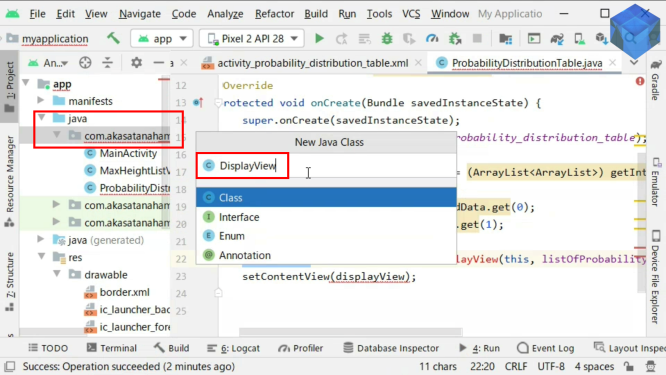
期待値を計算してその結果を表として表示するViewクラスを新たに作成し、配列の値を渡します。
Create a new View class that computes the expected value and displays the result as a table, passing two array values to the class.
このDisplayViewクラスは以前の動画でも何度も使用しているので、詳しいことは前回の動画等を参考にしてください。
This DisplayView class has been used many times in previous videos, so please refer to the previous video for details.
Viewクラスを継承したDisplayViewクラスを作成したら、必要なライブラリをインポートします。
After you create the DisplayView class, which extends the View class, import the necessary libraries.
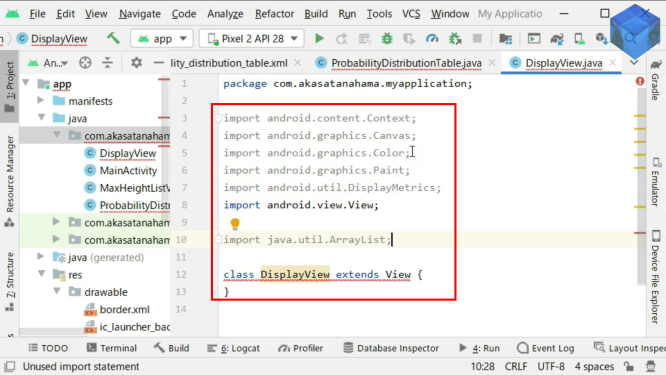
コンストラクタとonDrawメソッドを追加します。
Add the constructor and the onDraw method.
以上です。お疲れ様です。
That's all. Thank you for your hard work.