Published Date : 2020年5月11日13:48
Androidエミュレーターでアプリを表示する方法
How to Display Apps in an Android Emulator
This blog has an English translation
YouTubeにアップした動画、「【Androidエミュレーター】How to Display Apps in an Android Emulator in Android Studio」の補足説明の記事です。
Here's a little more about the 「【Androidエミュレーター】How to Display Apps in an Android Emulator in Android Studio」 video I uploaded to YouTube.
「Android Studio」でAndroidエミュレーターを起動させ、アプリの動作を確認しよう。
Let's Start up the Android emulator with "Android Studio" and see how the app works.
無駄な説明を省いて、忙しい時でも短時間で理解できるような動画です。
It's a video that can be understood in a short period of time even when you're busy, without any unnecessary explanation.
目次
Table of Contents
Android Studioで新規プロジェクトの作成 Creating a New Project in Android Studio |
Androidエミュレーターをダウンロードして起動させる Download and run the Android emulator |
ページの最後へ Go to the end of the page. |
Android Studioで新規プロジェクトの作成
Creating a New Project in Android Studio
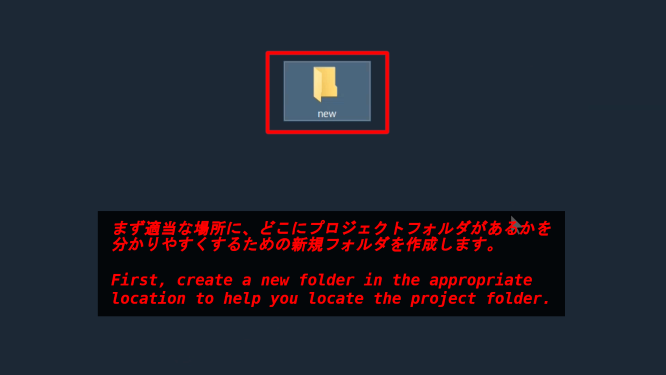
まず適当な場所に、どこにプロジェクトフォルダがあるかを分かりやすくするための新規フォルダを作成します。
First, create a new folder in the appropriate location to help you locate the project folder.
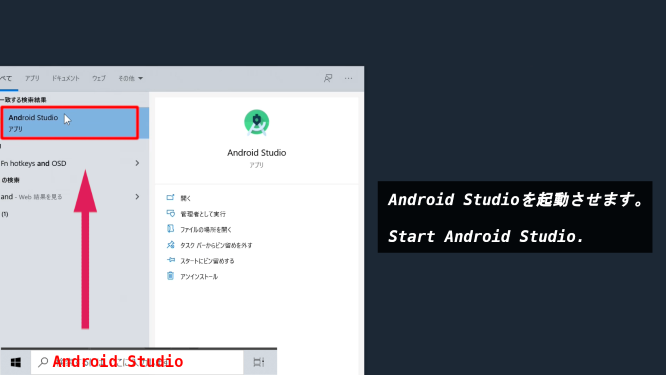
Android Studioを起動させます。
Start Android Studio.
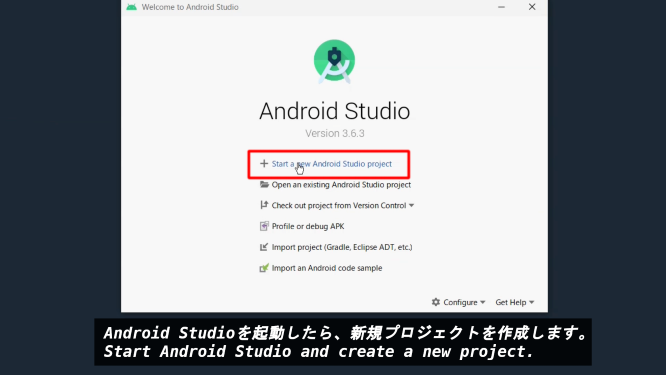
Android Studioを起動したら、新規プロジェクトを作成します。
Start Android Studio and create a new project.
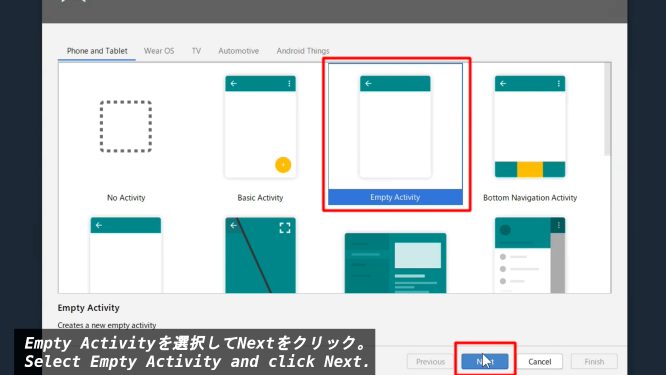
Empty Activityを選択してNextをクリック。
Select Empty Activity and click Next.
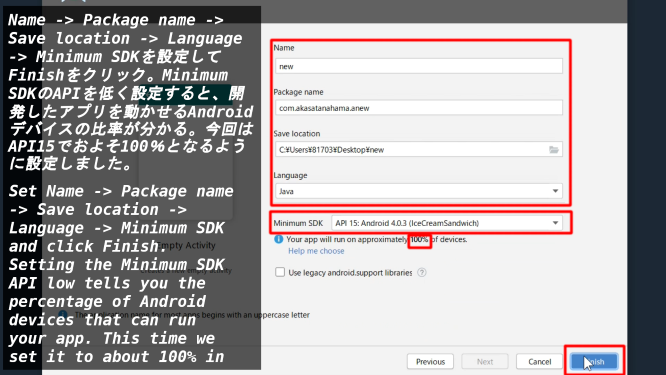
Name -> Package name -> Save location -> Language -> Minimum SDKを設定してFinishをクリック。Minimum SDKのAPIを低く設定すると、開発したアプリを動かせるAndroidデバイスの比率が分かる。今回はAPI15でおよそ100%となるように設定しました。
Set Name -> Package name -> Save location -> Language -> Minimum SDK and click Finish. Setting the Minimum SDK API low tells you the percentage of Android devices that can run your app. This time we set it to about 100% in API 15.
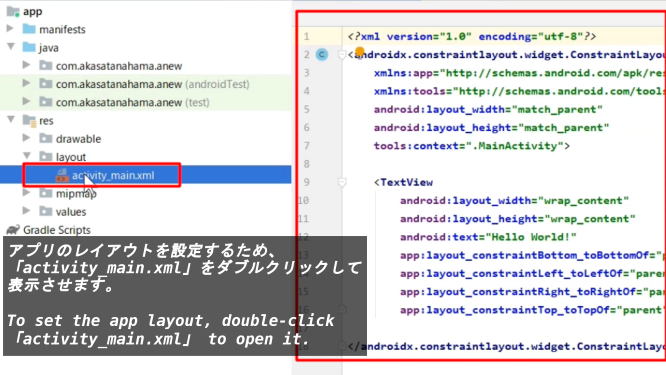
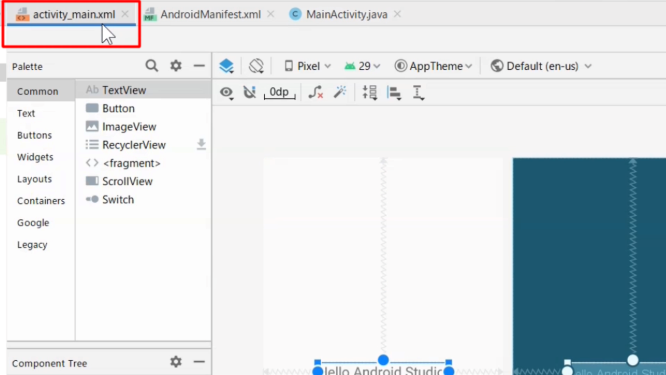
アプリのレイアウトを設定するため、「activity_main.xml」をダブルクリックして表示させます。
To set the app layout, double-click 「activity_main.xml」 to open it.
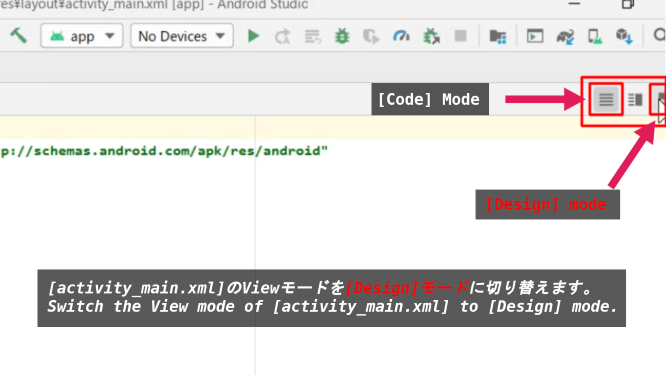
[activity_main.xml]のViewモードを[Design]モードに切り替えます。
Switch the View mode of [activity_main.xml] to [Design] mode.
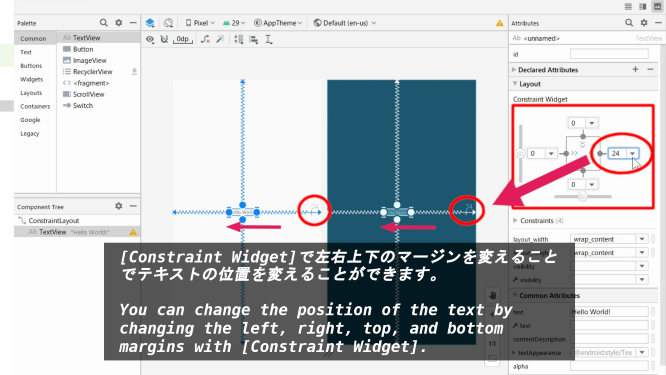
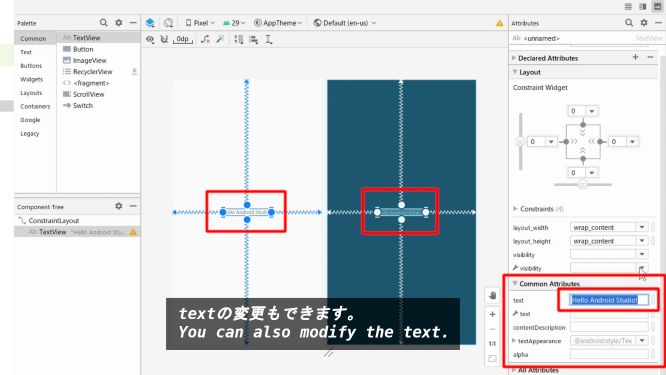
[Constraint Widget]で左右上下のマージンを変えることでテキストの位置を変えることができます。
You can change the position of the text by changing the left, right, top, and bottom margins with [Constraint Widget].
textの変更もできます。
You can also modify the text.
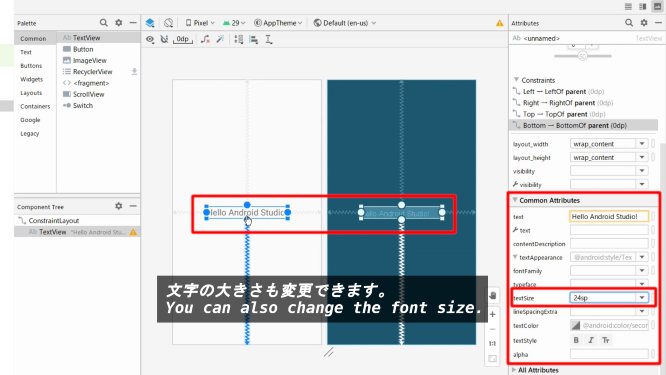
文字の大きさも変更できます。
You can also change the font size.
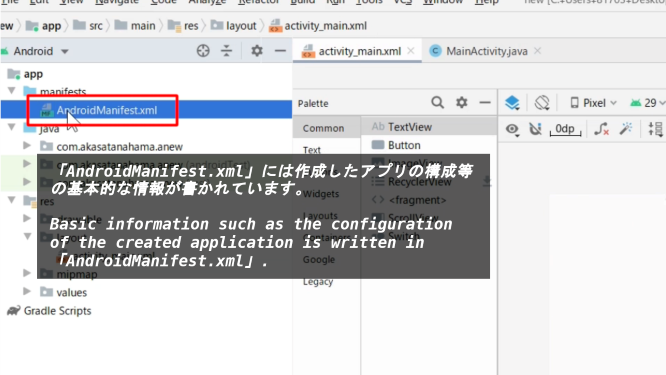
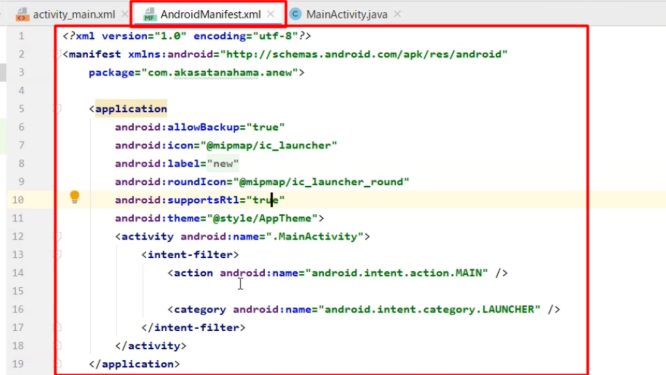
「AndroidManifest.xml」には作成したアプリの構成等の基本的な情報が書かれています。
Basic information such as the configuration of the created application is written in 「AndroidManifest.xml」.
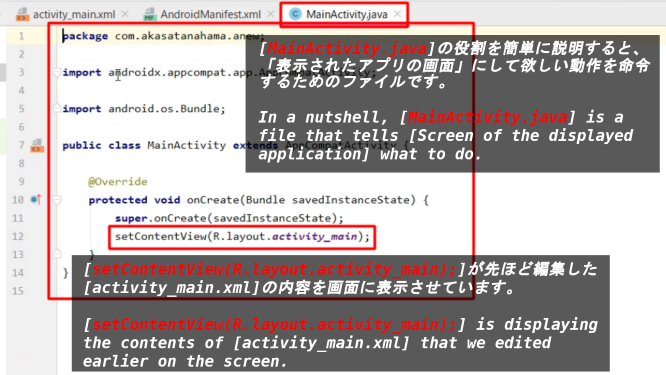
[MainActivity.java]の役割を簡単に説明すると、「表示されたアプリの画面」にして欲しい動作を命令するためのファイルです。
In a nutshell, [MainActivity.java] is a file that tells [Screen of the displayed application] what to do.
[setContentView(R.layout.activity_main);]が先ほど編集した[activity_main.xml]の内容を画面に表示させています。
[setContentView(R.layout.activity_main);] is displaying the contents of [activity_main.xml] that we edited earlier on the screen.
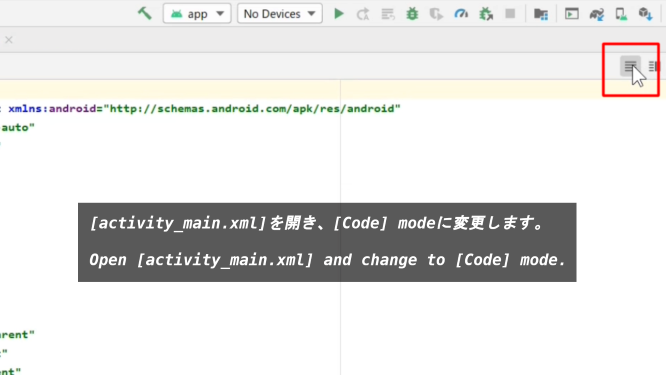
[activity_main.xml]を開き、[Code] modeに変更します。
Open [activity_main.xml] and change to [Code] mode.
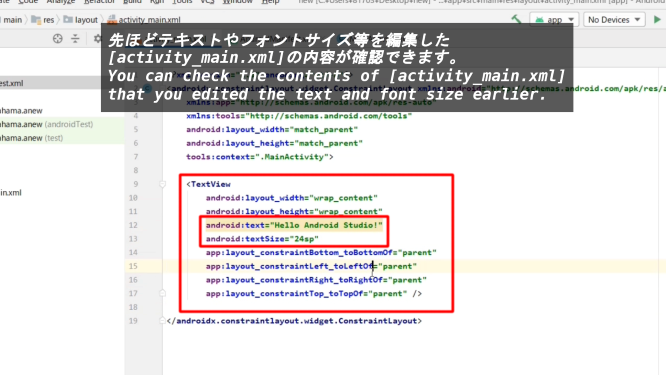
先ほどテキストやフォントサイズ等を編集した[activity_main.xml]の内容が確認できます。
You can check the contents of [activity_main.xml] that you edited the text and font size earlier.
Androidエミュレーターをダウンロードして起動させる
Download and run the Android emulator
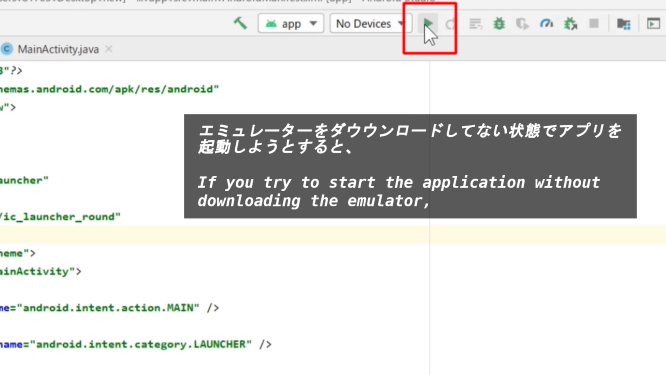
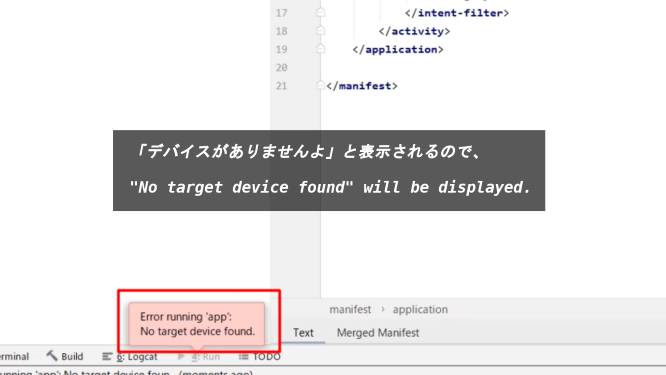
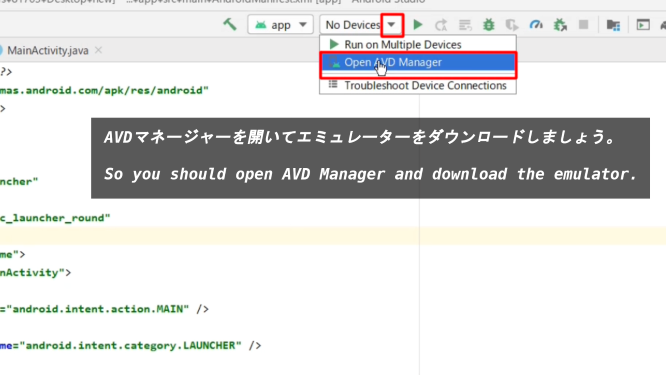
エミュレーターをダウウンロードしてない状態でアプリを起動しようとすると、「デバイスがありませんよ」と表示されるので、AVDマネージャーを開いてエミュレーターをダウンロードしましょう。
If you try to start the application without downloading the emulator, "No device" will be displayed. So you should open AVD Manager and download the emulator.
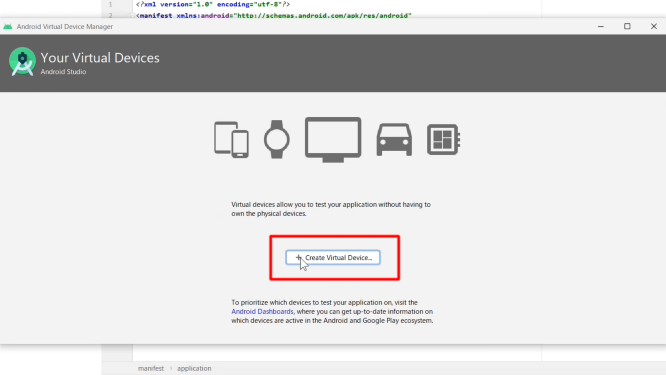
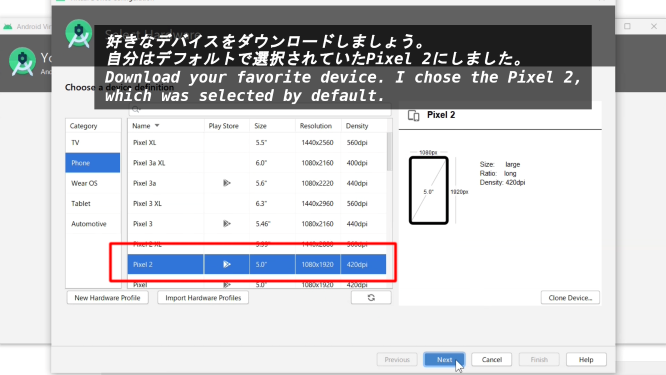
好きなデバイスをダウンロードしましょう。自分はデフォルトで選択されていたPixel 2にしました。
Download your favorite device. I chose the Pixel 2, which was selected by default.
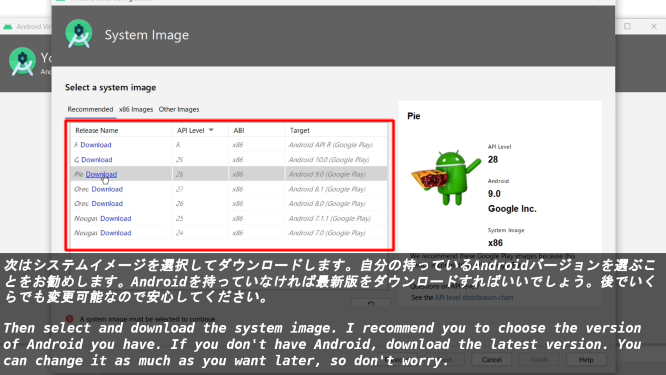
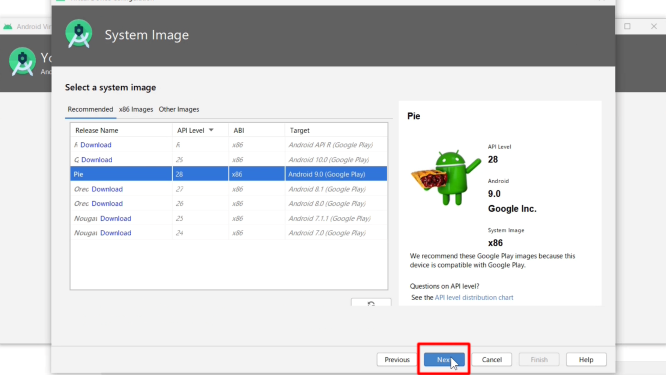
次はシステムイメージを選択してダウンロードします。自分の持っているAndroidバージョンを選ぶことをお勧めします。
Then select and download the system image. I recommend you to choose the version of Android you have.
Androidを持っていなければ最新版をダウンロードすればいいでしょう。後でいくらでも変更可能なので安心してください。
If you don't have Android, download the latest version. You can change it as much as you want later, so don't worry.
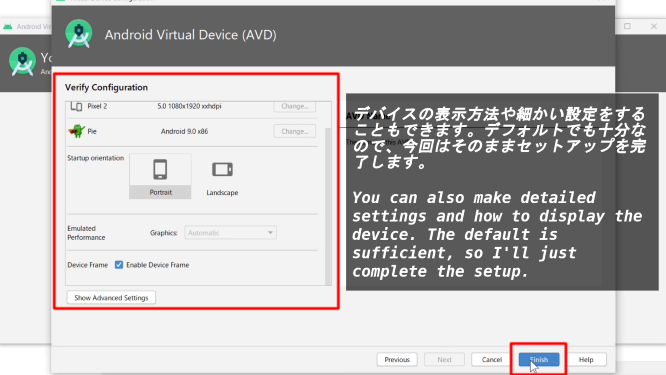
デバイスの表示方法や細かい設定をすることもできます。デフォルトでも十分なので、今回はそのままセットアップを完了します。
You can also make detailed settings and how to display the device. The default is sufficient, so I'll just complete the setup.
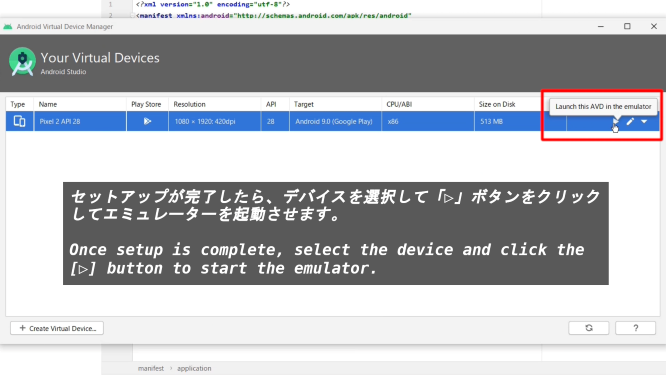
セットアップが完了したら、デバイスを選択して「▷」ボタンをクリックしてエミュレーターを起動させます。
Once setup is complete, select the device and click the ▷ button to start the emulator.
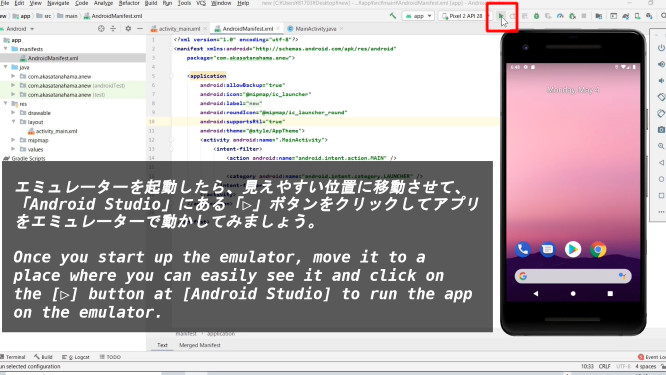
エミュレーターを起動したら、見えやすい位置に移動させて、「Android Studio」にある「▷」ボタンをクリックしてアプリをエミュレーターで動かしてみましょう。
Once you start up the emulator, move it to a place where you can easily see it and click on the [▷] button at [Android Studio] to run the app on the emulator.
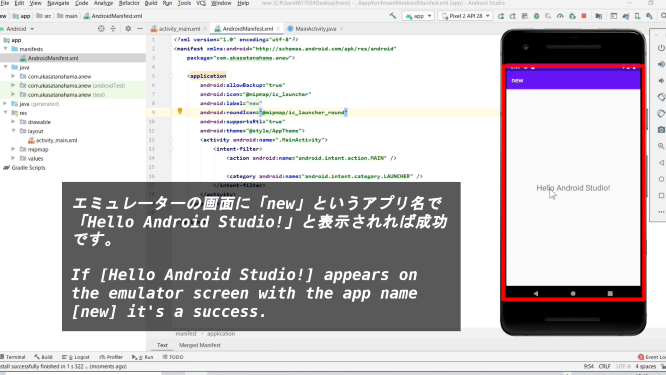
エミュレーターの画面に「new」というアプリ名で「Hello Android Studio!」と表示されれば成功です。
If [Hello Android Studio!] appears on the emulator screen with the app name [new] it's a success.
以上です。お疲れ様です。
That's all. Thank you for your hard work.