Published Date : 2020年3月18日22:25
【Part 3】Shotcutで簡単な動画編集をしてみよう - GIMPを使ったシーンの作成
【Part 3】Let's do a simple video editing with Shotcut - Create scenes with GIMP
This blog has an English translation
YouTubeにアップした動画、「Shotcutで動画編集 簡単なチュートリアル動画を作ろう - GIMPを使ったシーンの作成」の補足説明の記事です。
Here's a little more about the [Shotcut Video Editing Make a simple tutorial video - Create scenes with GIMP] video I uploaded to YouTube.
無料の動画編集ソフトShotcutを使って動画を編集してみようというシリーズです。
Edit videos with the free video editing software Shotcut.
Blender Video Editingモードのレンダリング時間に不満を覚え、別のフリーの動画編集ソフトを探していました。 そして色々と試して、Shotcutがレンダリング時間が速く(自分のPCだと)、UI(以前使っていたAdobe Premierer Proと似ています)と操作性が良いと感じたので、 使用する動画編集ソフトをShotcutに変更しました。 そして、その操作方法を覚えた過程を共有したいと思い、この動画シリーズを作成しました。
I was unhappy with the rendering times in Blender Video Editing mode and was looking for another free video editing software. After trying various things, I found that Shotcut's rendering time was fast (On my computer.) and the UI (It's similar to the Adobe Premiere Pro I used to use.) was good, so I changed the video editing software to Shotcut. I created this video series to share with you how I learned to use Shotcut.
第三回目は、GIMPを使ってシーンの作成を行いそれをShotcutで編集する方法を説明していきます。
In Part 3, I'll explain to you how to create a scene using GIMP and edit it in Shotcut.
全体の説明は動画に任せるとして、補足が必要だろうと思われる部分を説明していきマウス。
I'll leave the entire explanation to the video, but I'll explain the parts that I think need to be supplemented.
目次
Table of Contents
GIMPで材料作り Create a video scene with GIMP |
材料をShotcutで編集 Edit your video scene in Shotcut |
GIMPを使ったテキストの縁取り方法 How to Outline Text in GIMP |
ページの最後へ Go to the end of the page. |
GIMPで材料作り
Create a video scene with GIMP
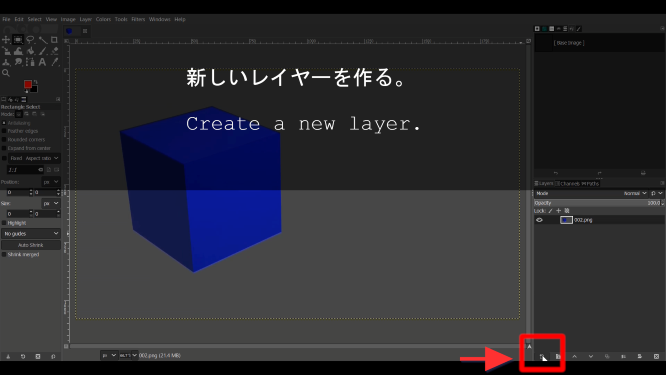
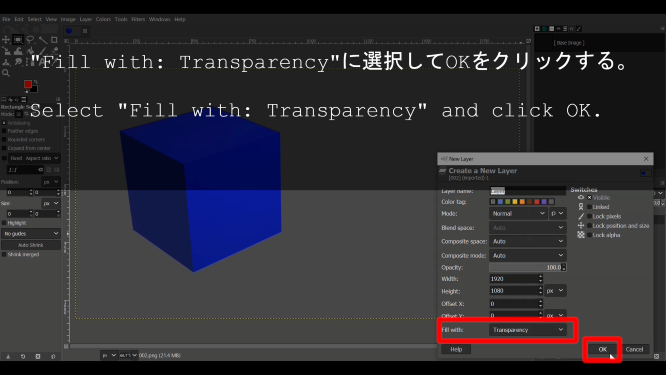
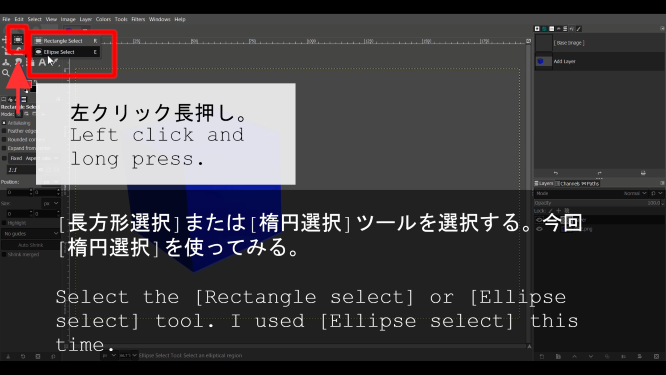
ではまずGIMPで動画のシーンの材料を作成していきます。
Now you'll use GIMP to create the materials for your video scene.
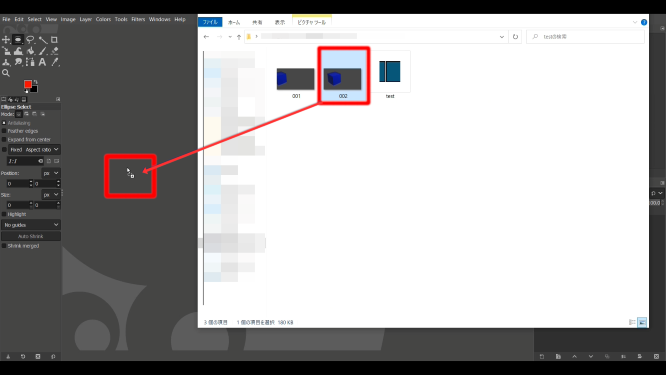
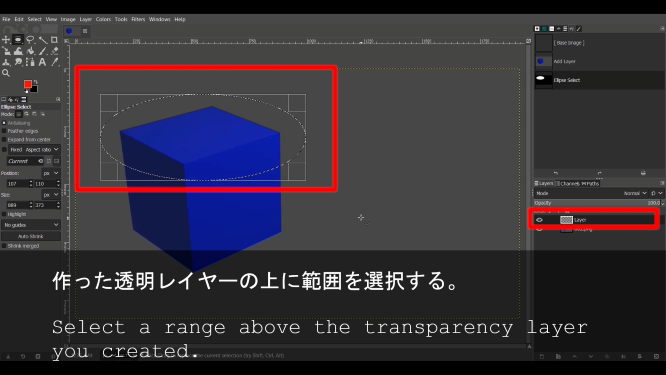
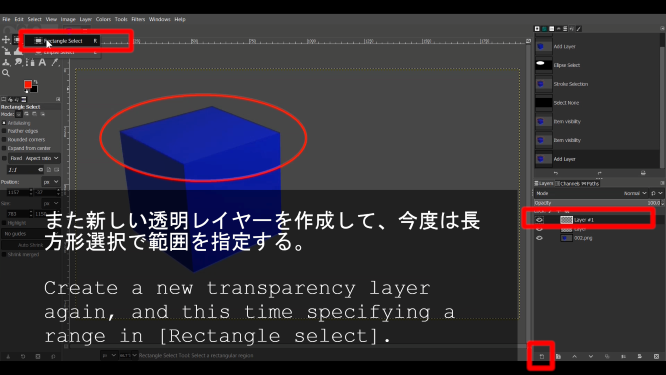
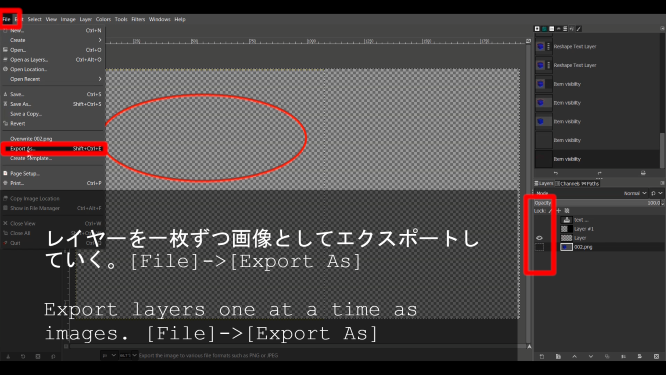
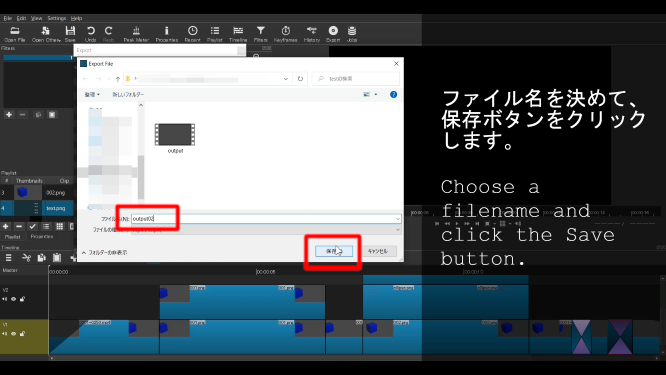
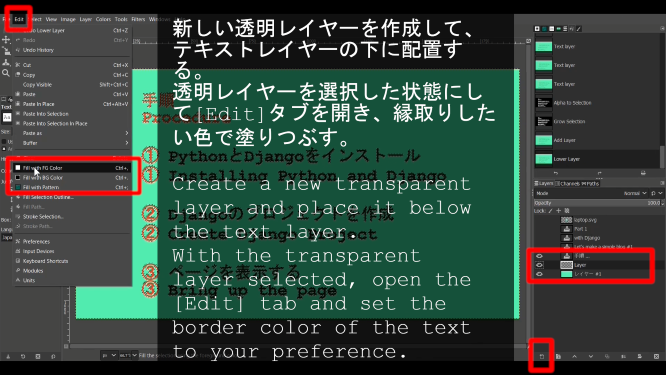
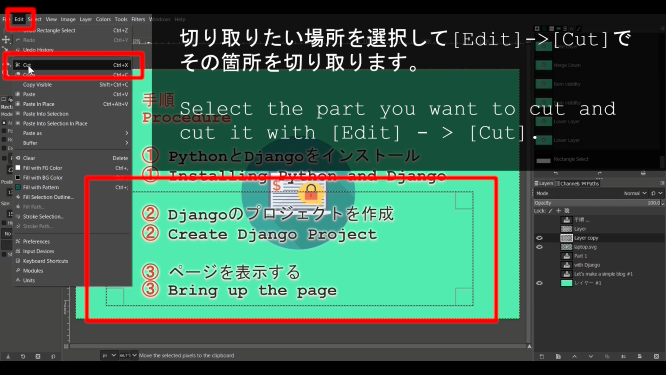
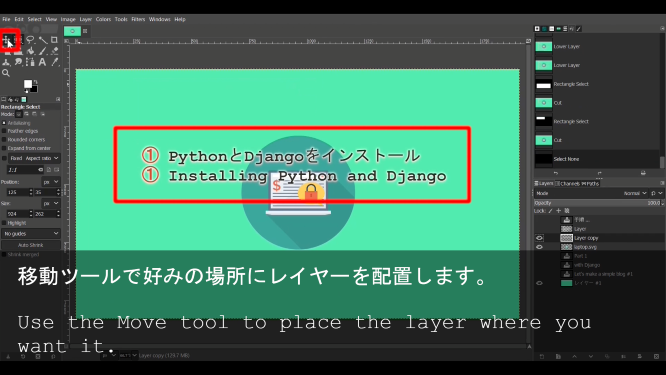
GIMPを立ち上げ、②で保存した002.pngをGIMPの作業ウィンドウにドラッグアンドドロップする。
Launch GIMP and drag and drop the 002.png saved in ② into the GIMP's image window.

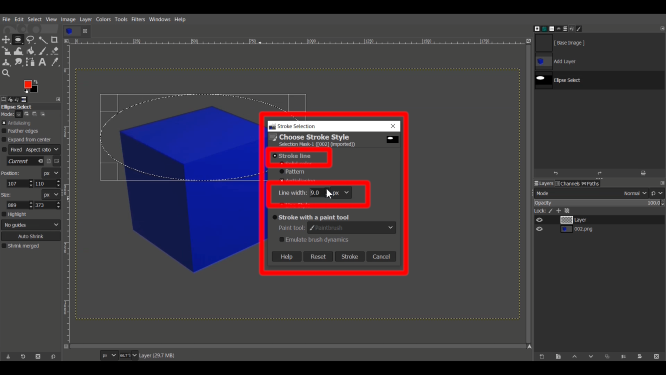
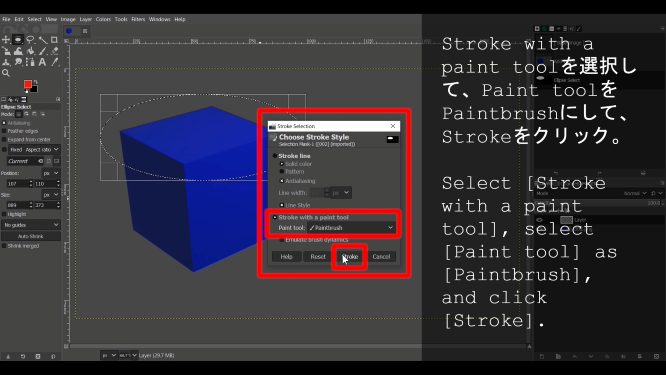
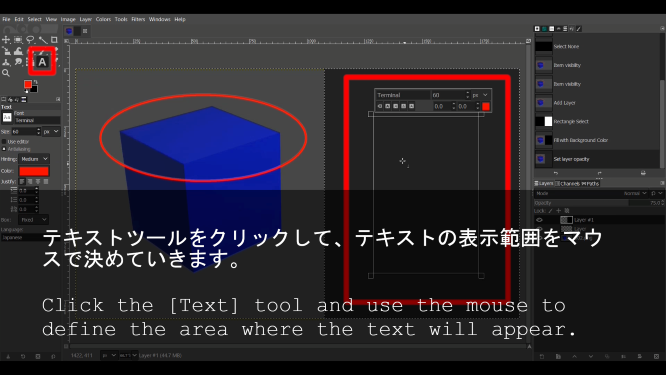
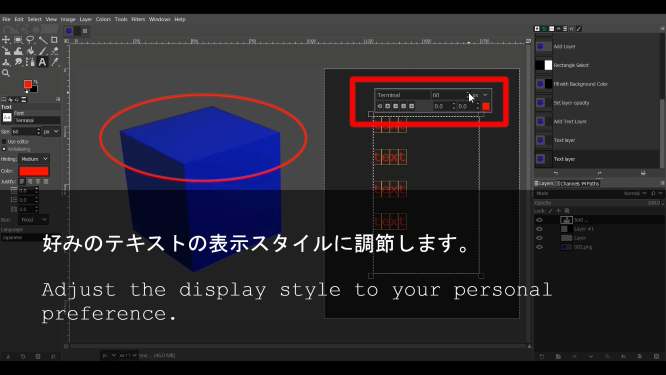
Stroke Lineの設定から行います。Line widthをお好みの太さにします。
From the Stroke Line settings. Make the Line width as thick as you like.
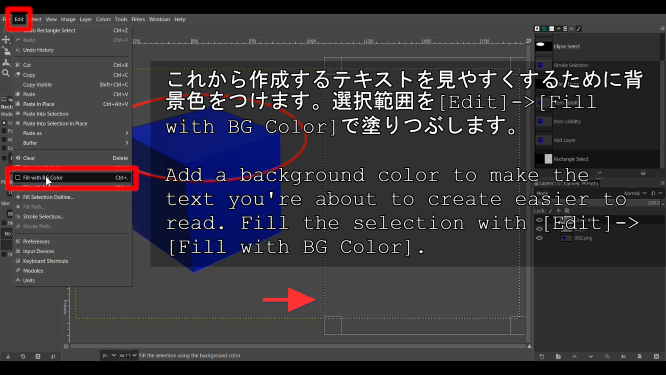
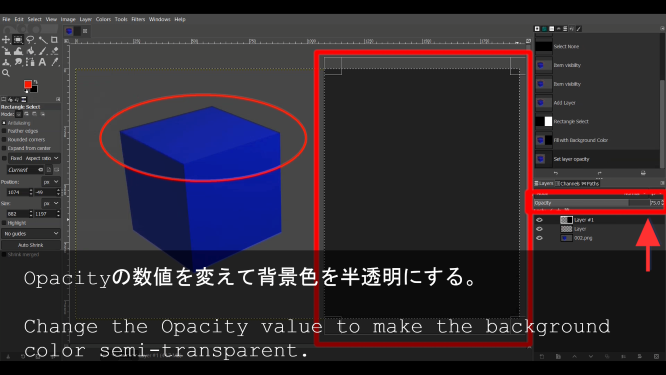
テキストの背景色ですので、お好みで色や透明度は設定してください。
This is the background color of the text, so please set the color and transparency as you like.
材料をShotcutで編集
Edit your video scene in Shotcut
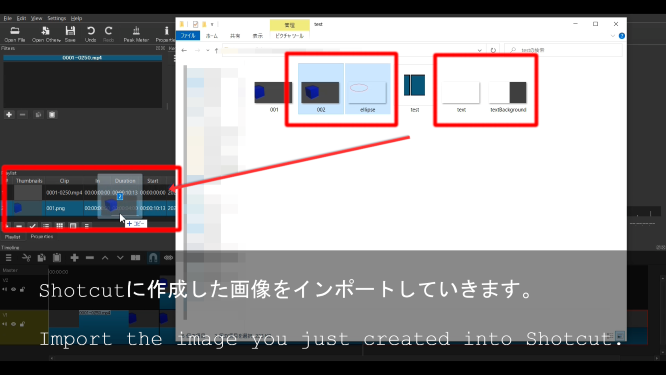
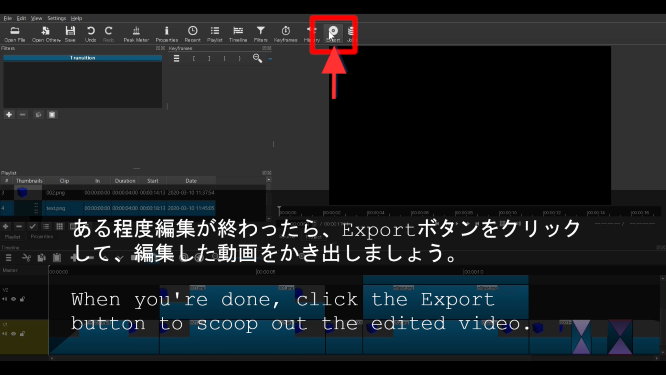
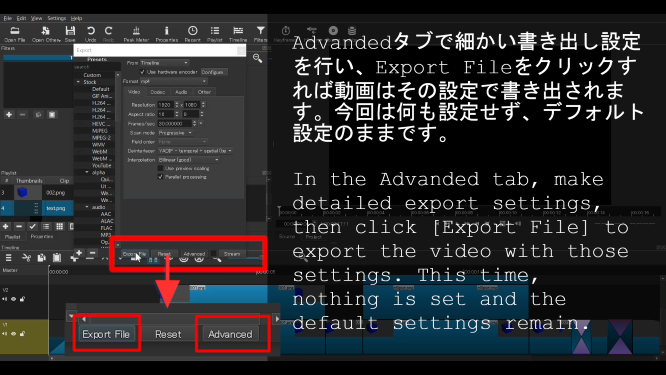
続いて、作ったシーンの材料をShotcutにインポートして、編集を行っていきます。
Now you'll import the scene's materials into Shotcut for editing.
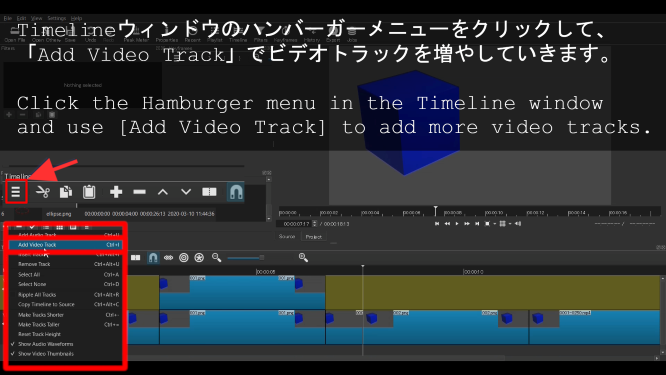
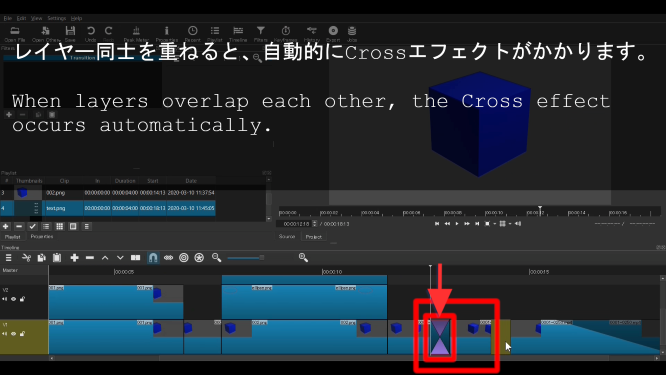
先ほどGIMPで作ったファイルを一枚ずつ重ねていく為に、幾つかのVideo trackを増やしていきます。
To stack the image files created in GIMP one by one, increase the number of video tracks.
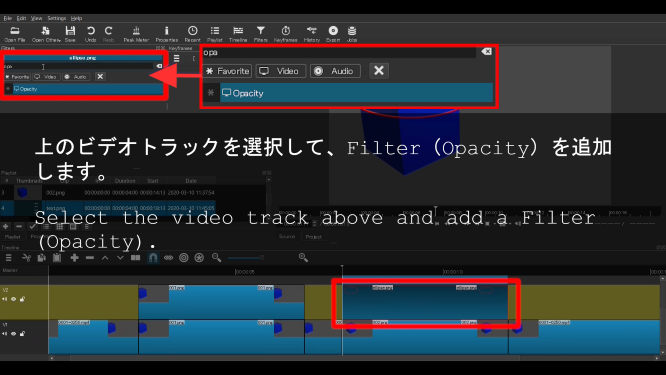
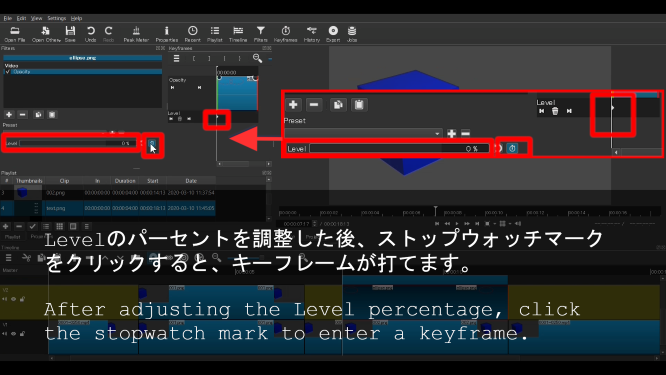
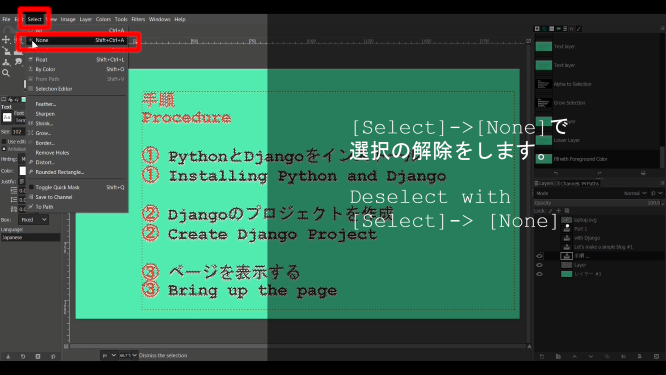
その後、なめらかに図形やテキストが表示されるように、一枚ずつレイヤーにFilter(今回は透明度にする)をかけていきます。
Filters (Make it transparent this time.) the shapes and text layer one by one to smooth the display.
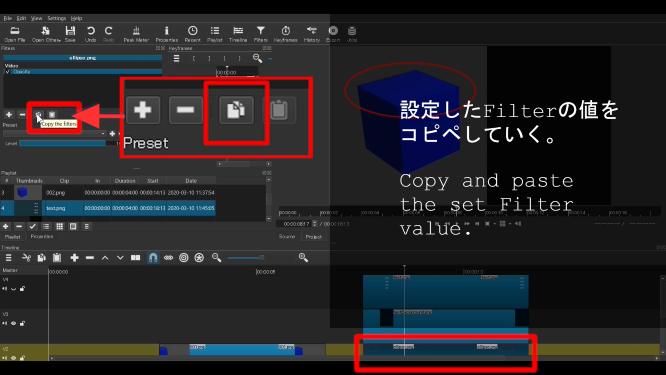
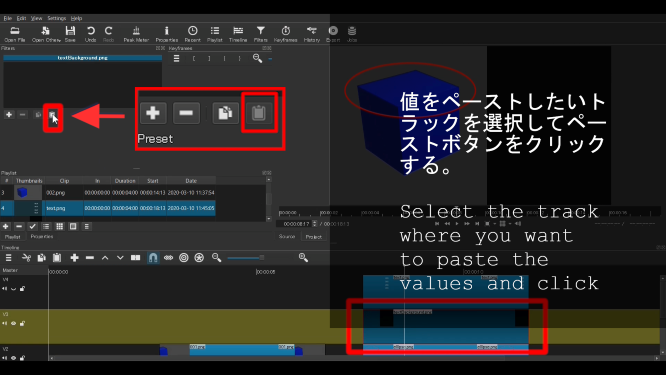
同じFilterを個別のレイヤーに対して同じ様に設定していくのは大変なので、Filter毎コピペしてから細かい調整を行いましょう。
It's hard work to set the same filter for each layer in the same way, so it's easier to copy and paste each filter and make fine adjustments.
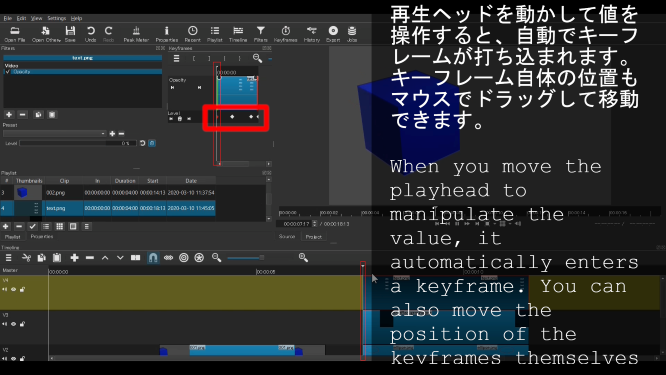
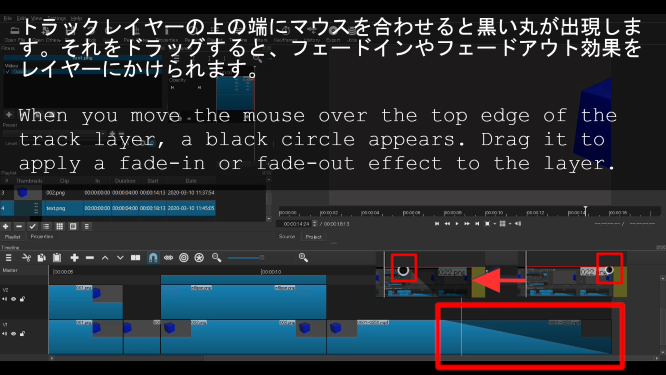
フェードインとフェードアウトの効果を動画や画像に付けたい時も簡単に設定できます。
You can also easily set fade-in and fade-out effects for movies and images.
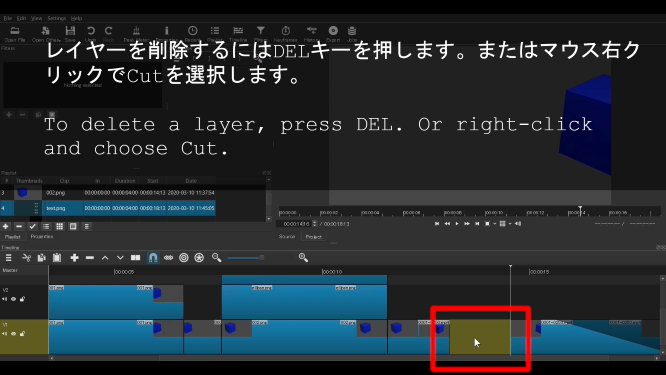
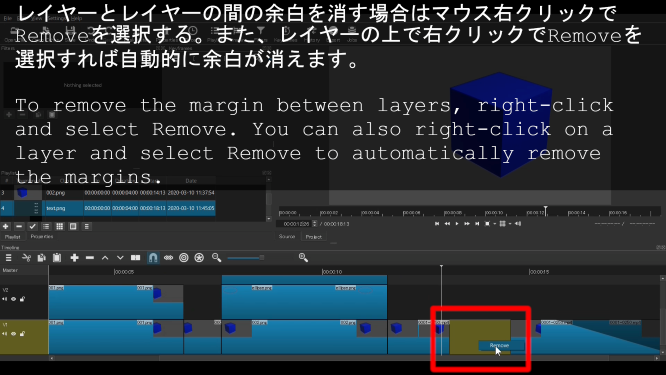
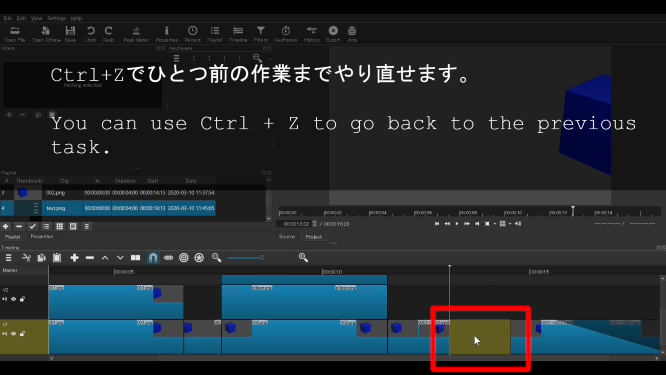
DeleteとRemoveは頻繁に使います。
Delete and Remove operations are frequently used.
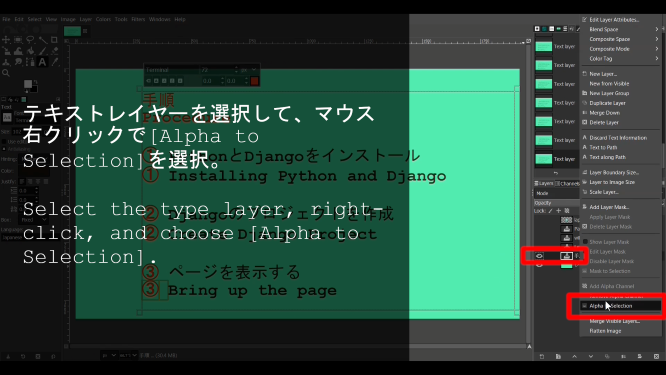
GIMPを使ったテキストの縁取り方法
How to Outline Text in GIMP
おまけとしてGIMPを使ったシンプルなテキストの縁取り方法を紹介します。
As a bonus, I'll also show you an easy way to add borders around text using GIMP.
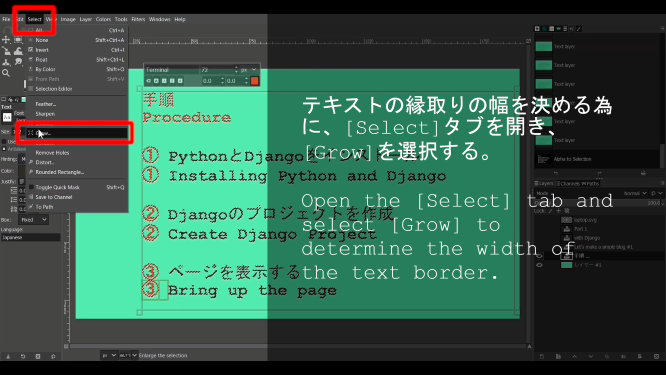
ピクセルの数を増やせば縁取りが大きくなります。
Increasing the number of pixels will increase the border of text.
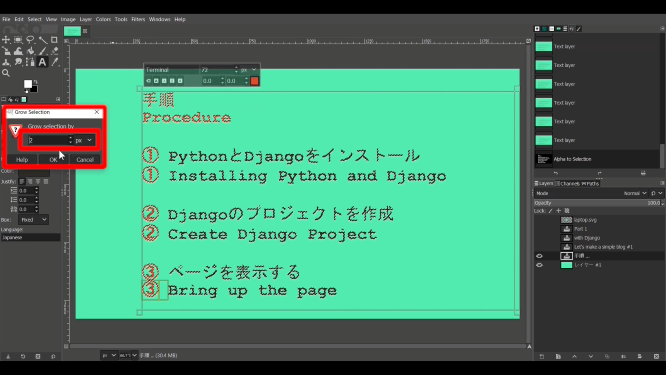
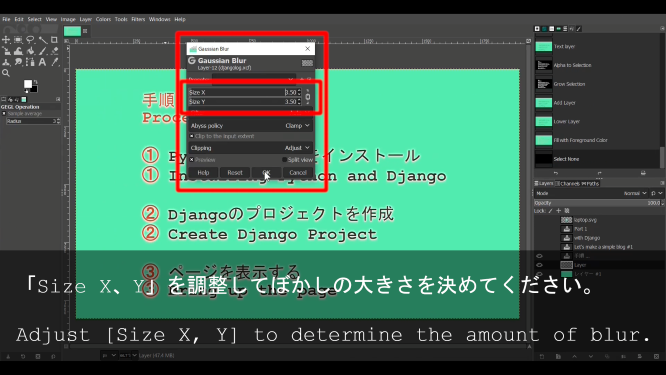
縁取りをくっきりさせたければ、ブラーはかけずにそのままにしておきます。これは各個人の好みで調整してください。
If you want a sharp border, leave it unblurred. Please adjust this to your personal preference.

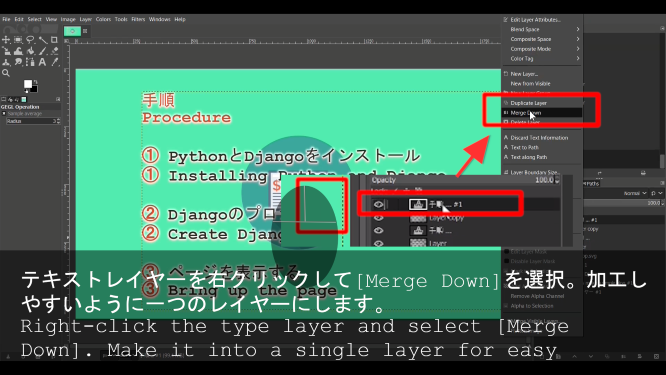
後はこの作業を繰り返して、画像として保存してください。
Repeat this process and save as an image.
このShotcutの動画シリーズで紹介した操作方法を使えば大概のチュートリアル動画は作れます。 後はあなたの工夫次第です。
You will now be able to create most of the tutorial videos using the methods presented in this video series. The rest depends on your ingenuity.