Published Date : 2019年2月11日20:23
ドメインを取得し、CORESERVERの設定をしよう。
Get the domain and configure CORESERVER.
バリュードメインでドメインを取得し(○○.comみたいなやつ)
CORESERVERにてCORE MINIという最小最安のサーバーをレンタル。
簡単な設定をメモしてみました。
English Translation
Get domain by value domain (Something like ○ ○ .com) CORESERVER rents the cheapest server called CORE MINI. I wrote down a simple setting.
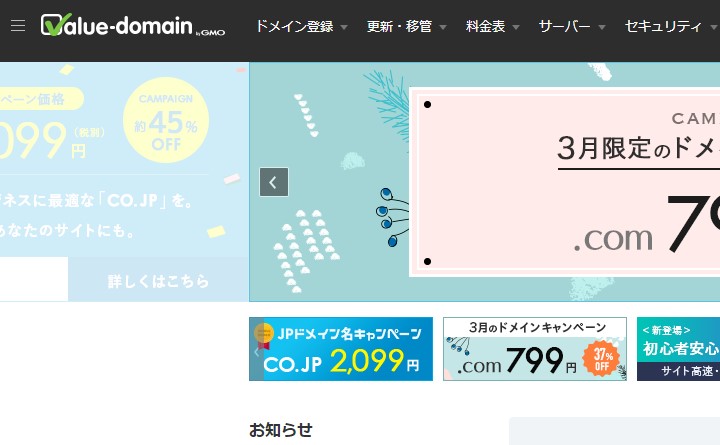
先にドメインから購入するならバリュードメインへ。
English Translation
If you buy from the domain first, go to the value domain.
Value-domain
サーバーから選択するならCORESERVER へ。
English Translation
To select from the server, go to CORESERVER.
CORESERVER.JP

正直どっちでもいいですけど、
サーバーなら無料期間があるし、
自分オリジナルのドメインでなくてもいいやって人は
サーバー側でドメインを用意してくれているので
まずサーバーから決めてもいいかもです。
English Translation
Honestly, it doesn't matter. If it is a server, there is a free period. You don't have to be your own domain. because they have a domain on the server side, It might be good to decide from the server first.
どっちも同じ会社らしいので連携の設定も簡単です。
(バリュードメインのサイトからCoreserverを使うかって問われますし。。。)
English Translation
Since both companies seem to be the same company, it is easy to set up the cooperation. (The value domain site asks if you want to use Coreserver.)
なにはともあれ申し込みとかの流れにいきます。
English Translation
Anyway, I will go through the process of application.
自分はバリュードメインでオリジナルドメインを買いました。
数百円程度ですし、長く運用していくなら買って損はないはず。。。
English Translation
I bought the original domain in the value domain. It costs a few hundred yen, so if you are going to use it for a long time, you won't lose anything.
バリュードメインのユーザー登録をする。
Register for the value domain.
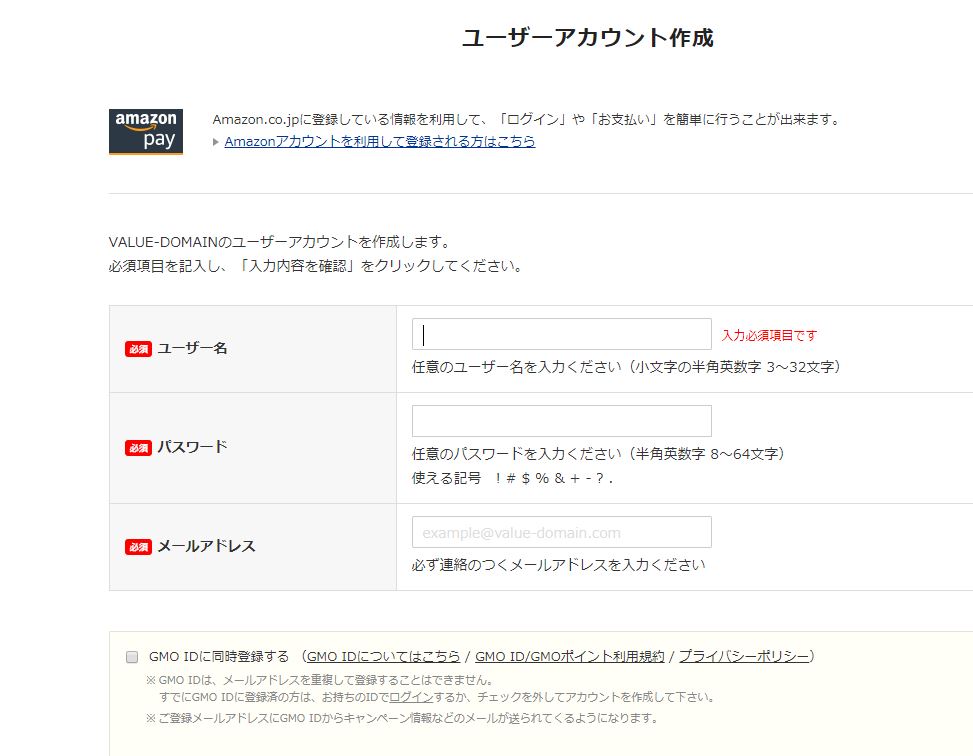
ユーザー名とパスワード、メールアドレスを入力。
English Translation
Enter your user name, password, and email address.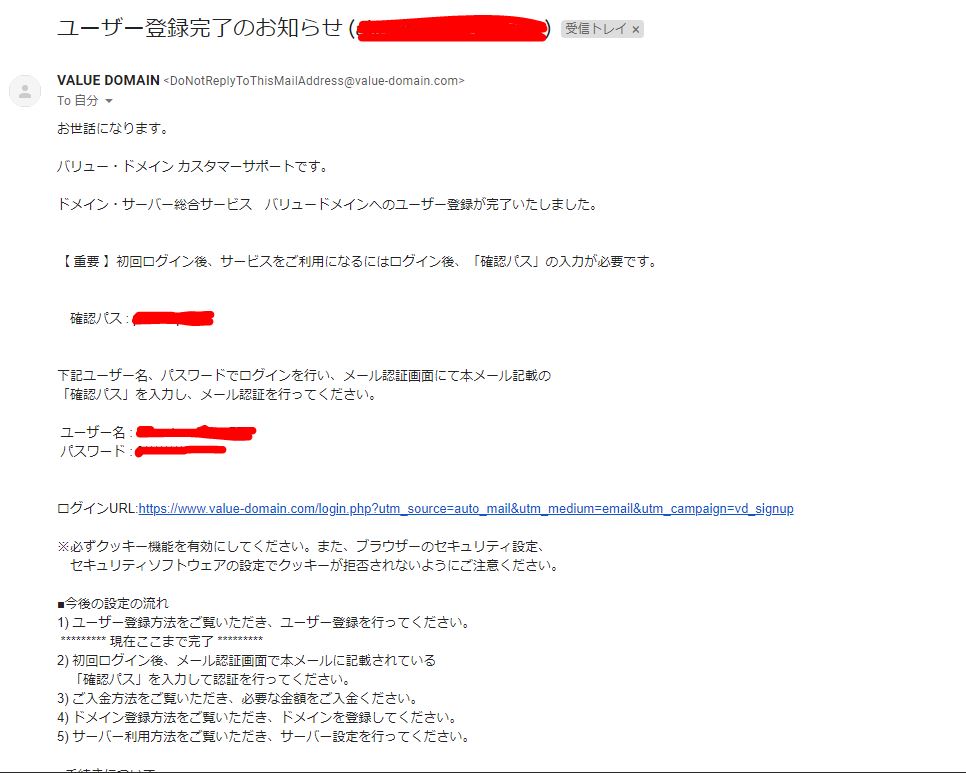
入力したメールアドレス宛に登録完了のお知らせが届くので、ログインURLへ飛びログインする。
English Translation
A notification of the registration completion is sent to the email address you entered, so you jump to the login URL and log in.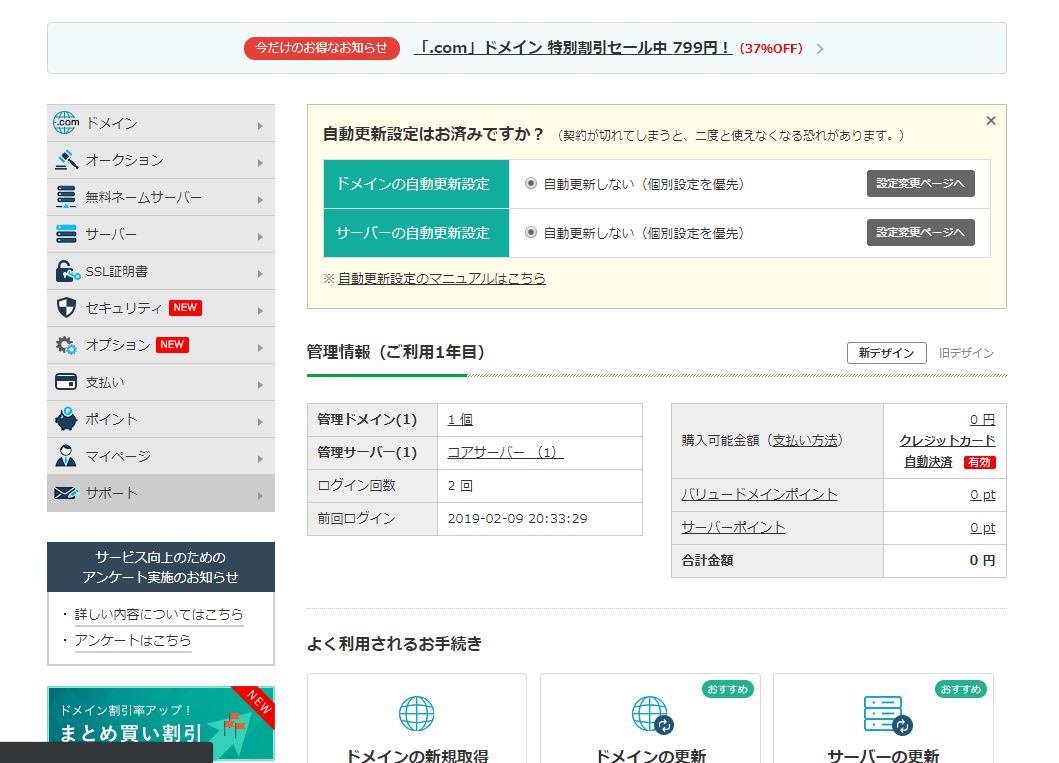
この画面の、

ドメイン ー> ドメイン登録をクリック。
English Translation
On this screen, click Domain > Domain Registration.
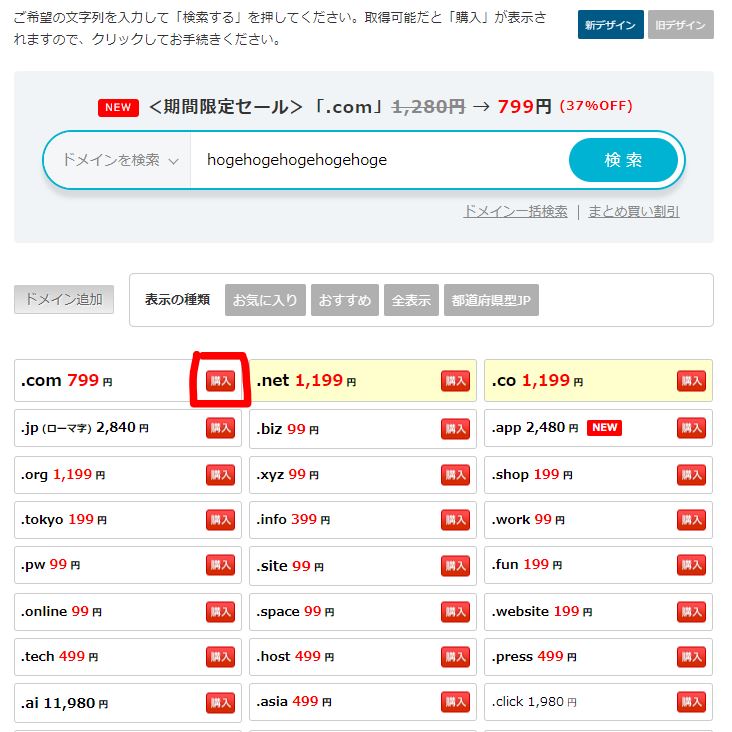
欲しいドメインネームを入力して検索ボタンをクリック。
購入可能なら購入ボタンが出てくる。
English Translation
Enter the desired domain name and click the search button. If it's available, you'll see a buy button.
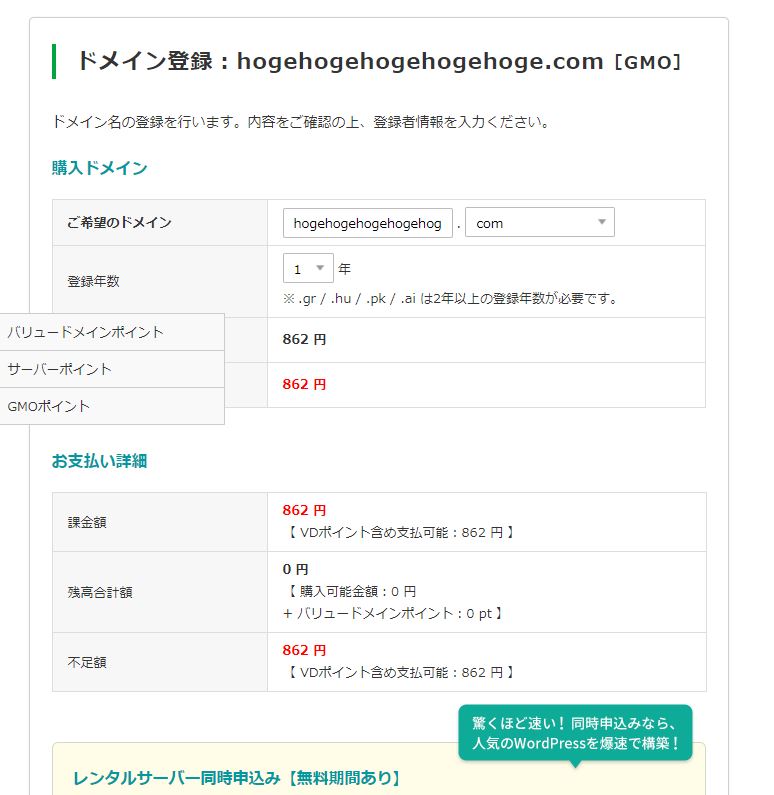
購入確認場面。
English Translation
Purchase confirmation scene.
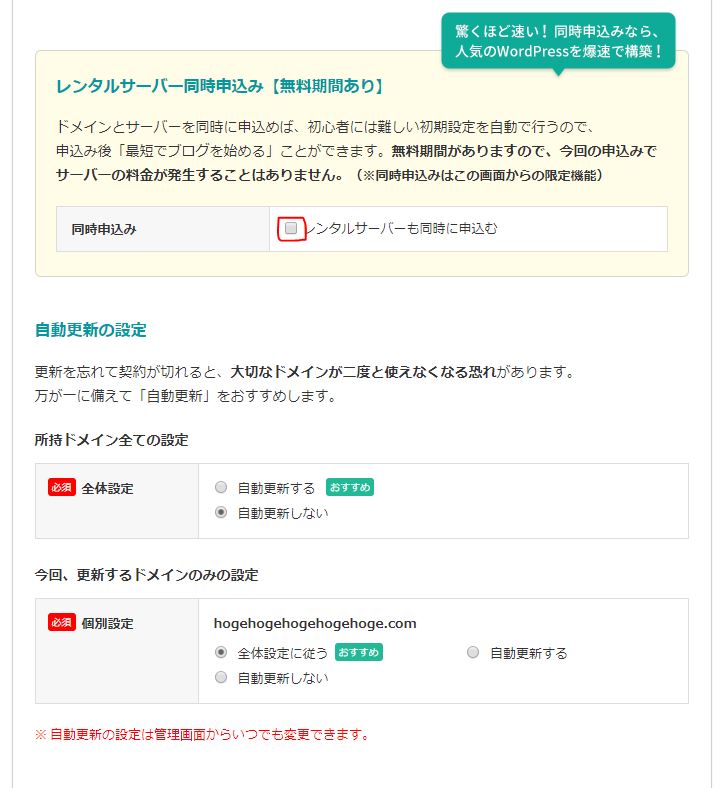
レンタルサーバーも同時に申し込み、
初期設定かおすすめを選択。
English Translation
Apply for a rental server at the same time. Select Default or Recommended.
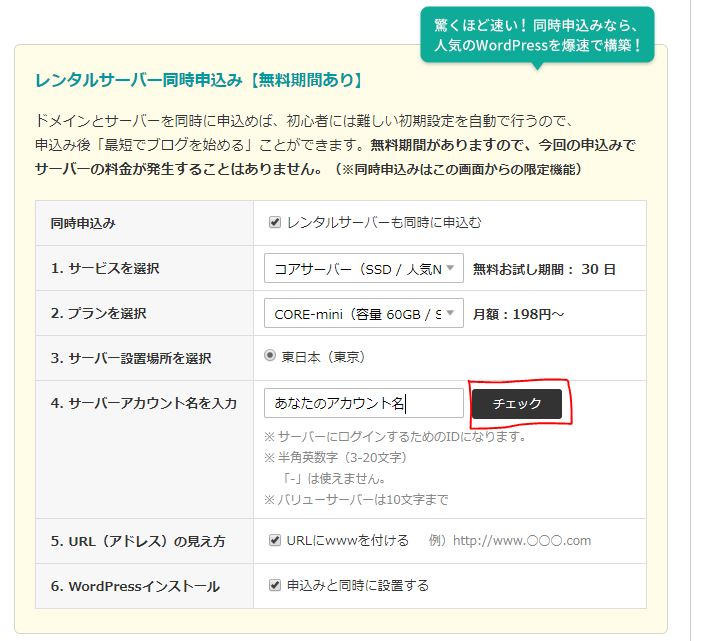
サーバーとプラン(自分は一番安いプランを選択)を選択し、
アカウント名等入力、選択。
English Translation
Select the server and plan (I choose the cheapest plan), then click Enter and select account name, etc.
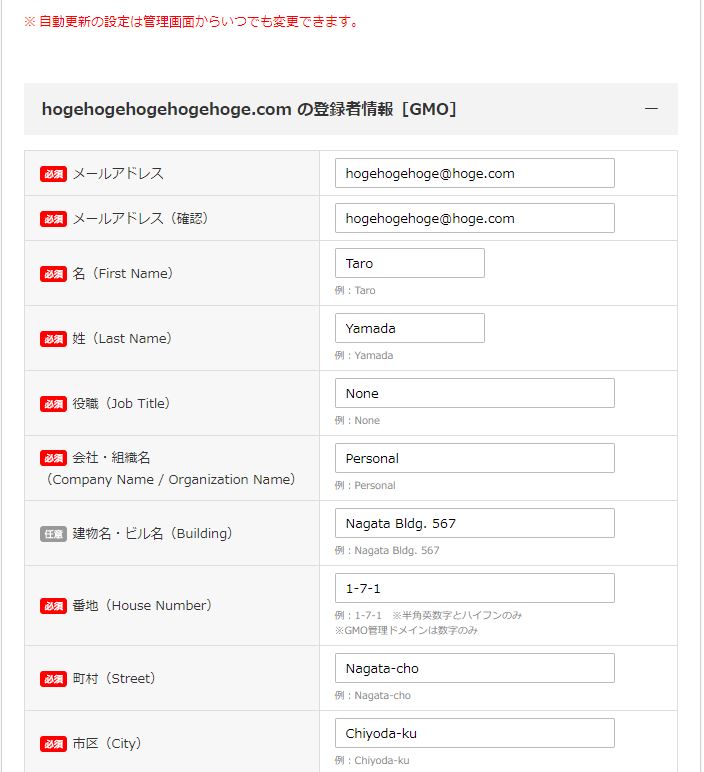
Whois情報を自分の情報にするなら入力。
English Translation
Enter whois information if you want it to be your information.
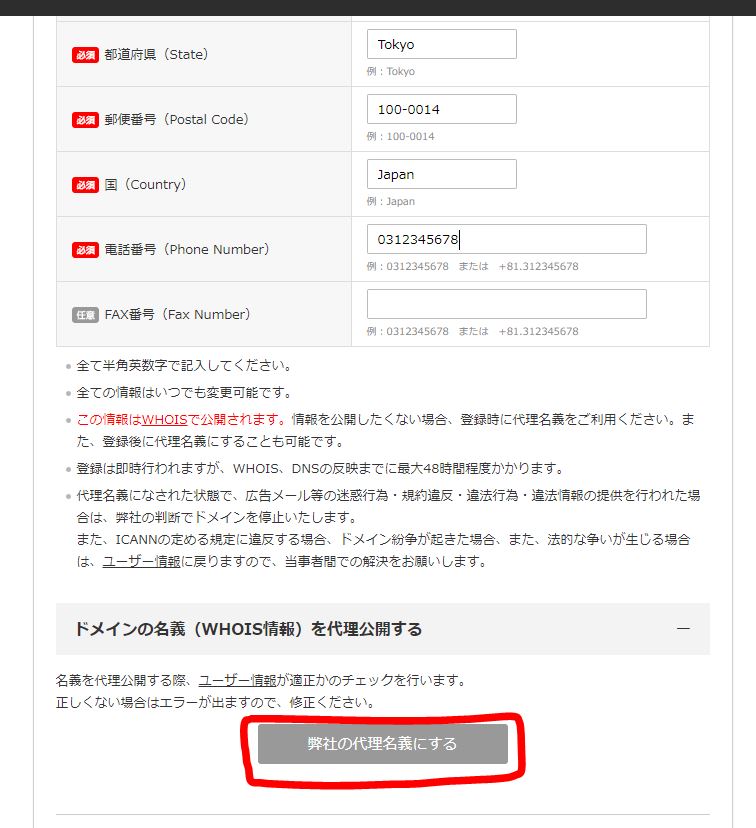
Whois情報を代理にするか、個人の情報にするかを選択
*WHOISとは(ドメインの所有者情報)
*ドメインやIPアドレスを誰が所有しているのかといった登録情報をインターネットユーザが参照できるサービス。
English Translation
Choose between "Whois" information on behalf of others or personal information *What is WHOIS? (Domain owner information) *A service that allows Internet users to view registration information such as who owns a domain or IP address.
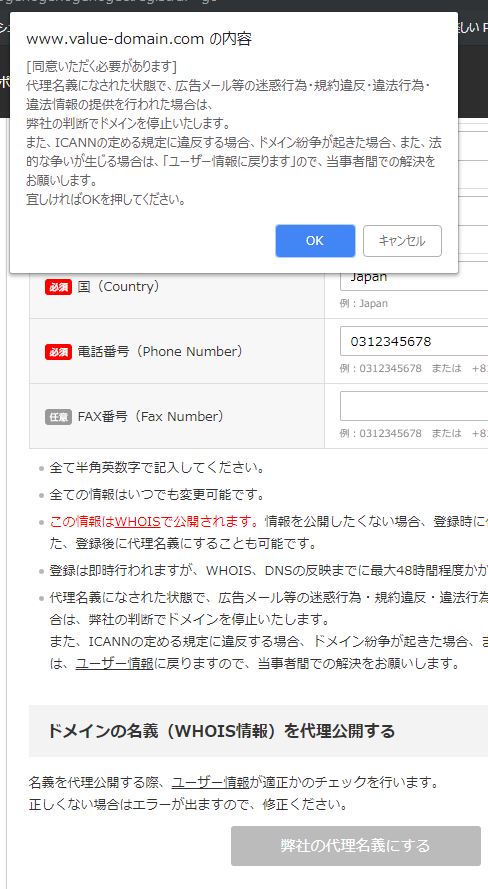
代理公開の場合は、注意事項への同意するかのポップアップが出るのでOKで。
English Translation
If you're publishing on behalf of someone else, you'll see a pop-up asking if you agree to the caveats.
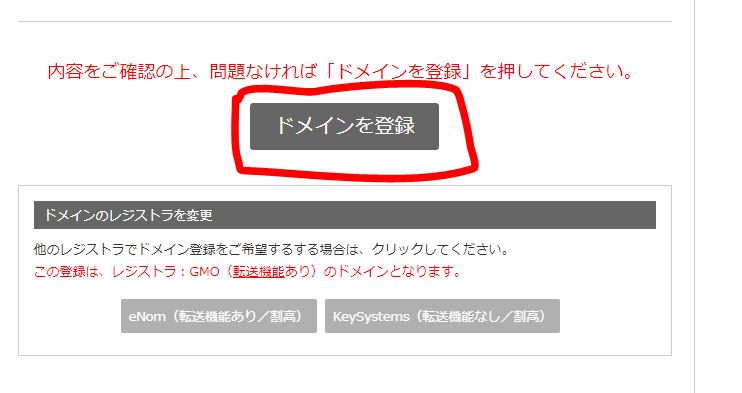
ドメインを登録。
English Translation
Register Domain.
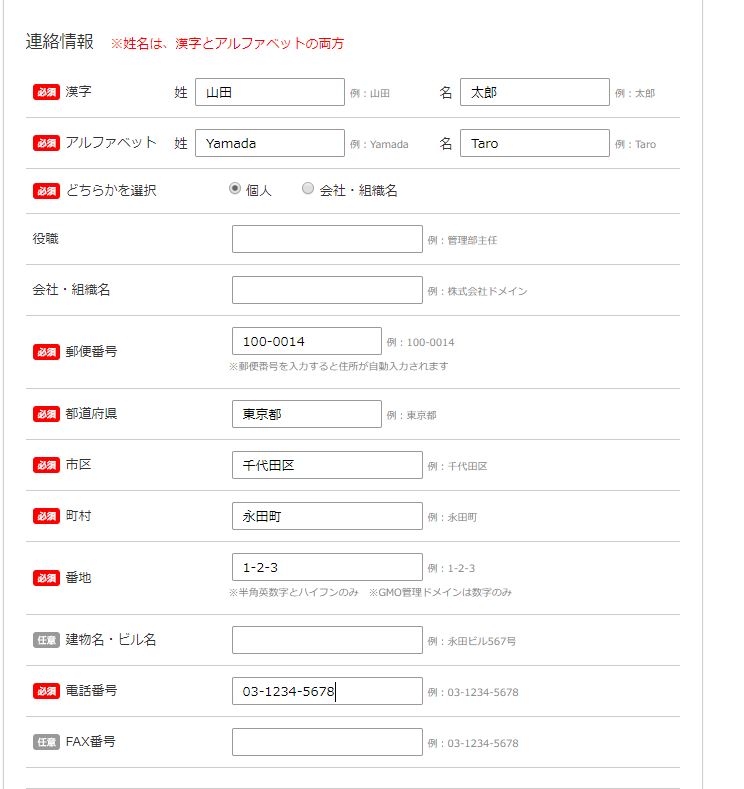
自分の情報を入力。
English Translation
Enter your information.
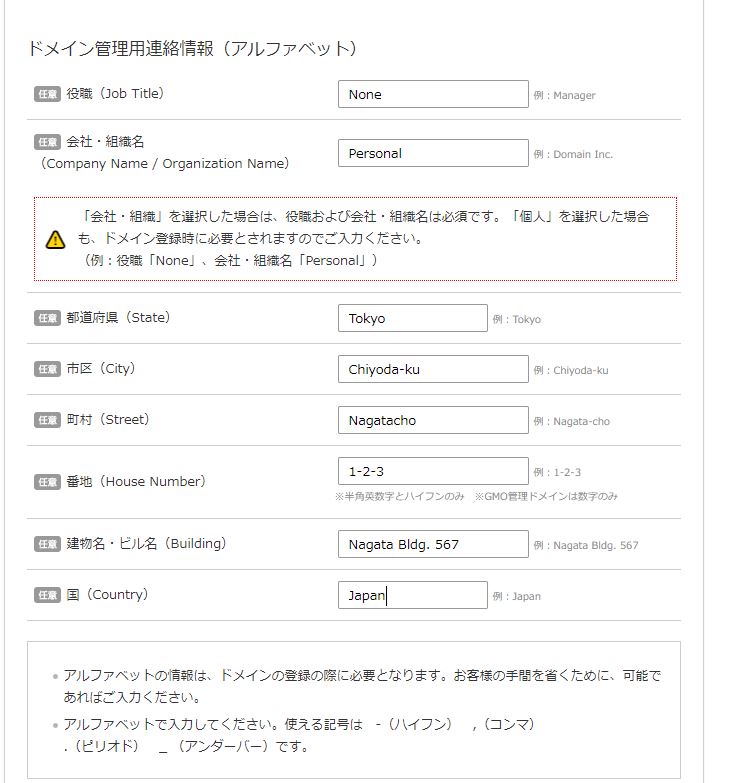
できる限り入力。
(何故か自分は任意の箇所を入力しなかったらエラーが出た。)
じゃあなんで任意やねん。
会社用じゃなければ、NoneとPersonalで。
English Translation
Enter as much as possible. (For some reason, if I didn't enter any part, an error occurred.) Then why is it optional? If not for company use, use None and Personal.
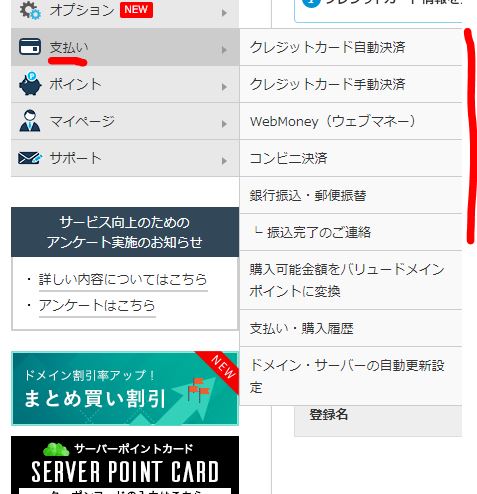
支払い方法を決め、
クレジットで支払うのならカード情報を入力。
English Translation
Decide how to pay. If you are paying by credit card, enter your card information.
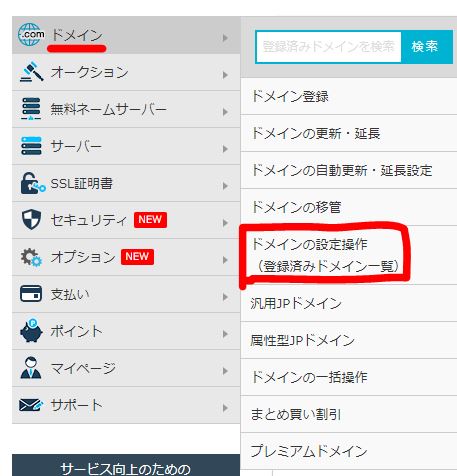
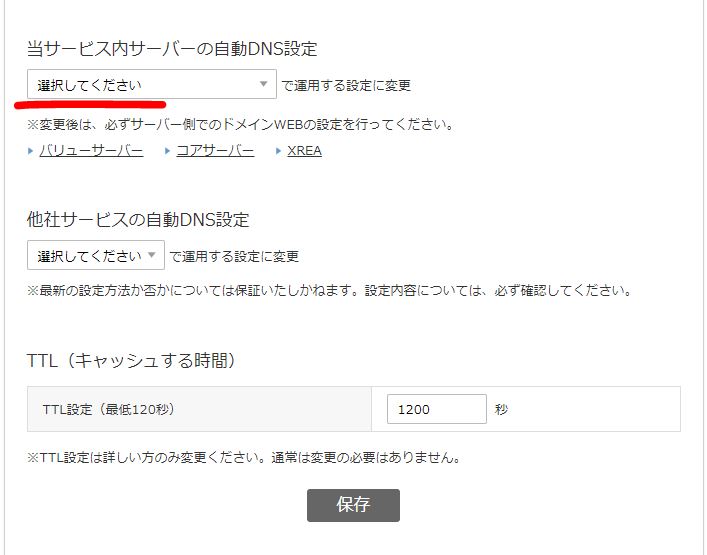
ドメイン ー> ドメインの設定操作へ。
English Translation
Domain > Set Domain operation.
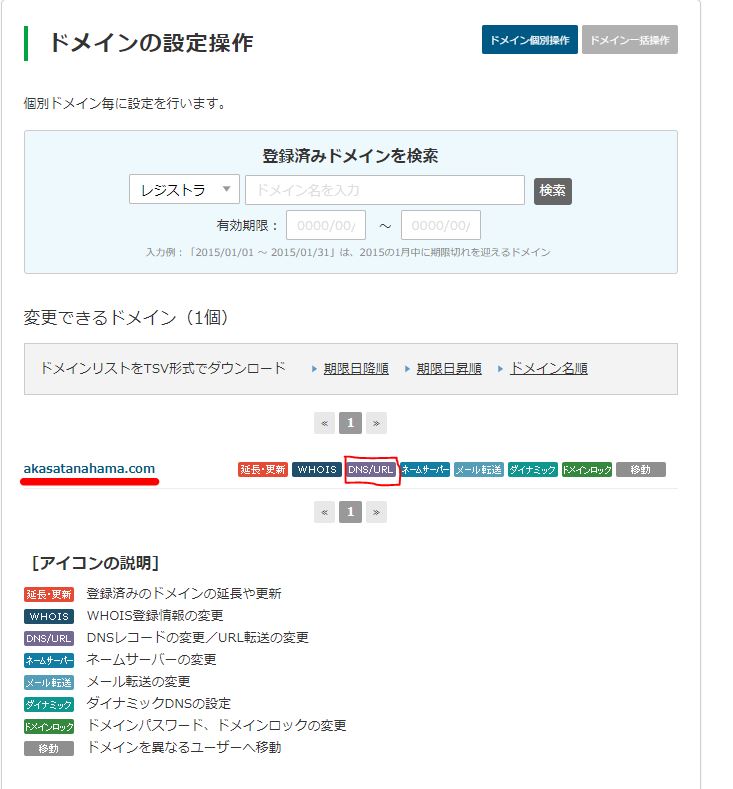
ドメイン名が出てきたら(時間がかかることがある)
正しく設定できたのに
変更できるドメイン一覧にでてこなかったら、
時間をおいて再度チャレンジ。
出てたら、右のDNS/URLを選択。
English Translation
When the domain name comes up (May take a long time) Even though the settings were correct If you don't see it in your list of domains that you can change, Try again later. Then select DNS/URL on the right.
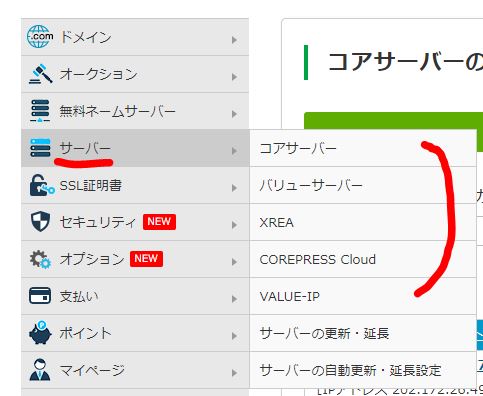
前後することになって申し訳ないが、
一応サーバー名をコピペしとくといいので、
一旦サーバー ー> 自分がレンタルしたサーバー名に行き
English Translation
Sorry for the delay. Just copy and paste the server name. Go to the name of the server you rented.
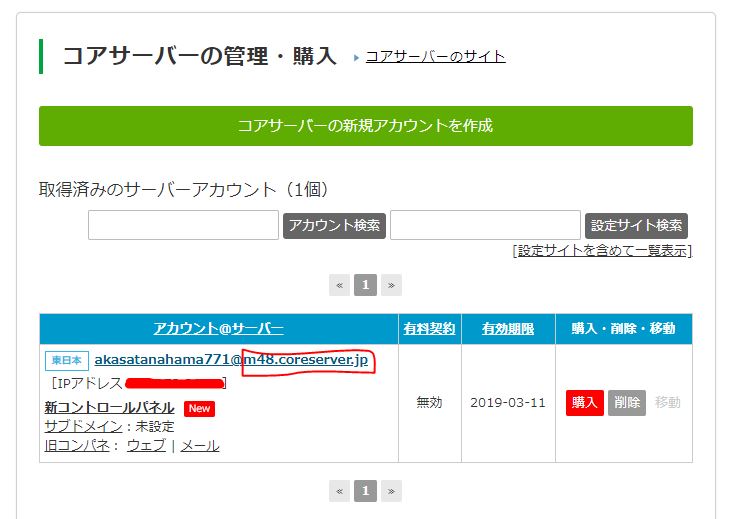
@より後をコピーしてどっかに貼っておく。
English Translation
@ After that, I copied and pasted somewhere.
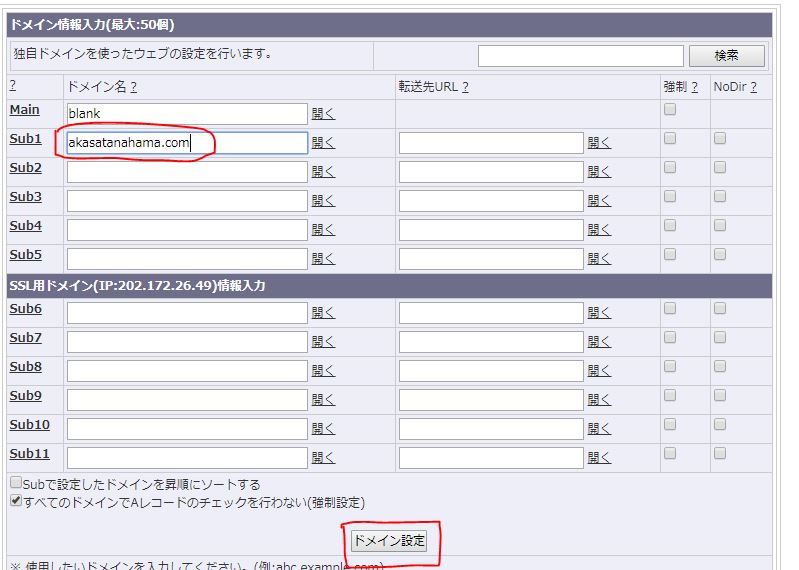
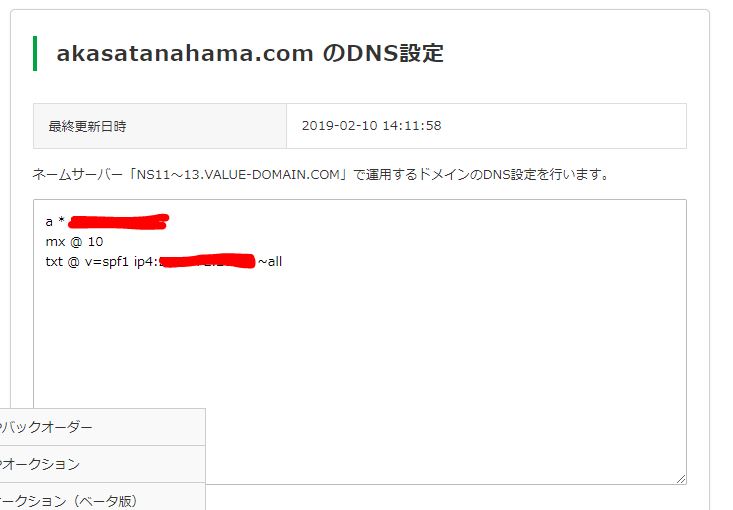
21番目の説明のDNS/URLを押すと
この画面に飛ぶ。
MainはBlankにのまま
その下に購入したドメイン名を入力。
ドメイン設定を押す。
English Translation
By pressing DNS/URL described in 21 Go to this screen. Main is left blank Enter the purchased domain name below. Press SET DOMAIN.
先程コピーしたレンタルサーバー名を選択一覧から選択。
English Translation
Select the name of the rental server you copied from the selection list.
このような画面があれば成功。
English Translation
If you have a screen like this, it works.
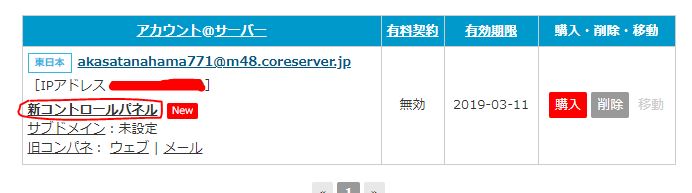
続いて、WindowsならTeraTerm、MacならTerminal
等でコマンドラインから接続するためのSSH設定を行う。
新コントロールパネルを押し。
「サイト設定タブ」から、FTP設定をクリック。
English Translation
TeraTerm on Windows and Terminal on Mac. to connect from the command line. Press the new control panel. From "Site Settings tab", click FTP Settings.
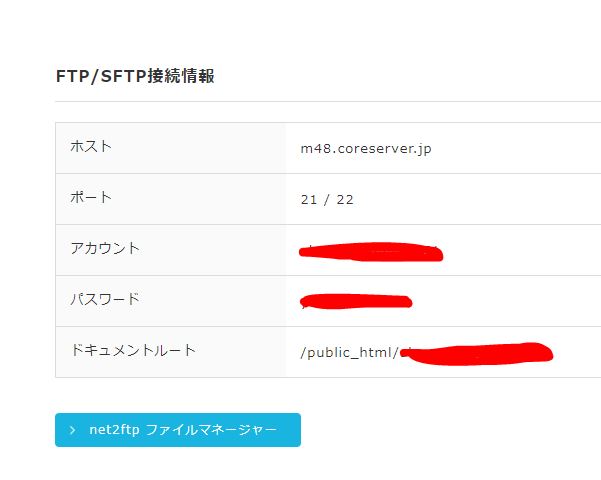
ホスト名と
アカウント名と
パスワードをコピーしておく。
English Translation
host name and Account name and Make a copy of the password.
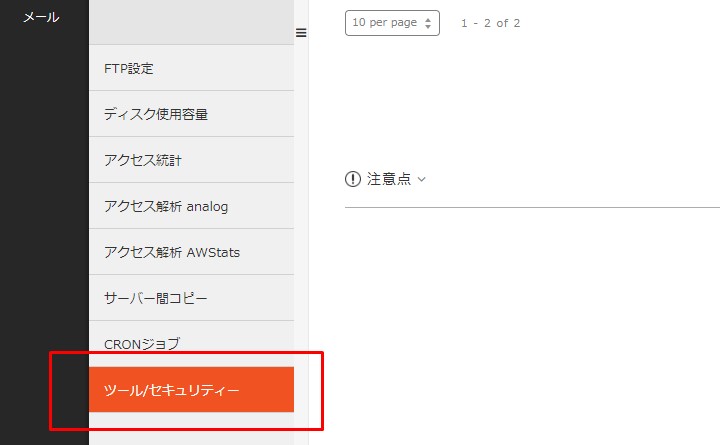
戻って、ツール/セキュリティーを押し
English Translation
Go back and press Tools/Security
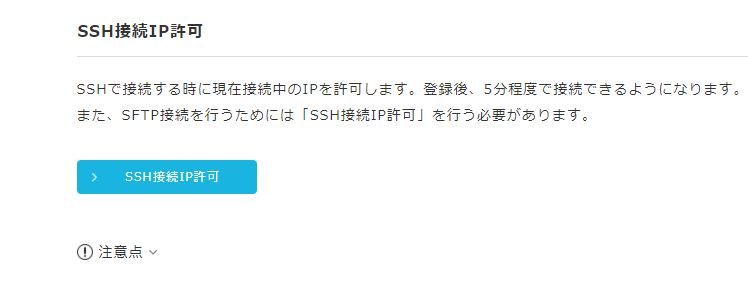
SSH接続IP許可を押す。
English Translation
Press SSH Connection IP Authorization.
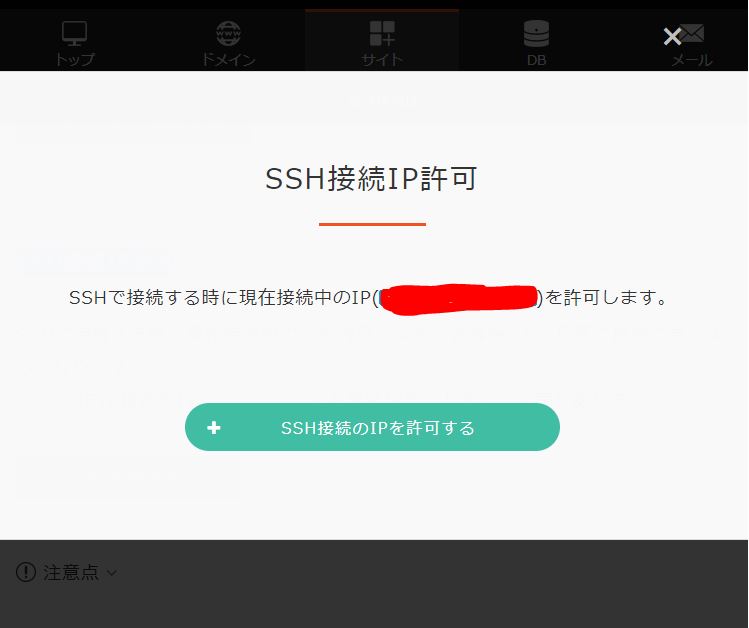
SSH接続のIPを許可するを押して5分ほど待つ。
その間にWindowsの人たちはTera Term
をダウンロードして設定しておく。
English Translation
Press Accept SSH Connection IP and wait about 5 minutes. In the meantime, Windows users are using Tera Term Download and configure.
続く。
Continued.