Published Date : 2019年10月27日9:33
ついにきた!Nim言語Version 1.0.0と1.0.2 リリース!
Finally! Nim Language Version 1.0.0 and 1.0.2 Released!
This blog has an English translation
Nimの公式ホームページを眺めていたら、「あれ?何時の間にか1.0.0がリリースされとるやないかい!」 9月28日付けでした。。。
When I was looking at Nim's official homepage, I found that [Huh? I wonder if 1.0.0 will be released soon!] It was dated September 28.....
しかも10月23日には1.0.2にアップデートされていたのです。。。ようやくNimの運営チームが本気を出してきた。。。
On October 23, it was updated to 1.0.2. Nim's team is finally getting serious.

さっそくNimをアップデートしてみます。
I'll update Nim right away.
Nim1.0.2をインストールする
Installing Nim 1.0.2
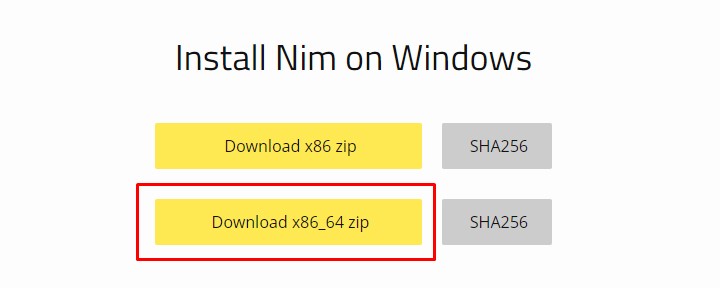
公式のブログ通りにインストールしてみます。
I will install it according to the official blog.
Nimをインストールするのが初めての方は簡単にインストールできます。
If you are new to installing Nim, it is easy to install.
Windows版(x64)64bit版で説明。
Described in Windows 64 bit version. (x64)

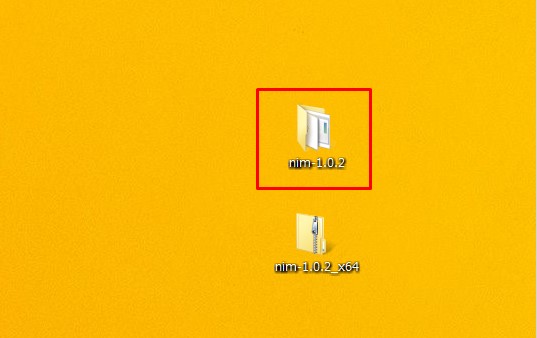
ダウンロードしたフォルダを解凍する。解凍したフォルダの中に「bin」フォルダがあるので、そのPathを環境変数に登録するだけ。
Unzip the downloaded folder. There is a [bin] folder in the unzipped folder, so all you have to do is register that Path in your environment variable.
「コントロールパネル」ー>「システム」ー>「システムの詳細」ー>「環境変数」の順にクリック。
Click [Control Panel] ー> [System] ー> [System Details] ー> [Environment Variables].
「Path」をクリックして、既にあるパスの後ろに「;」を入力。(なんとか¥Bin¥;なんとか¥exe¥;)
Click [Path] to append the existing path with the [;] . (Somehow¥Bin¥;Somehow¥exe;)
[bin] folder のパスを追加します。
Add the path to the [bin] folder.
パスの確認方法は[bin] folderを右クリックして「プロパティ」ー>「セキュリティ」をクリックすると、上の方にパスが出てきます(オブジェクト名:Path)。それをコピーしてください。
To check the path, right click the [bin] folder and click [Properties]ー>[Security]. Then, the path comes up (object name: Path). Please make a copy of it.
C:\Program Files\hogehoge\bin;C:\Program Files\hogehoge\bin;C:\hogehoge\hogehoge\nim-1.0.2\bin
一旦CMDを閉じて、開き直して、[nim --version]を打ちましょう。
Close and reopen CMD and hit [nim --version].
うまくパスが通っていれば、以下のようにバージョン情報が出てきます。
If the path is successful, the version information will appear as follows.
Nim Compiler Version 1.0.2 [Windows: i386]
Compiled at 2019-10-22
Copyright (c) 2006-2019 by Andreas Rumpf
はて、なぜ32ビットなんだろうか?...
So why 32 bit? ...
ちなみに、以前のバージョンではちゃんと64ビットだったはず。。。
By the way, it was 64 bit in the previous version.
Nim Compiler Version 0.20.2 [Windows: amd64]
まあ細かいことは気にしないことにする。
Well, I won't mind the details.
さて、ここからはもうNimを入れてしまっている人の場合。
Now, if you already have Nim installed.
Installing Choosenim
Installing Choosenim
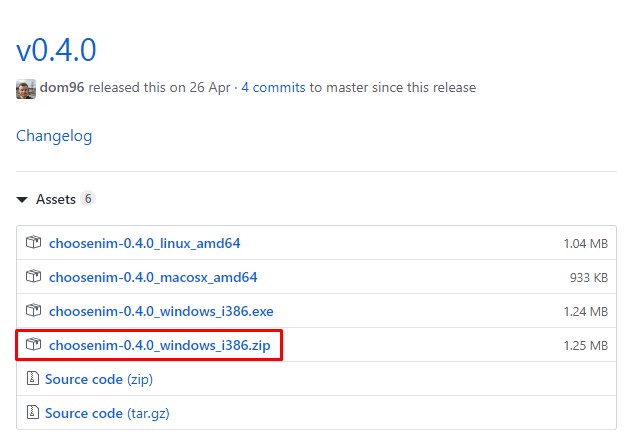
Choosenimが必要になってくるので、公式ブログに書いてある、Githubへのリンクへ飛びます。
You will need choosenim, so head over to the official blog's link to Choosenim's Github.
Choosenimとはその名の通り、複数のVersionを切り替える用のツールです。Pythonでいうpyenvみたいなもんです。
As its name suggests, Choosenim is a tool for switching between multiple versions. It's like pyenv in Python.
Windows版でインストールします。(UNIXはコマンド一発。)
Install for Windows. (UNIX uses a single command.)
Windows版のリンクへ飛びます。
Go to the Windows link.
ソースコードをダウンロードしましょう。
Download the source code.
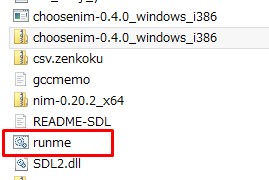
ダウンロードした圧縮フォルダを解凍すると、runme.batというファイルが出てきます。これをダブルクリック。
Unzip the compressed folder and you'll see a file called runme.bat. Double-click it.
実行するとYESかNOを問われるので、YESを選択。
Select YES when you are asked YES or NO.

インストールが終わったら、何かキーを押してくださいと出るので、ENTERキーを押すと終了する。
When the installation is complete, the message [Press any key] appears. Press the ENTER key to exit.
試しに、ヴァージョンを確認する。
Try to check the choosenim version.
choosenim --version
成功すれば、以下のようになる。
If you succeed, you'll get version information like this.
choosenim v0.4.0 (2019-04-19 02:52:17) [windows/i386]
それではNimをアップデートしてみませう。
Let's update Nim.
choosenim update stable
自分の場合は既にアップデートした後でしたので、以下のように出力されました。
In my case, I had already updated it, so the output was as follows.
Updating stable
Info: Already up to date at version 1.0.2
さて、Helloworldでもやってみますか。
Now, why not try Helloworld?
普通のHelloworldではつまらないので、Nim-forumにあったもので試してみます。https://forum.nim-lang.org/t/1083
Normal Helloworld is boring, so I'll try it with Nim-forum. https://forum.nim-lang.org/t/1083
hellowolrd.nim
import threadpool
var messageFlowVar = spawn stdin.readLine()
stdout.write "> "

var s = ^messageFlowVar
echo "you wrote: ", s
Threadpool requires --threads:on option. と言われるので、--threads:onをコンパイル時に指定する。
It is called [Threadpool requires --threads:on option.], so specify [--threads:on] at compile time.
nim c -r --threads:on hellowolrd.nim
> hello world
you wrote: hello world
Nimの発展と今後の動向に期待ですね。この記念すべきヴァージョン1.0.2へのアップデートがきっかけでNim好きな人が増えるといいですね。
I look forward to Nim's development and future trends. I hope this memorable update to version 1.0.2 will lead to more Nim fans.
See You Next Page!