Published Date : 2019年3月6日1:04
CORESERVERでDjangoのBLOGを作る
〜 後半 ( Part 2 ) 〜
Create a BLOG of Django with CORESERVER
〜 Second half (Part2) 〜
前回の記事の簡単なおさらい。
A quick review of the previous article.
➀ django-admin コマンドを使ってサーバーに Django のプロジェクト雛形を作る。
➀ Use the pick django -admin command to create a Django project template on the server.
➁ net2ftp マネージャーを使って、ローカル環境にそのプロジェクトをダウンロード。
➁ Download the project to your local environment using the net2ftp manager.
今度こそ Django でブログを作っていきます。
This time, I will create a blog in Django.
このサイトは非常にわかりやすく、おすすめです。
This site is very easy to understand and I recommend it.
Introduction tutorial - Graphene and Django
プロジェクトを作る。
I make a project.
では、ローカルにダウンロード、解凍したフォルダに入ってください。
Then, please go to the folder that you downloaded and extracted locally.
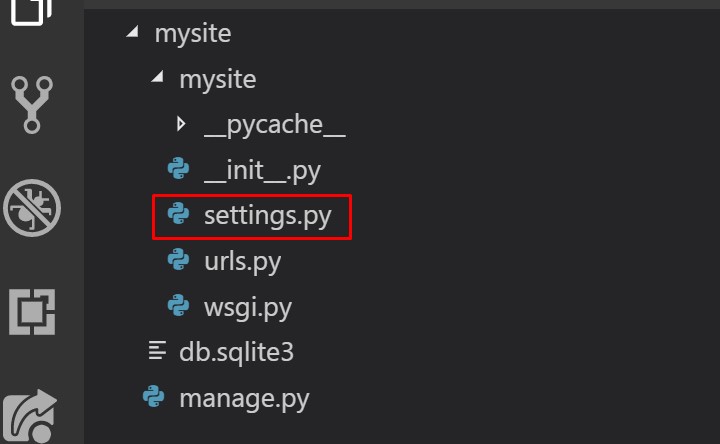
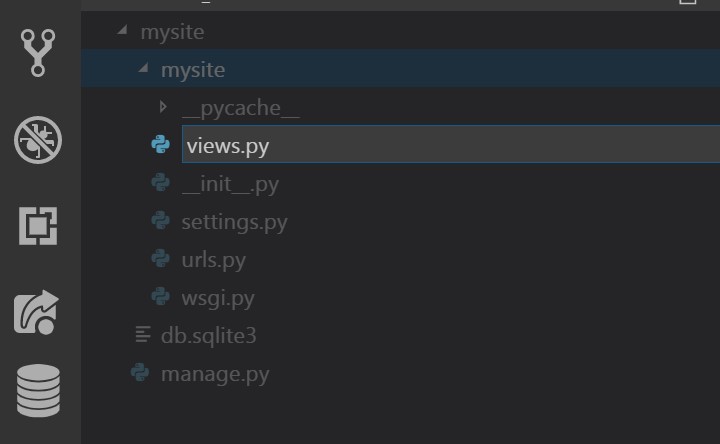
プロジェクトのフォルダに入ると、下の画像のように
なってますので、
If you go into the project folder, it looks like this.
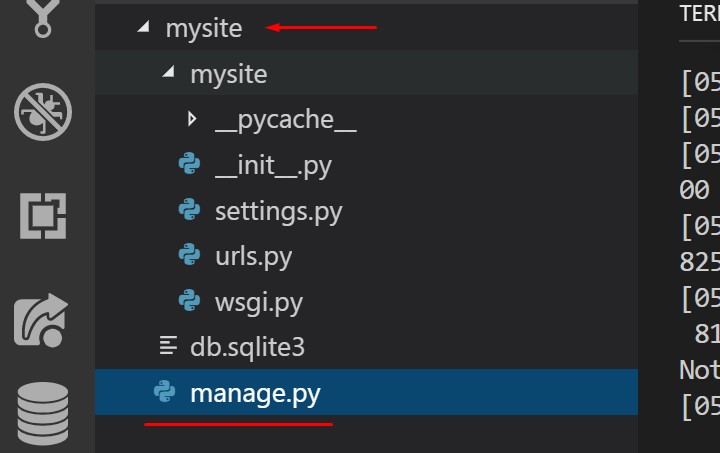
manage.py があるのと同じ場所で、コマンドプロンプトやターミナルを開いて、
Open a command prompt or Terminal in the same location where manage.py is located.
python manage.py runserverのコマンドを打ってください。
Type the command above.
この manage.py は Django プロジェクトの縁の下の力持ちです。
This manage.py is the power behind the Django project.
よく使います。
We often use it.
補足 1 :
Note 1 :
エディターはこれを使ってます。
The editor uses this.
Visual Studio Code
速い、使いやすい、無料の三タテです。
It's fast, easy to use and free of charge.
Python だけじゃなく、HTMLの編集などにも
コード補完機能(予測変換みたいなもん)やシンタックス機能(見やすくなる)
があるので便利です。
In addition to Python, there are code completion features (It's like predictive transformation.) and syntax features (It's easier to see.) for HTML editing.
エクステンション機能(スマホの無料アプリみたいなもん)
エディター画面左横に並んでるタグから、検索してダウンロードするだけです。
Just search and download from the extension (Tags on the left side of the editor screen).
補足 2 :
Note 2 :
ローカル環境に Python がなくて動かないよって方。
If you don't have Python in your local environment, it won't work.
これを機会に Anaconda 入れちゃいましょう。
Take this opportunity to install Anaconda.
Anaconda Distribution
上のサイトはすべてワンセットになった実行ファイルがダウンロードできます。
You can download an executable from the site that contains everything you need to install Anaconda.
セットアップはEXEファイルをクリックして説明に従うだけです。
Setup simply clicks on the EXE file and follows the instructions.
その後のわかりやすいチュートリアルはこちら。
The rest of the tutorial is here.
getting-started
Anaconda くそ重いから、Python だけでいいやって方はこちらがわかりやすいです。
Anaconda is heavy, so it's easier to understand if you only need Python.
Python3のインストール
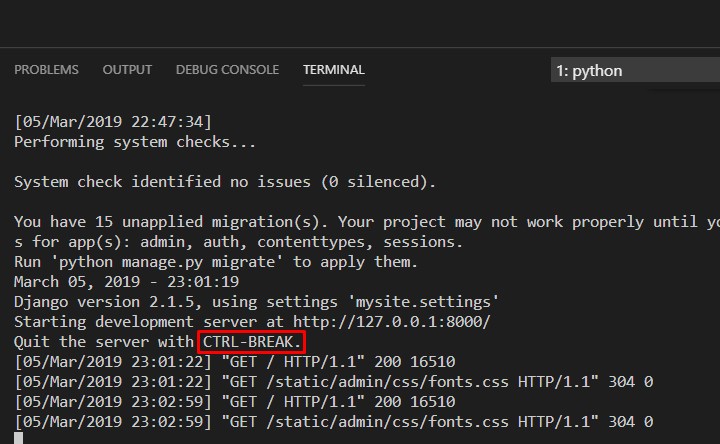
さて、このコマンドを打ったら、
python manage.py runserverこんな感じで表示されるので、赤枠の部分に注目してください。
Now, when you type this command, you will see something like this, so look at the red box.
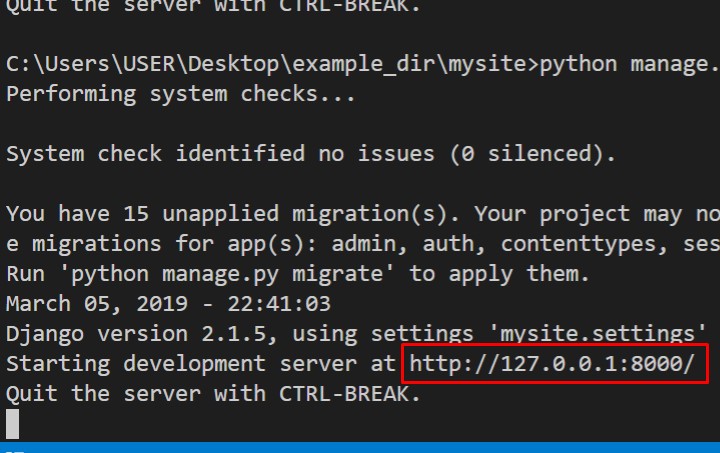
これはローカルホストの8000番ポートを使ってサーバーが起動してますよって意味です。
This means that the server is running on port 8000 of the local host.
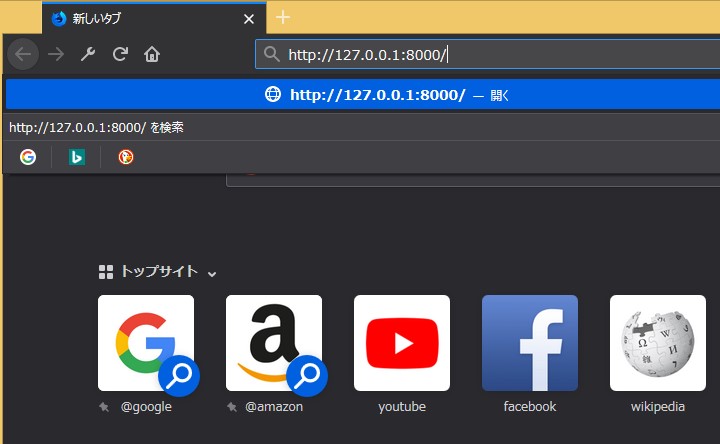
試しに普段使っているブラウザを起動して、
検索窓に赤枠通りに打ってみてください。
To try it out, open up your browser and type in the search box.
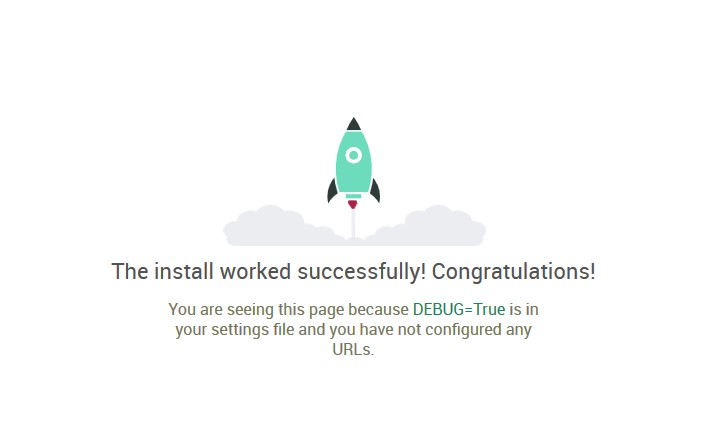
そして、この画面がでたら成功。
And when this screen comes up, it's a success.
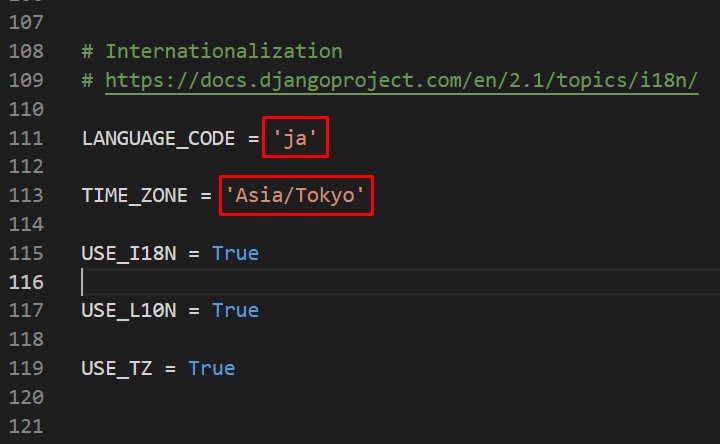
表示を日本語にして、日本時間にしたい場合は、
settings.py を開いて、
110行目あたりにある、赤線の場所を、
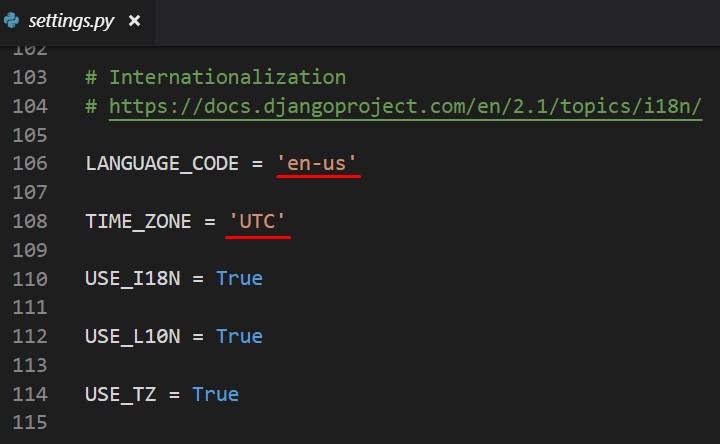
下記のように書き直してください。
If you want to change the display to Japanese time, open settings.py and rewrite the location of the red line around line 110 as follows.
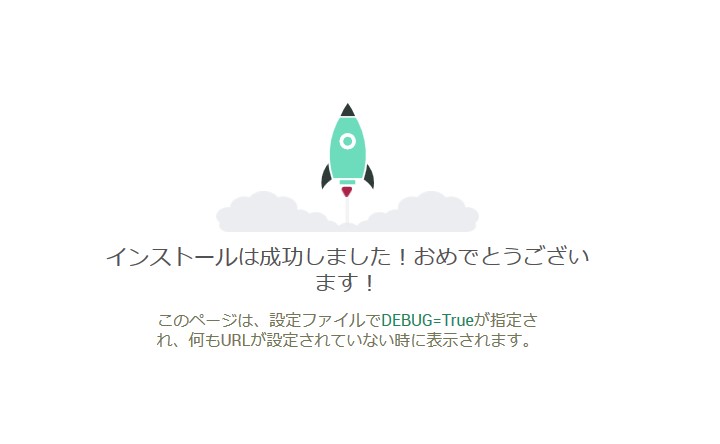
ブラウザを更新、(コントロールキー と Rキー 同時押し)
するとこのように日本語の表示になっていることが確認できます。
Refresh Browser, (Press the Control key and the R key simultaneously) Then you can make sure that the display is in Japanese like this.
settings.py はその名の通り、サーバーに様々な設定を命令するPythonファイルです。
As its name implies, settings.py is a Python file that tells the server to set various settings.
この settings.py で、画像を置く場所をどこに決めるか、
データベースは何を使うか、
どのホストネームをつかうか(前回あたりに設定したドメインネームなど)
を細かく設定していくことができます。
This settingspy allows you to set the details. where to place the image, what database to use, what host name to use, etc. (For example, the last domain name)
さきほどの manage.py は家のお金をどうやって使うか決める人。
Back in manage.py, he decides how to spend money on a home.
この settings.py はそのお金の管理をしてくれる人みたいな感じです。
This settings.py looks like a money manager.
ところでブラウザを更新したら、設定の変更もすぐに反映されていますよね。
By the way, when I updated the browser, the setting changes are reflected immediately.
それはサーバーが起動しっぱなしで、サーバーの中にあるファイルが 変更されるとすぐさま変化を知らせてくれるからです。
This is because the server keeps running and notifies you as soon as a file in the server changes.
チャットなどで、通信中はすぐ返事を返せたり、返事を読んだりできますが、チャットをオフにすると、オンにするまで、新しい返事を読めないのと一緒です。
You can reply to or read replies immediately while chatting, but with chat turned off, you can't read new replies until you turn it on.
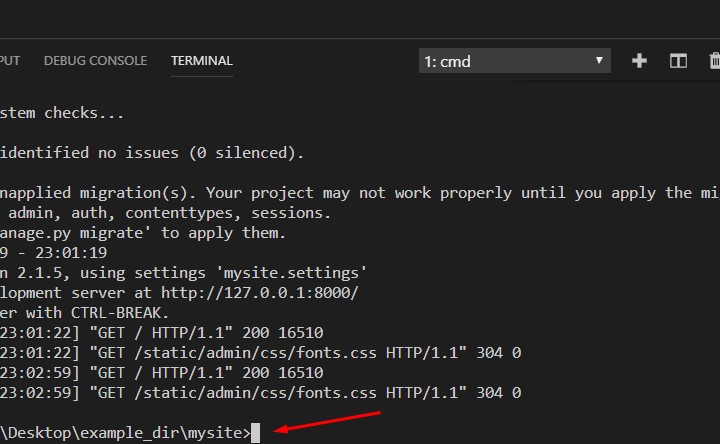
試しにサーバーを落としたらどうなるか試してみましょう。
Let's see what happens if we drop the server.
先程サーバーを起動するためにコマンドを打った場所に戻り、
赤枠部分の通りにコマンドを打ちます。
Go back to where you typed the command to start the server and type the command as shown in the red box.
コントールキーとキーボードの C を同時に押してみて下さい。
Please press the control key and C on the keyboard at the same time.
"GET / HTTP/1.1" 200
と続いていたのが、元に戻りましたね。
"GET/HTTP/1.1" 200. It was like that, but now it's back.
因みに GET とは かんたんにいうと
ブラウザからサーバーに 「これを表示してね」というお願いです。
By the way, GET From your browser, say "Please display this." to the server.
HTTP/1.1
HTTPはかんたんにいうとクライアントがサーバー(コンテンツを持っていて、それを提供してくれる)に対して 「件名:提供のお願い。本文:このテキストファイルを下さい。」みたいな通信の決まりごとです。
HTTP is basically a set of rules about how you want your browser to display text.
In short, HTTP allows a client to send a message to a server (Have content and provide it) It is a communication rule like "Subject: Please provide. Body: Please give me this text file.".
1.1 はバージョンです。(Windows 7,8,10みたいな感じです。)
1.1 is the version. (It's like Windows 7, 8, 10.)
最後の 200は かんたんに説明すると、
正常にサーバーと通信ができましたよーという意味です。
The last 200 simply means that We was able to communicate with the server successfully.
ブラウザが客なら、サーバーはコンビニ店員。 商品は画像ファイルやHTMLファイル(文章や画像など) HTTP通信は「レジに商品を持っていく。会計が終わる。金額を渡す。商品を受け取る。」 といった商品を買う為のルールです。
If the browser is a customer, the server is a convenience store clerk. Products are image files or HTML files (Text and images, etc.) HTTP communication is "I take the product to the cash register. The check is done. I give you the amount. I receive the goods." It is a rule to buy such products.
例えが分かりにくかったらすみません。
I am sorry if the example is hard to understand.
さて、サーバーを落としたら、
開いていたブラウザを更新してみましょう。
(コントールキーとRキー同時押し)
Now, if you drop the server, try refreshing your open browser.(Press the control key and the R key simultaneously)
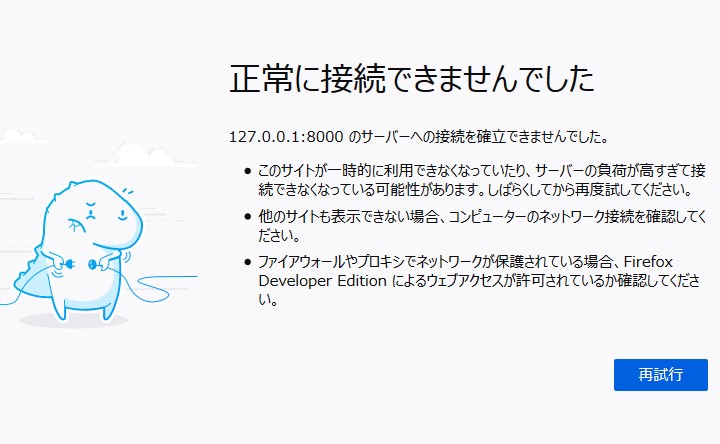
このように通信ができなくなりました。
We can't communicate like this.
友達に会いに家まで行っているのに、
留守か寝ていてテコでも起きない状態みたいなものです。
It's like going home to see my friend, but he's not home or sleeping, and he can't even get up.
次にブラウザに「こんにちは、ブラウザ。」と表示させましょう。
Now let the browser say "Hello, browser."
プロジェクトフォルダの中に同じ名前のフォルダがあります。
A folder with the same name exists in the project folder.
さきほどの settings.py がある場所ですね。
This is where the settings.py.
右クリックでNew Fileを選んで
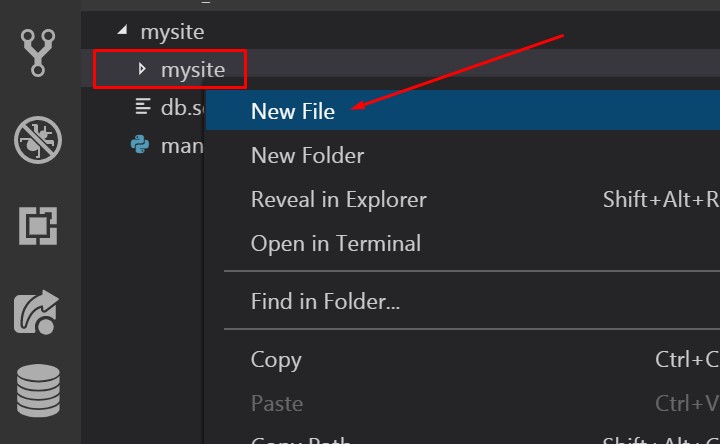
そこに views.py というファイルを作ります。
Right-click and select New File to create a file called views.py.
次にこのコードをコピペしてください。
Then copy and paste this code.
from django.http import HttpResponse

def index(request):
    return HttpResponse('こんにちは、ブラウザ。')
一行づつ説明していきます。
I'll explain it line by line.
from django.http import HttpResponseDjangoのhttp通信が使える機能から、HttpResponseをインポートしますよー。
つまりレスポンス(応答)できるようにする、です。
Import HttpResponse from Django's http communication facility.
def index(request):関数(色々な命令、こうしろ、ああしろ、といった手順のかたまりをひとつにまとめたもの)
をつくります。
def はディファインのDefです。
function (a package of instructions and procedures). def is a mean of define.
関数名にindex。
The function name is index.
(余談ですが、インデックスフィンガーとはひとさし指のことです。
As an aside, an index finger is an index finger.
つまりインデックスとはなにか「目安となるものを指す」ことをいいます。
In other words, an index is something "Refer to a standard item".
インデックス番号とかいいますよね。
request は変数です。
request には(リクエスト)つまり要望が入っています。
「これくださいな」
といったサーバーに寄せられた人々の懇願(チョコくださいなみたいな)です。
(request)は request を受け取って、
関数の中で使いますよといった意味です。
request is the variable containing the request to be sent to the server. You can pass it to the Index function to use.
(今回ははっきりとつかっている様子はありませんが、
このrequestを入れるのは村の掟みたいなもんで、
ないと Django長老に怒られます。)
I don't seem to use it clearly this time. This request is required for HTTP communication, so if the function does not receive this variable it will fail.
return HttpResponse('こんにちは、ブラウザ。')
最後 return(リターン)でHttpResponseメソッドに
「こんにちは、ブラウザ。」の文字を入れて外側に送り出します。
メソッドとは今回つくった関数とほぼ一緒だと思ってください。
偉大なDjangoを作った様々な人々が用意してくれたありがたいギフトです。
Httpは 通信するための決まりごと Responseは応答ですから
リクエスト(くれ)と言われたので HTTPにのっとって(まずは握手して、お辞儀して、)
レスポンス(こんにちは、ブラウザ。)というイメージです。
Finally, return to the HttpResponse method
Insert the word "Hello, browser." and send it out.
Think of a method as almost the same as your function.
Http is the protocol to communicate, Response is the response.
I was told to make a request (GIVE IT TO ME.), so I took HTTP and (First, shake hands, bow,)
This is an image of a response (Hello, browser.).
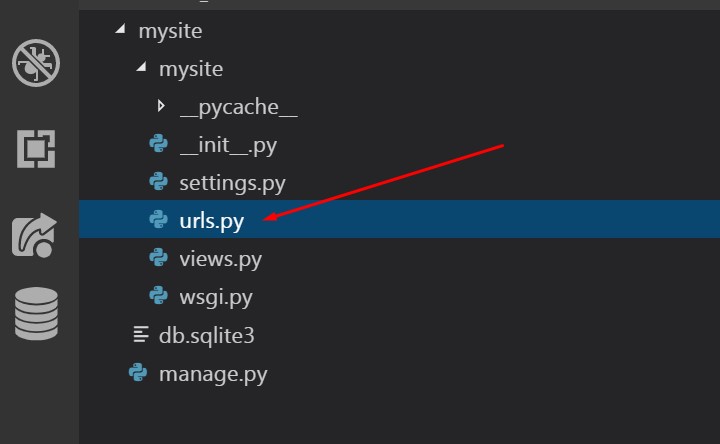
つぎに同じフロアにいる urls.py 君をみつけて、このファイルを開きましょう。
Next, find urls.py on the same floor and open the file.
彼は人と人とをつなげることに長けたコネクター的役割の人物??です。
He's a good connecterer.
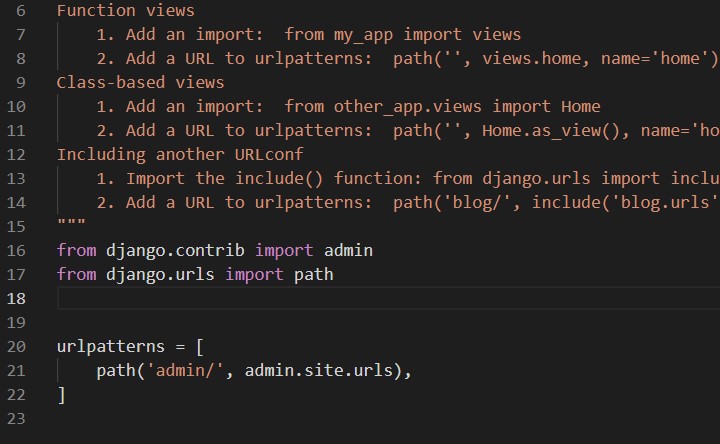
はじめ開くとこんな感じになってます。
It looks like this when opened at first.
上の英語の説明どおりに、さきほどの views.py をインポートしましょう。
Import views.py as described above.
赤枠部分が今回あらたに書き加える箇所です。
The red frame is the part to be added this time.
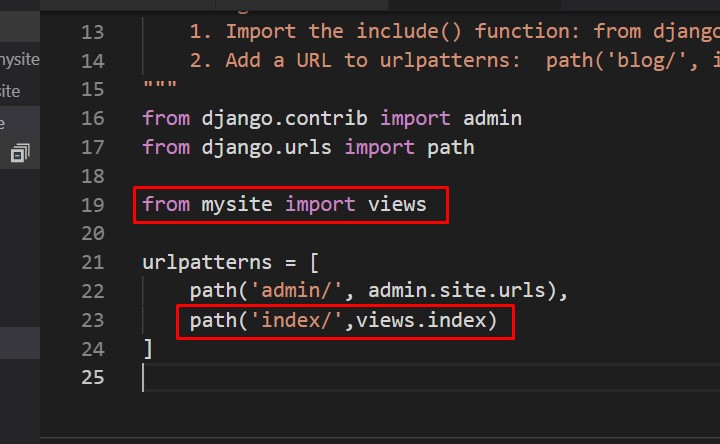
自分たちがいる(mysiteという名のフロア)に さっきつくった views.py 君がいることを
urls.py 君に知らせます。
We will let urls.py know that views.py is in (Floor named mysite) where we are.
from mysite import viewsこれは、
path('index/',views.index)
'index/'にアクセスがあったとき、つまり
ブラウザ様に(http://127.0.0.1:8000/index)のように入力すると、
views.py の index 関数に働いてもらうことができますよといった感じ。
This means that the index function in views.py will be invoked when 'index /' is accessed, that is, when (http:// 127.0.0.1: 8000/index) is typed into the browser.
さて、ふたつのファイルをセーブして、
もう一度
python manage.py runserverと打って
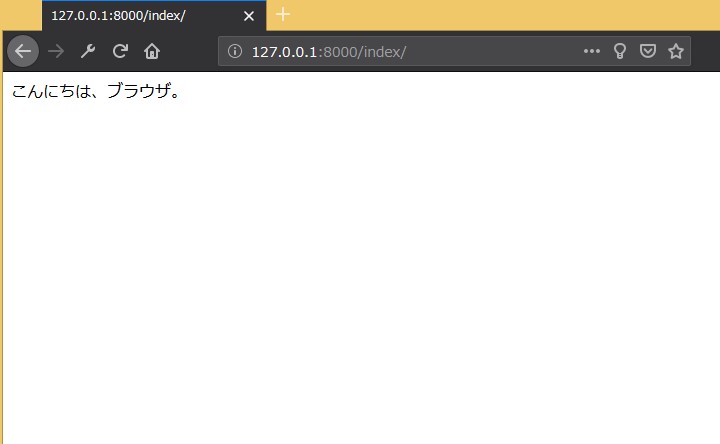
http://127.0.0.1/index/
とブラウザに入力してみると
こんにちは、ブラウザ。と表示されます。
Now, save the two files and type
python manage.py runserveragain into your browser as http:// 127.0.0.1/index/ and "hello browser" is displayed.
次はもっと細かくいじっていき、
表示も整えて、ブログっぽくしていきます。
Next, I will make it more detailed, arrange the display, and make it look like a blog.
また次回です。。。
See You Next Page !