Published Date : 2021年6月11日15:00
Part 9 - ドルと円の為替レートを使った簡単な計算アプリのアンドロイドバージョン
Part 9 - Android version of a simple calculation
app that uses the dollar-yen exchange rate
This blog has an English translation
ニコニコ動画にアップした動画のまとめ記事です。
This is a summary blog post about a video I uploaded to NicoNico.
細かい部分は動画を参考にしてください。
Please refer to the video for details.
目次
Table of Contents
① 動画の説明
① Video
Description
警告:
このアプリは大雑把に大体の見積りを計算して楽しむ為のツールです。
計算の詳細や、端数の処理等は各金融機関等によって異なります。
このアプリを使って何かしらの損害が発生したとしても、私は一切の責任を負いません。
Warning:
This application is used to calculate rough estimates and enjoy them.
The details of calculations and the treatment of fractions differ depending on the financial institution.
I will not be liable for any damage caused by using this app.
ドルと円の為替レートを使った簡単な計算アプリのアンドロイドバージョンPart 9
Android version of a simple calculation app that uses the dollar-yen exchange rate Part 9
前回の続きです。
Continued from last time.
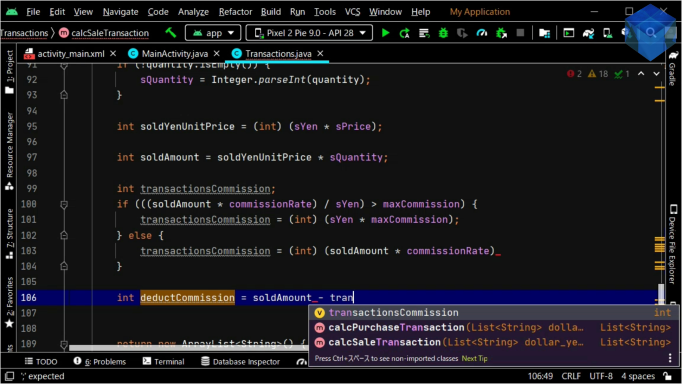
セミコロンを書き忘れていますが、後で修正します。
I forgot to write a semicolon, but I'll fix it later.
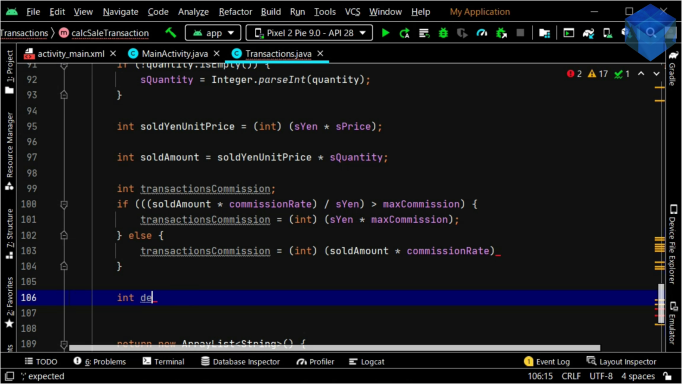
手数料を求めて、合計金額を計算します。
Calculates the total amount after calculating the charge.
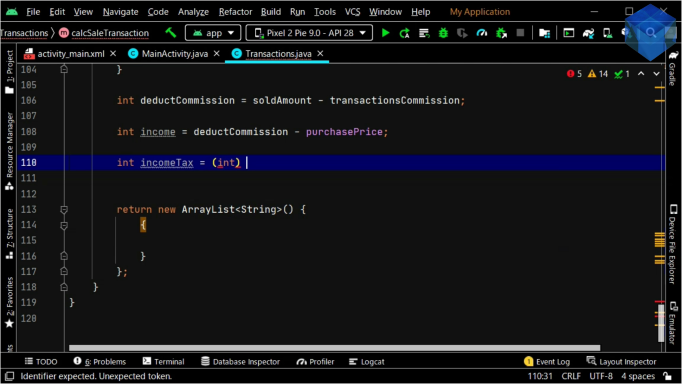
所得や所得税等を計算します。
Calculates income and income tax.
購入金額と売却金額との差額や倍率を求めます。
It calculates the difference between the purchase price and the sale price and the magnification.
全体でいくらになるかを計算します。
Calculate the total amount.
計算結果をArrayListに加えていき、メソッドの戻り値とします。
Add each result to the ArrayList and return the method.
return new ArrayList<String>() {
    {
        // 売却時年月
        add(sYear + "年" + sMonth + "月");
        // 売却時ドル
        add(String.format("%.2fドル", sPrice));
        // 売却時円
        add(String.format("%.2f円", sYen));
        // 売却数あたり円
        add(String.format("%,d円", soldYenUnitPrice));
        // 売却数
        add(String.valueOf(sQuantity));
        // 売却金額
        add(String.format("%,d円", soldAmount));
        // 取引手数料
        add(String.format("%,d円", transactionsCommission));
        // 売却手数料を引いた後の売却金額
        add(String.format("%,d円", deductCommission));
        // 手数料、購入時金額を差し引いた所得
        add(String.format("%,d円", income));
        // 所得税と復興特別所得税と住民税
        add(String.format("%,d円", incomeTax));
        // 税金を収めた後の金額
        add(String.format("%,d円", afterTaxIncome));
        // 差額
        add(String.format("%,d円", difference));
        // 倍率
        add(String.format("%.3f倍", magnification));
    }
};
String.formatやString.valueOfを使用して、文字列に直し、3桁毎にカンマで区切る、金額や年月の単位を付ける、小数点以下の桁数を制限する等して、計算結果を見やすくしていきます。
To make the results easier to read, you can use String.format and String.valueOf to convert the results to a string separated by commas every three digits, to a string with units of money or years and months, or to a string with a limited number of decimal places.
それではMainActivity.javaに戻り、残りの作業を仕上げていきましょう。
Let's go back to MainActivity.java and finish the rest.
GridLayoutの子ビューであるTextViewを取得して、IDがあるかどうかを判定して、計算結果のリストの配列数を調整するための変数を使って計算結果をTextViewのTextに挿入していきます。
Get the TextView, which is a child view of the GridLayout, determine if it has an ID, and insert the result into the Text of the TextView using a variable to adjust the number of arrays in the resulting list.
~~~~~~~~~~~~~~~~~~~~~~~~~~~~~~~~~~~~~~~~~~~~~~~~~~~~~~~~~~~~~~~~~~~~~~~~~~~~~~~~~~~~~~~~~

for (List<String> dollar_yen : csvDriver.getDollar_yen_list()) {
    if (dollar_yen.get(0).equals(sellYear) && dollar_yen.get(1).equals(sellMonth)) {

        List<String> saleTransactionsList = transactions.calcSaleTransaction(dollar_yen, price, quantity);

        saleTxPlaceHolder.setVisibility(View.GONE);

        saleTransactionsLayout.setVisibility(View.VISIBLE);

        int adjustCount = 1;

        for (int i = 0; i < saleTransactionsLayout.getChildCount(); i++) {
            TextView tv = (TextView) saleTransactionsLayout.getChildAt(i);
            if (tv.getId() != -1) {
                tv.setText(saleTransactionsList.get(i - adjustCount));
                adjustCount++;
            }
        }

        break;
    }
}

~~~~~~~~~~~~~~~~~~~~~~~~~~~~~~~~~~~~~~~~~~~~~~~~~~~~~~~~~~~~~~~~~~~~~~~~~~~~~~~~~~~~~~~~~
アプリの挙動を確かめてみましょう。
Let's see how the app works.
いつも通りに電卓アクティビティへ変移するボタンと、オールリセットボタンのメソッドを作成しましょう。
As usual, Let's create a button that transitions to Calculator activity and a method for the Reset All button.
アプリ全体のファイル構成をおさらいしていきましょう。
Let's review the structure of the entire app.
最終的なアプリの動作を確かめてみましょう。
Let's see how the finished app works.
以上です。お疲れ様です。
That's all. Thank you for your hard work.
各自で創意工夫してもっと良いアプリに仕上げてみてください。アディオス。
Be creative and make the app more user-friendly. Adios.