Published Date : 2021年3月3日12:46
パート 8: 給与所得者の所得税と住民税を計算するAndroidアプリ
Part 8: Android App Calculates Income and
Resident Taxes for Salaried Workers
This blog has an English translation
ニコニコ動画にアップした動画のまとめ記事です。
This is a summary blog post about a video I uploaded to NicoNico.
細かい部分は動画を参考にしてください。
Please refer to the video for details.
目次
Table of Contents
① 動画の説明
① Video
Description
警告:
今回説明する給与所得者の所得税及び住民税を計算するツールは、あくまで簡易的なお遊び用のツールです。
正確な数値、計算方法は各自で調べて下さい。
このツールは大雑把に大体の見積りを計算して楽しむ為のツールです。
決して従業員の年末調整や個人の確定申告等に使用しないでください。
さらに、税金の計算方法は変更される場合があり、控除についても同様です。
また、控除や税金の計算方法が間違っている可能性もありますので、
あまり信用せずに、各自で調べてから実験してみてください。
このツールを使って何かしらの損害が発生したとしても、私は一切の責任を負いません。
Warning:
The tool I'm going to show you for calculating income and residence taxes for salaried workers is just a simple tool for playing.
Please check the exact number and calculation method by yourself.
This tool is used to calculate rough estimates and enjoy them.
Do not use for year-end adjustment of employees or for individual tax return.
In addition, the method of calculating taxes and deductions may change.
Also, there is a possibility that the deduction and tax calculation methods are incorrect.
Don't trust it too much, and test it yourself.
I will not be liable for any damage caused by using this tool.
前回の続きです。
Continued from last time.
基礎控除用のテキストビューを配置します。
Places the text view for the basic deduction.
いつも通り[strings.xml]にレイアウト画面に表示させるテキストを記述していきましょう。
Write the text displayed on the layout screen in [strings.xml] as usual.
その下にグリッドレイアウトを2行2列にして配置します。
Place the grid layout in two rows and two columns below it.
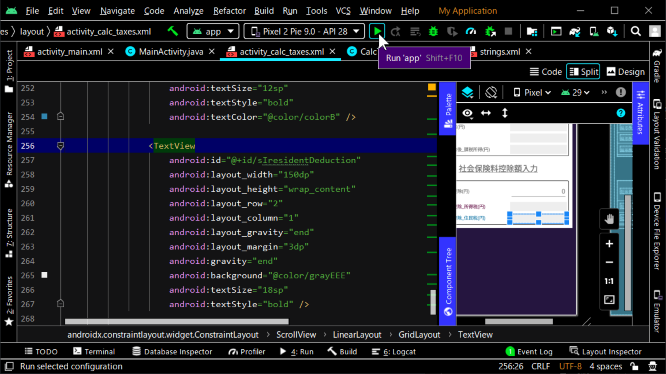
所得税用の基礎控除額の行。見やすいようにテキストの色を変えます。
A row of Basic Deduction for Income Tax. Change the text color to make it easier to see.
住民税用の基礎控除額の行。見やすいようにテキストの色を変えます。
A row of Basic Deduction for Resident Tax. Change the text color to make it easier to see.
税金計算用のアクティビティのJavaファイルへ戻ります。
Return to the Java file for the activity.
ScrollViewのインスタンス用変数を宣言します。
Declares a variable for an instance of ScrollView.
給与収入の入力や給与所得控除の表示等を行うGridLayoutのインスタンス用の変数を宣言します。
Declare a variable for the instance of GridLayout to input salary revenue, display salary income deduction, etc.
社会保険料の入力や社会保険料控除の表示を行うGridLayoutのインスタンス用の変数を宣言します。
Declare a variable for the GridLayout instance that will input social insurance premiums and display social insurance deductions.
基礎控除の表示を行うGridLayoutのインスタンス用の変数を宣言します。
Declare a variable for the instance of GridLayout that will display basic deduction.
レイアウトのIDを使用して宣言したLayout用の変数をインスタンス化していきます。
Instantiate the variables for the Layout you declared using the ID of the layout.
給与収入の入力用のエディットテキストの変数を宣言します。
Declares an edit text variable for salary revenue entry.
社会保険料の入力用のエディットテキストの変数を宣言します。
Declares an edit text variable for social insurance premium entry.
レイアウトのIDを使用して宣言したEditText用の変数をインスタンス化していきます。
Instantiates variables for the EditText declared using the layout ID.
控除額の表示用のテキストビュー用の変数を宣言していきます。
Declare variables for the text view for showing deductions.
レイアウトのIDを使用して宣言したTextView用の変数をインスタンス化していきます。
Instantiates variables for the TextView declared using the layout ID.
取り出した社会保険料を画面に表示させるメソッドの内容を記述していきます。
Let's write the contents of the method for displaying extracted social insurance premium on screen.
とりあえず取り出した社会保険料の値をsetTextメソッドを使って画面に表示させてみましょう。
For now, let's use the setText method to display the social insurance premium value on the screen.
public void displayTotalSocialInsurancePremium(Bundle extras) {
    totalSocialInsurancePremium = extras.getString("totalSocialInsurancePremium");
    socialInsuranceDeductionForm.setText(totalSocialInsurancePremium);
}
ここまで作成したアプリの挙動を確かめてみましょう。
Let's take a look at the behavior of the apps we've created so far.
税金計算用のアクティビティレイアウトファイルへ戻り、グリッドレイアウトを1行8列にして配置します。
Return to the activity layout file for tax calculation and place the grid layout in one row and eight columns.
各種控除の入力欄用のタイトルのテキストビューを配置します。
Places a text view of the title for the various deduction entry fields.
いつも通り[strings.xml]にレイアウト画面に表示させるテキストを記述していきましょう。
Write the text displayed on the layout screen in [strings.xml] as usual.
入力欄を折り畳んだり展開したりする為のイメージボタンを配置しましょう。
Place an image button to collapse or expand the input field.
drawableフォルダにcollapse用のボタンとexpand用のボタンを作成して格納します。
Create and store the collapse and expand buttons in the drawable folder.
res
    drawable
        collapse.png
        expand.png
ボタンを作るのがめんどくさいなら普通のボタンでも大丈夫です。
If you don't like making buttons, you can use regular buttons.
ボタンを作成するなら大体30×30ピクセルぐらいのpngファイルがお勧めです。
If you want to create a button, I recommend a png file of about 30 x 30 pixels.
ImageButtonやTextViewをインスタンス化していきましょう。
Let's instantiate ImageButton and TextView.
では入力欄を折り畳んだり展開したりする実際のメソッドを作成していきましょう。
Now let's write an actual method that collapses and expands the input field.
各種控除の入力欄のレイアウトが見えているかどうかをgetVisibilityメソッドを使ってブール値を取り出し、その値を使ってswitch文で処理を分けていきます。
The getVisibility method is used to retrieve a boolean value to see if the layout of the various deductions is visible, and the value is used to change the processing in the switch statement.
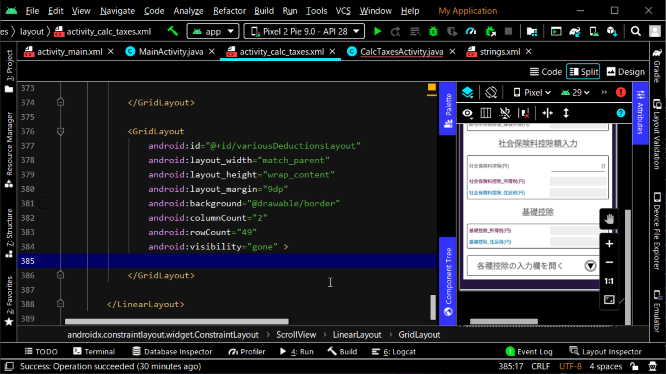
税金計算用のアクティビティレイアウトファイルへ戻り、各種控除の入力欄用のグリッドレイアウトを49行2列にして配置します。
Return to the activity layout file for tax calculation and place the grid layout for entering various deductions in 49 rows by 2 columns.
そしてVisibilityをgoneに設定して、初期表示ではレイアウト自体が無くなっている状態にします。
Then set Visibility to gone so that the layout itself is not visible on the initial display.
パート9へ続く。
Continue to Part 9.
以上です。お疲れ様です。
That's all. Thank you for your hard work.