Published Date : 2020年5月18日21:15
ProcessingのSketchをAndroid Studioで動かす方法
How to run Processing Sketch in Android Studio
This blog has an English translation
YouTubeにアップした動画、「How to run Processing Sketch in Android Studio:ProcessingのSketchをAndroid Studioで動かす方法」の補足説明の記事です。
Here's a little more about the 「How to run Processing Sketch in Android Studio:ProcessingのSketchをAndroid Studioで動かす方法」 video I uploaded to YouTube.
ProcessingのSketchをAndroid Studioを使ってエミュレーターや実機で動かす方法を紹介します。
I'll show you how to run Processing Sketch on an emulator or a real machine using Android Studio.
無駄な説明を省いて、忙しい時でも短時間で理解できるような動画です。
It's a video that can be understood in a short period of time even when you're busy, without any unnecessary explanation.
目次
Table of Contents
ProcessingのライブラリをAndroid Studioで利用できるようにする
Making Processing Libraries Available to Android Studio
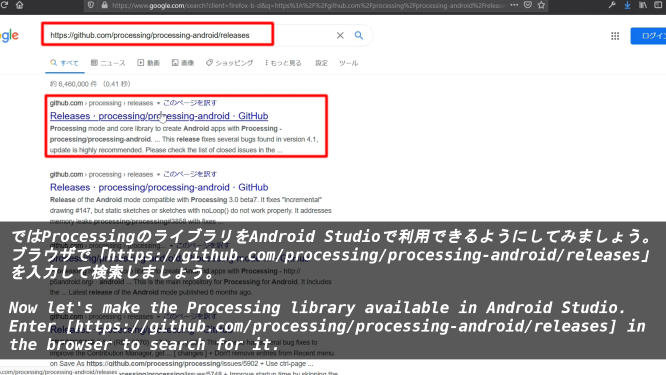
ではProcessingのライブラリをAndroid Studioで利用できるようにしてみましょう。ブラウザで「https://github.com/processing/processing-android/releases」を入力して検索しましょう。
Now let's make the Processing library available in Android Studio. Enter [ https://github.com/processing/processing-android/releases ] in the browser to search for it.
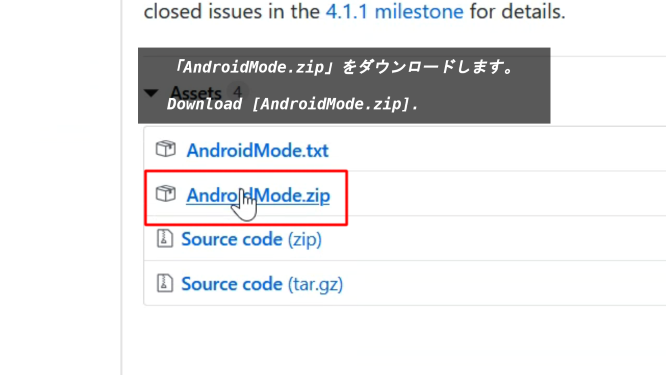
「AndroidMode.zip」をダウンロードします。
Download [AndroidMode.zip].
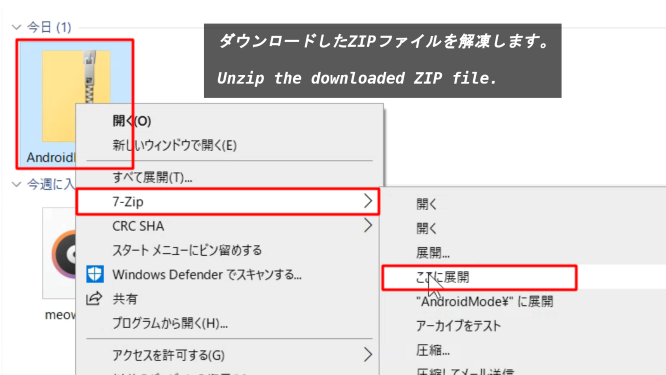
ダウンロードしたZIPファイルを解凍します。
Unzip the downloaded ZIP file.
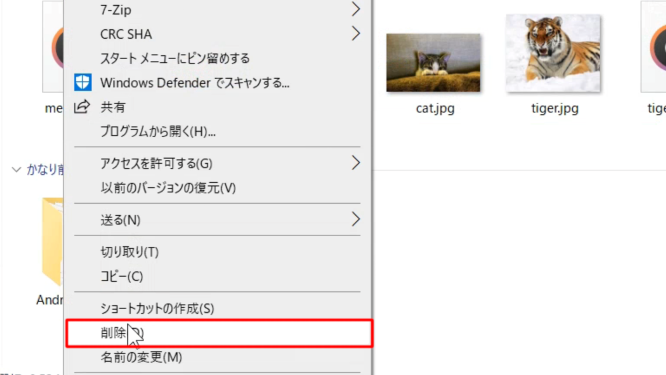
ZIPファイルを削除して、解凍したファイルを開きます。
Delete the ZIP file and open the extracted file.

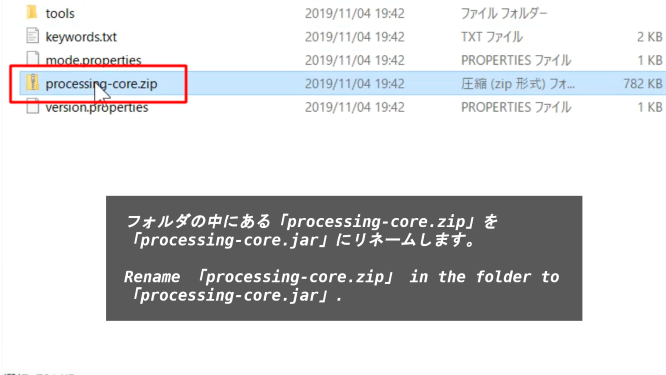
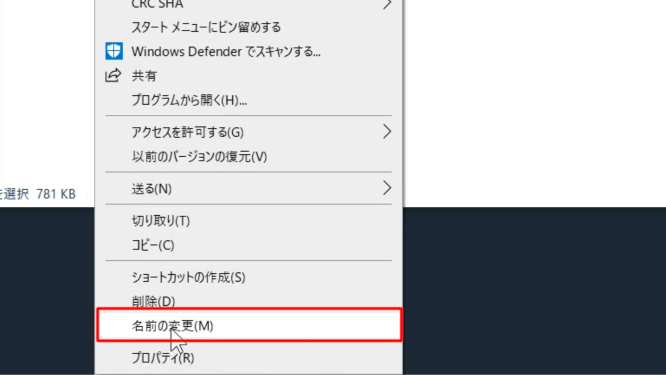
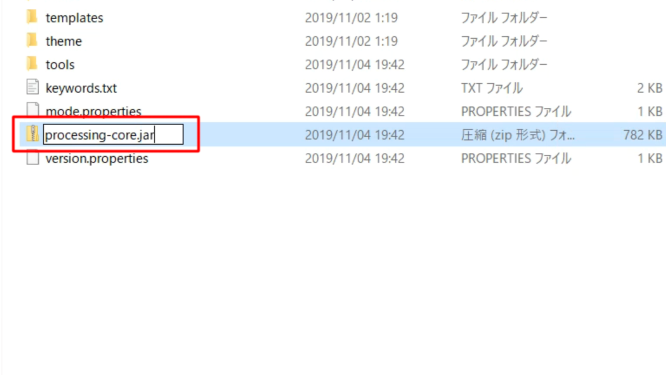
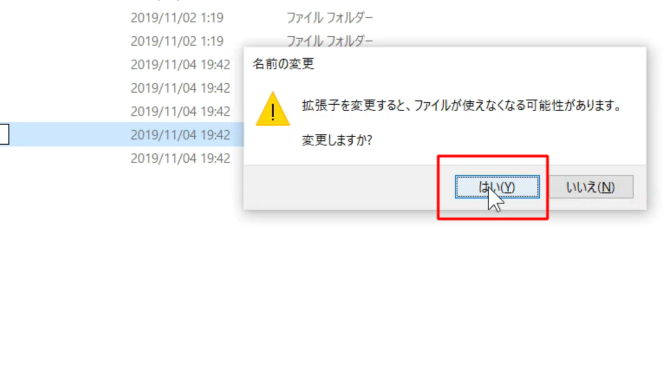
フォルダの中にある「processing-core.zip」を「processing-core.jar」にリネームします。
Rename 「processing-core.zip」 in the folder to 「processing-core.jar」.
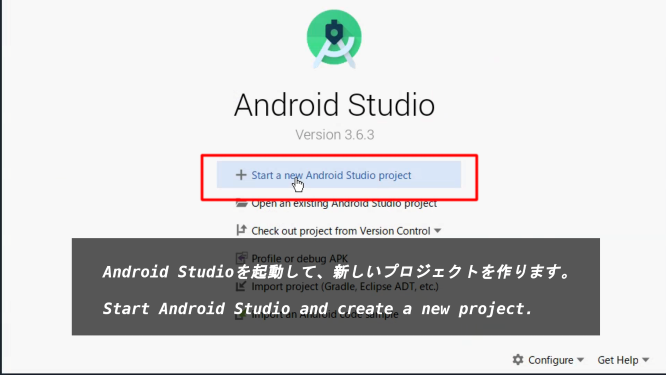
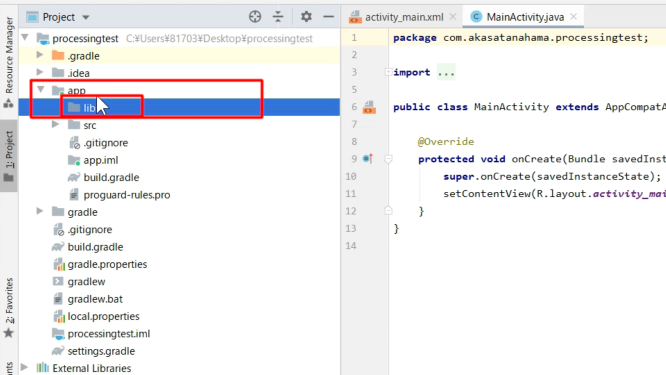
Android Studioを起動して、新しいプロジェクトを作ります。
Start Android Studio and create a new project.
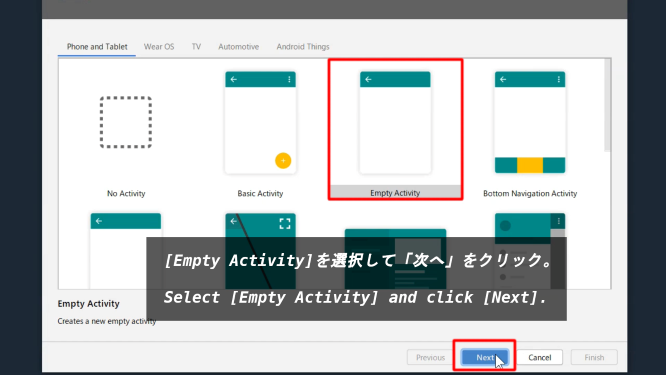
[Empty Activity]を選択して「次へ」をクリック。
Select [Empty Activity] and click [Next].
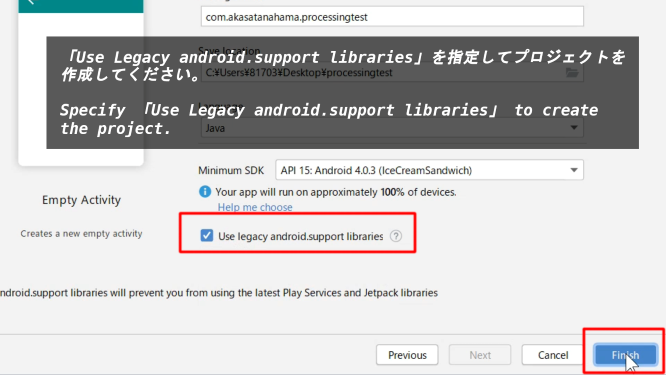
「Use Legacy android.support libraries」を指定してプロジェクトを作成してください。
Specify 「Use Legacy android.support libraries」 to create the project.
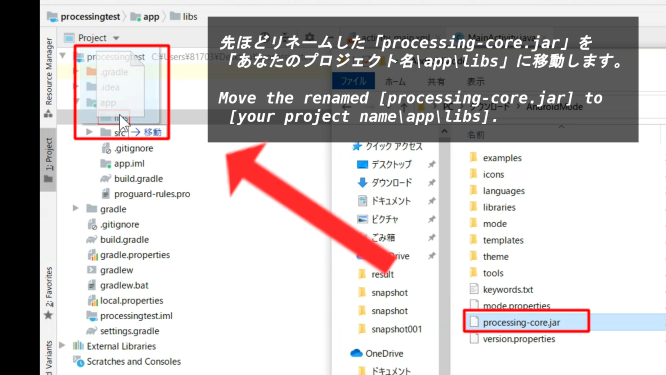
先ほどリネームした「processing-core.jar」を「あなたのプロジェクト名\app\libs」に移動します。
Move the renamed [processing-core.jar] to [your project name\app\libs].
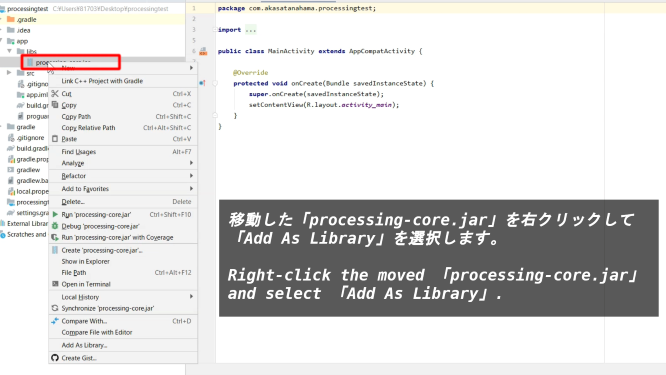
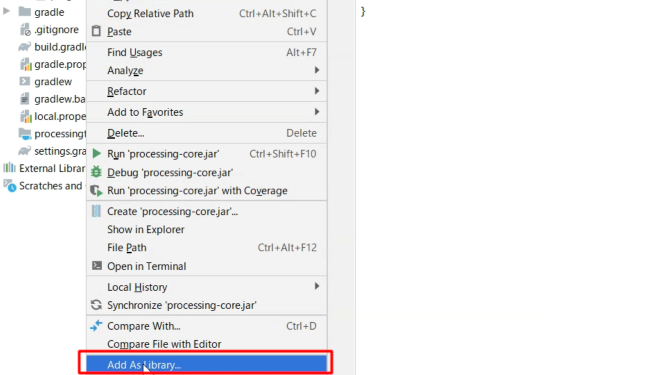
移動した「processing-core.jar」を右クリックして「Add As Library」を選択します。
Right-click the moved 「processing-core.jar」 and select 「Add As Library」.
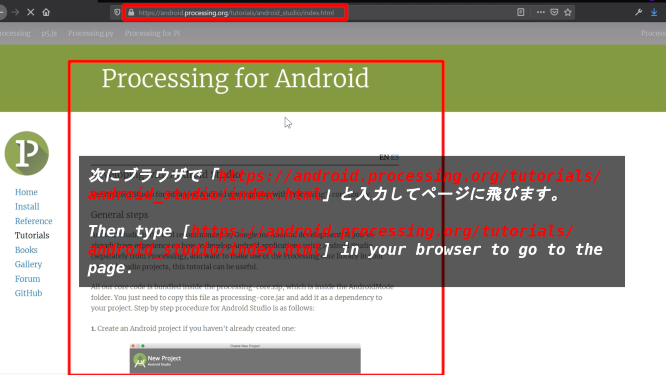
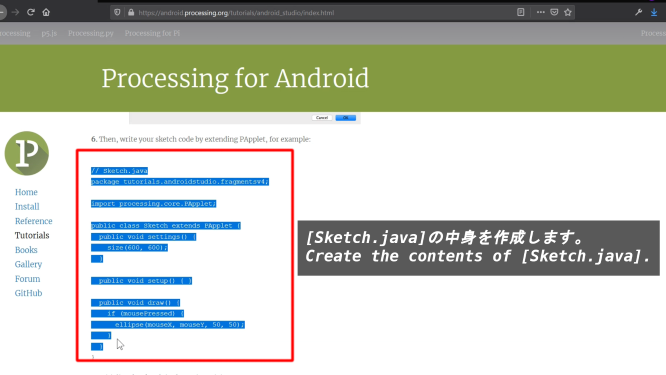
次にブラウザで「https://android.processing.org/tutorials/android_studio/index.html 」と入力してページに飛びます。
Then type [ https://android.processing.org/tutorials/android_studio/index.html ] in your browser to go to the page.
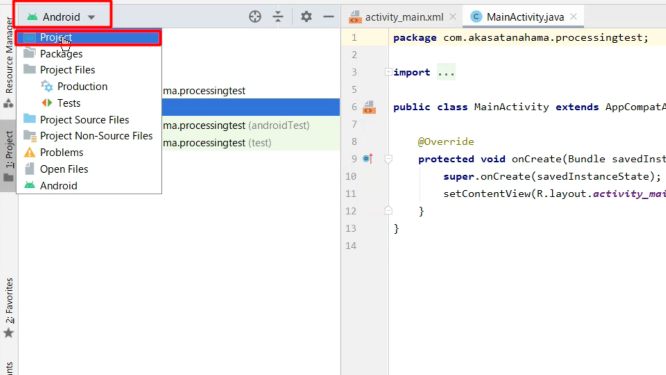
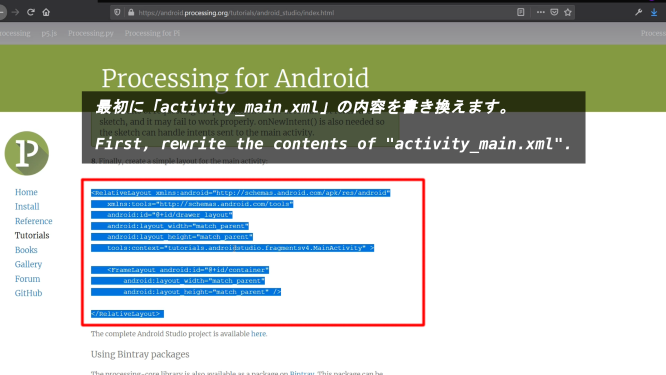
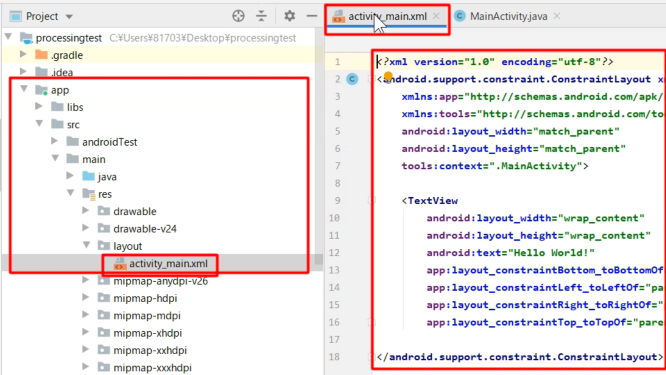
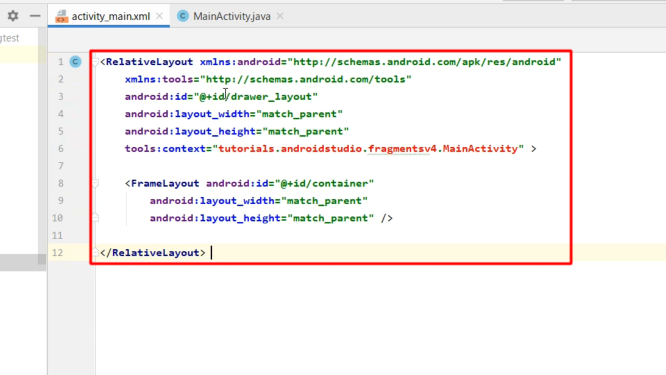
最初に「activity_main.xml」の内容を書き換えます。
First, rewrite the contents of "activity_main.xml".
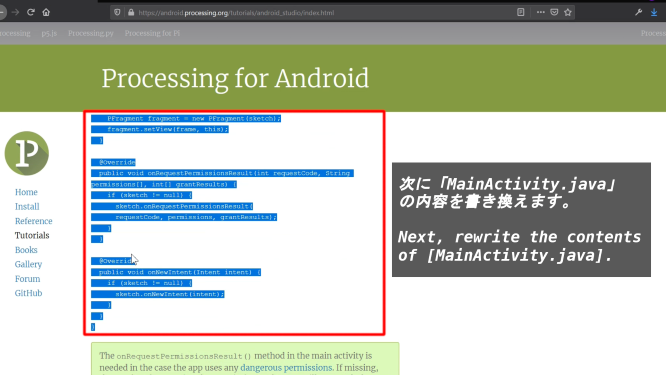
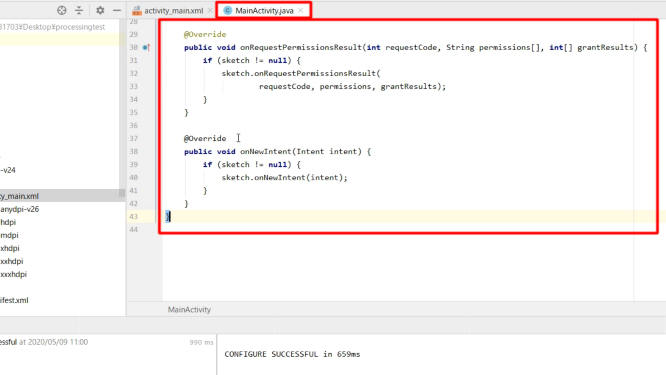
次に「MainActivity.java」の内容を書き換えます。
Next, rewrite the contents of "MainActivity.java".

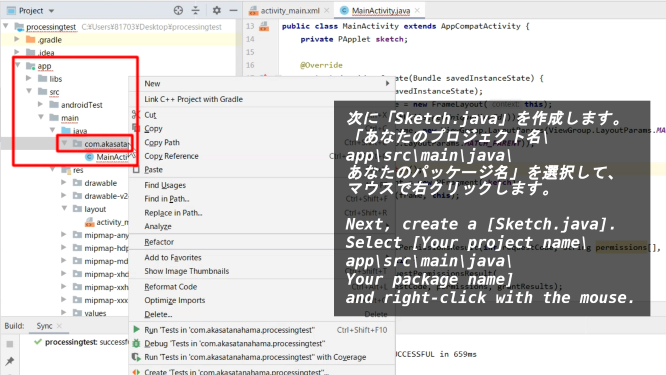
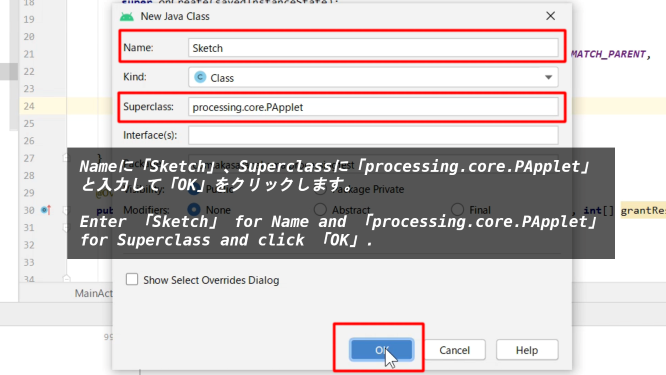
次に「Sketch.java」を作成します。「あなたのプロジェクト名\app\src\main\java\あなたのパッケージ名」を選択して、マウスで右クリックします。
Next, create a [Sketch.java]. Select [Your project name\app\src\main\java\Your package name] and right-click with the mouse.
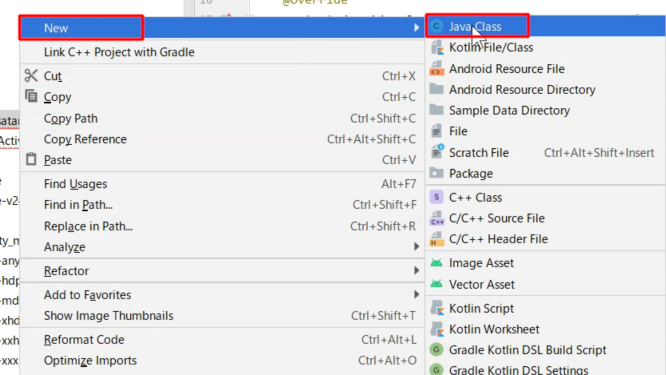
[New] -> [Java Class]
[New] -> [Java Class]
Nameに「Sketch」、Superclassに「processing.core.PApplet」と入力して「OK」をクリックします。
Enter 「Sketch」 for Name and 「processing.core.PApplet」 for Superclass and click 「OK」.
[Sketch.java]の中身を作成します。
Create the contents of [Sketch.java].
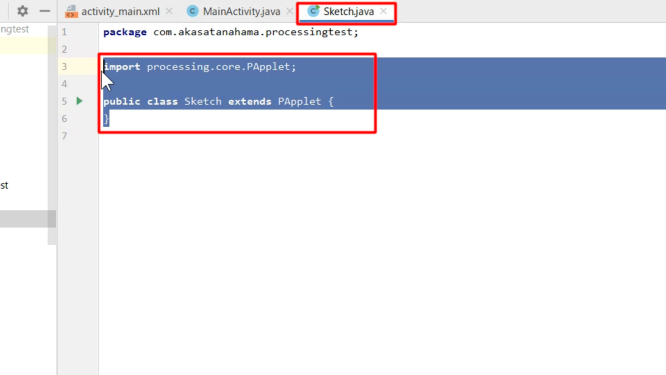
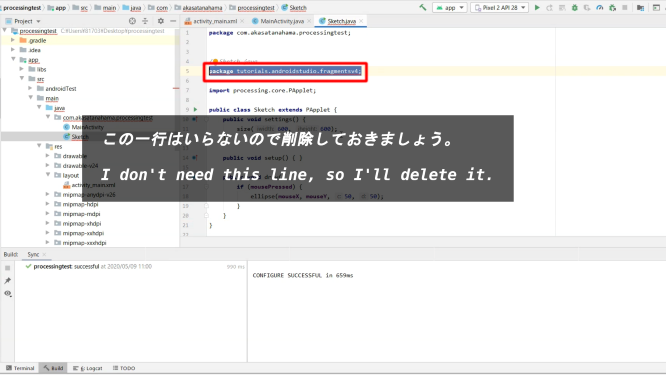
この一行はいらないので削除しておきましょう。
I don't need this line, so I'll delete it.
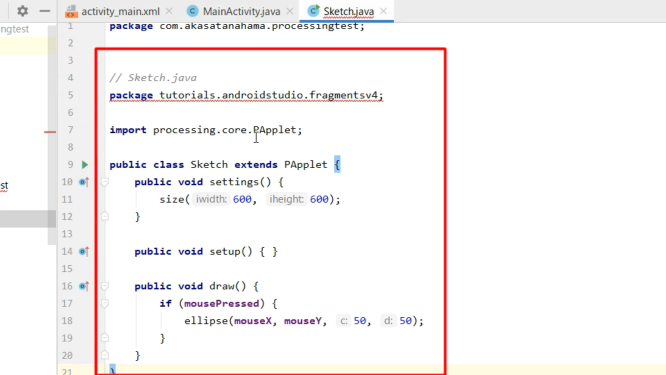
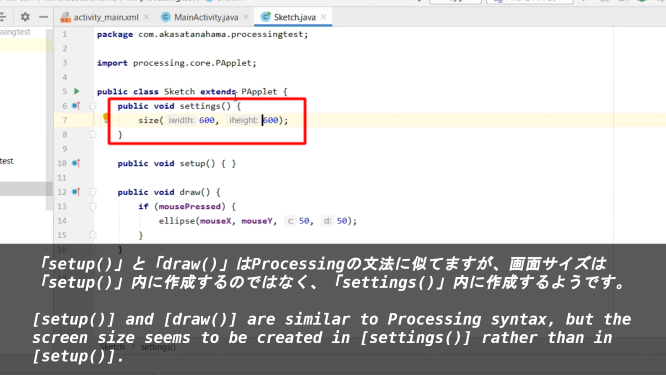
「setup()」と「draw()」はProcessingの文法に似てますが、画面サイズは「setup()」内に作成するのではなく、「settings()」内に作成するようです。
[setup()] and [draw()] are similar to Processing syntax, but the screen size seems to be created in [settings()] rather than in [setup()].
ProcessingのsketchをエミュレーターやAndroidの実機で動かす
Running Processing sketches on emulators and Android devices
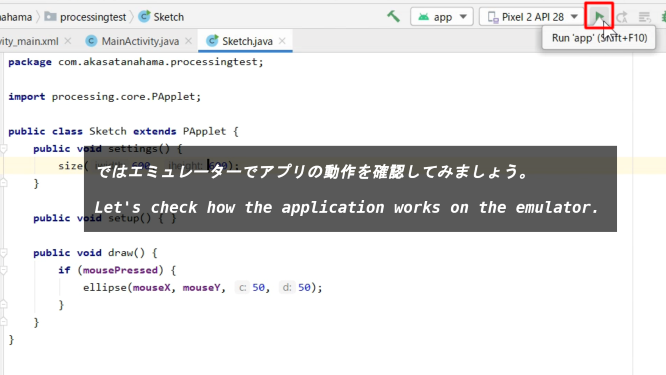
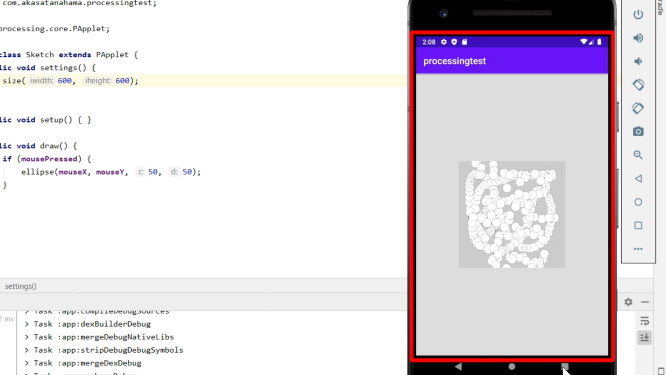
ではエミュレーターでアプリの動作を確認してみましょう。
Let's check how the application works on the emulator.
エミュレーターでの動作が確認できたので、手持ちのAndroidの実機でProcessingのアプリを試してみよう。
The emulator operation was confirmed. Now let's try the Processing app on your Android device.
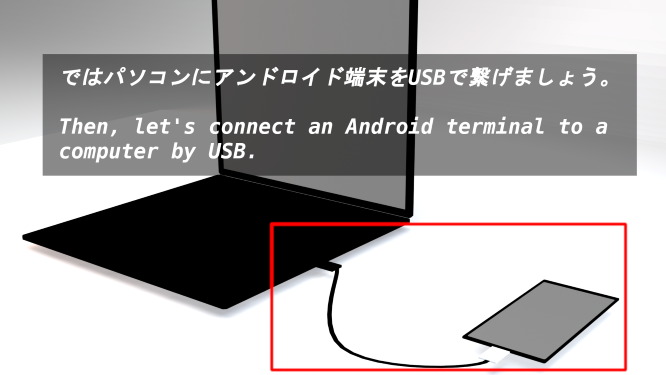
パソコンにアンドロイド端末をUSBで繋げましょう。
Let's connect an Android terminal to a computer by USB.
繋げたAndroid端末の画面に注目しましょう。
Watch the screen of the connected Android device.

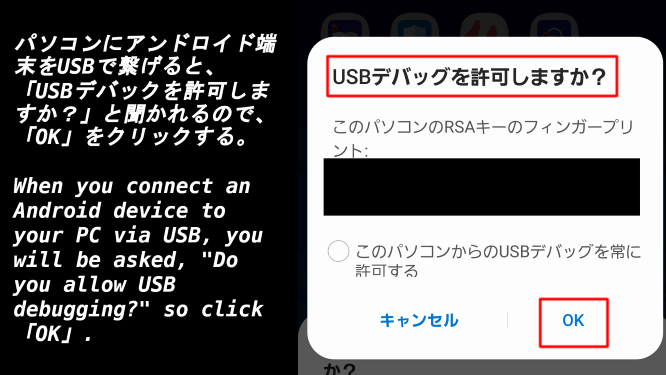
パソコンにアンドロイド端末をUSBで繋げると、「USBデバックを許可しますか?」と聞かれるので、「OK」をクリックする。
When you connect an Android device to your PC via USB, you will be asked, "Do you allow USB debugging?" so click 「OK」.
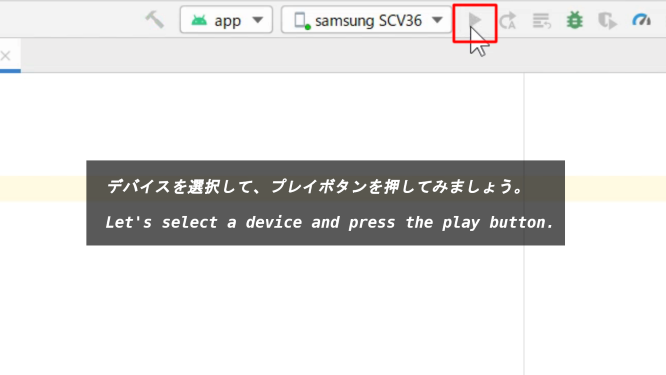
Android Studioに戻ると使用可能デバイスの欄に「あなたのAndroid端末の名前」が選択できる状態になっているはずです。
When you return to Android Studio, you should be able to select "The name of your Android device" in the Available Devices column.

デバイスを選択して、プレイボタンを押してみましょう。
Let's select a device and press the play button.
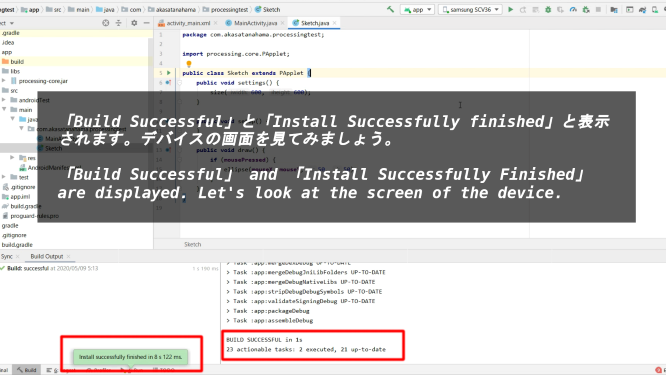
「Build Successful」と「Install Successfully finished」と表示されます。デバイスの画面を見てみましょう。
「Build Successful」 and 「Install Successfully Finished」 are displayed. Let's look at the screen of the device.
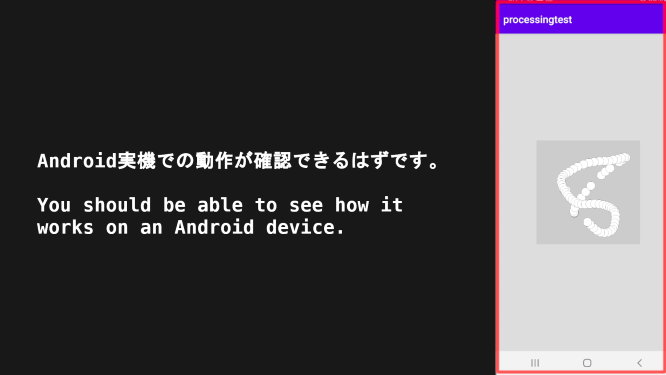
Android実機での動作が確認できるはずです。
You should be able to see how it works on an Android device.
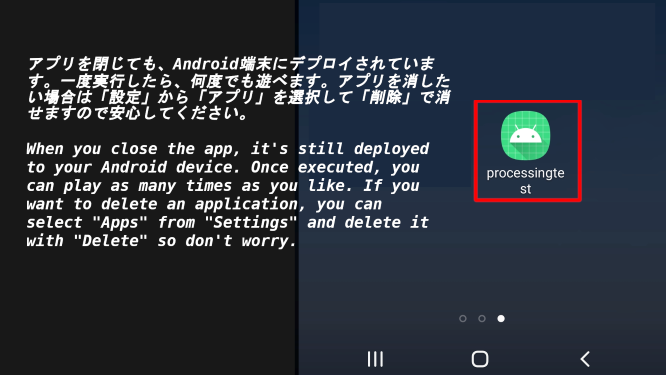
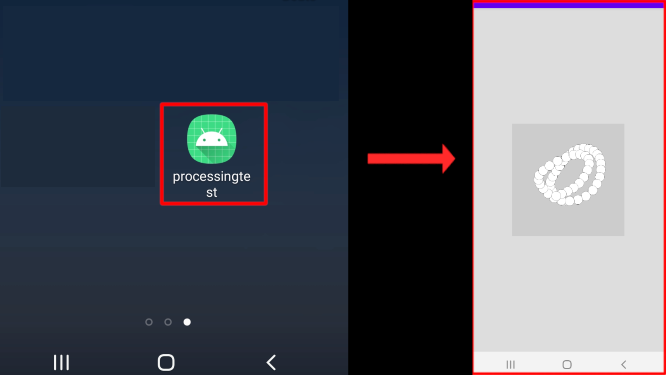
アプリを閉じても、Android端末にデプロイされています。一度実行したら、何度でも遊べます。アプリを消したい場合は「設定」から「アプリ」を選択して「削除」で消せますので安心してください。
When you close the app, it's still deployed to your Android device. Once executed, you can play as many times as you like. If you want to delete an application, you can select "Apps" from "Settings" and delete it with "Delete" so don't worry.
以上です。お疲れ様です。
That's all. Thank you for your hard work.