Published Date : 2020年4月27日10:44
【会計ソフトfreee】Firebaseとfreeeの環境を整える
【accounting software freee】Setting up Firebase and freee environments
This blog has an English translation
YouTubeにアップした4つの動画からなるシリーズ、「【会計ソフトfreee】Firebaseとfreeeのアプリを連携させる 」の補足説明の記事です。
This article is a supplement to 4 video series I uploaded to YouTube "【accounting software freee】Connecting Firebase and freee Apps".
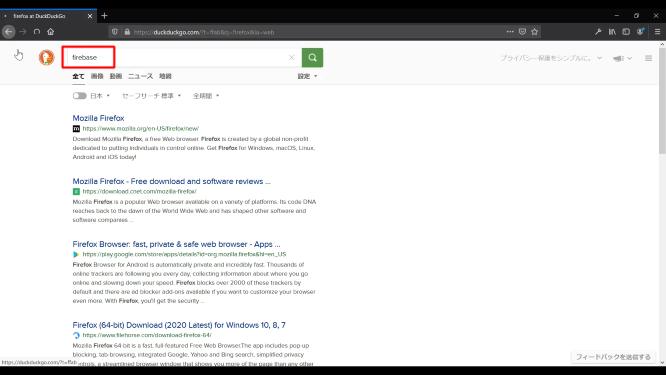
確定申告や労務、会計等を簡易化できるウェブ上の会計ソフト 「freee」とmBaaS(mobile Backend as a Service)の 「Firebase」を連携させる方法を紹介します。
This section introduces how to link the online accounting software [freee], which simplifies tax returns, labor, and accounting, with mBaas (mobile Backend as a Service ) [Firebase].
前回の続きです。今回は実際の環境構築の一連の流れ(mac、WindowsとWSLの使用)を統一して説明していきます。
This post is a continuation of a previous blog post. This article describes the actual environment building process (mac, using Windows and WSL).
目次
Table of Contents
Firebaseとfreeeのセットアップ作業
Firebase and freee Setup Tasks
こちらのセットアップ作業はウェブ上で行うため、Windowsやmac, linuxでも共通です。
This setup is done on the web, so it is the same for Windows, mac and linux.
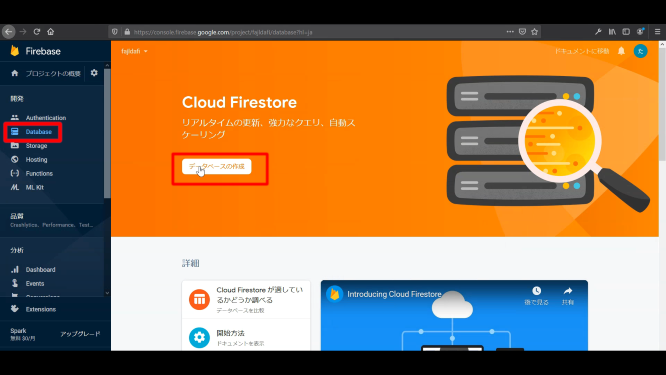
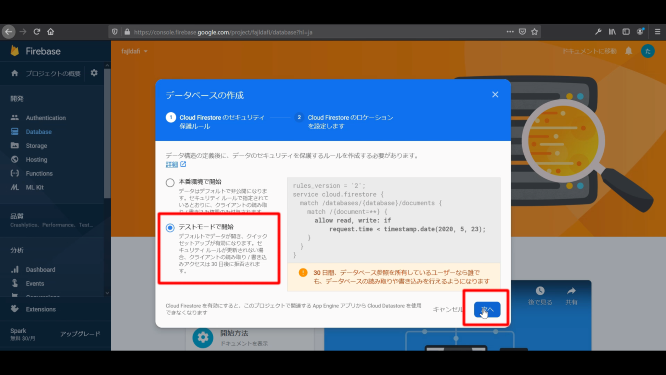
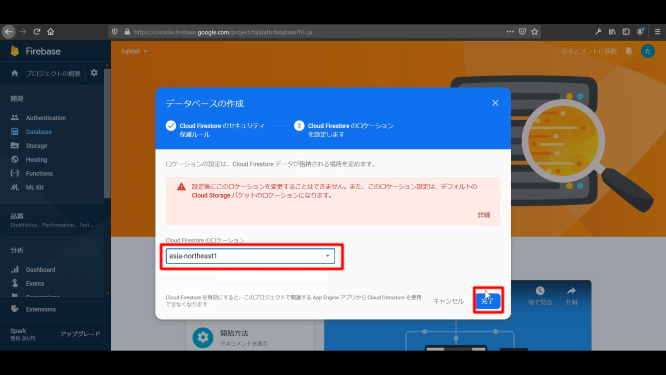
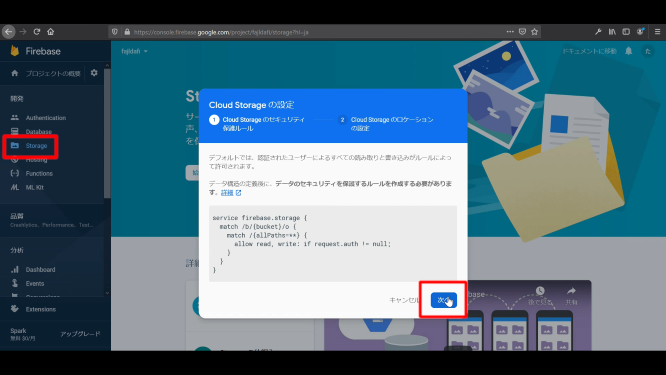
Firebaseの設定
Firebase Settings
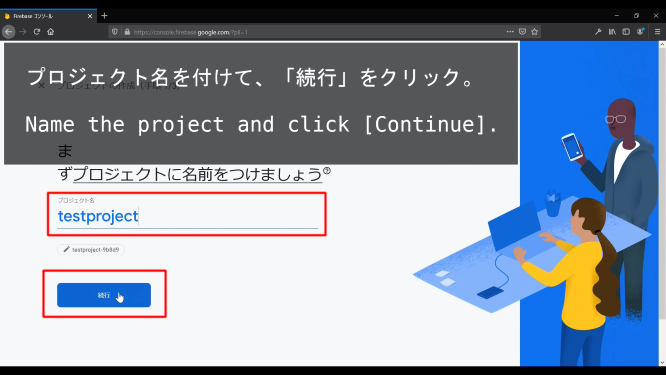
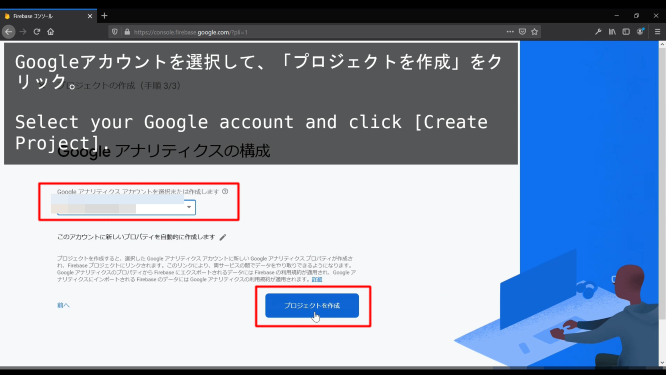
全体の流れ:GoogleアカウントでFirebaseにログイン -> Firebase consoleに移動してプロジェクト作成 -> databaseとstoreを有効にする -> サービスアカウントから秘密鍵をダウンロードする。
Overall flow: Login to Firebase with your Google account -> Go to Firebase console and create a project -> Enable database and store -> Download the private key from your service account.

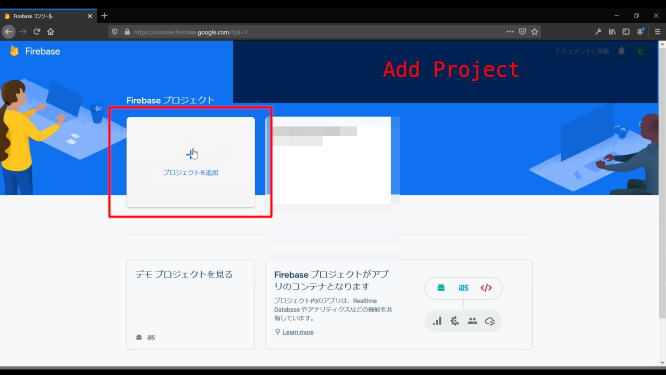
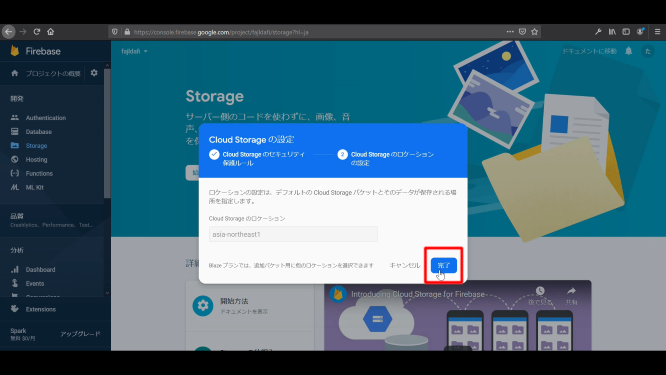
プロジェクトを作成できたら、サイドバーにある「Database」と「Storage」を有効化します。
Once the project is created, enable [Database] and [Storage] in the sidebar.
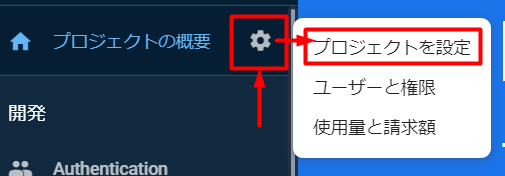
サービスアカウントから秘密鍵をダウンロードする。
Download the private key from your service account.
.png)
.png)
.png)
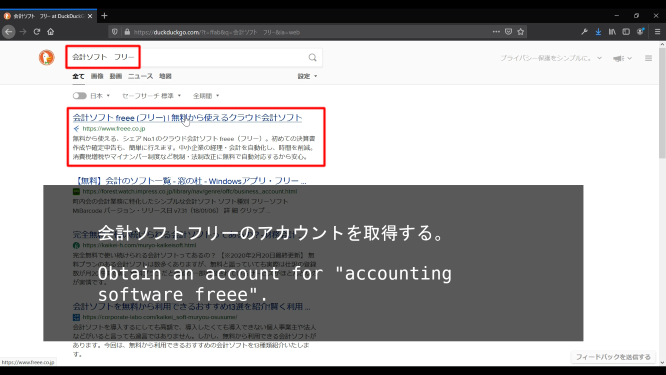
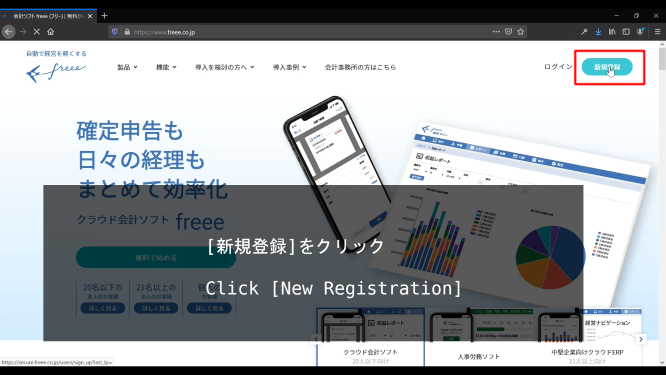
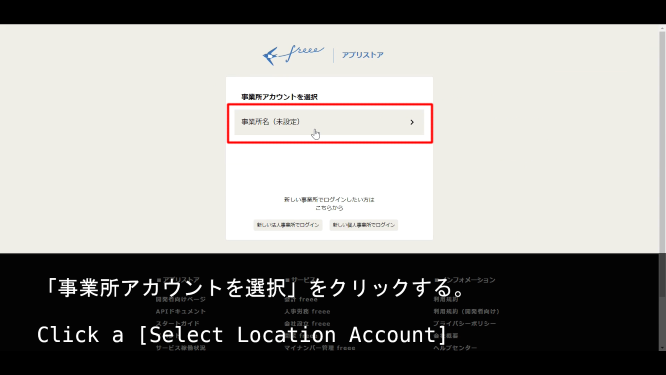
freeeの設定
freee settings
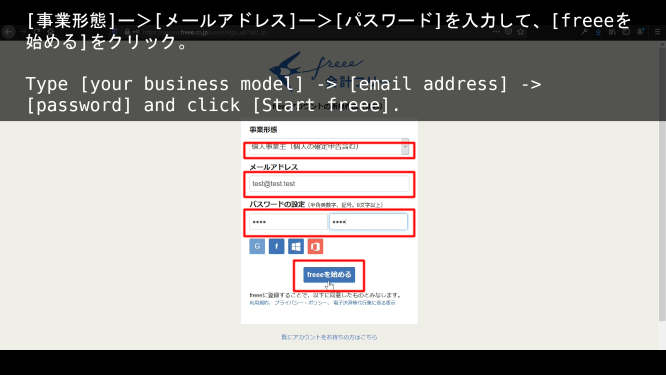
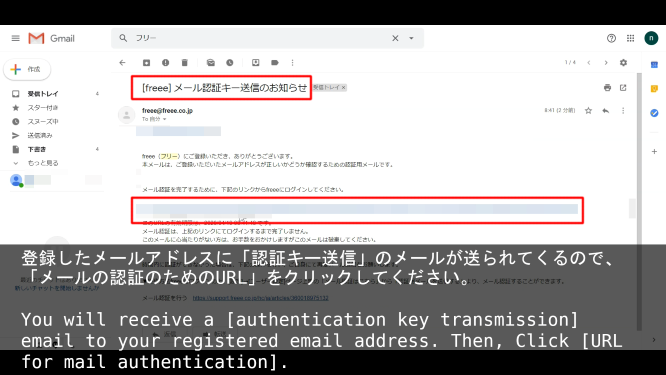
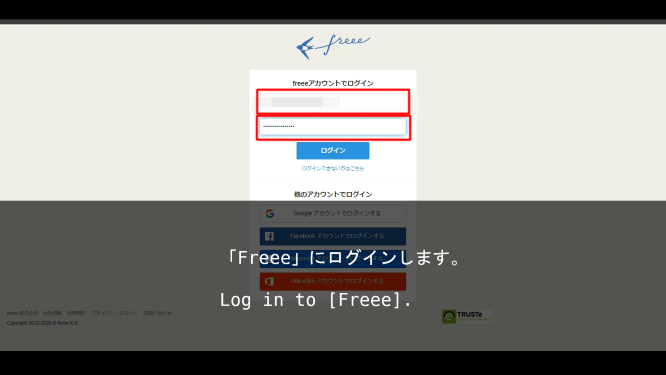
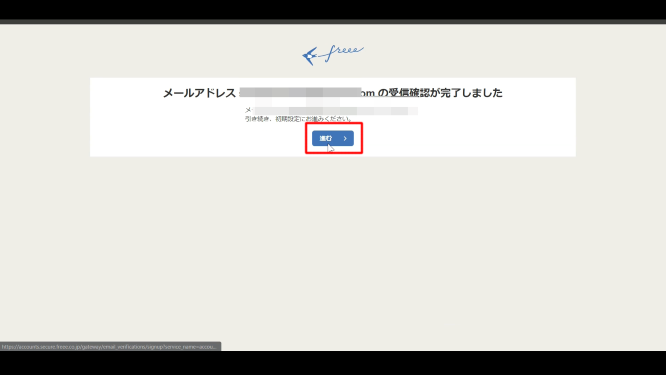
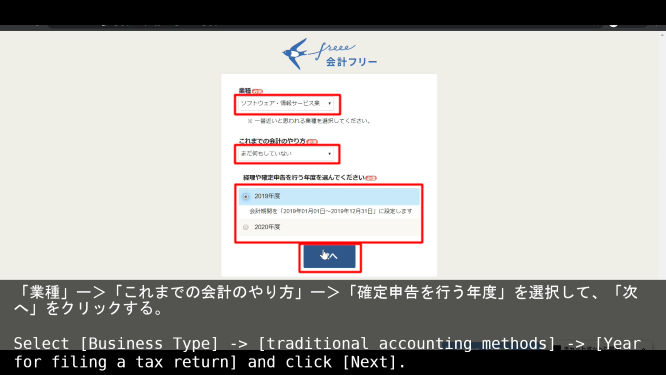
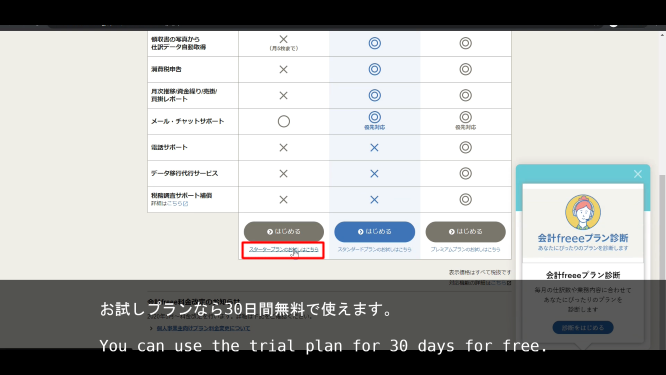
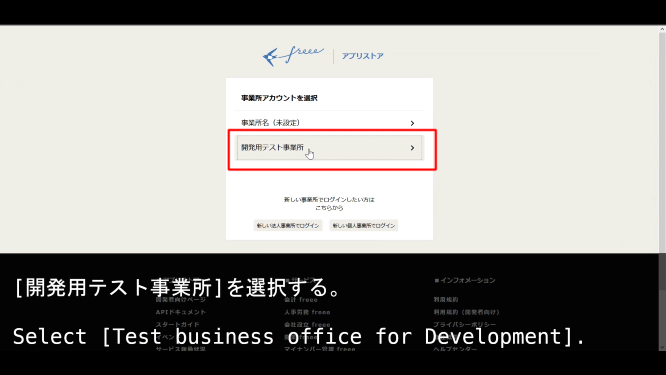
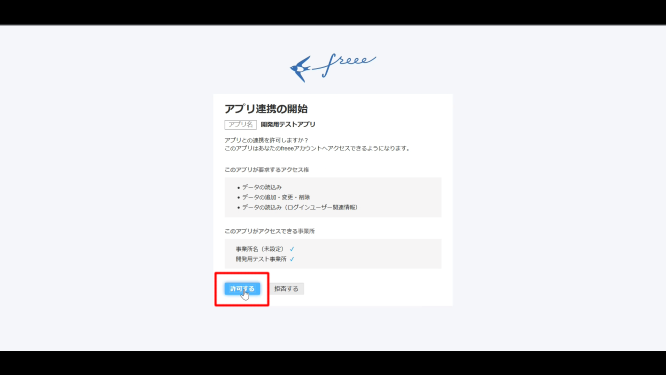
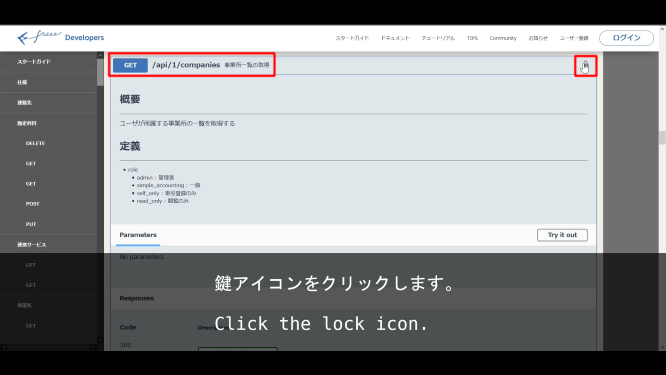
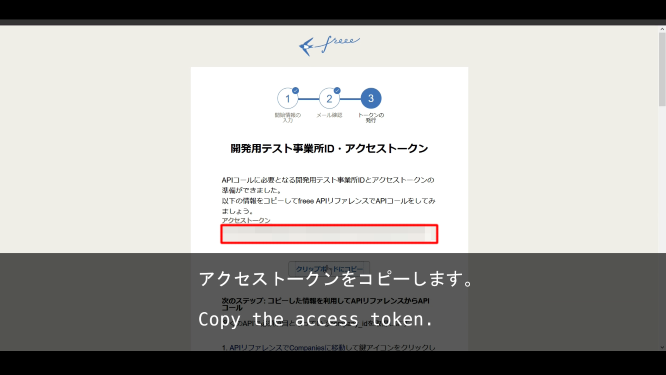
全体の流れ:freeeにログイン -> freeeアプリ作成 -> APIをテストする。
Overall flow: Login to freee -> create a freee application -> Test the API.
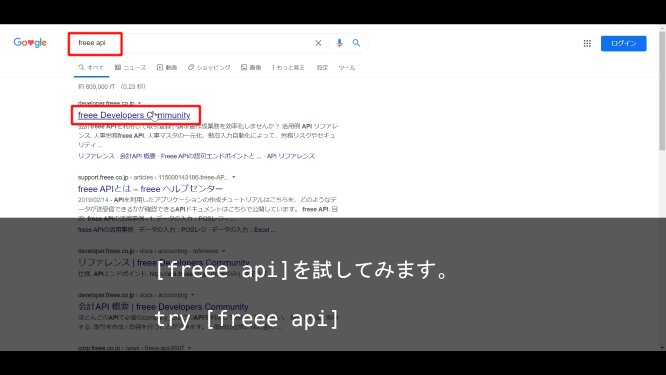
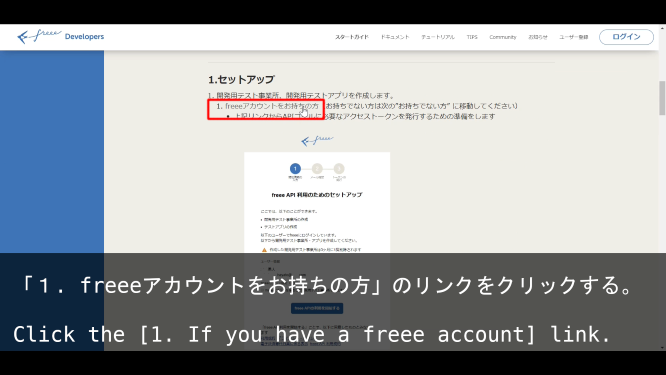
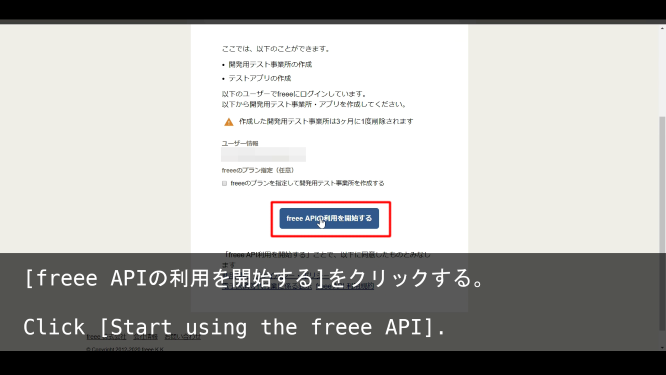
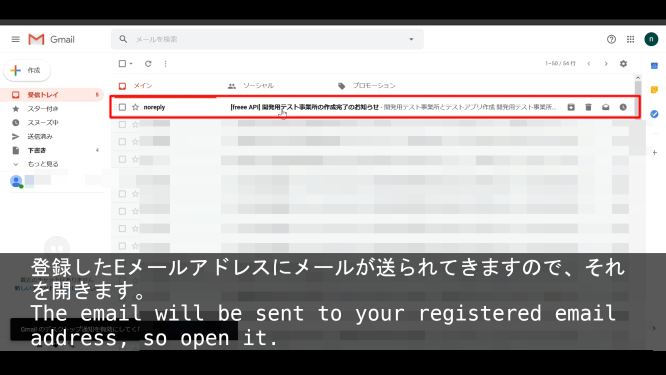
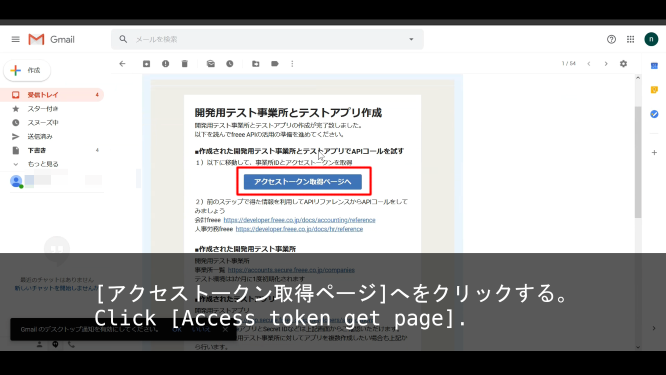
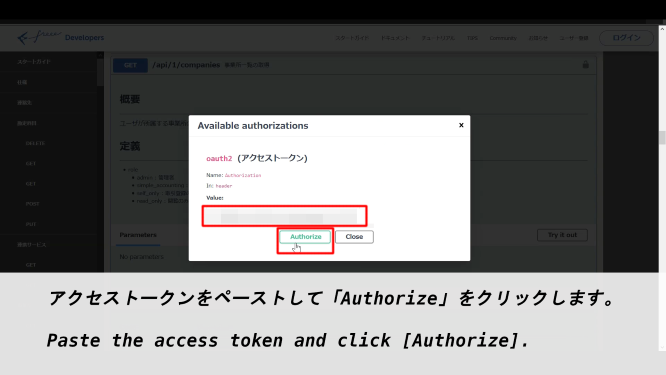
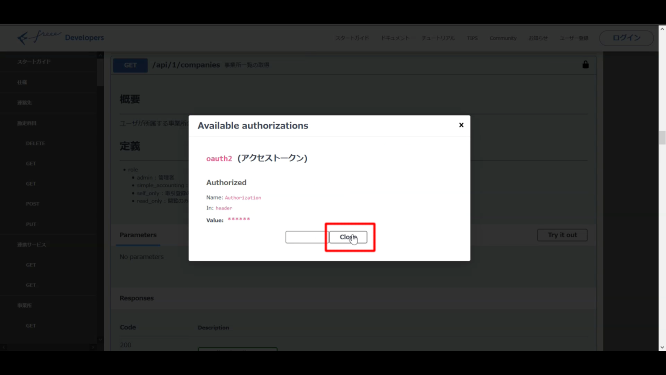
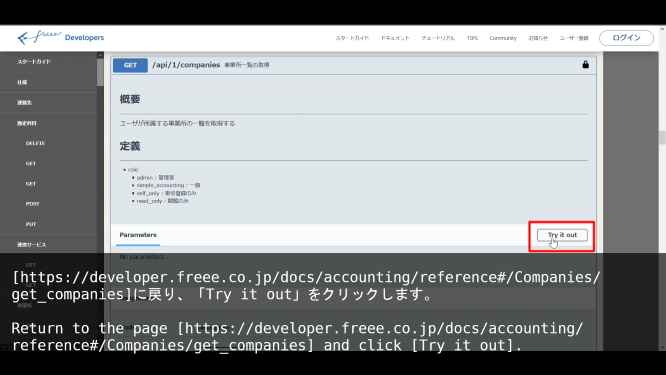
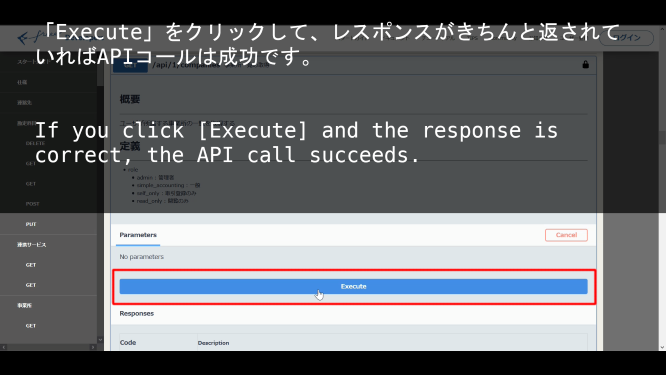
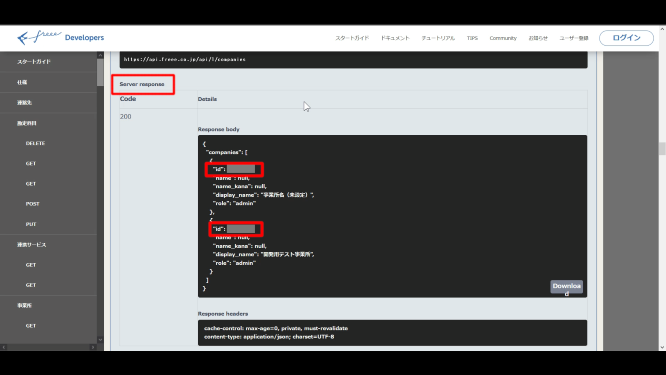
freee APIのテスト
Testing the freee API

Windows10での環境構築方法(WSLバージョンに統一)
How to Build Your Environment on Windows 10 (WSL version)
では続いて、Windows10(WSLを使用する)での環境構築方法の簡単な説明です。
The following is a brief explanation of how to create an environment in Windows 10 (Using WSL)
全体の流れ:WSL (Windows Subsystem For Linux) を有効化する -> ubuntu18をインストールする -> nvmを使ってNode.jsをインストールする。-> pip3をapt-getを使ってインストール(python3とgitはubuntu18にすでにインストール済み)
Overall flow: Enable WSL (Windows Subsystem For Linux) -> Install ubuntu 18 -> Install Node.js using nvm -> Install pip3 using apt-get (python3 and git are already installed on ubuntu 18)
.png)
.png)
Ubuntu 18をMicrosoft Storeからインストールする
Install Ubuntu 18 from the Microsoft Store
.png)
.png)
.png)
.png)
Ubuntuのターミナルが開くのでコマンドを打ち、アップデートとnvmのインストール、nvmを使ってNode.jsをインストールして、apt-getを使ってpip3をインストールしていきます。
Once the Ubuntu terminal opens, update, install nvm, install Node.js using nvm, and install pip3 using apt-get.
.png)
.png)
.png)
.png)
.png)
.png)
これでWindows10の環境は整いました。
Your Windows 10 environment is now complete.
macでの環境構築方法
How to Build Your Environment on mac
お次はmacの手順です。
The next step is mac.
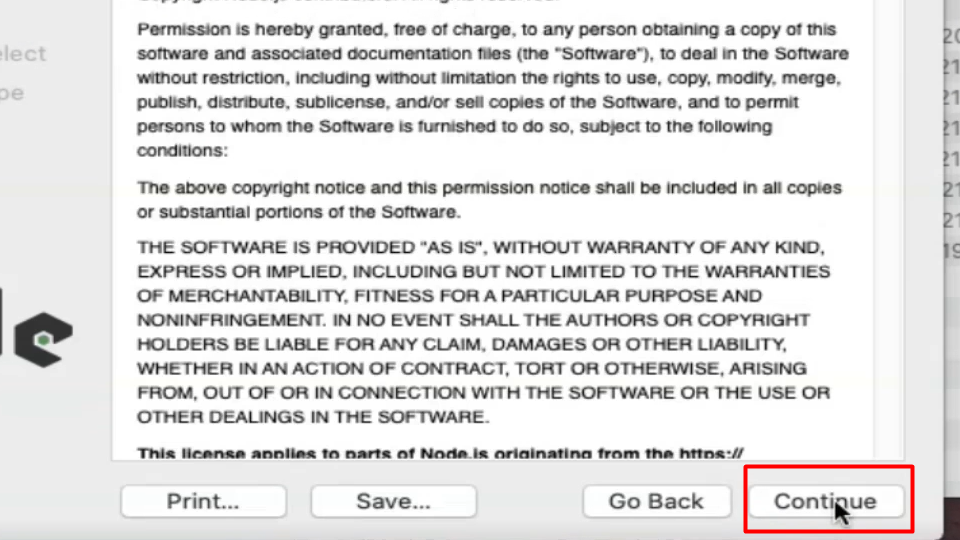
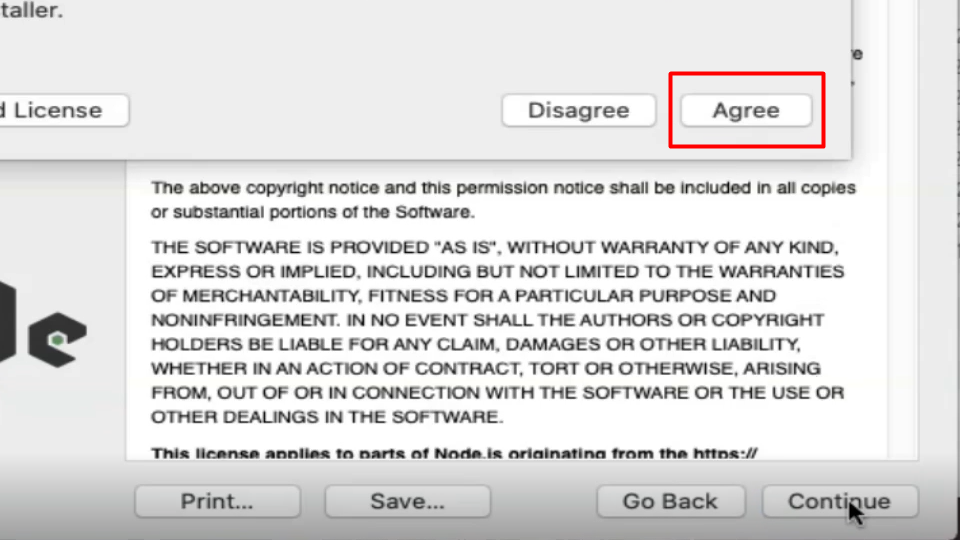
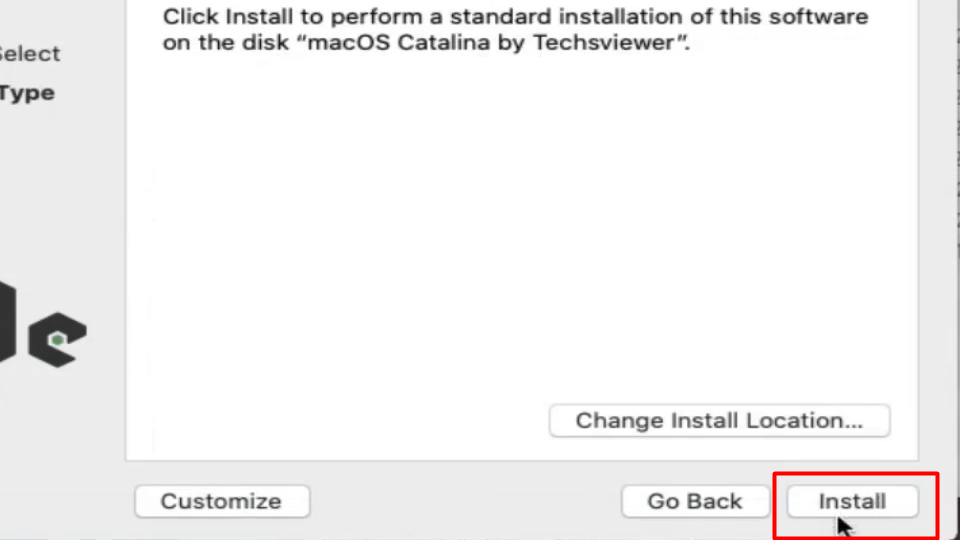
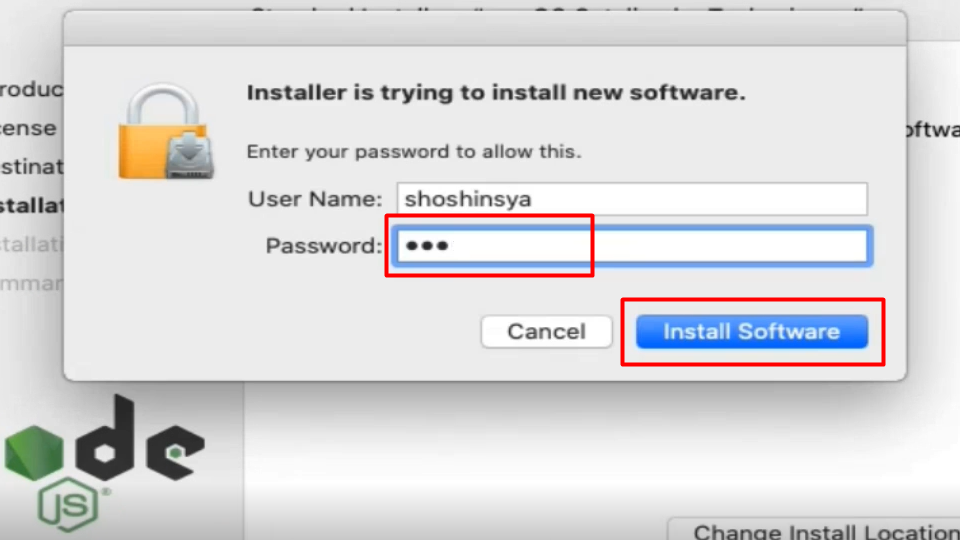
まずはNode.jsをインストールします。
Install Node.js first.
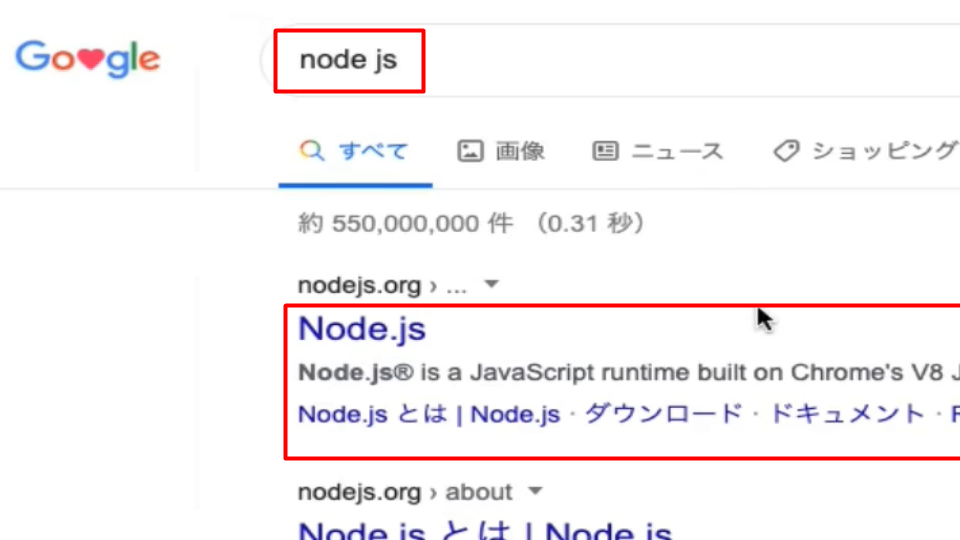
適当なブラウザを開いて、「node.js」と検索しましょう。
Open a browser of your choice and search for "node.js".
.png)
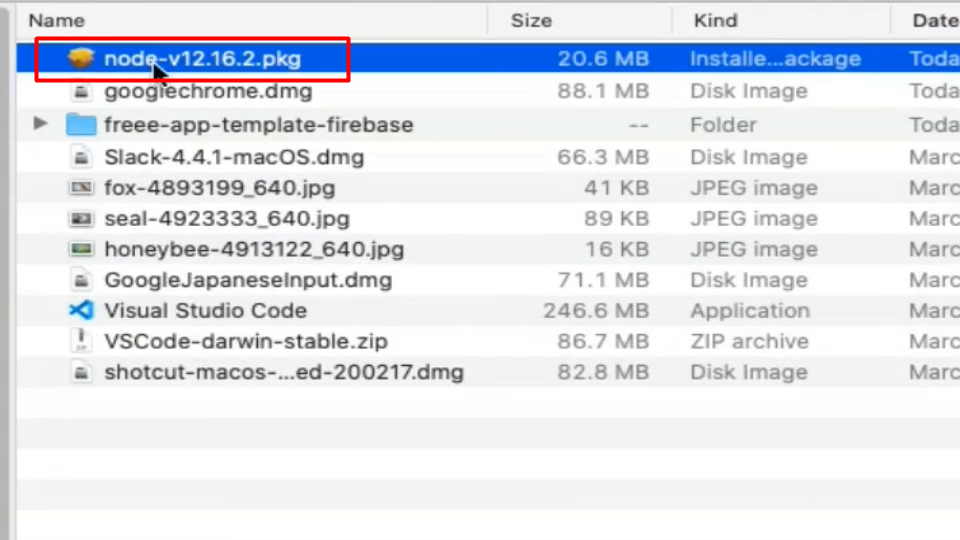
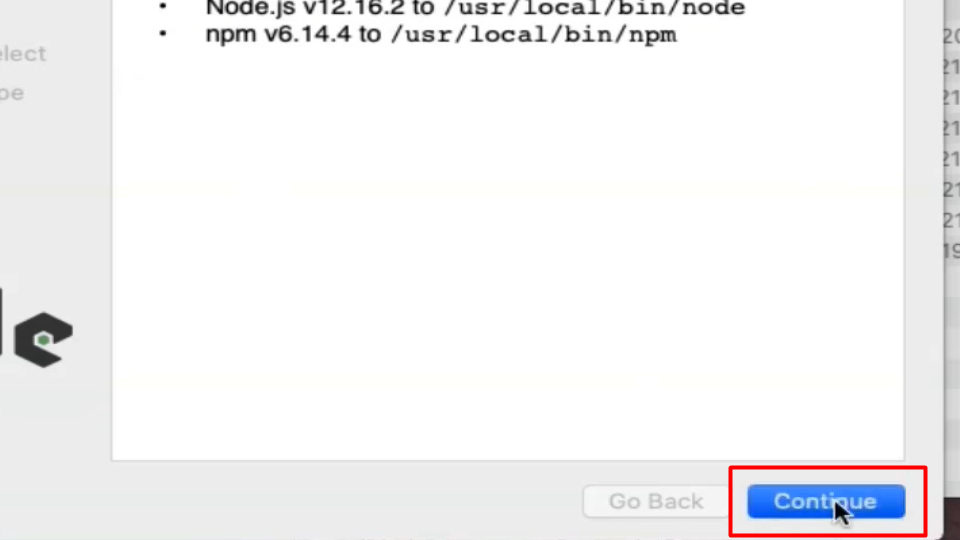
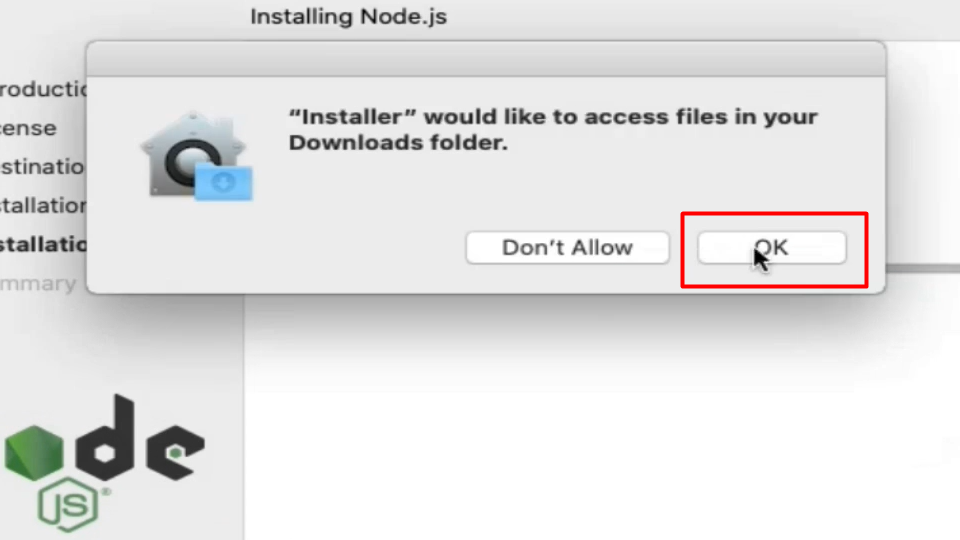
ダウンロードしたファイルをダブルクリックして、指示通りにセットアップしていきます。
Double-click the downloaded file and set it up as instructed.
Gitをインストールします。
Install Git.
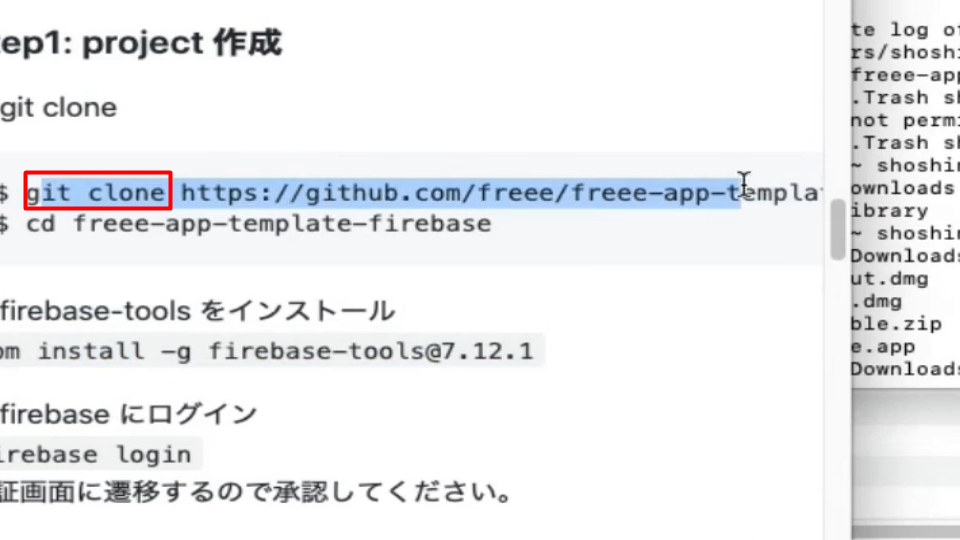
freee-app-template-firebaseにいき、"git clone ~" の部分をコピペします。
Jump to freee-app-template-firebase and copy and paste the "git clone ~" part.
Command Line Toolsをインストールすように促されますので、「はい」をクリックしてインストールしてくだちぃ。
When prompted to install the Command Line Tools, click "Yes" to install it.
.png)
これでGitのインストールと同時に[freee-app-template-firebase]も取得できています。
You can now install Git and get [freee-app-template-firebase] at the same time.
以上です。
以上です。
お疲れ様です。次回は「プロジェクトのひな型」をGithubからGitを使い取り寄せて(macの場合はもう終わっているので無視してください)、中身のファイルを新規に作成したり、書き換えたりして開発環境を完成させましょう。 本番環境のデプロイはFirebaseの有料課金プランが必要になってきますので、お金かけてもいいよって方は是非トライしてみてください。
Thank you for your hard work. Next time you'll use Git to get "template for a project" from Github (In the case of mac, please ignore it because it is already over) and complete the development environment by creating and rewriting the files. You'll need to pay for Firebase to deploy your production environment, so if you're willing to pay for it, give it a try.