Published Date : 2020年4月8日12:11
2: Google SheetsをPythonで利用できるようにする
2: Make Google Sheets available in Python
This blog has an English translation
YouTubeにアップした動画、「【作業自動化】Part 2 - Make Google Sheets available in Python. : Google SheetsをPythonで利用できるようにする 」の補足説明の記事です。
Here's a little more about the "【作業自動化】Part 2 - Make Google Sheets available in Python. : Google SheetsをPythonで利用できるようにする" video I uploaded to YouTube.
リモートワーク、在宅ワーク、テレワーク等で活躍するであろう、チャットツールのSlack、
どこにいてもWEB上で表計算の編集の共有ができるGoogleスプレッドシート、
これらのツールをPythonを使って自動化して作業効率を上げよう。
Slack, the chat tool, and Google Spreadsheets,
the service that lets you edit spreadsheets anywhere on the web.
Automating these tools using Python will improve your efficiency.
全体の説明は動画に任せるとして、補足が必要だろうと思われる部分を説明していきます。
I'll leave the entire explanation to the video, but I'll explain the parts that I think need to be supplemented.
目次
Table of Contents
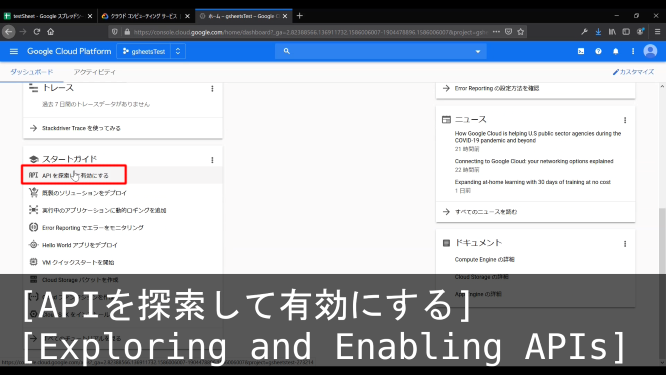
① Google Sheets APIとGoogle Drive APIを有効にする
① Enable the Google Sheets and Google Drive APIs
*前回の動画でGmail APIの設定を行いましたが、 しかし、SlackとGmailを同時に使うのは無駄だと感じたので、
日本の職場では当たり前になりつつあるSlackだけを使い、 Slack⇔Google Sheets間だけのやり取りをすることにしました。
その為、新たにGoogle Sheets APIとGoogle Drive APIを有効にする必要があります。
*In the previous video, we set up the Gmail API. However, I felt that using Slack and Gmail at the same time was a waste of time,
so I decided to use Slack, which is becoming the standard in the Japanese workplace. So for this video series, I decided to use only Slack and Google Sheets.
Therefore, it is necessary to newly enable Google Sheets API and Google Drive API.
GCP(Google Cloud Platform)
まずGCPへログインします。https://console.cloud.google.com/getting-started
Login to GCP first. https://console.cloud.google.com/getting-started

ログインしたらコンソールへ移動します。
After login, go to the console.
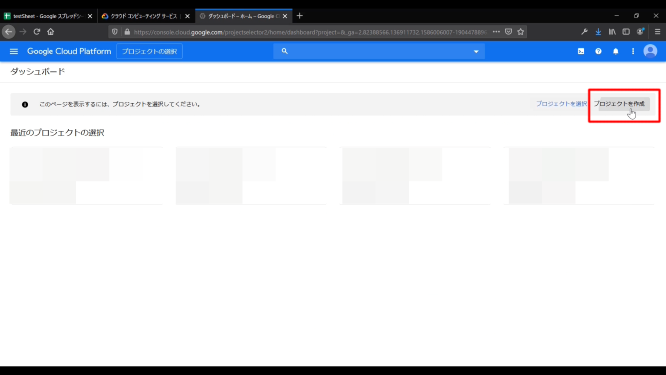
プロジェクトを作成をクリックする。
Click Create Project.
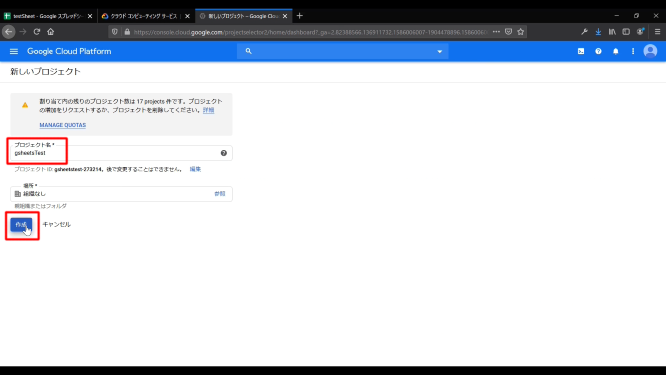
適当なプロジェクト名を決めて、作成ボタンをクリックする。
Select an appropriate project name and click the Create button.
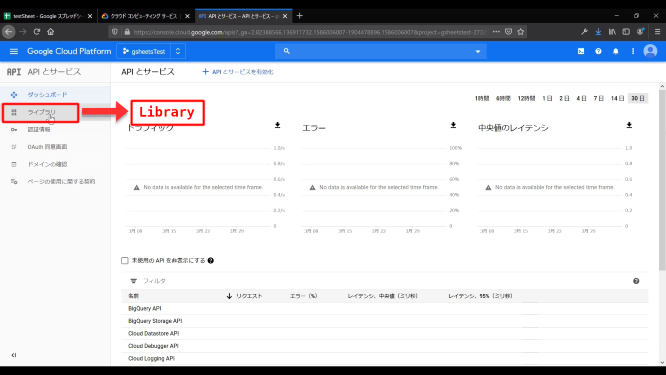
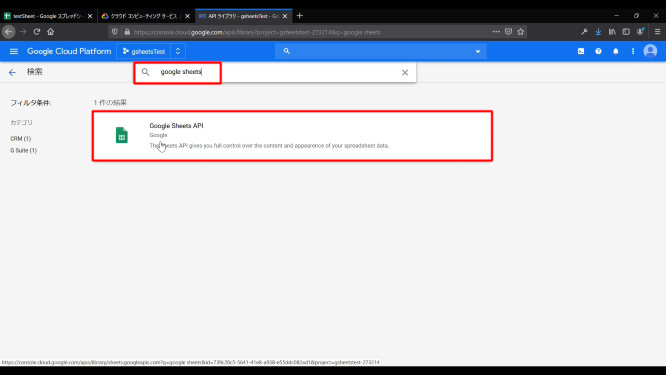
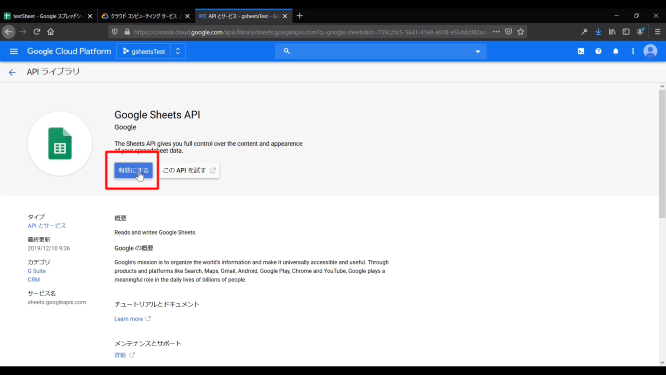
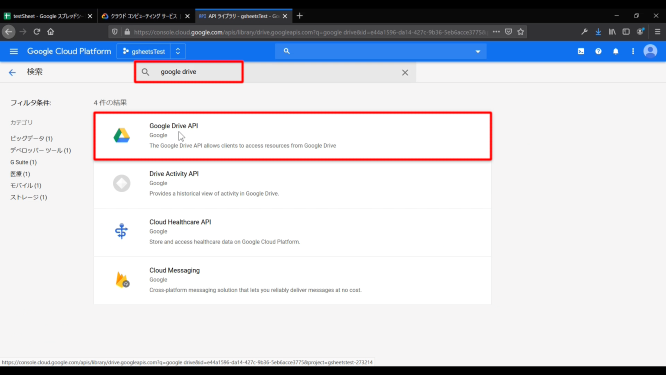
ライブラリをクリックして「Google Sheets」 と 「Google Drive」を検索してAPIを有効にしていく。
Click on the library and search for "Google Sheets" and "Goolge Drive" to enable the API.
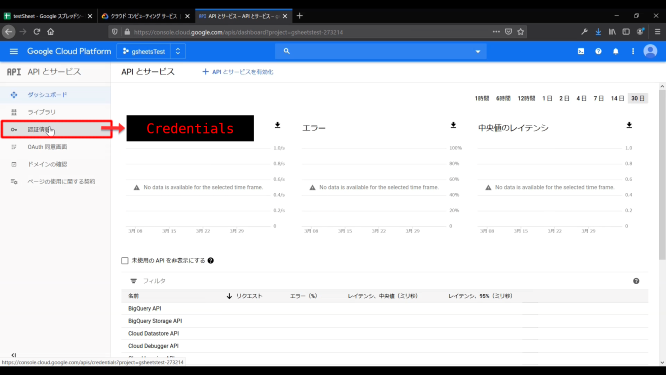
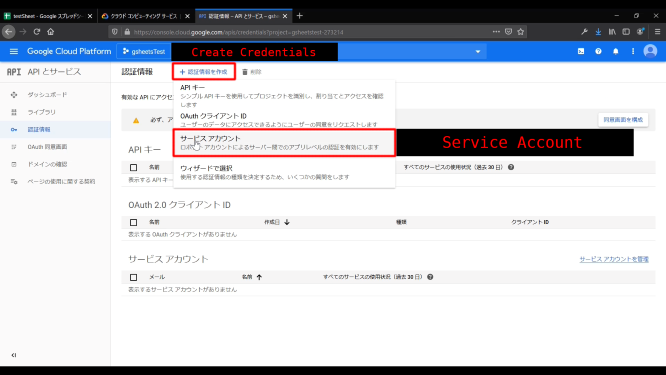
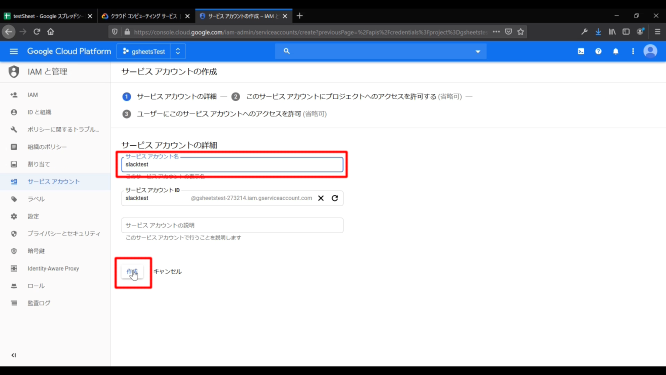
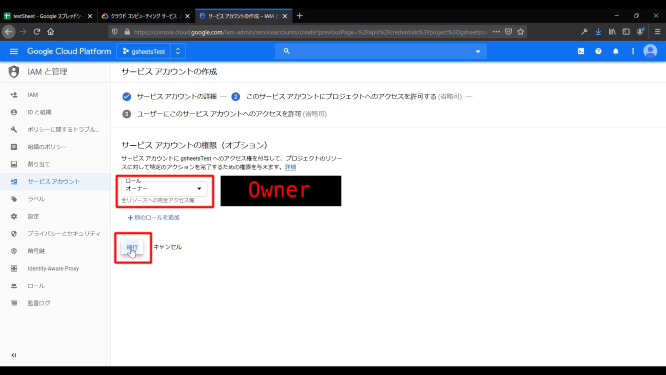
認証情報ー>認証情報を作成ー>サービスアカウントー>サービスアカウント名を入力ー>作成をクリック
Credentials ー> Create Credentials ー> Service Account ー> Enter Service Account Name ー> Click Create
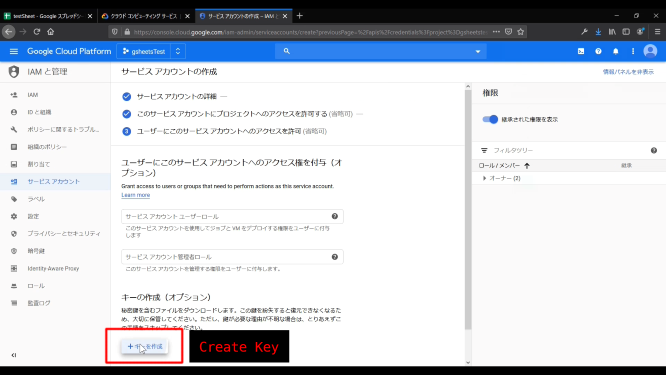
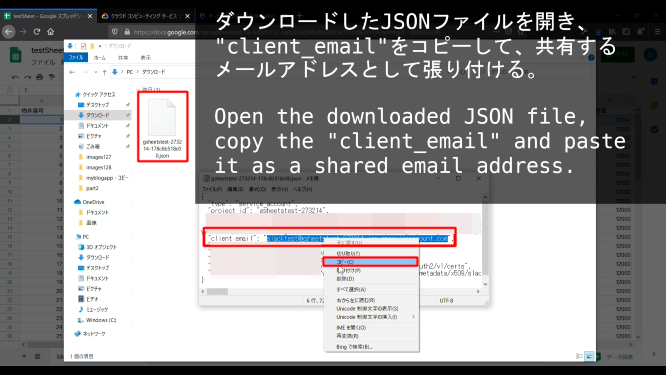
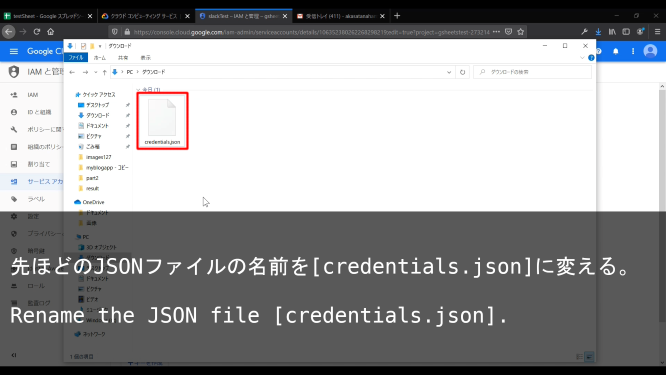
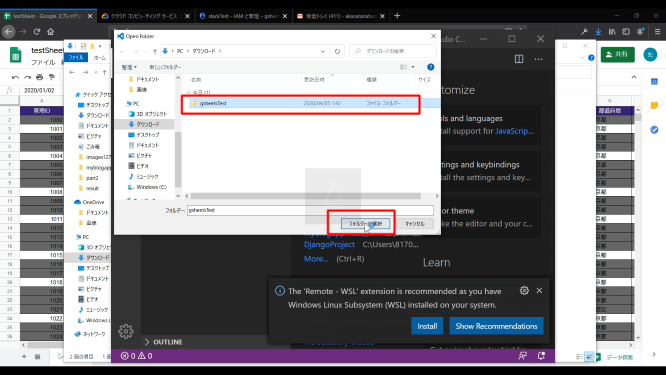
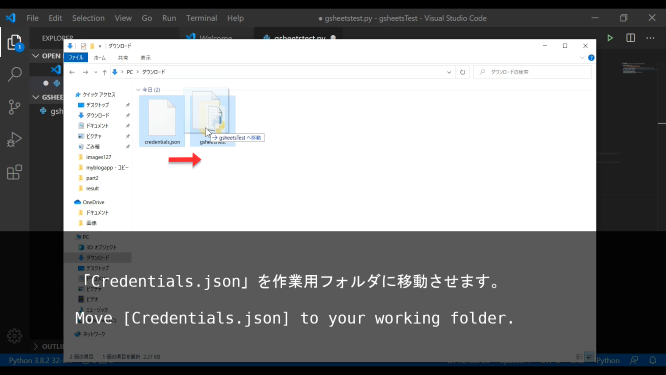
キーを作成をクリックして、JSONファイルをダウンロードする。
Click Create Key to download the JSON file.
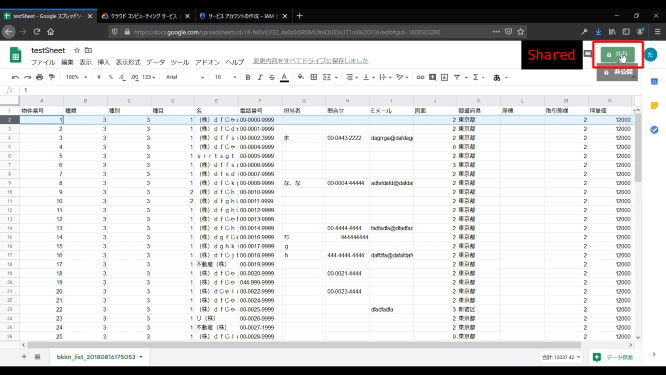
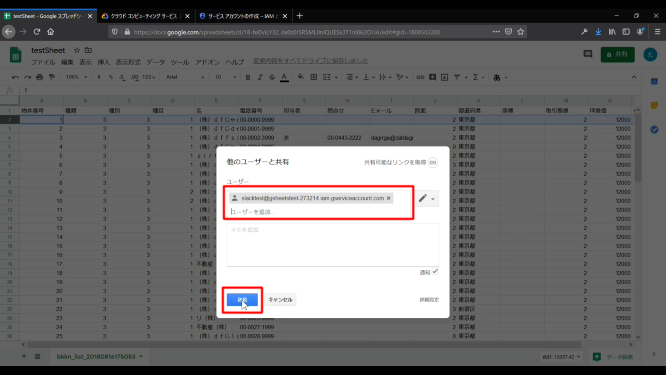
前回作成したスプレッドシートを開き、共有ボタンをクリックする。
Open the previously created spreadsheet and click the Share button.
② Google Sheetsを編集する
② Edit Google Sheets
Google Sheets
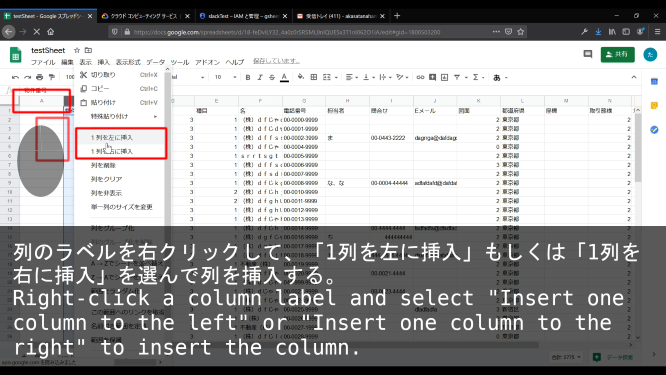
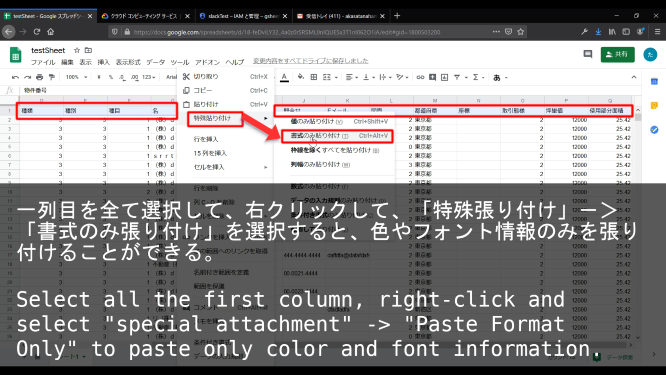
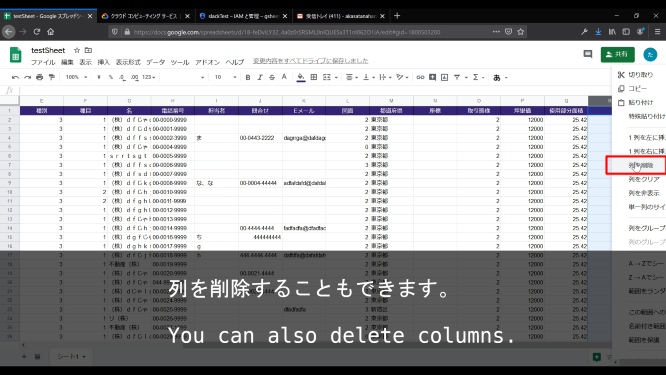
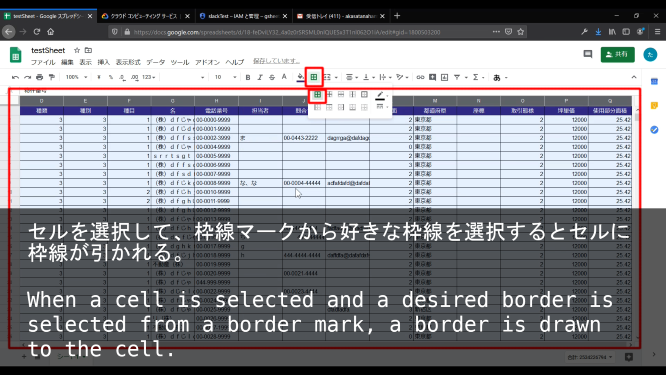
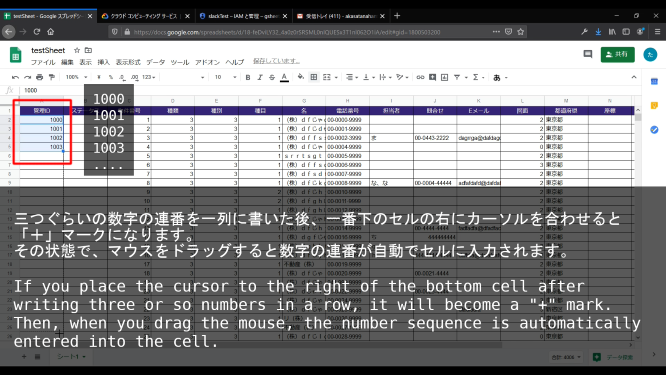
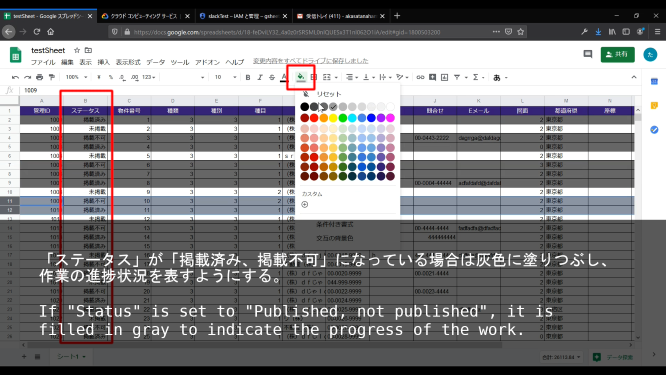
ここからは、Google Sheetsでの簡単なスプレッドシート作成方法の説明です。必要ないかたはこのセクションを飛ばしてください。
Here's how to create a simple spreadsheet in Google Sheets. Skip this section if you don't need it.
③ PythonでGoogle Sheetsを編集する
③ Edit Google Sheets in Python
Python Scripts
ではGoogle Sheets APIにPythonでアクセスして、操作をしてみましょう。
Let's access and manipulate the Google Sheets API in Python.
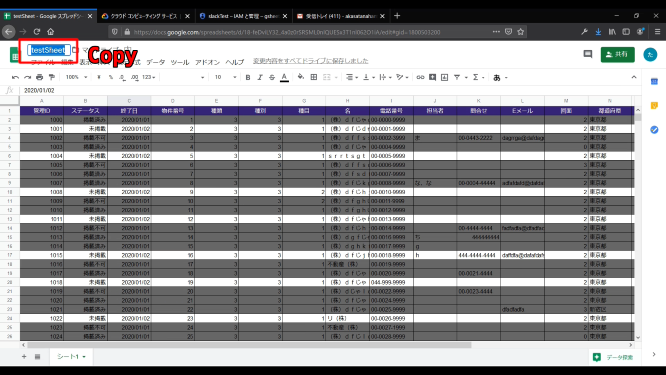
今回はシート名を使ってアクセスするので、スプレッドシートの名前をクリックしてコピーください。
This time I will access by sheet name, so please click the name of the spreadsheet and copy it.
import gspread
from oauth2client.service_account import ServiceAccountCredentials
import pandas as pd

scope = ['https://spreadsheets.google.com/feeds',
        'https://www.googleapis.com/auth/drive']

credentials = ServiceAccountCredentials.from_json_keyfile_name('credentials.json', scope)
gc = gspread.authorize(credentials)
# ここにあなたのシート名をペーストしてください。
# Paste your sheet name here.
wks = gc.open('here').sheet1
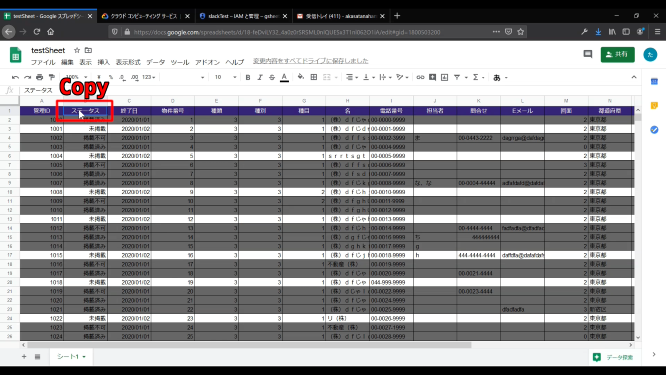
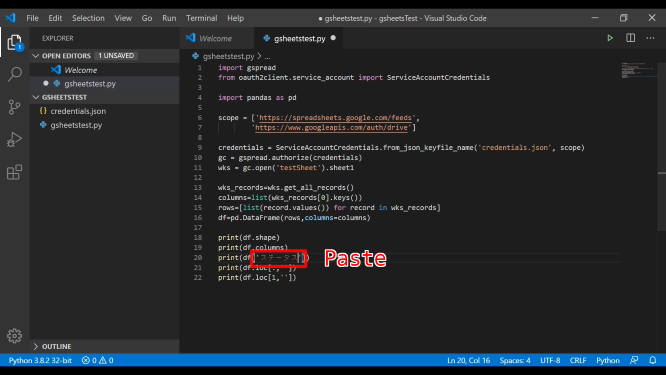
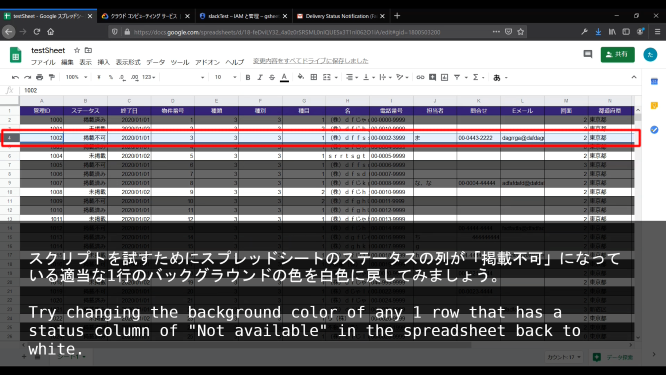
適当に列名を選んでコピー&ペーストしてその列の情報を確認してみましょう。
Copy and paste any column name to see the information in that column.
import gspread
from oauth2client.service_account import ServiceAccountCredentials
import pandas as pd

scope = ['https://spreadsheets.google.com/feeds',
        'https://www.googleapis.com/auth/drive']

credentials = ServiceAccountCredentials.from_json_keyfile_name('credentials.json', scope)
gc = gspread.authorize(credentials)
# ここにあなたのシート名をペーストしてください。
# Paste your sheet name here.
wks = gc.open('here').sheet1

##################################
wks_records=wks.get_all_records()

columns=list(wks_records[0].keys())
rows=[list(record.values()) for record in wks_records]
df=pd.DataFrame(rows,columns=columns)

print(df.shape)
print(df.columns)
print(df['ステータス'])
print(df.loc[:,'管理ID'])
print(df.loc[1,'終了日'])
#################################
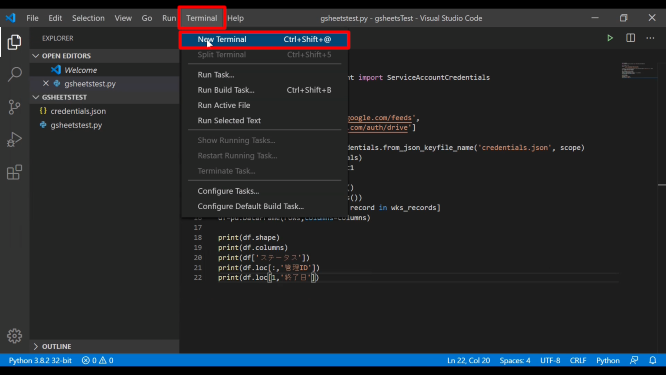
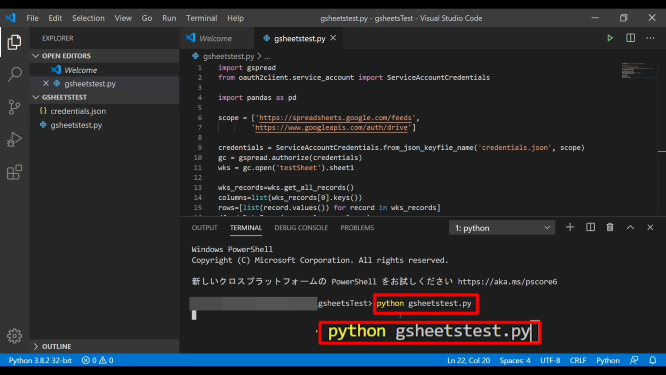
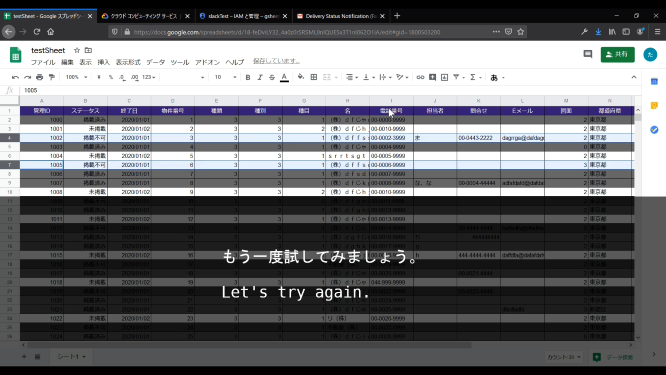
このスクリプトを保存して、Terminalを開いて、「python gsheetstest.py」と入力して実行し、その挙動を確認してみましょう。
Save this script, open Terminal, type [python gsheetstest.py] and run it to see how it behaves.
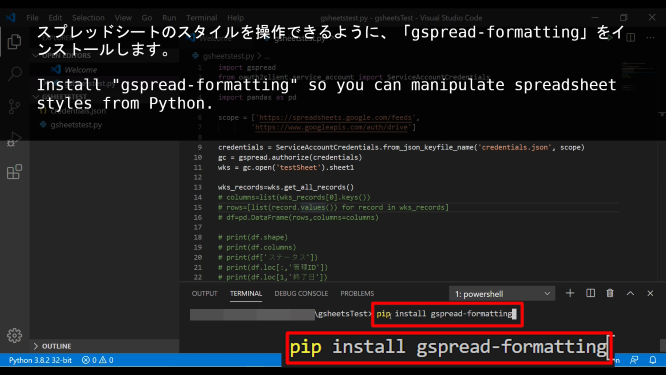
# インポートすることを忘れずに。
# Don't forget to import it.
from gspread_formatting import *
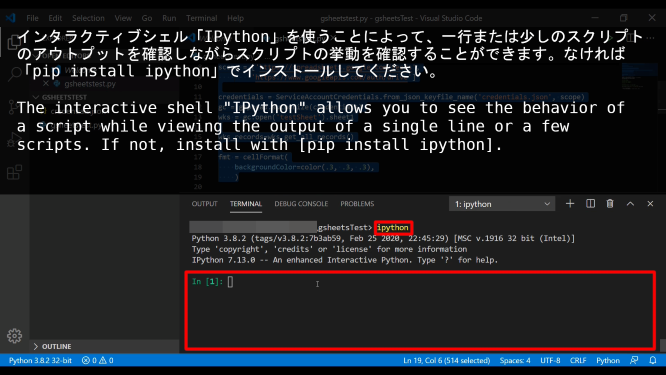
pip install ipython
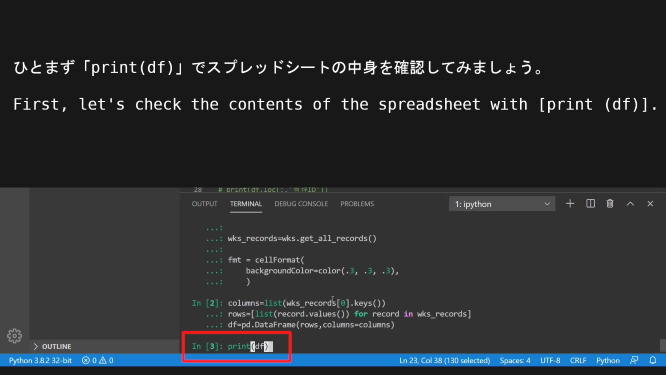
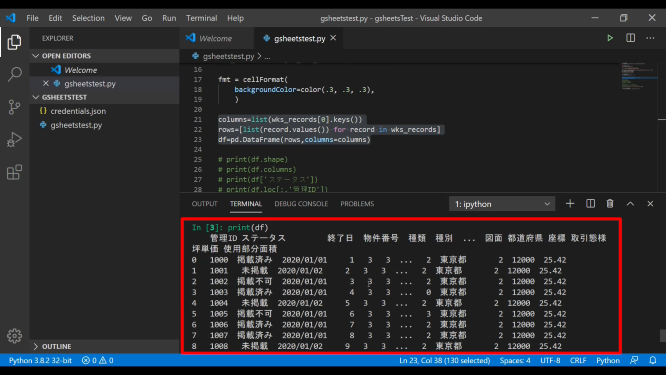
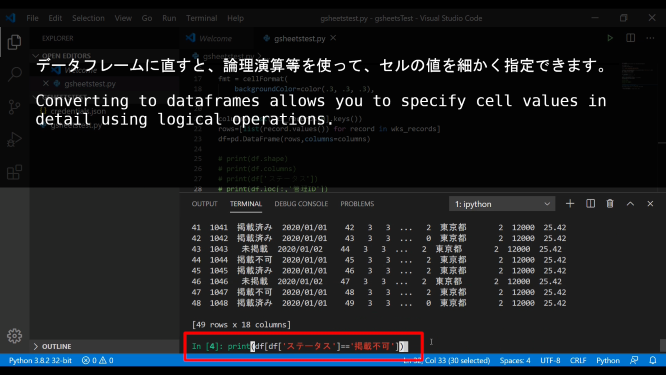
print(df)
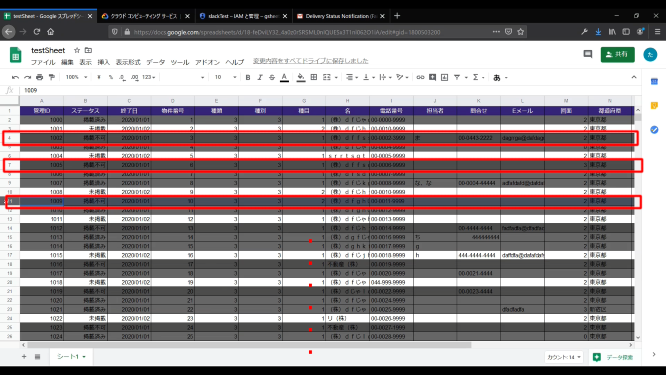
print(df[df['ステータス']=='掲載不可'])
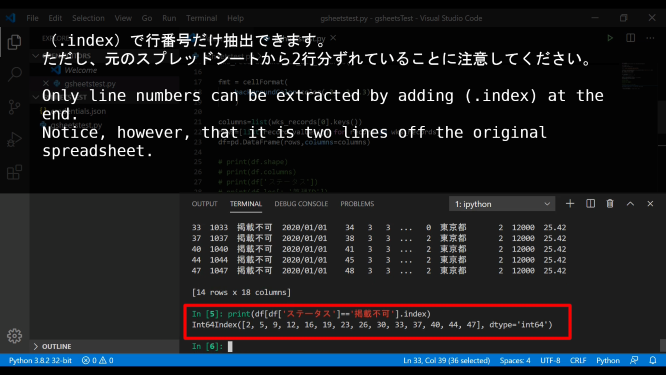
print(df[df['ステータス']=='掲載不可'].index)
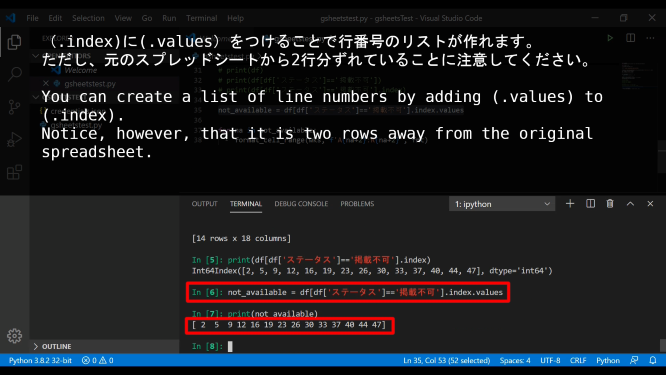
not_available = df[df['ステータス']=='掲載不可'].index.values
print(not_available)
for na in not_available:
print(f'A{na+2}:R{na+2}')
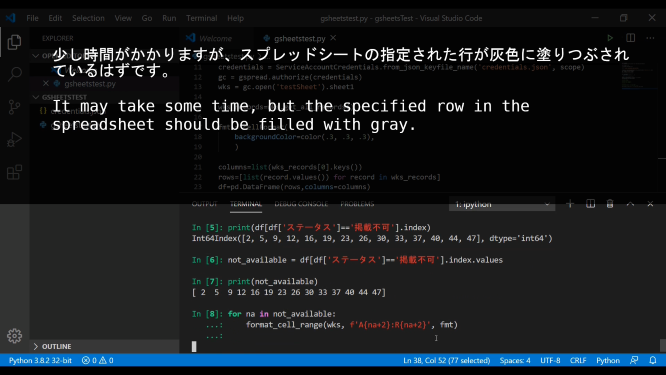
for na in not_available:
    format_cell_range(wks, f'A{na+2}:R{na+2}', fmt)
gsheetstest.py
import gspread
from oauth2client.service_account import ServiceAccountCredentials
import pandas as pd
from gspread_formatting import *
scope = ['https://spreadsheets.google.com/feeds',
'https://www.googleapis.com/auth/drive']
credentials = ServiceAccountCredentials.from_json_keyfile_name('credentials.json', scope)
gc = gspread.authorize(credentials)
wks = gc.open('testSheet').sheet1
wks_records=wks.get_all_records()
fmt = cellFormat(
backgroundColor=color(.3, .3, .3),
)
columns=list(wks_records[0].keys())
rows=[list(record.values()) for record in wks_records]
df=pd.DataFrame(rows,columns=columns)
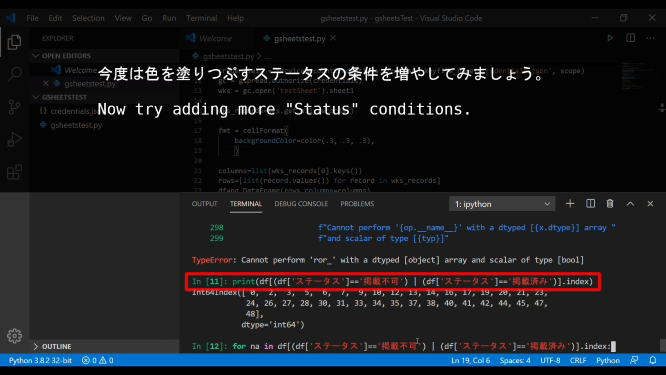
not_available = df[(df['ステータス']=='掲載不可') | (df['ステータス']=='掲載済み')].index.values
for na in not_available:
format_cell_range(wks, f'A{na+2}:R{na+2}', fmt)
次回もPythonスクリプトで各APIにアクセスして、スプレッドシートやSlackの自動化にチャレンジしていきたいと思います。
Next time, we'll also try to automate spreadsheets and Slack by accessing each API with Python scripts.