Published Date : 2020年3月30日16:25
【Part4】Djangoで簡単なブログを作ろう
【Part 4】Let's create a simple blog with Django
This blog has an English translation
YouTubeにアップした動画、「【Django】Part 4 - Let's create a simple blog with Django : Djangoで簡単なブログを作ろう」の補足説明の記事です。
Here's a little more about the "【Django】Part 4 - Let's create a simple blog with Django : Djangoで簡単なブログを作ろう" video I uploaded to YouTube.
この動画を作った理由は、初期のブログ記事にある「Djangoのシンプルなブログシリーズ」を動画にしてみたらどうなるか試してみたかったからです。
The reason I made this video is because I wanted to see what it would look like if I turned my early blog post "Django's simple blog series" into a video.
同時に、暫くPythonから遠ざかっていたので、Djangoも含めた復習のつもりで動画とこのブログ記事を作成しました。
At the same time, having been away from Python for a while, I wanted to relearn Python, including Django, so I created this video and blog post.
シリーズの第4部の内容は、 ①記事の個別ページの内容を表示できるようにする。 ②存在しないページは404エラーを表示させる。 ③Navbarをページ上部に表示させる。
The contents of the series Part 4 are as follows. ① Allows the content of individual pages of articles to be displayed. ② Non-existent pages will display a 404 error. ③ Display the Navbar at the top of the page.
全体の説明は動画に任せるとして、補足が必要だろうと思われる部分を説明していきます。
I'll leave the entire explanation to the video, but I'll explain the parts that I think need to be supplemented.
目次
Table of Contents
記事の個別ページの内容を表示できるようにする
Allows the content of individual pages of articles to be displayed
それでは個別の記事を一つのHTMLファイルだけで表示できるようにしてみましょう。
Let's make it possible to display individual articles in a single HTML file.
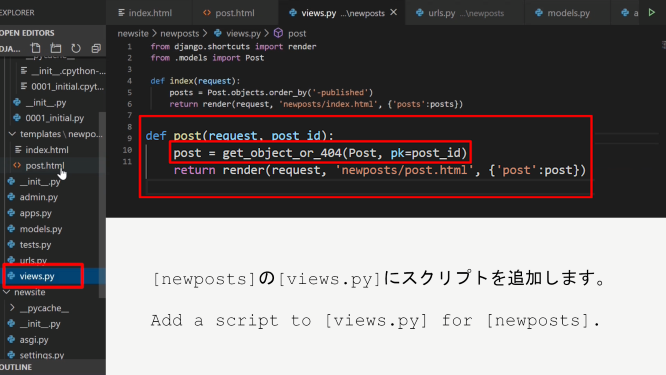
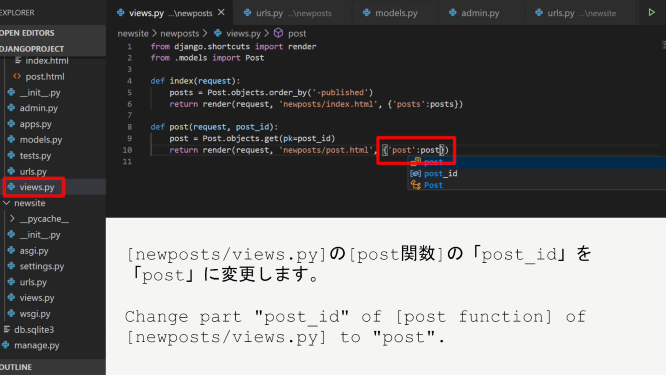
newposts/views.py
def post(request, post_id):
    post = Post.objects.get(pk=post_id)
    return render(request, 'newposts/post.html', {'post':post})


templates/newposts/posts.html
    <div class="container text-center" style="padding:30px;">
        <h1>{{ post.title }}</h1>
    </div>
    <div class="container bg-light" style="padding: 30px;">
        <div class="text-center">{{ post.published }}</div>
        <br><br>
        <div class="container" style="width: 60%;">
            <img src={{ post.image.url }} class="img-fluid rounded" />
        </div>
        <br><br>
        <p>{{ post.body }}</p>
        <br><br>
    </div>
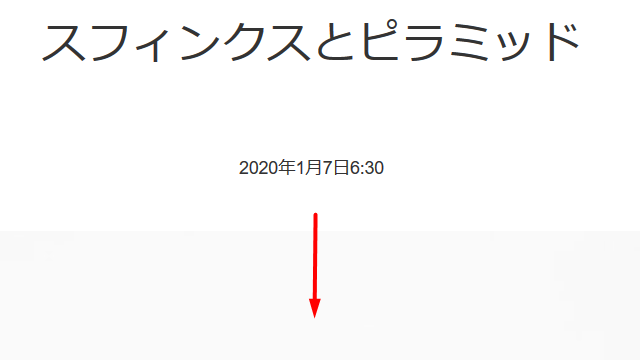
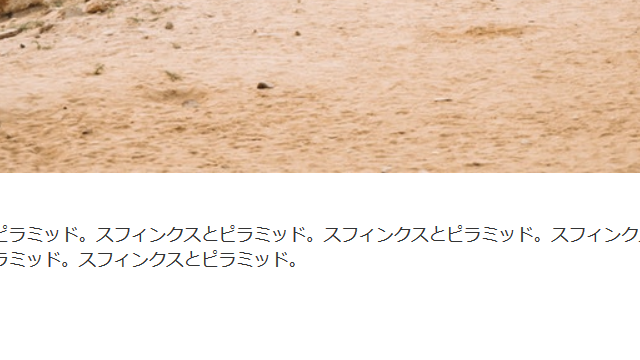
ここで、二つのファイルを保存したら、「python manage.py runserver」とターミナルかコマンドプロンプトに入力してサーバーを立ち上げます。 そして、各個人のブラウザの検索窓に「localhost:8000/newposts」と入力して投稿リストから記事のタイトルをクリックしてみてください。 個別のページを表示できるようになっているはずです。
Now save the two files and start the server by typing [python manage.py runserver] at a terminal or command prompt. Then, type [localhost:8000/newposts] in the search window of your browser and click the title of the article from the post list. You should be able to view individual pages.

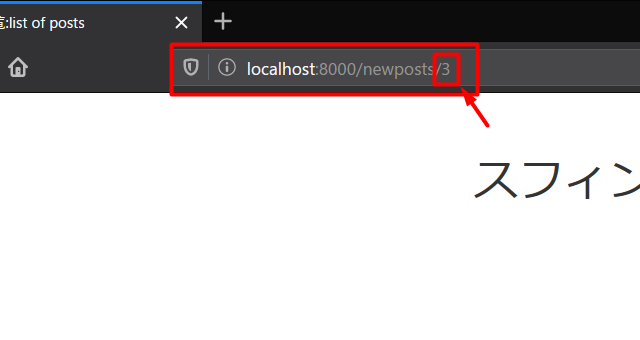
ここで、ブラウザの検索窓のURLの末尾に前回確認したページ毎に割り当てられたID数字が確認できます。 記事は3つしか作っていないので、試しにこの箇所に「4」と入力してENTERを押してみましょう。
Here, you can see the ID number assigned to each page you checked last time at the end of the URL in the search window of the browser. By the way, we have only written 3 articles. What happens if you type "4" here and hit enter? Let's try it.
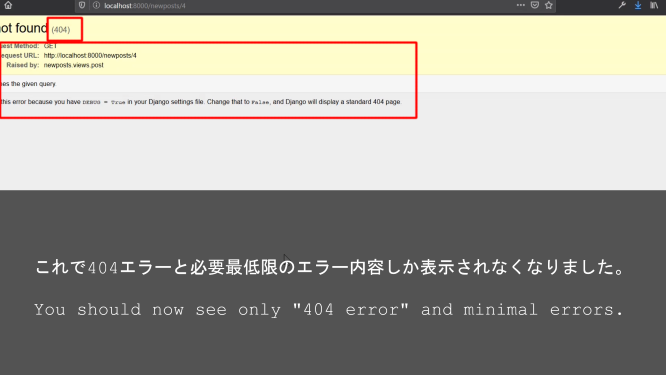
結果は以下です。次のセクションで以下の問題を解決しましょう。
The results are as follows. Resolve the following issues in the next section.

存在しないページは404エラーを表示させる
Non-existent pages will display a 404 error
それではエラーの際に余計な情報を表示させないように「404エラー」だけを表示させるようにしましょう。
Now let's modify the script to show only "404 Error" so that it doesn't show the information you don't want to show when an error occurs.
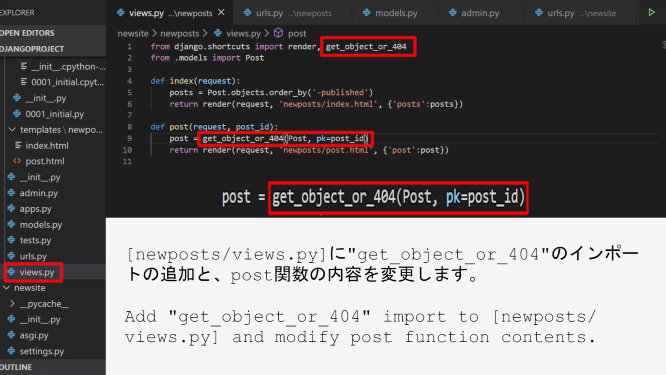
newposts/views.py
def post(request, post_id):
    post = get_object_or_404(Post, pk=post_id)
    return render(request, 'newposts/post.html', {'post':post})
Navbarをページ上部に表示させる
Display the Navbar at the top of the page
ここからは各個人の好みですが、ブログらしくするために、ページ上部にナビバーを表示させてみます。
From here on out, it's up to each individual, but to make it more like a blog, let's put a navigation bar at the top of the page.
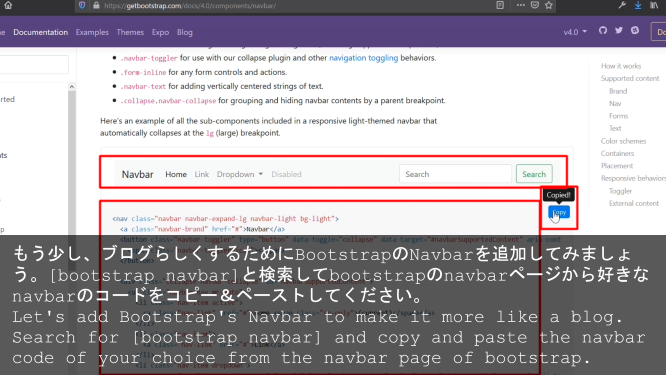
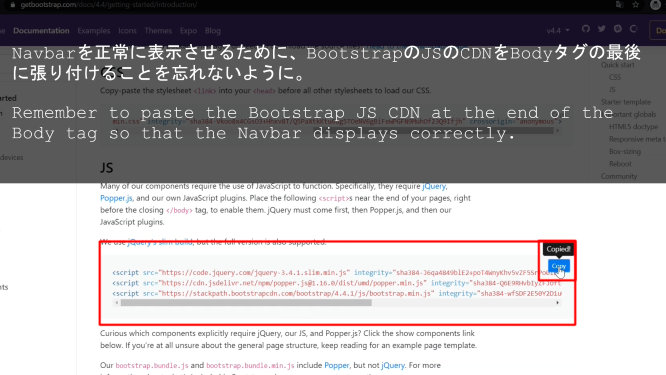
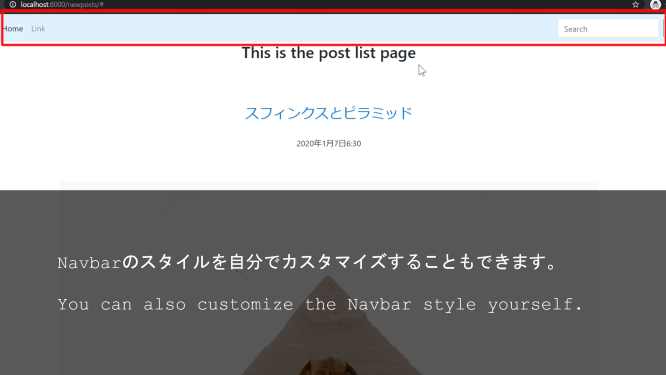
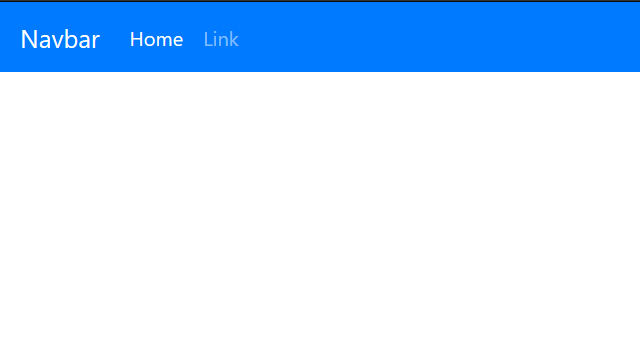
あとはNavbarの色やボタンの配置等、細かい部分を各個人の好みでカスタマイズしてください。
Then, please customize the details such as the Navbar color and the arrangement of buttons to each individual's taste.
では次回は個別のページにもNavbarを設置する。 記事の本文を読みやすいように調整する。 紹介ページ等を増やして、さらにブログらしくしていきます。
Next time you will place the Navbar on each page. Next, adjust the body of the article for readability. Also, to make it more blog-like, let's add [About page] and more to the Django application.
この記事のさらに詳しい説明は初期のブログ記事を参考にしてください。
For more information on how to upload your blog to CORESERVER and more on the content of this article, see my previous blog posts.