Published Date : 2020年3月17日21:16
【Part2】Shotcutで簡単な動画編集をしてみよう - Shotcutの基本操作
【Part 2】Let's do a simple video editing with Shotcut - Basic Operation of Shotcut
This blog has an English translation
YouTubeにアップした動画、「Shotcutで動画編集 簡単なチュートリアル動画を作ろう - Shotcutの基本操作」の補足説明の記事です。
Here's a little more about the "Shotcut Video Editing Make a simple tutorial video - Basic Operation of Shotcut" video I uploaded to YouTube.
無料の動画編集ソフトShotcutを使って動画を編集してみようというシリーズです。
Edit videos with the free video editing software Shotcut.
Blender Video Editingモードのレンダリング時間に不満を覚え、別のフリーの動画編集ソフトを探していました。 そして色々と試して、Shotcutがレンダリング時間が速く(自分のPCだと)、UI(以前使っていたAdobe Premierer Proと似ています)と操作性が良いと感じたので、 使用する動画編集ソフトをShotcutに変更しました。 そして、その操作方法を覚えた過程を共有したいと思い、この動画シリーズを作成しました。
I was unhappy with the rendering times in Blender Video Editing mode and was looking for another free video editing software. After trying various things, I found that Shotcut's rendering time was fast (On my computer.) and the UI (It's similar to the Adobe Premiere Pro I used to use.) was good, so I changed the video editing software to Shotcut. I created this video series to share with you how I learned to use Shotcut.
第二回目は、Shotcutの基本的な操作方法を説明していきます。 とても使いやすい上に、様々な機能が備わっているうえに無料ということで素晴らしいソフトです。
In Part 2, I'll explain to you the basic operation of Shotcut. Shotcut is very easy to use and it has many functions, but it is free, so it is wonderful software.
全体の説明は動画に任せるとして、補足が必要だろうと思われる部分を説明していきマウス。
I'll leave the entire explanation to the video, but I'll explain the parts that I think need to be supplemented.
目次
Table of Contents
実践に必要なだけのソフト操作 Software operations necessary for practical use |
実践に必要なだけの動画編集操作 Video editing operations required for practical use |
ページの最後へ Go to the end of the page. |
実践に必要なだけのソフト操作
Software operations necessary for practical use
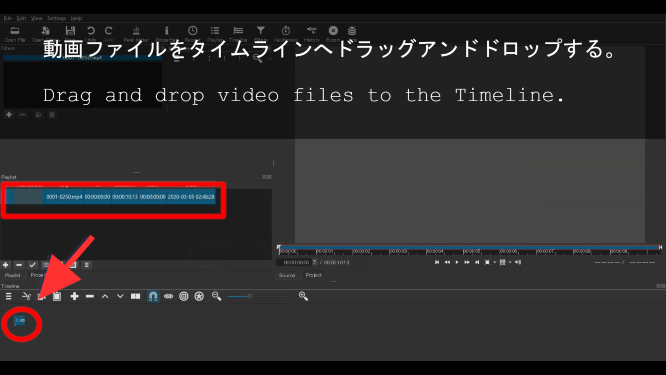
前回の続きからスタートです。まずタイムラインウィンドウにインポートしたファイルをドラッグアンドドロップします。
It starts from the continuation of the last time. Drag and drop the imported file into the Timeline window.
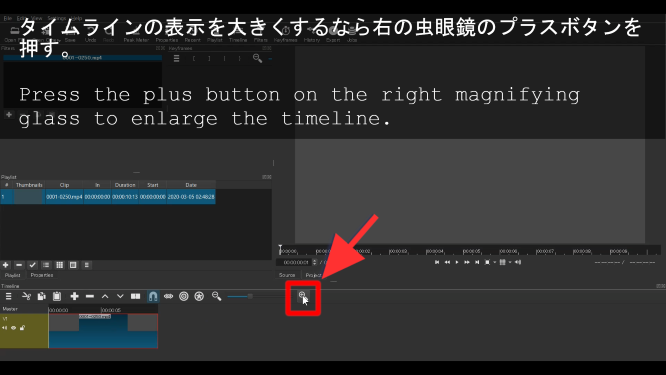
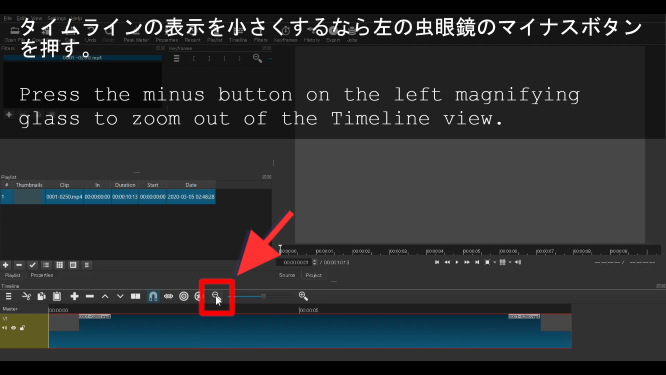
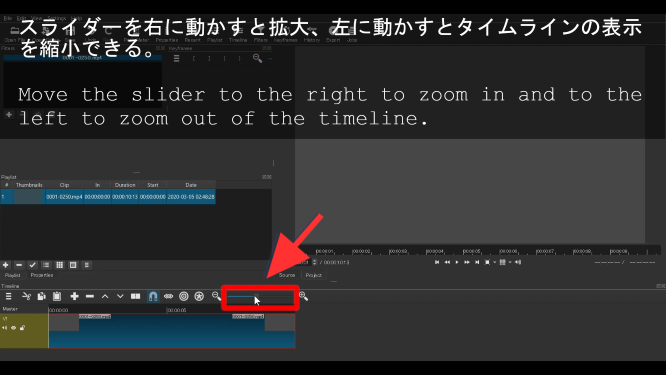
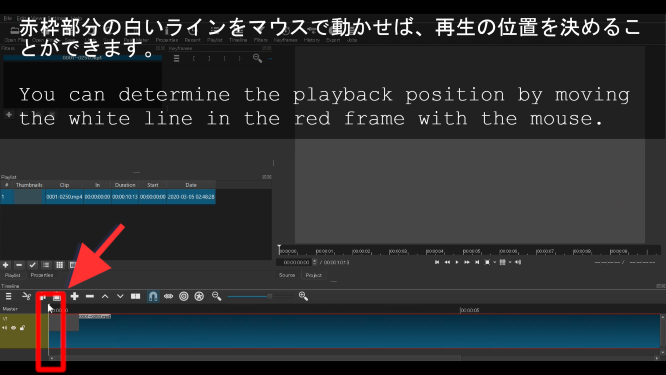
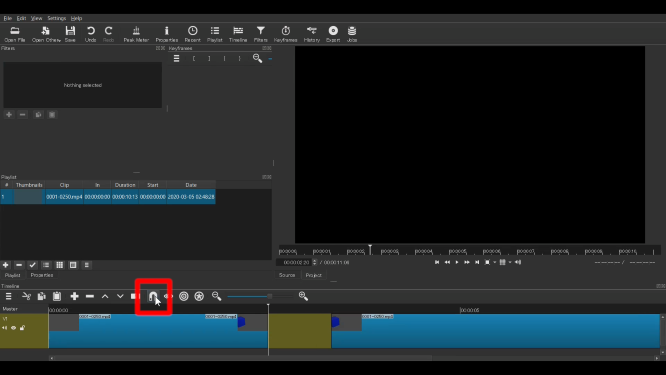
タイムライン上の表示が小さすぎるとカット編集等がやりにくくなりますので、適切な大きさの表示に調整します。
If the display on the timeline is too small, it will be difficult to edit the cut, so adjust the display to an appropriate size.
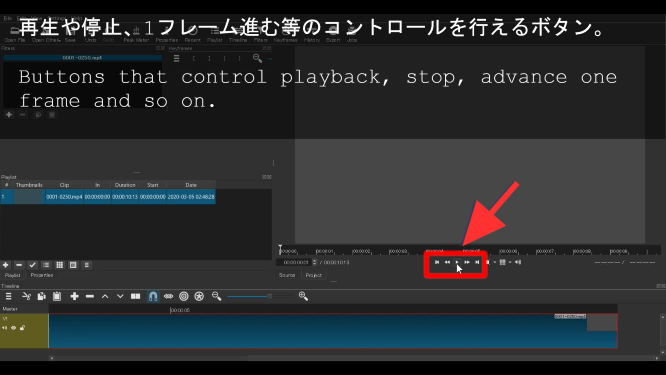
[<</>>]を幾つかクリックすると早送りや早戻しが可能になります。
If you click [<</>>] for several, you can fast forward or fast reverse.
[▯◁/▷▯]をクリックすると動画の再生開始場所が始めや終わりにジャンプします。
Click [▯◁/▷▯] to jump to the start or end of the movie.
横にある二つのボタンはプレビュー画面のズーム機能とグリッドを表示させる機能です。
The two buttons on the side are the zoom function of the preview screen and the function to display the grid.
実践に必要なだけの動画編集操作
Video editing operations required for practical use
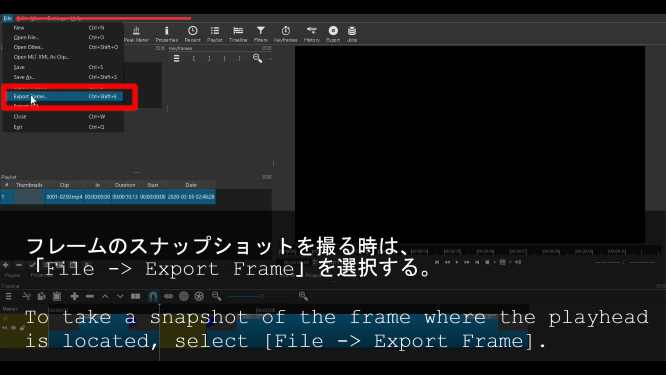
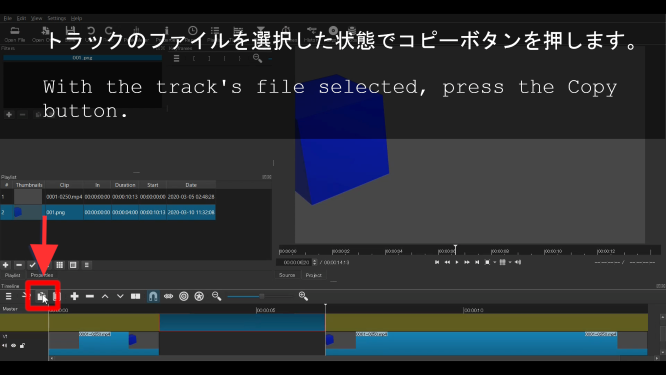
「CTRL+SHIFT+E」のショートカットキーを使ってもフレームのキャプチャができます。
You can also use the [CTRL+SHIFT+E] shortcut keys to capture frames.
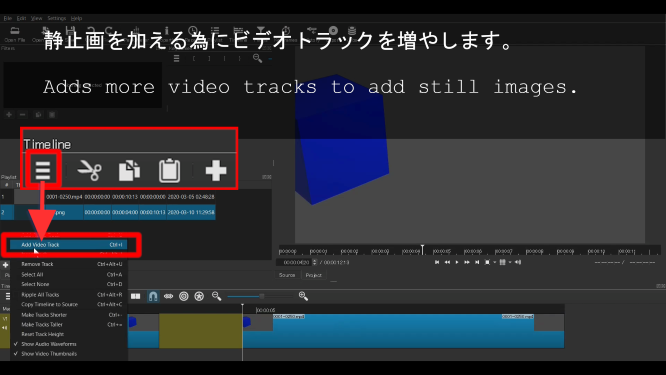
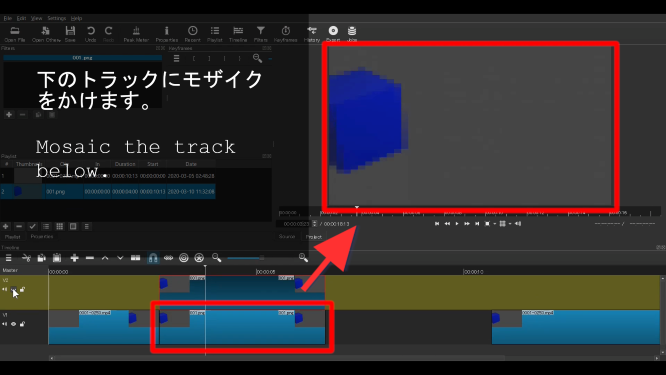
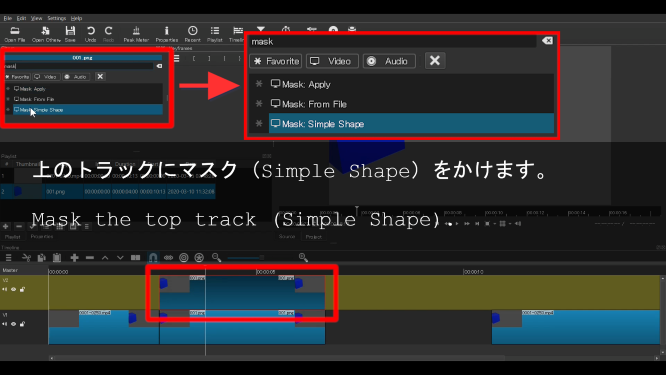
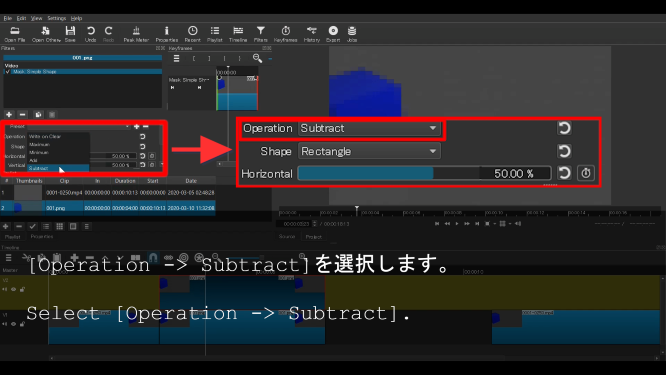
上と下のトラックに同じ動画レイヤーを重ねます。 原理としては、下のトラックにある動画レイヤーは上のトラックにある動画レイヤーに隠されて表示はされません。 しかし、上のトラックの動画にMaskをかけてSubtractにするとMaskがかかった部分のみ下のトラックの動画レイヤーが表示されます。 これを利用して、表示を隠したい部分のみにモザイクをかけます。 同じ動画が重なっているので、動画が激しく動かなければ、常にそのMaskをかけた場所にモザイクがかかる仕組みです。
Layer the same video layer on top and bottom tracks. The principle is that the video layer in the lower track is hidden by the video layer in the upper track. However, if Mask is applied to the video of the upper track and subtract is applied, the video layer of the lower track is displayed only in the part masked. Using this mechanism, only the parts you want to hide will be mosaicked. If the video does not move too much because the same video overlaps at the same playback point, the masked areas will always become mosaic.

次回はTutorial動画等で必要な注釈の表現をするため、GIMPを使ってシーンのアセットを作る作業と、それをShotcutにインポートして編集する作業方法を説明します。
Next time, I will show you how to create an asset of a scene using GIMP and how to import it into Shotcut and edit it in order to express necessary annotations in Tutorial videos, etc.