Published Date : 2020年2月27日12:44
BlenderとGIMPを使った簡単なTutorial用動画編集 Part2
Part 2 - Easy Tutorial video editting using Blender and GIMP
This blog has an English translation
BlenderとGIMPを使って簡単なTutorial動画を作ってみましょう。
Create a simple tutorial video using Blender and GIMP.
これらのソフトは全て無料で使用できます。さらにMac、Windows、Linuxどれでも動きます。
You can use all of these software for free. In addition, all of these run on Mac, Windows, or Linux.
無駄に高いソフトを購入しなくても、簡単な動画ならこれで十分です。
You don't have to buy expensive software. This is enough for simple videos.
今回は[Part 7 - first half - Adding sound to apps created with Processing]を作った時の映像の一部を見せながら説明していきます。
I will explain part 2 this time by showing part of the video when I made [Part 7 - first half - Adding sound to apps created with Processing].
目次
Table of Contents
スピードコントロール Speed Control |
VLCとBlenderでスナップショットを取りGIMPで編集する Take a snapshot with VLC and Blender and edit in GIMP |
編集した画像をBlenderで組み合わせる Combine edited images in Blender |
ページの最後へ Go to the end of the page. |
スピードコントロール
Speed Control
まずBlender Video Editingを使った動画のスピードをコントロールしていく編集の方法から説明していきます。
First, I'll explain how to use Blender Video Editing to control the speed of your video.
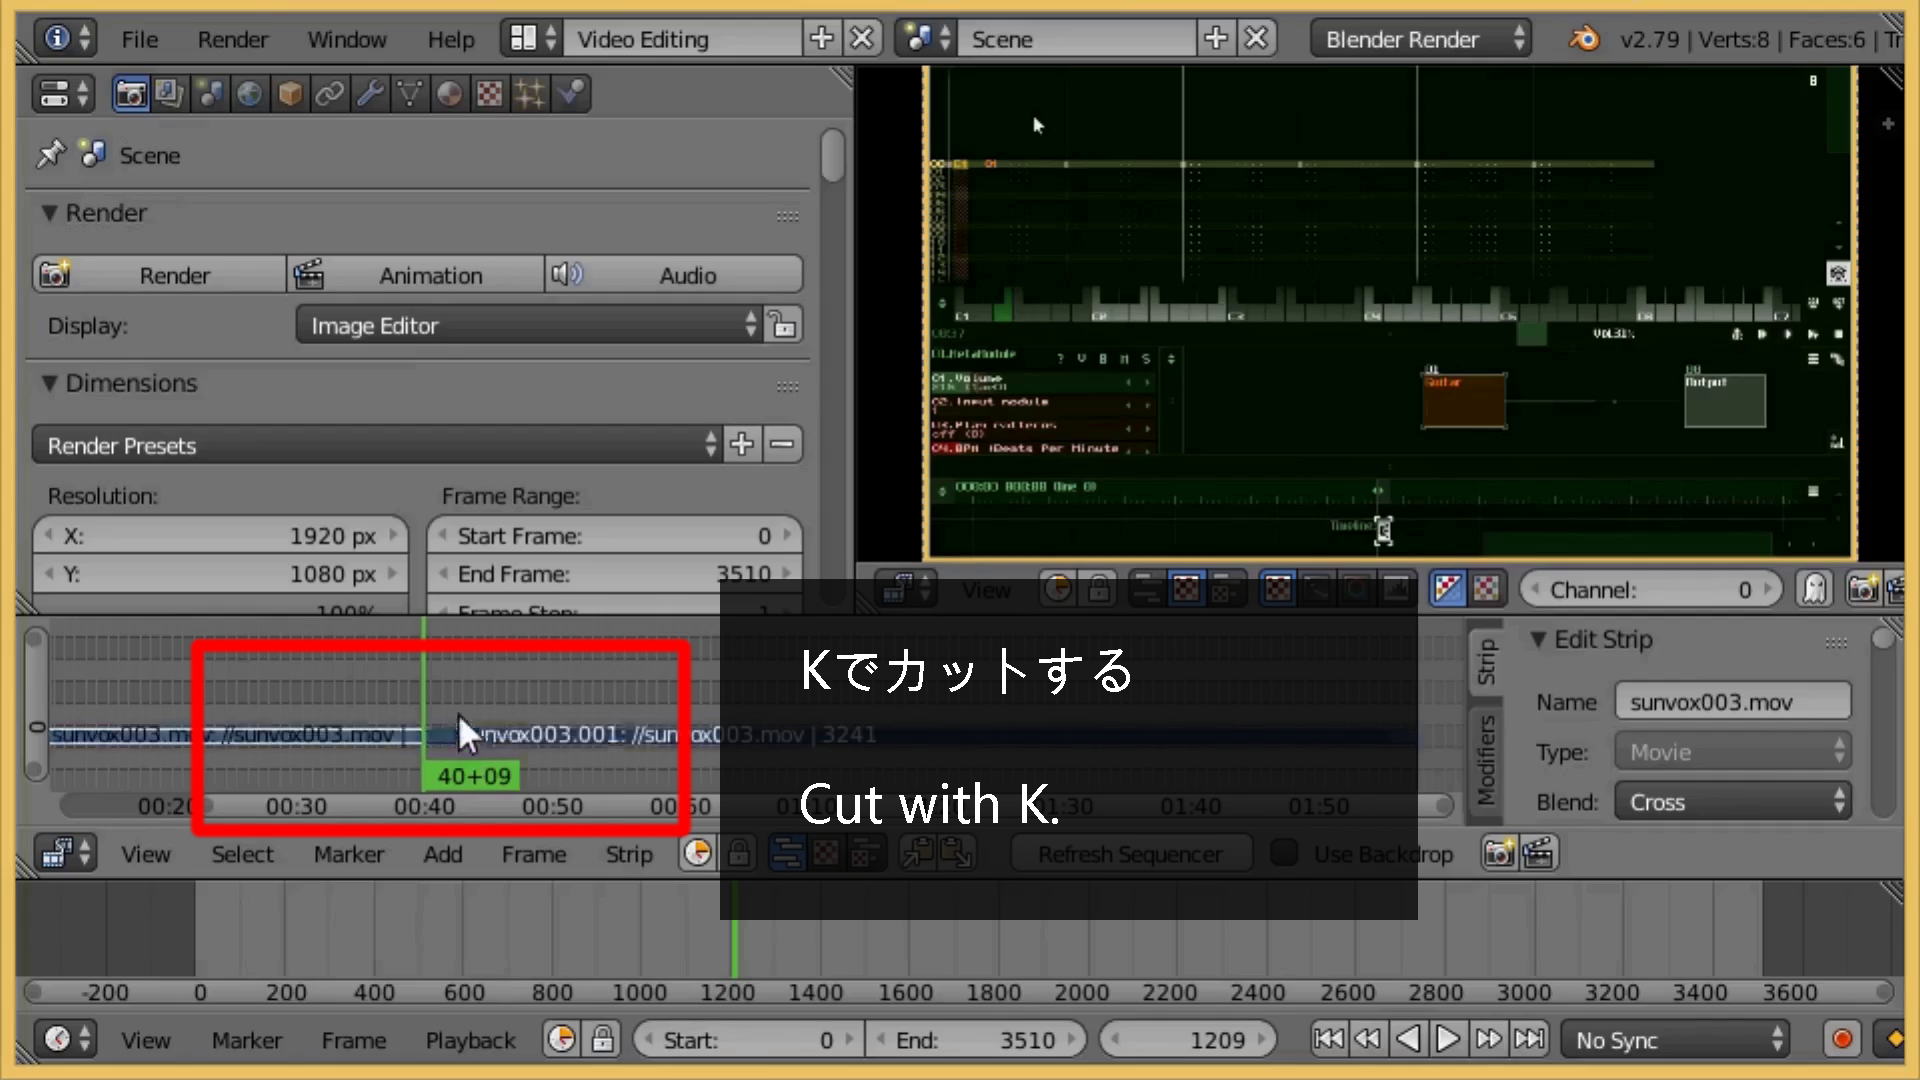
キーボードのKで動画をカットできる。
You can cut movies with K on the keyboard.
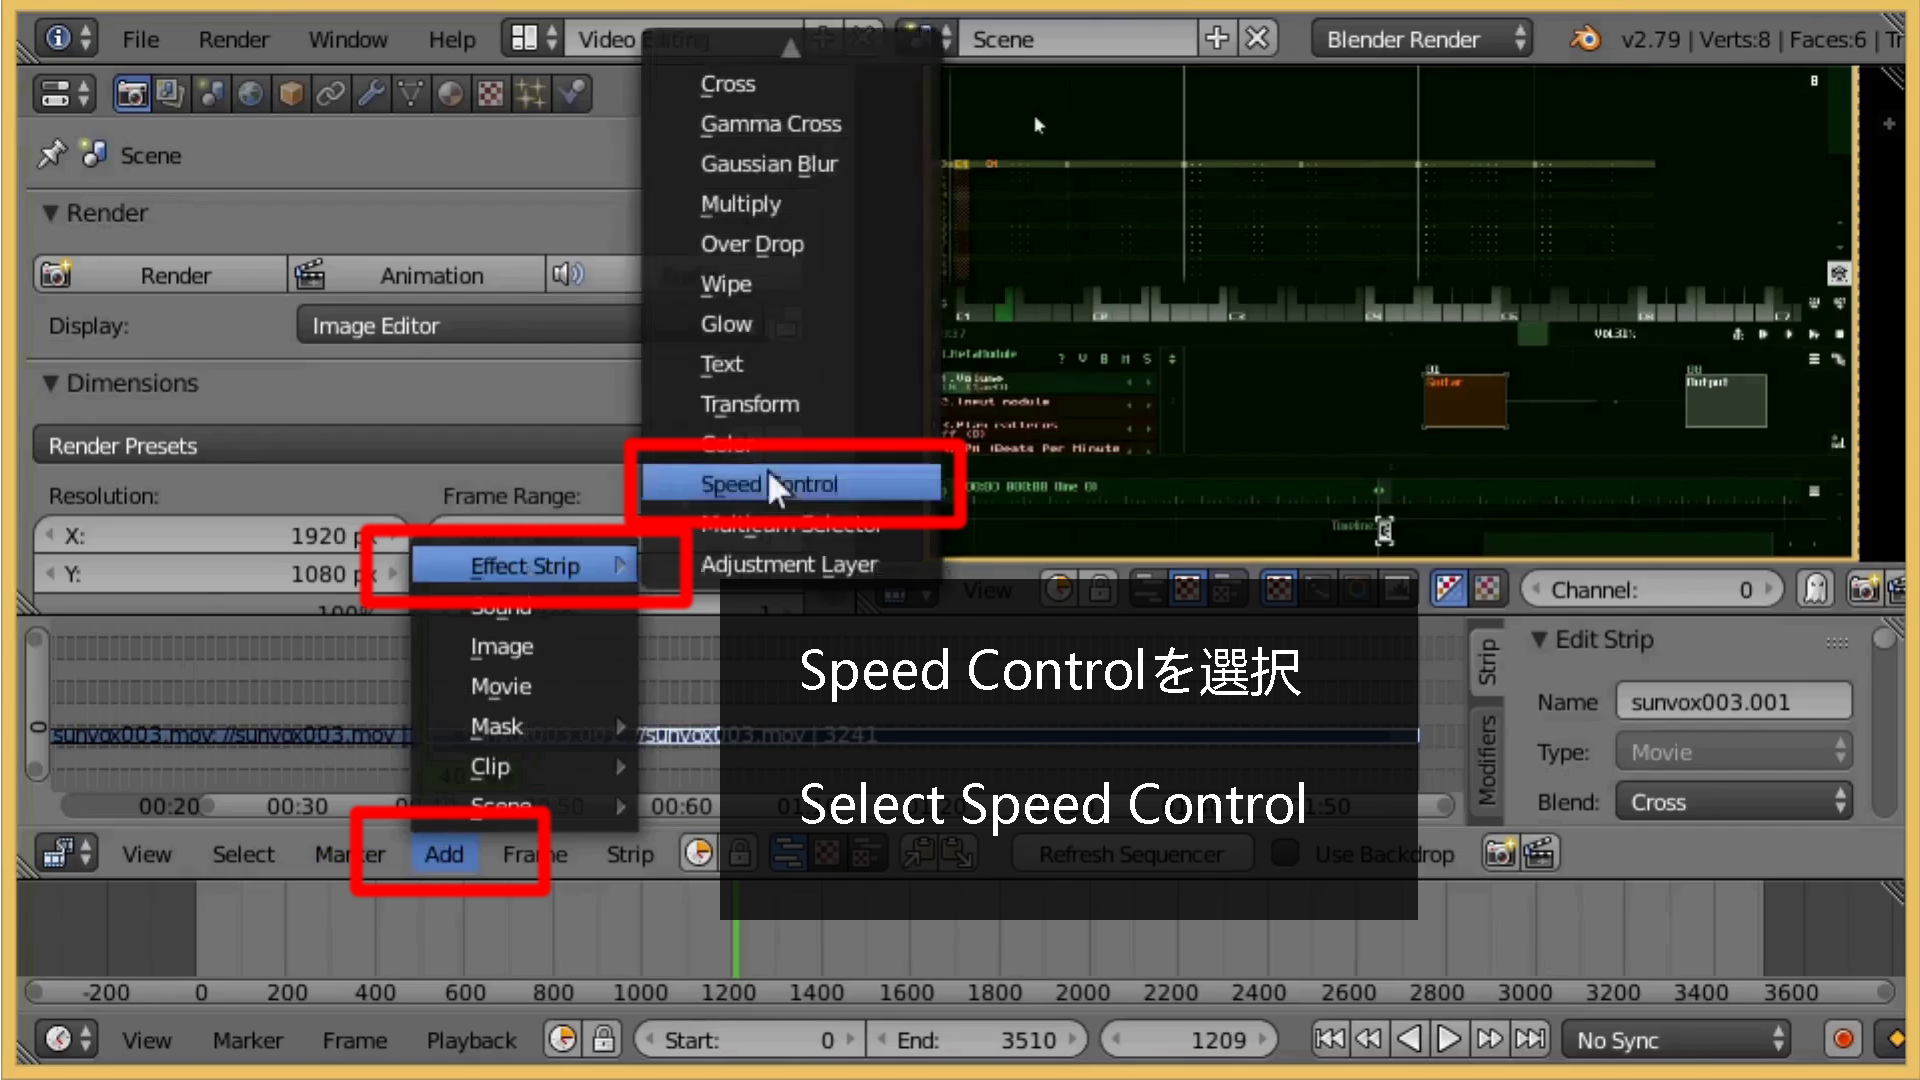
Addー>Effect Stripー>Speed Controlを選択。
Choose Addー>Effect Stripー>Speed Control.
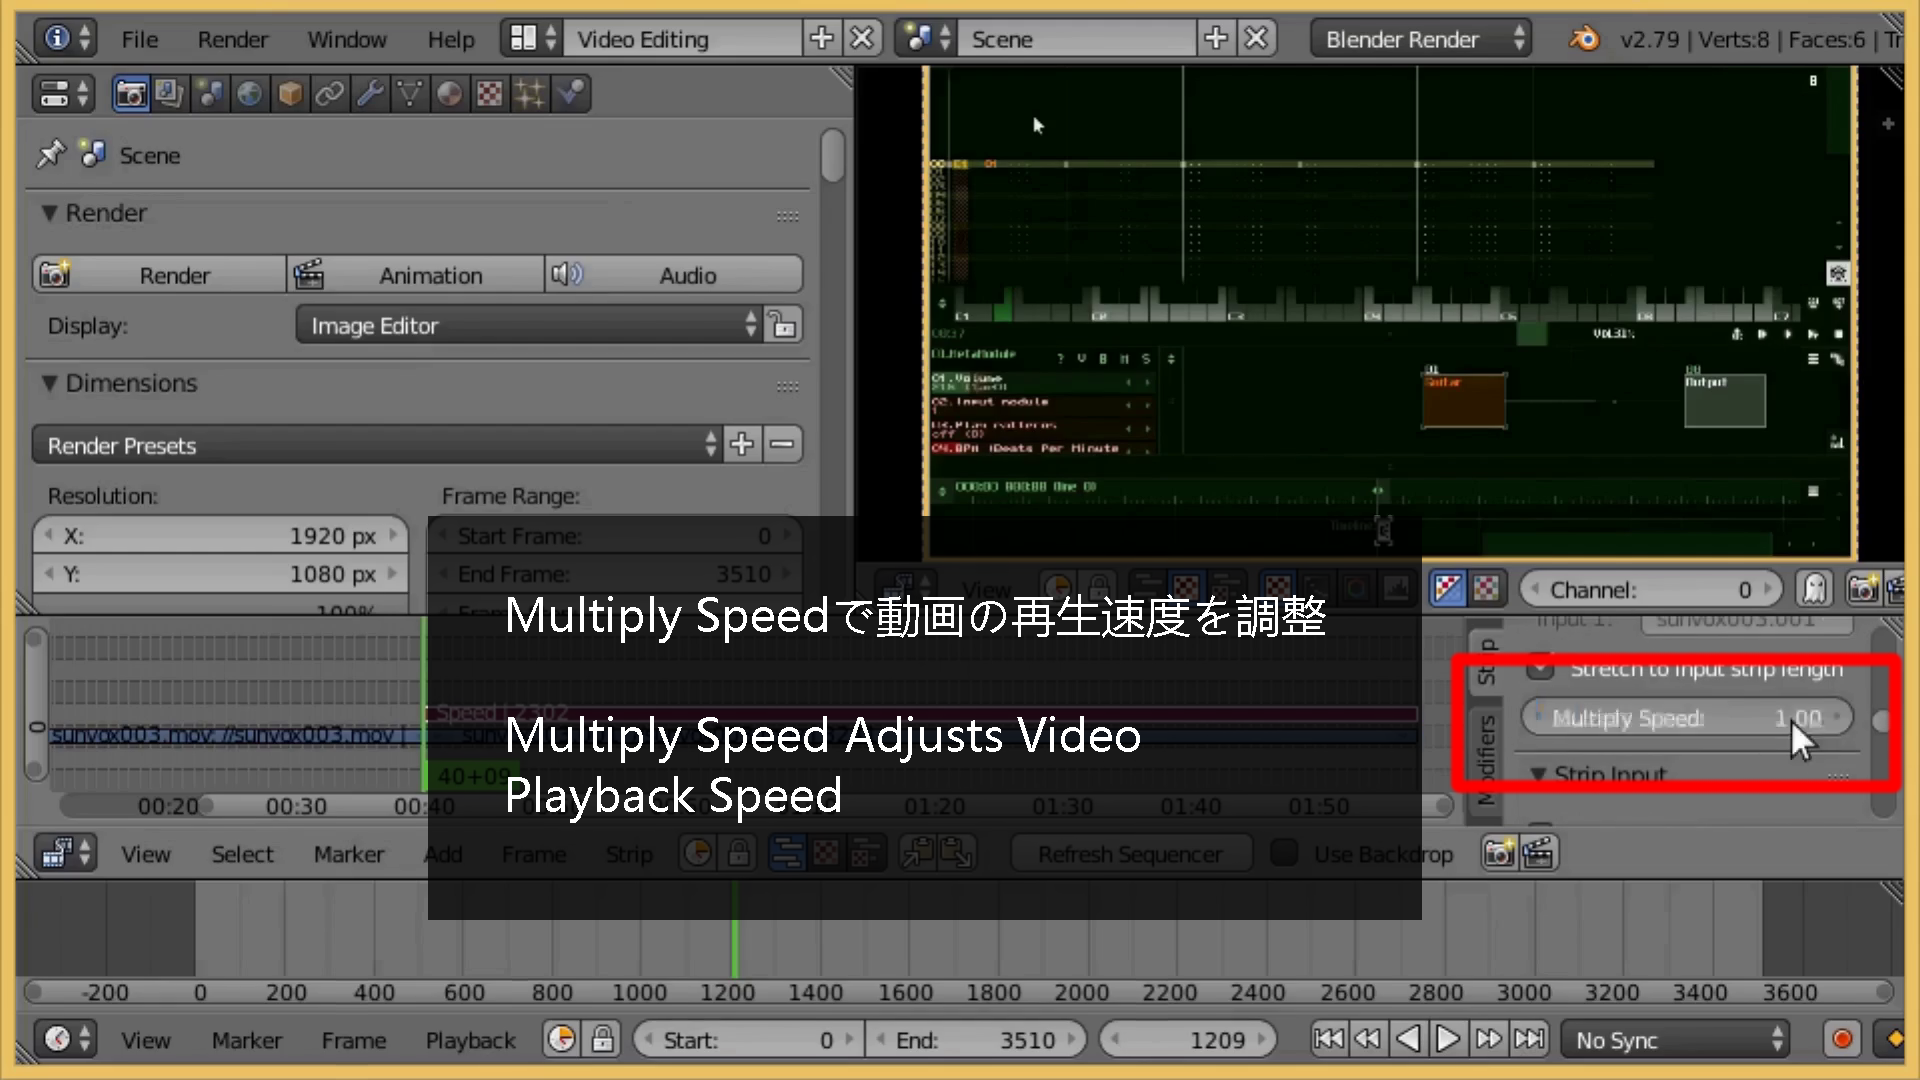
Multiply Speedで動画の再生速度を調整する。
Multiply Speed adjusts video playback speed.
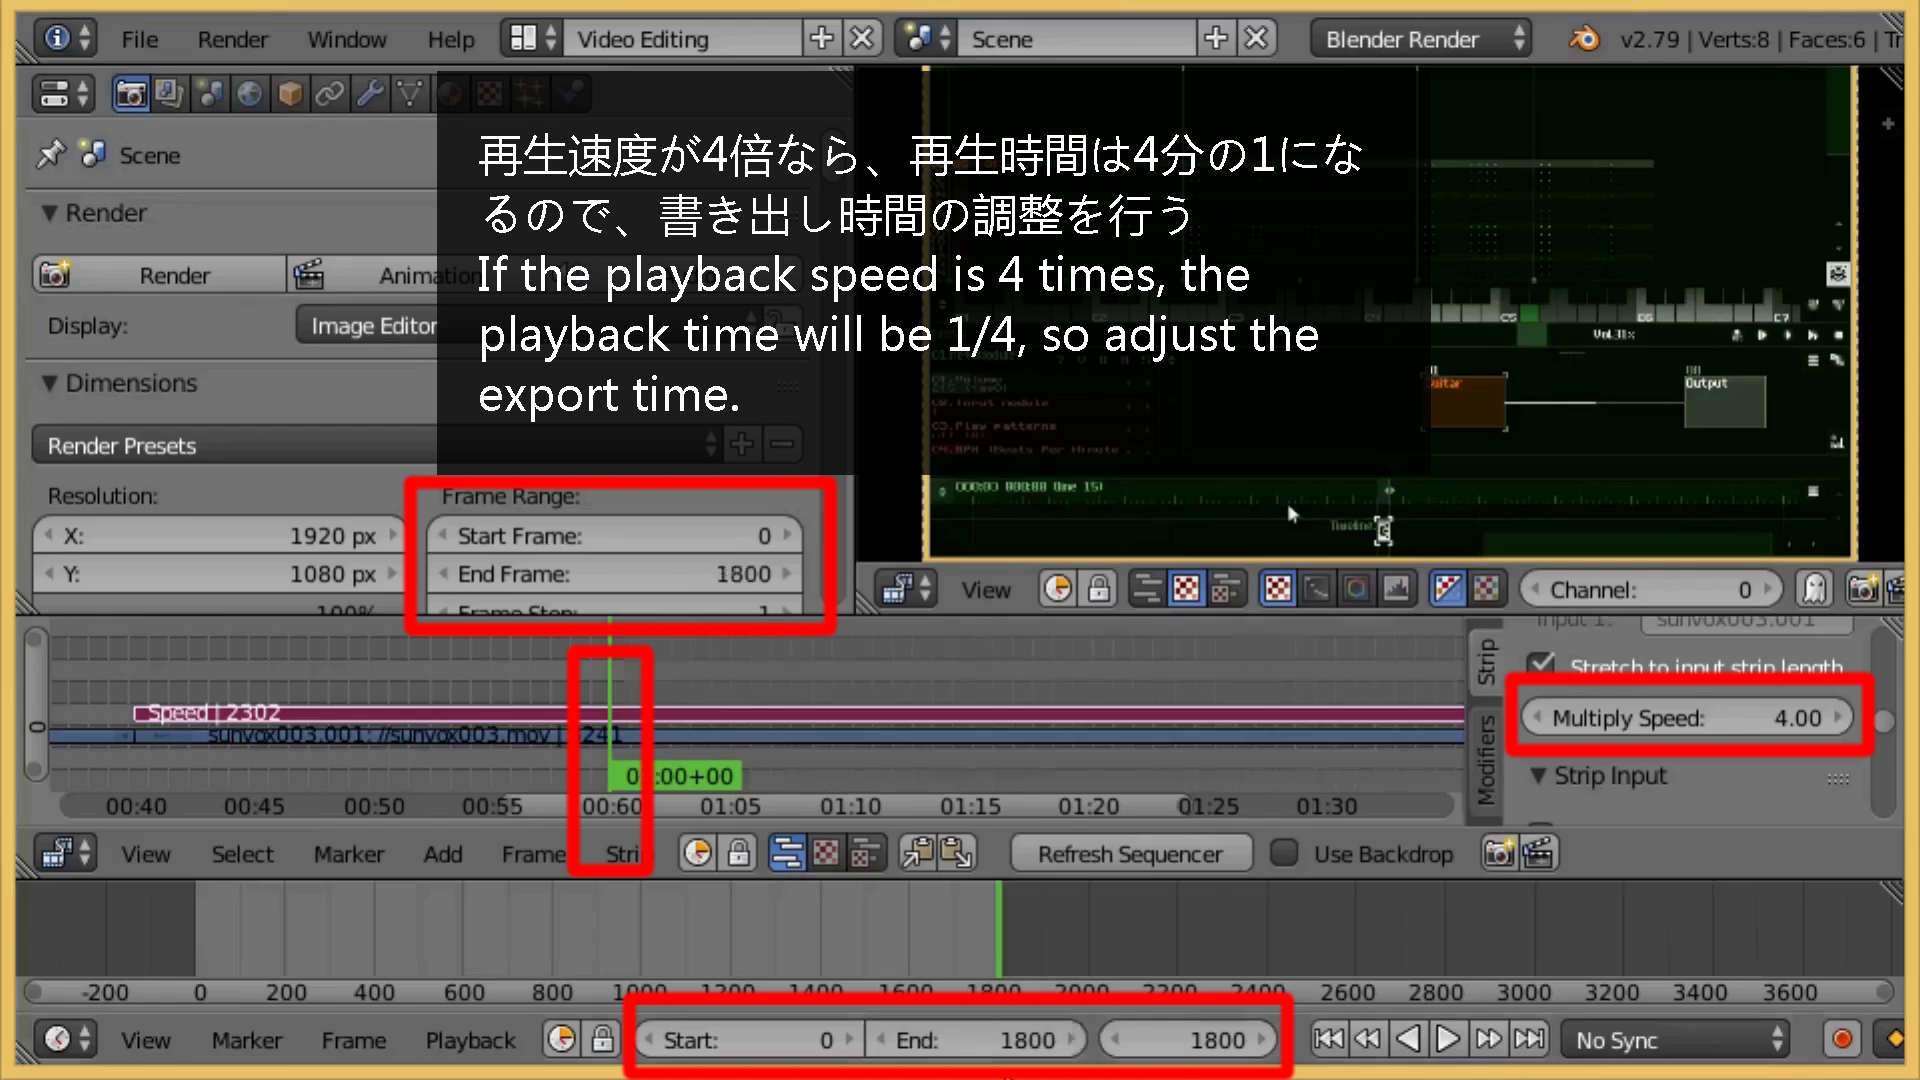
再生速度が4倍なら、再生時間は4分の1になるので、書き出し時間の調整を行う。
If the playback speed is 4 times, the playback time will be 1/4, so adjust the export time.

RenderタブのAnimationボタンを押せば、動画の書き出しが行われる。
Press the Animation button in the Render tab to export the video.
VLCとBlenderでスナップショットを取りGIMPで編集する
Take a snapshot with VLC and Blender and edit in GIMP
VLCとBlenderでスナップショットを取りGIMPで編集する方法の説明です。
Next is a description how to take a snapshot with VLC and Blender and edit in GIMP.
続いて、VlC Media Playerを用いて動画のスナップショットを撮っていく。
Next, you'll take a snapshot of the video using the VLC Media Player.
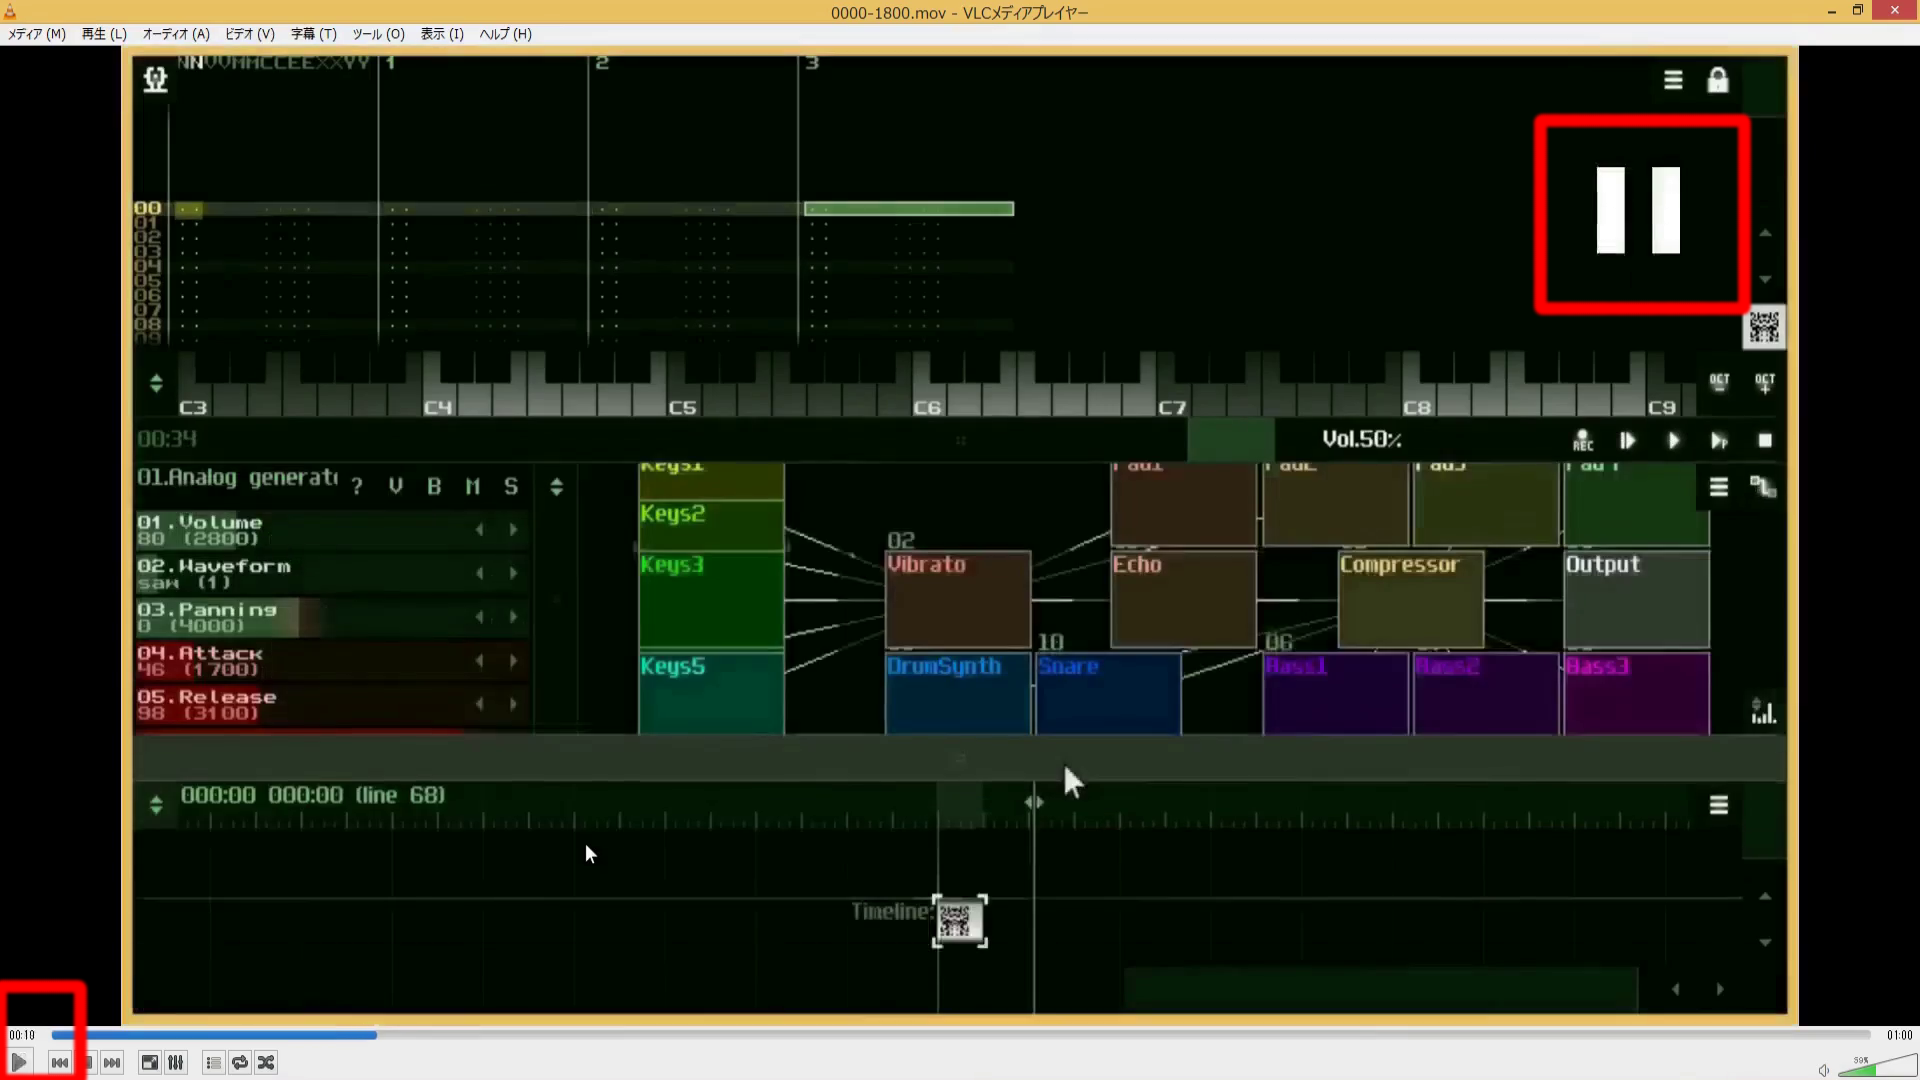
space keyや再生ボタンを押して一時停止と再生を繰り返し、説明が必要な動画のスナップショットの部分を探す。
Press the space key or play button to pause and play until you find the snapshot of the video you need to explain.
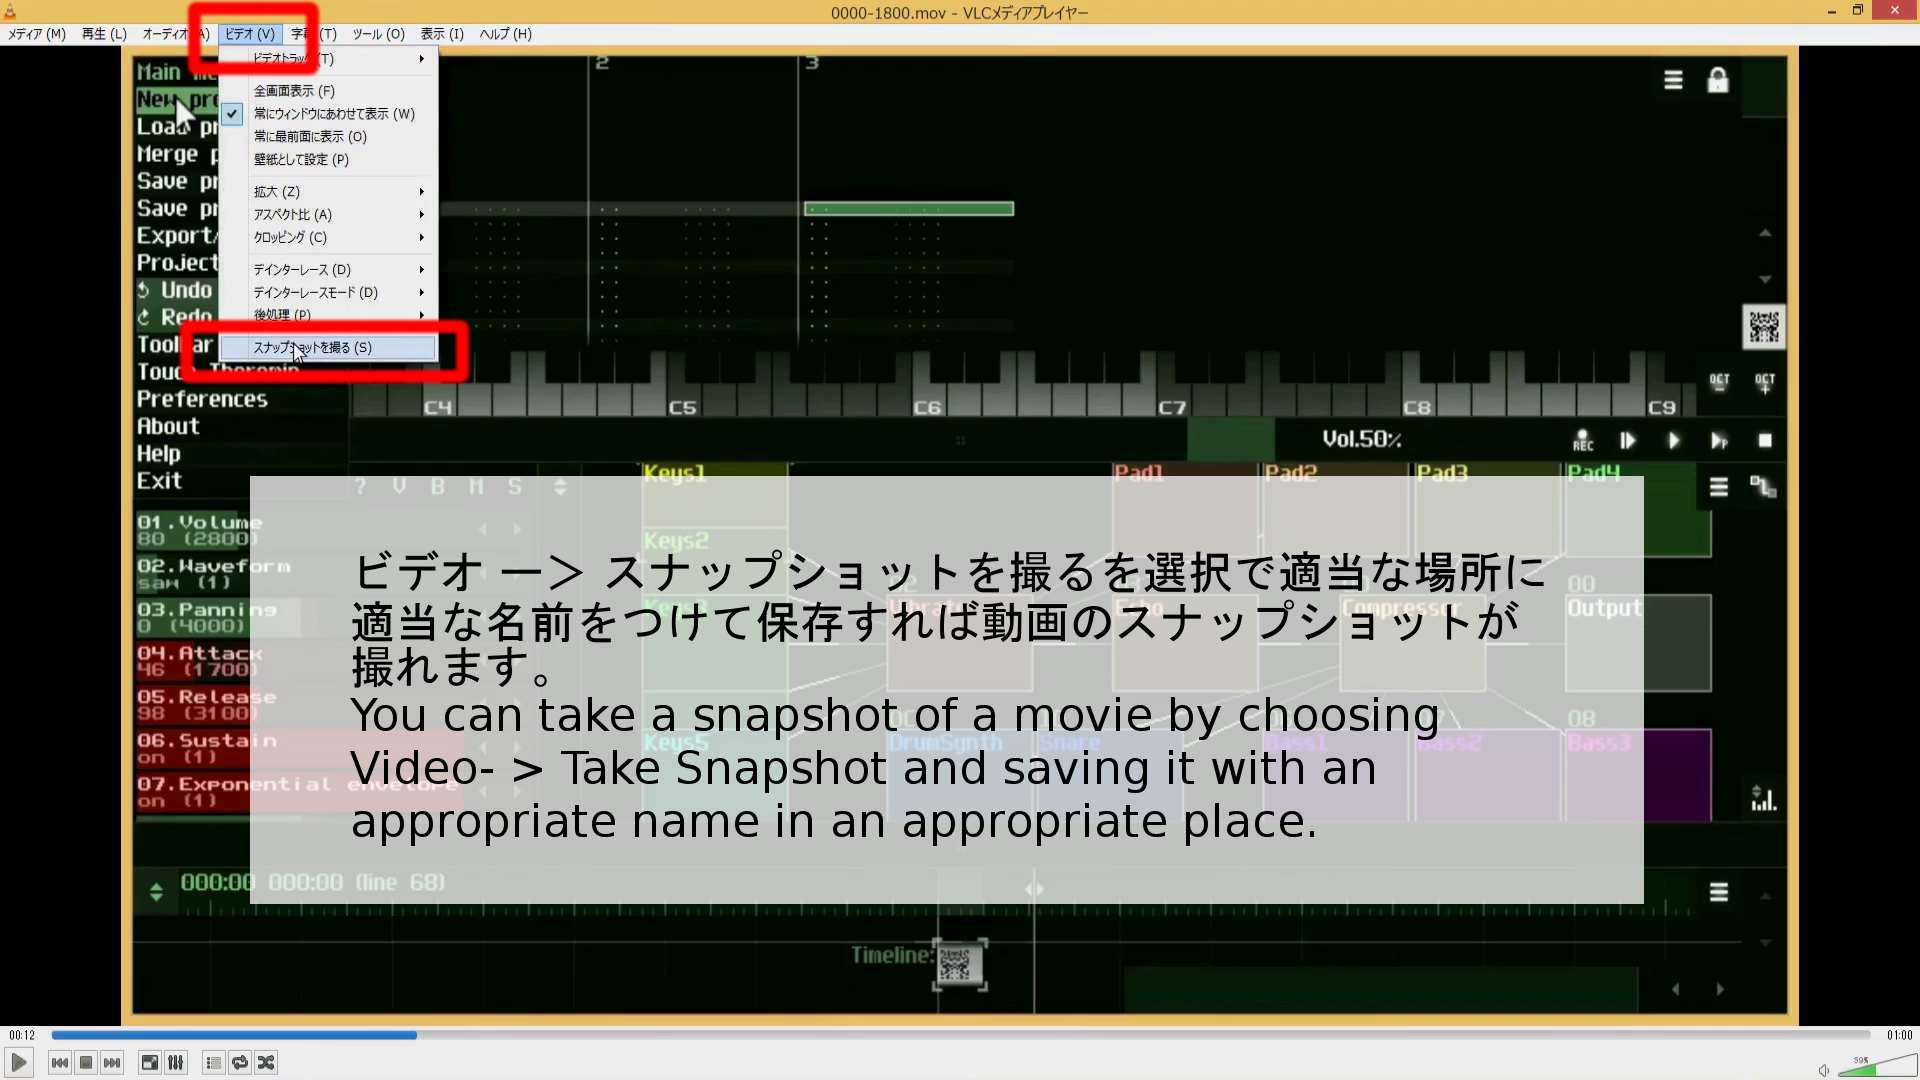
スナップショットを保存する。
Save a snapshot
後はこの作業を必要な数だけ繰り返します。
Repeat this process as many times as necessary.
Blenderを使った方法 : How to do snapshot in Blender
Blenderを使ってスナップショットを撮る場合のやり方を説明します。 実はこっちのやり方ほうが、後で何番のスナップショットがどの時間帯のものか照らし合わせる手間が少ないので、時間がかかりますがお勧めです。
Here's how to take a snapshot with Blender. In fact, I recommend this method, although it takes more time, because you don't have to check which snapshot is from which time zone later.
Blenderを開いてVideo Edi tModeにして動画をインポートしてください。
Open Blender and make it Video Edit Mode to import the video.
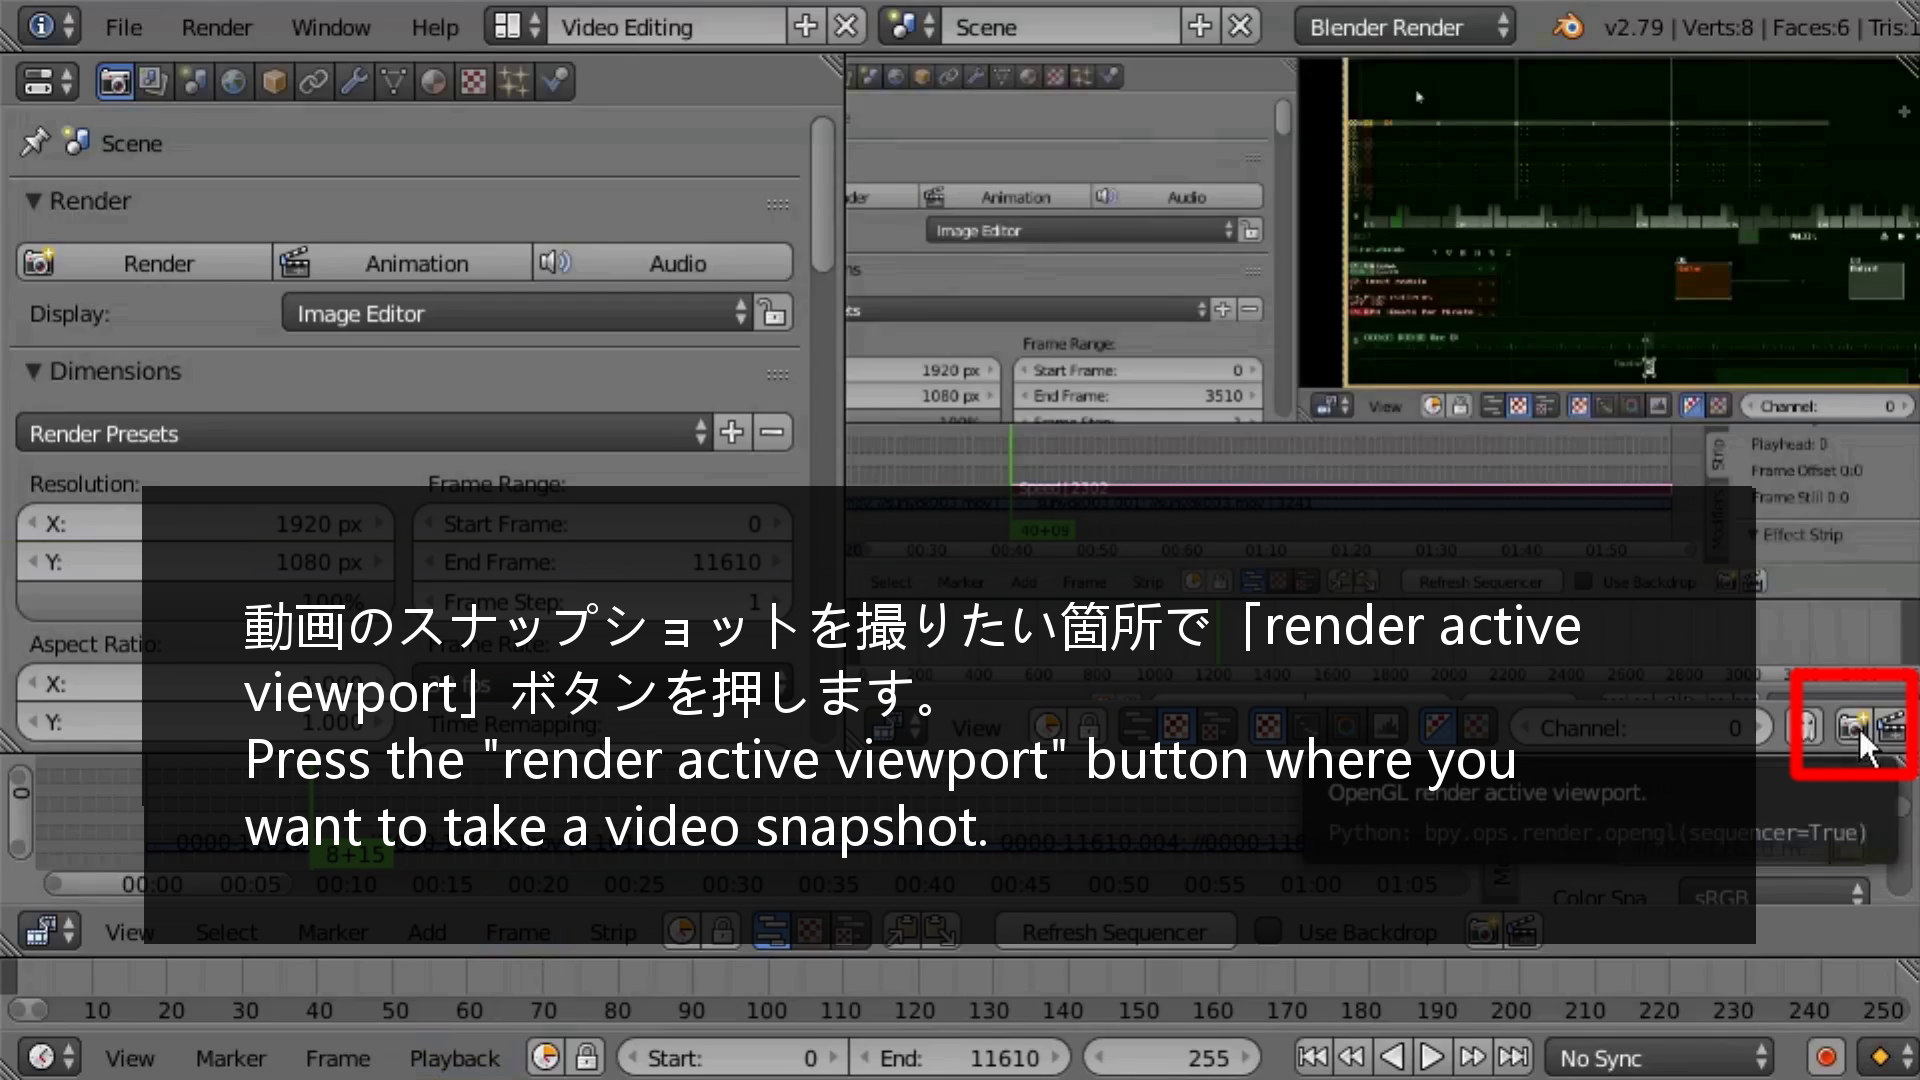
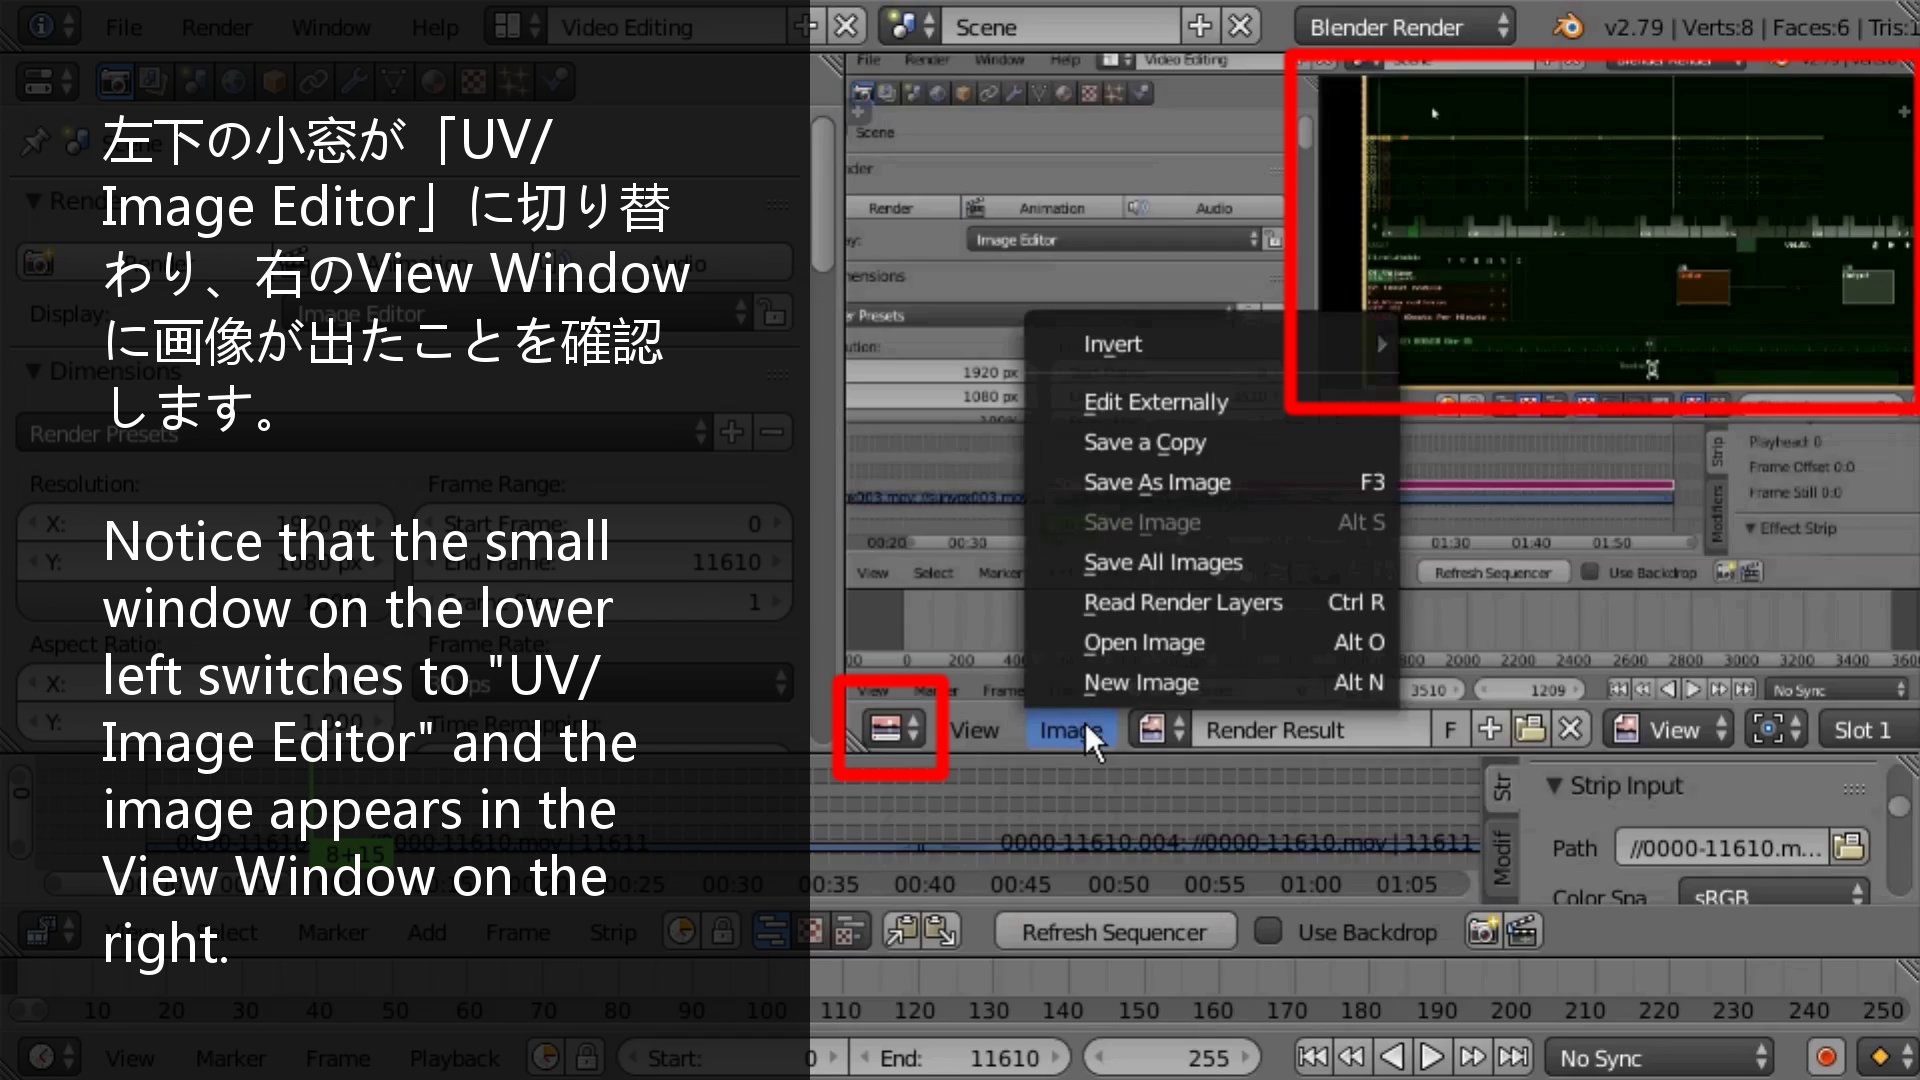
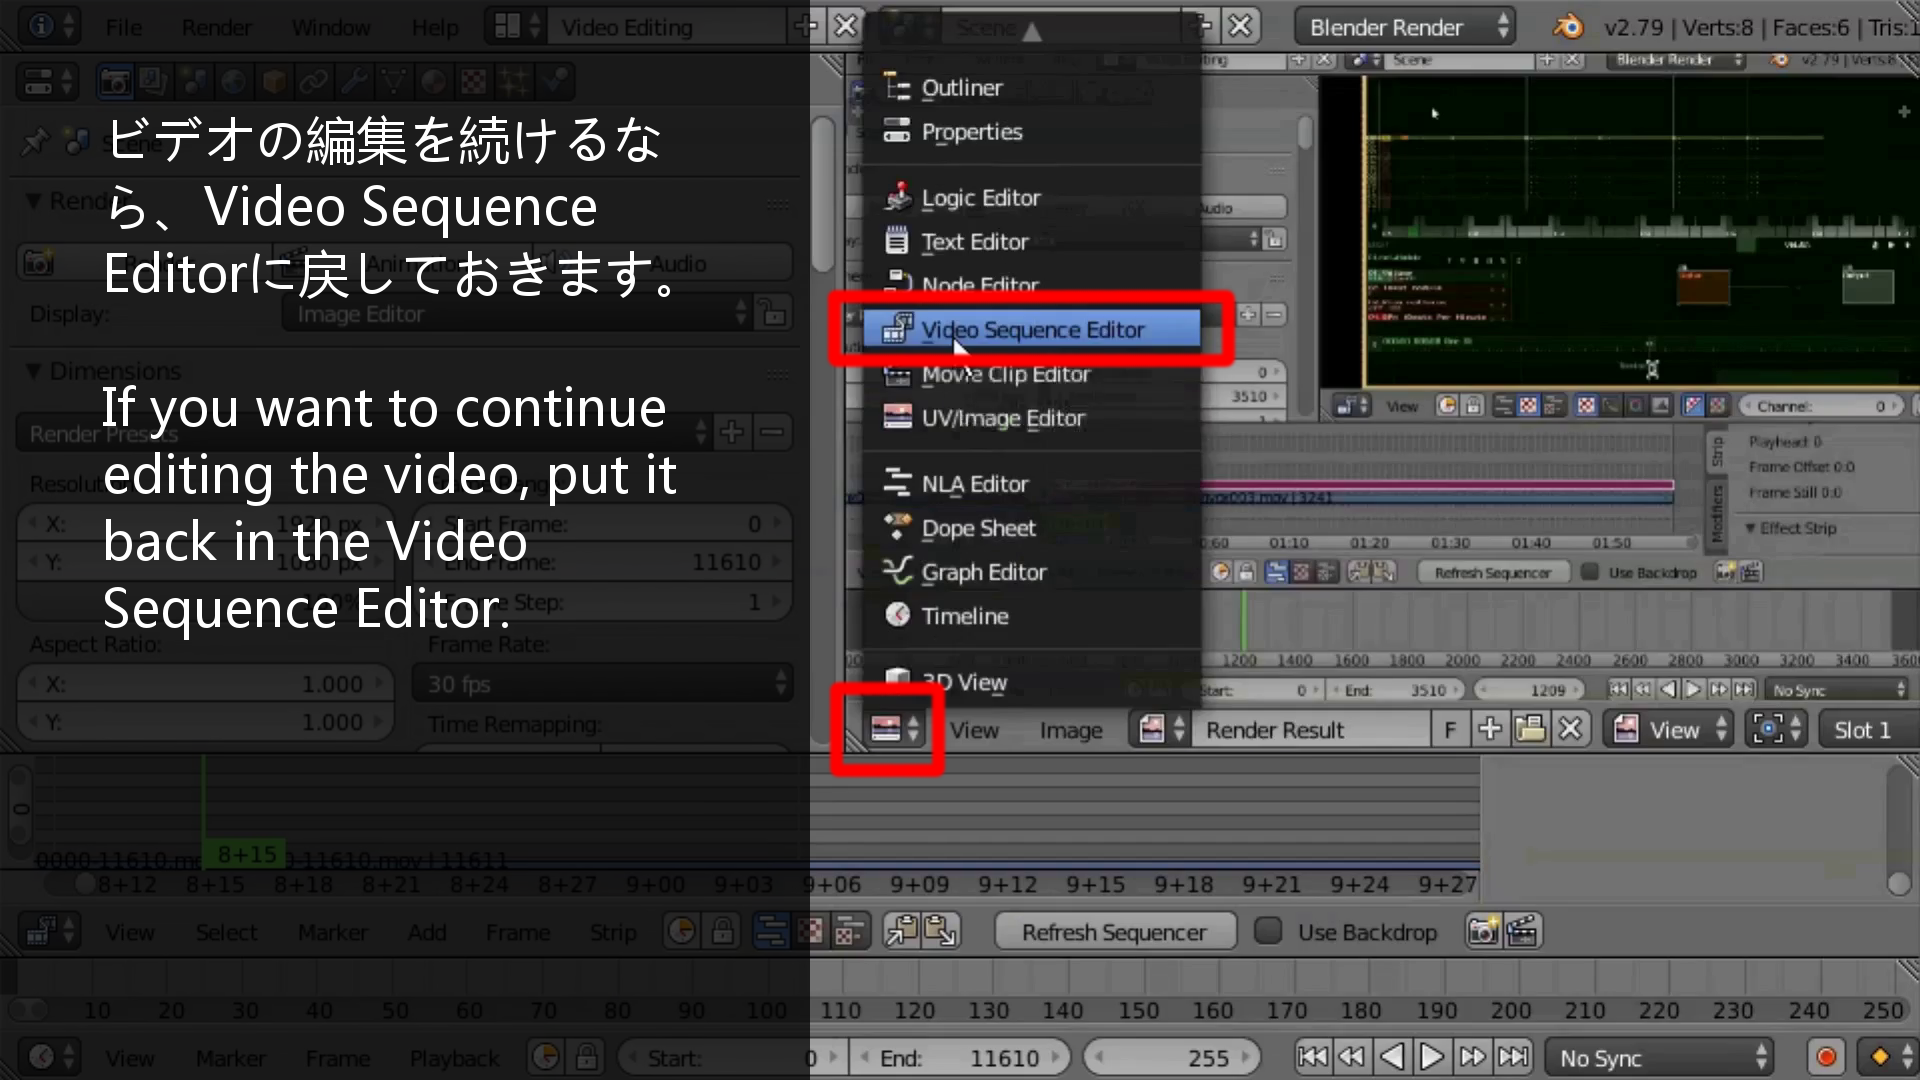
そして上記の手順でスナップショットを撮っていきます。
Follow the steps in the figure above to create a snapshot.
GIMPでの画像処理 : Image Processing in GIMP
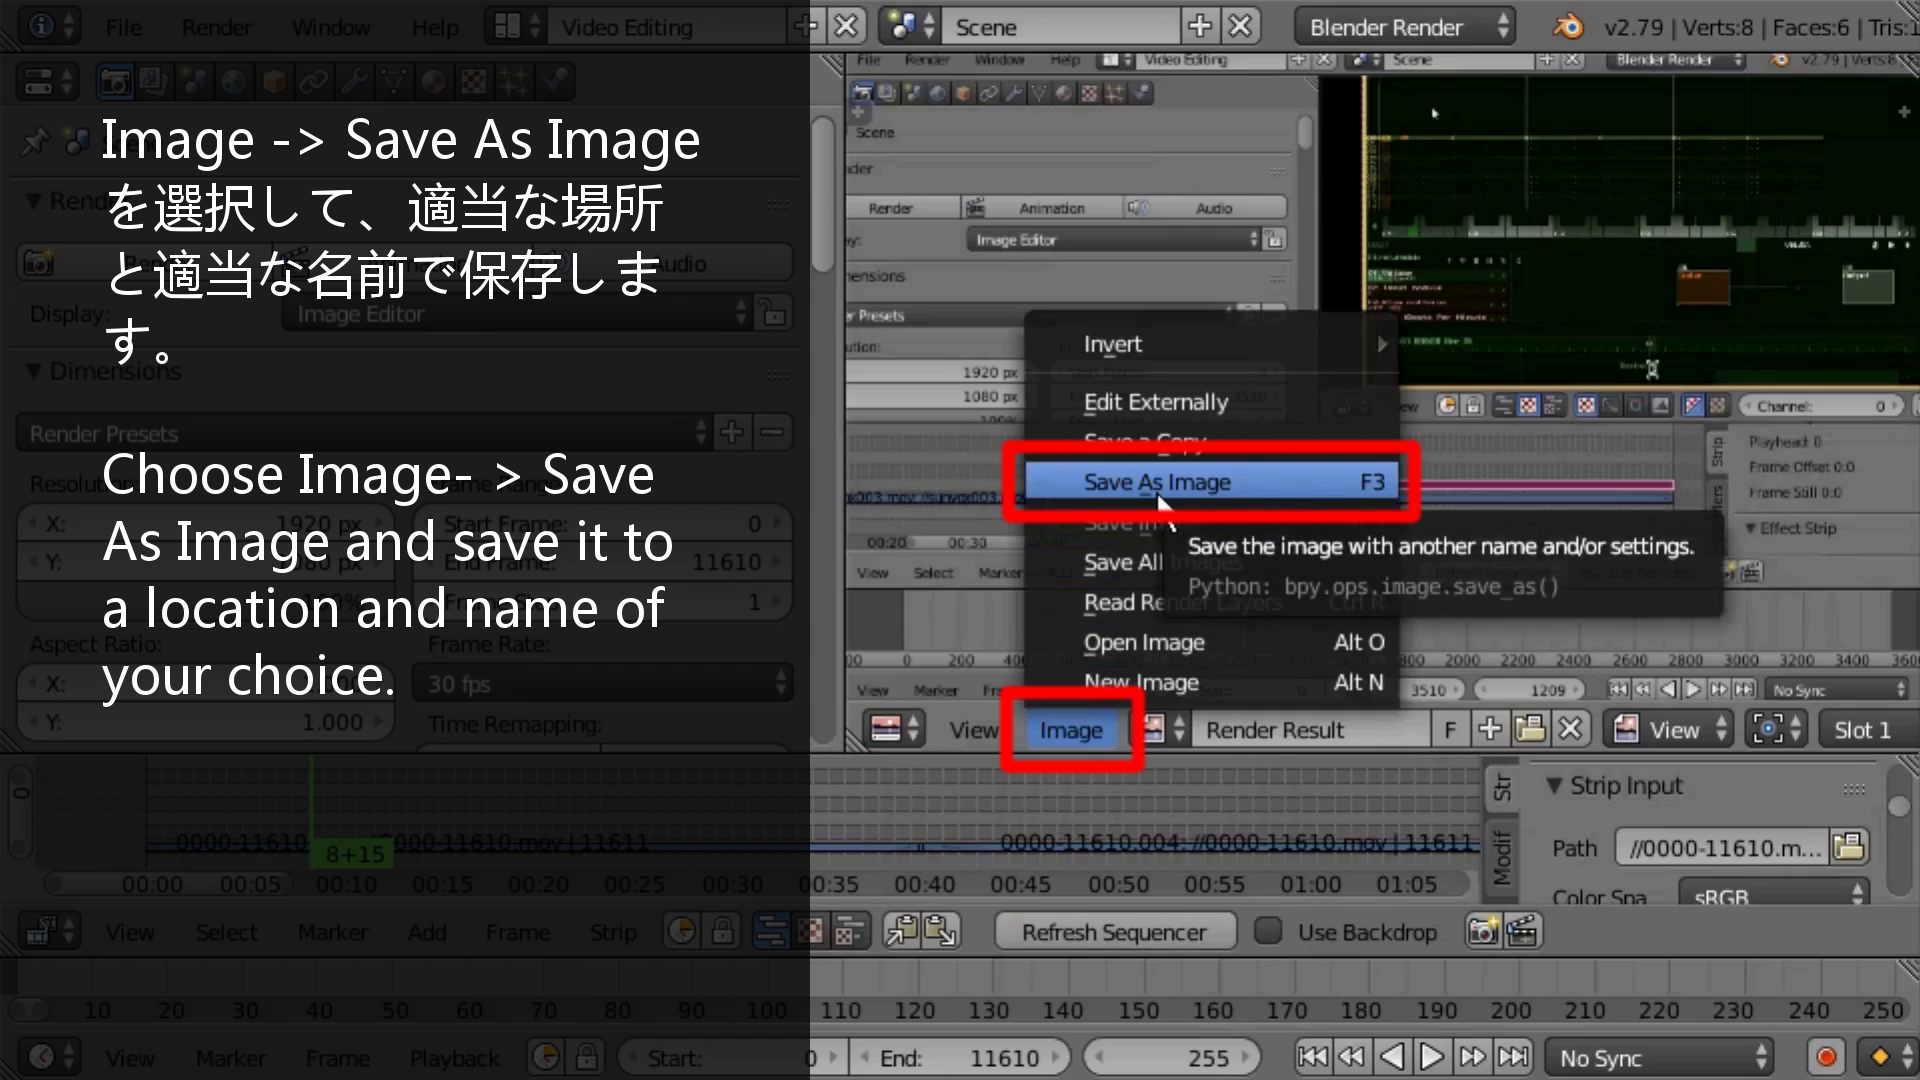
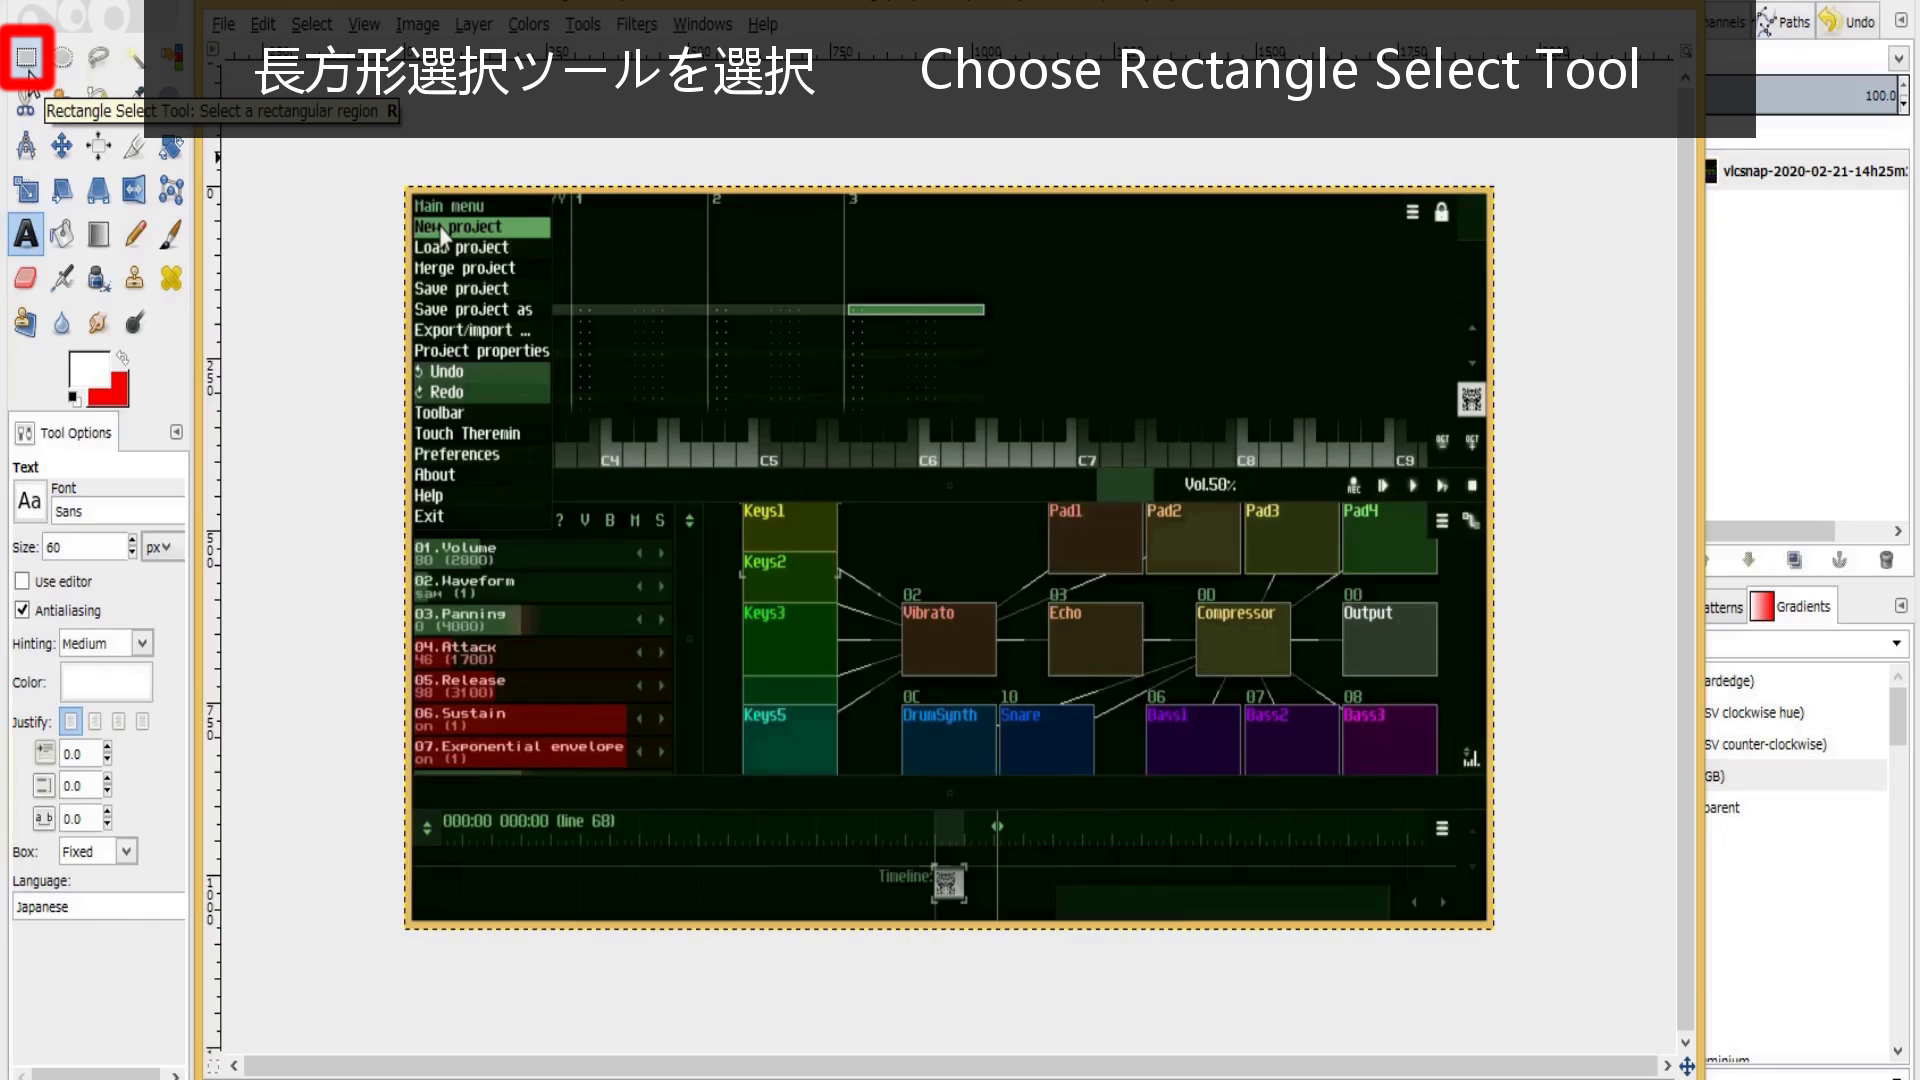
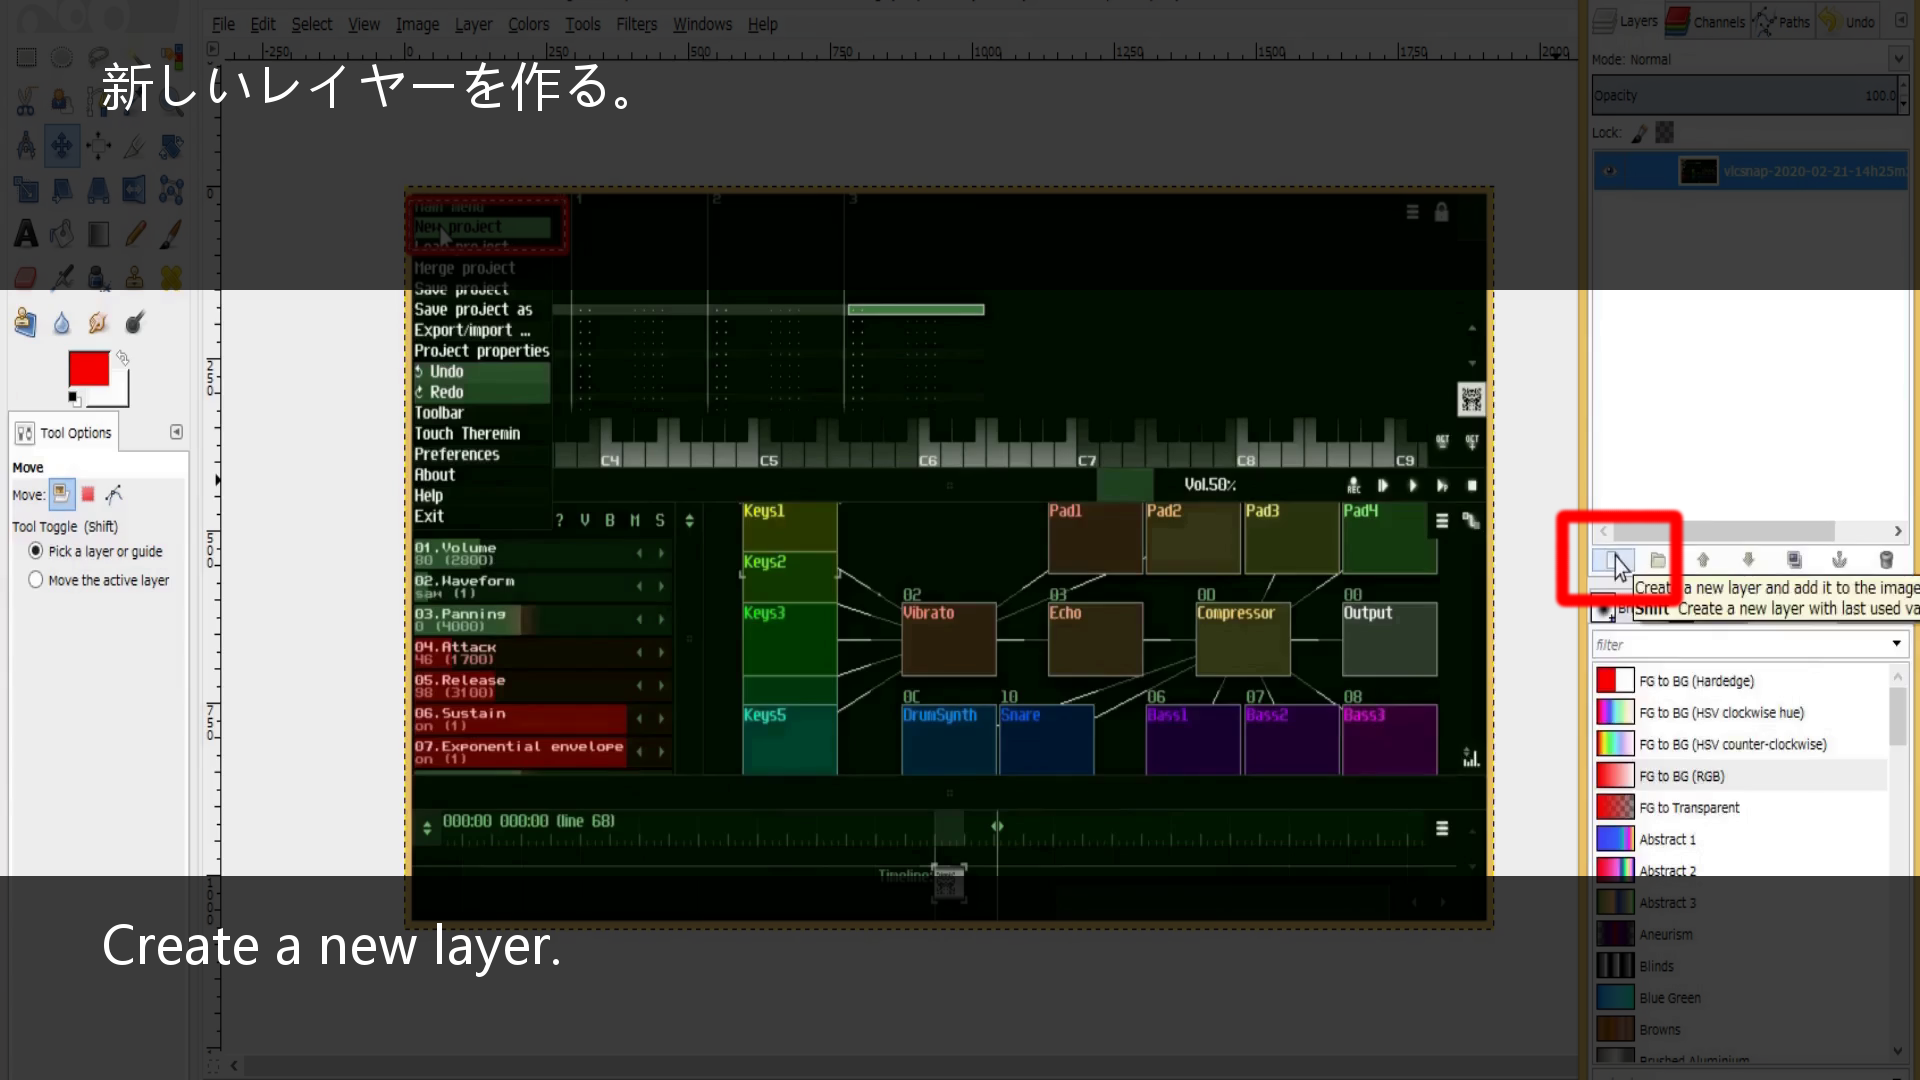
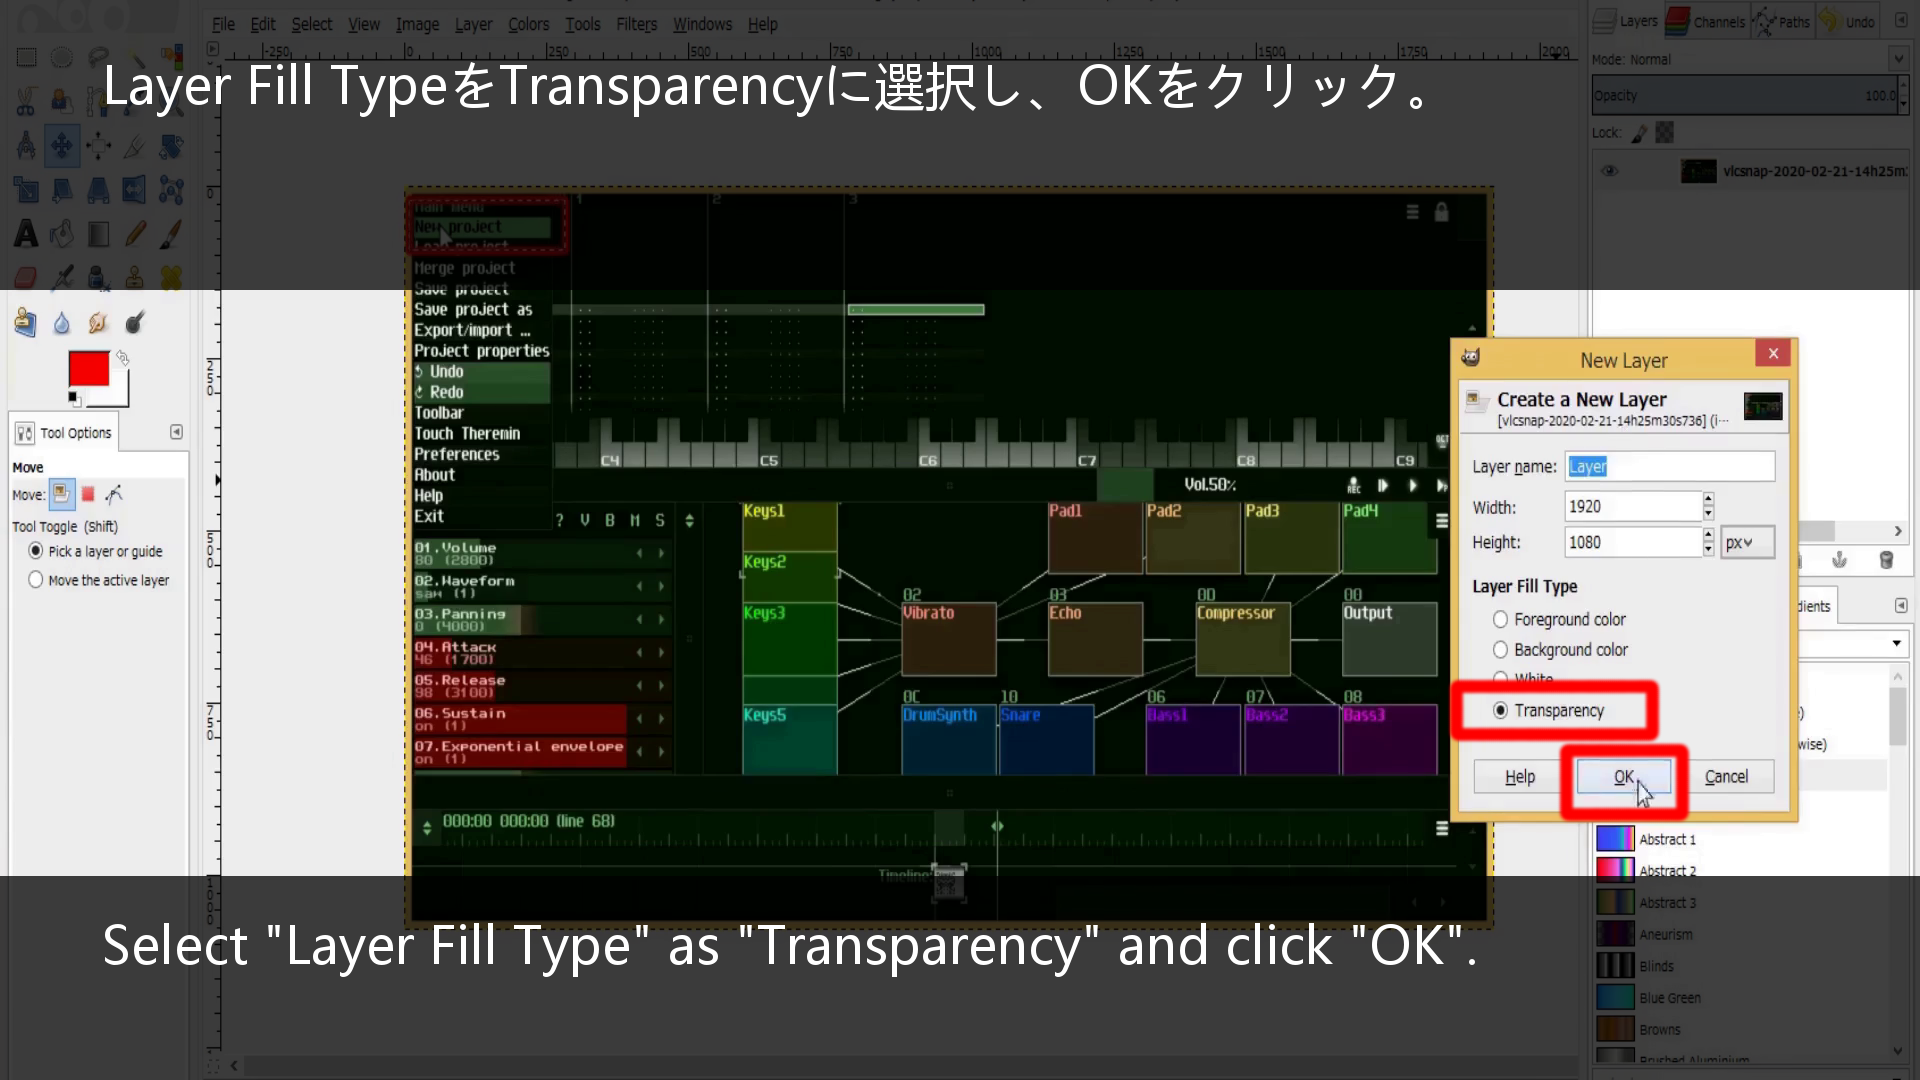
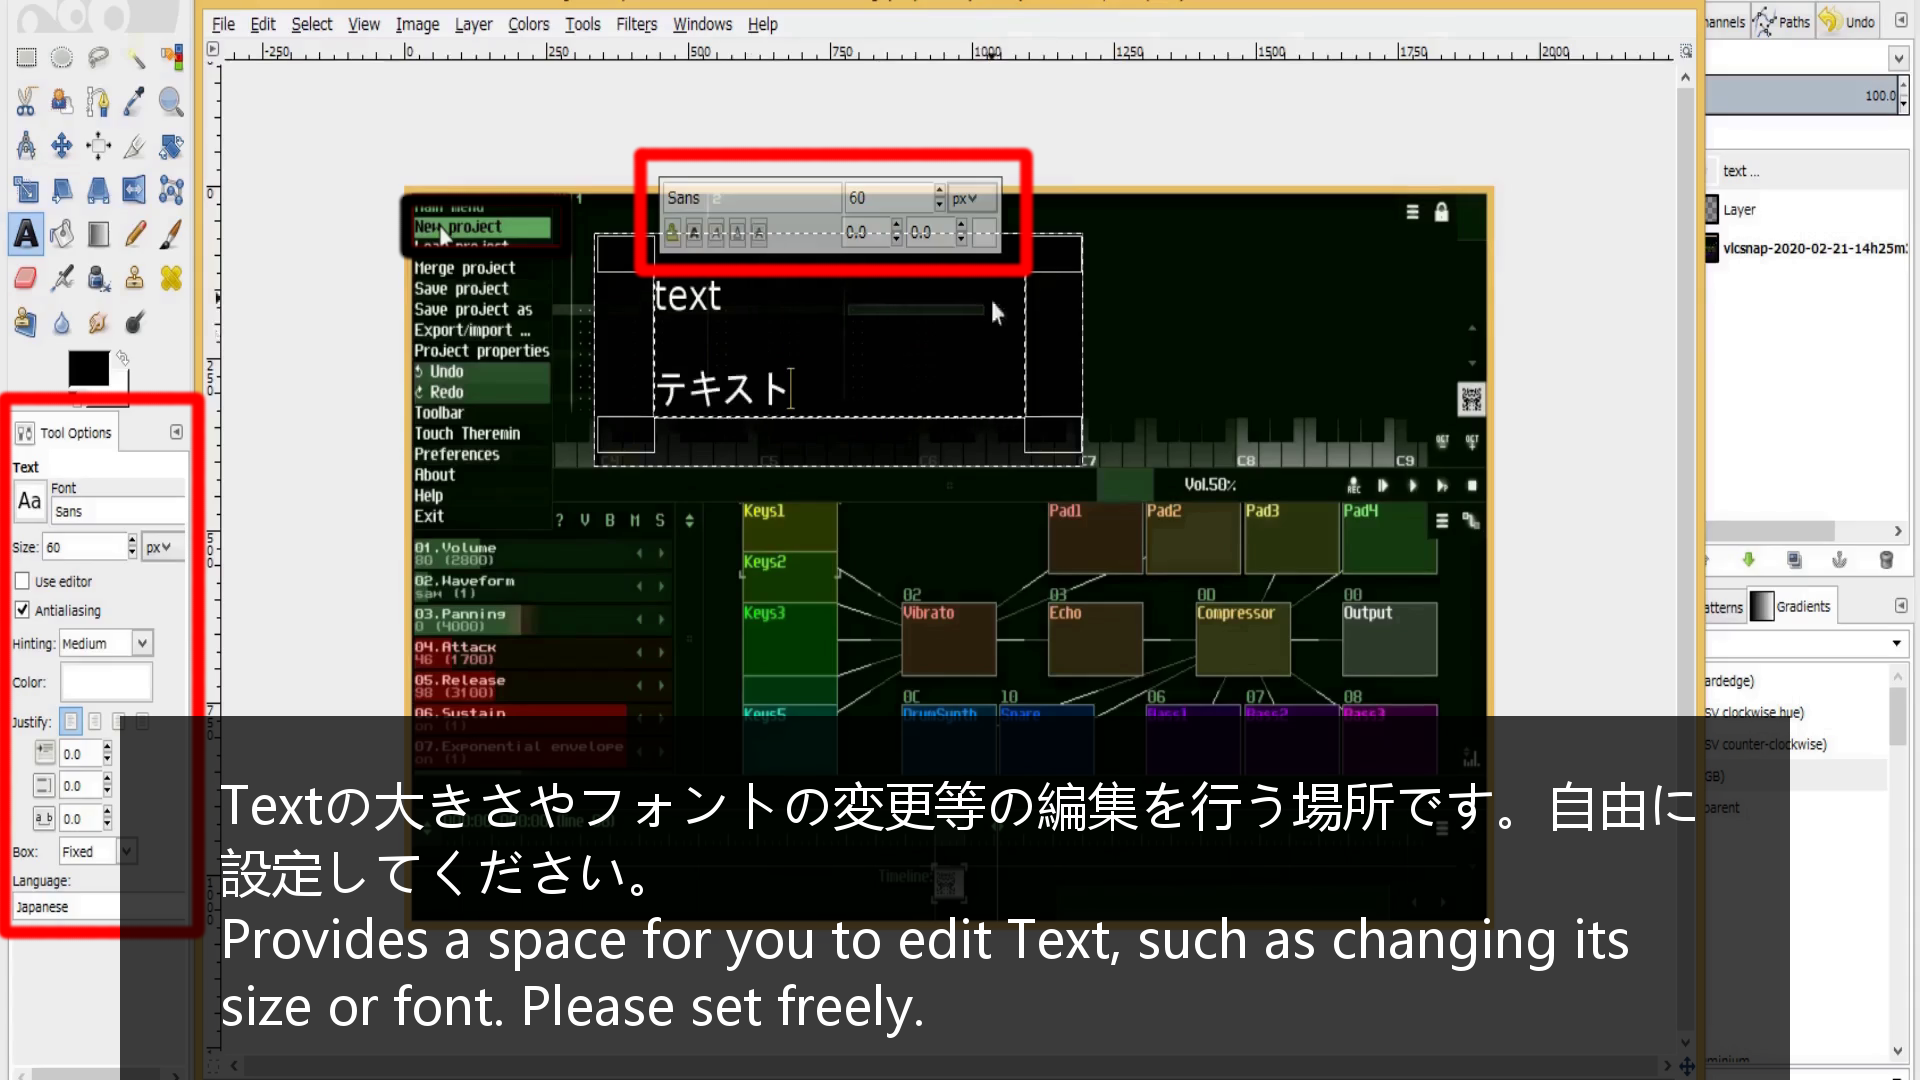
続いては撮ったスナップショットを加工するためにGIMPを開きその画像をドラッグアンドドロップでGIMPにインポートします。
Next, open GIMP and use drag and drop to import the snapshot image into GIMP for further processing.
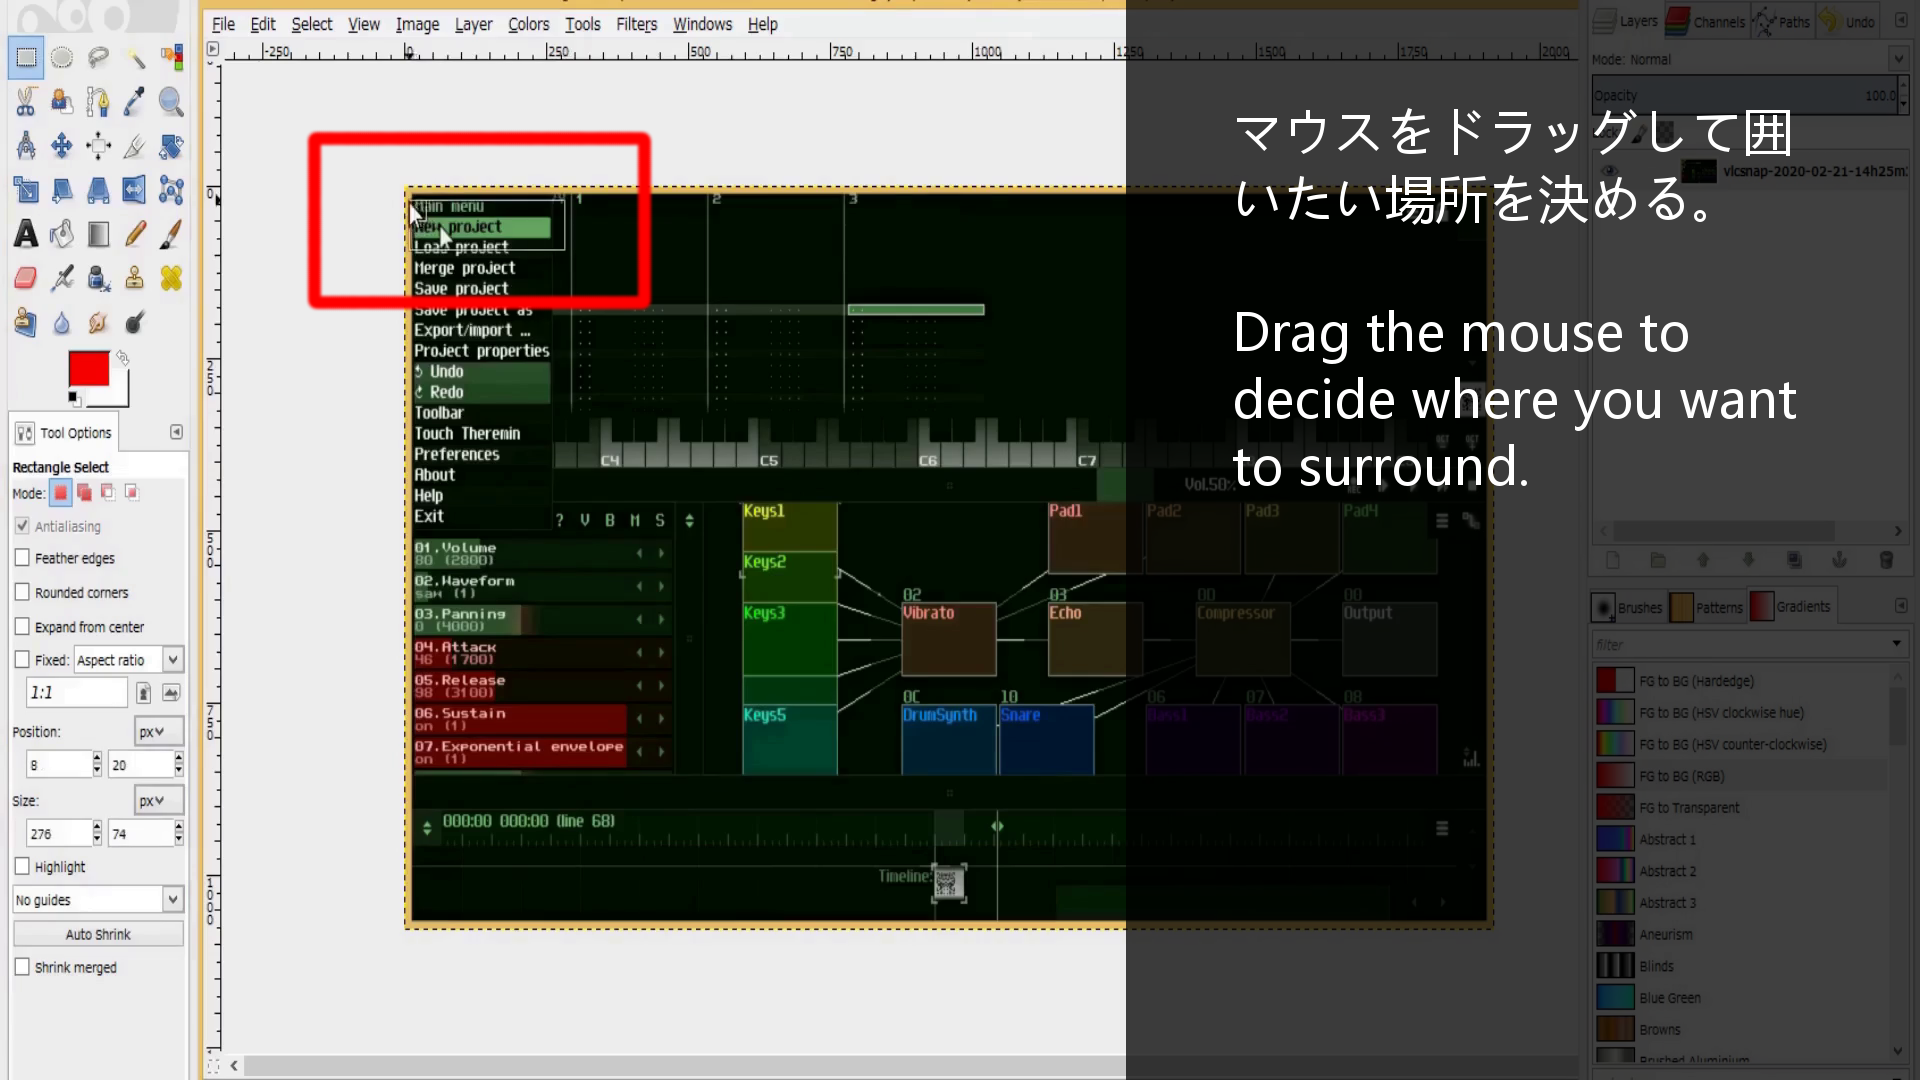
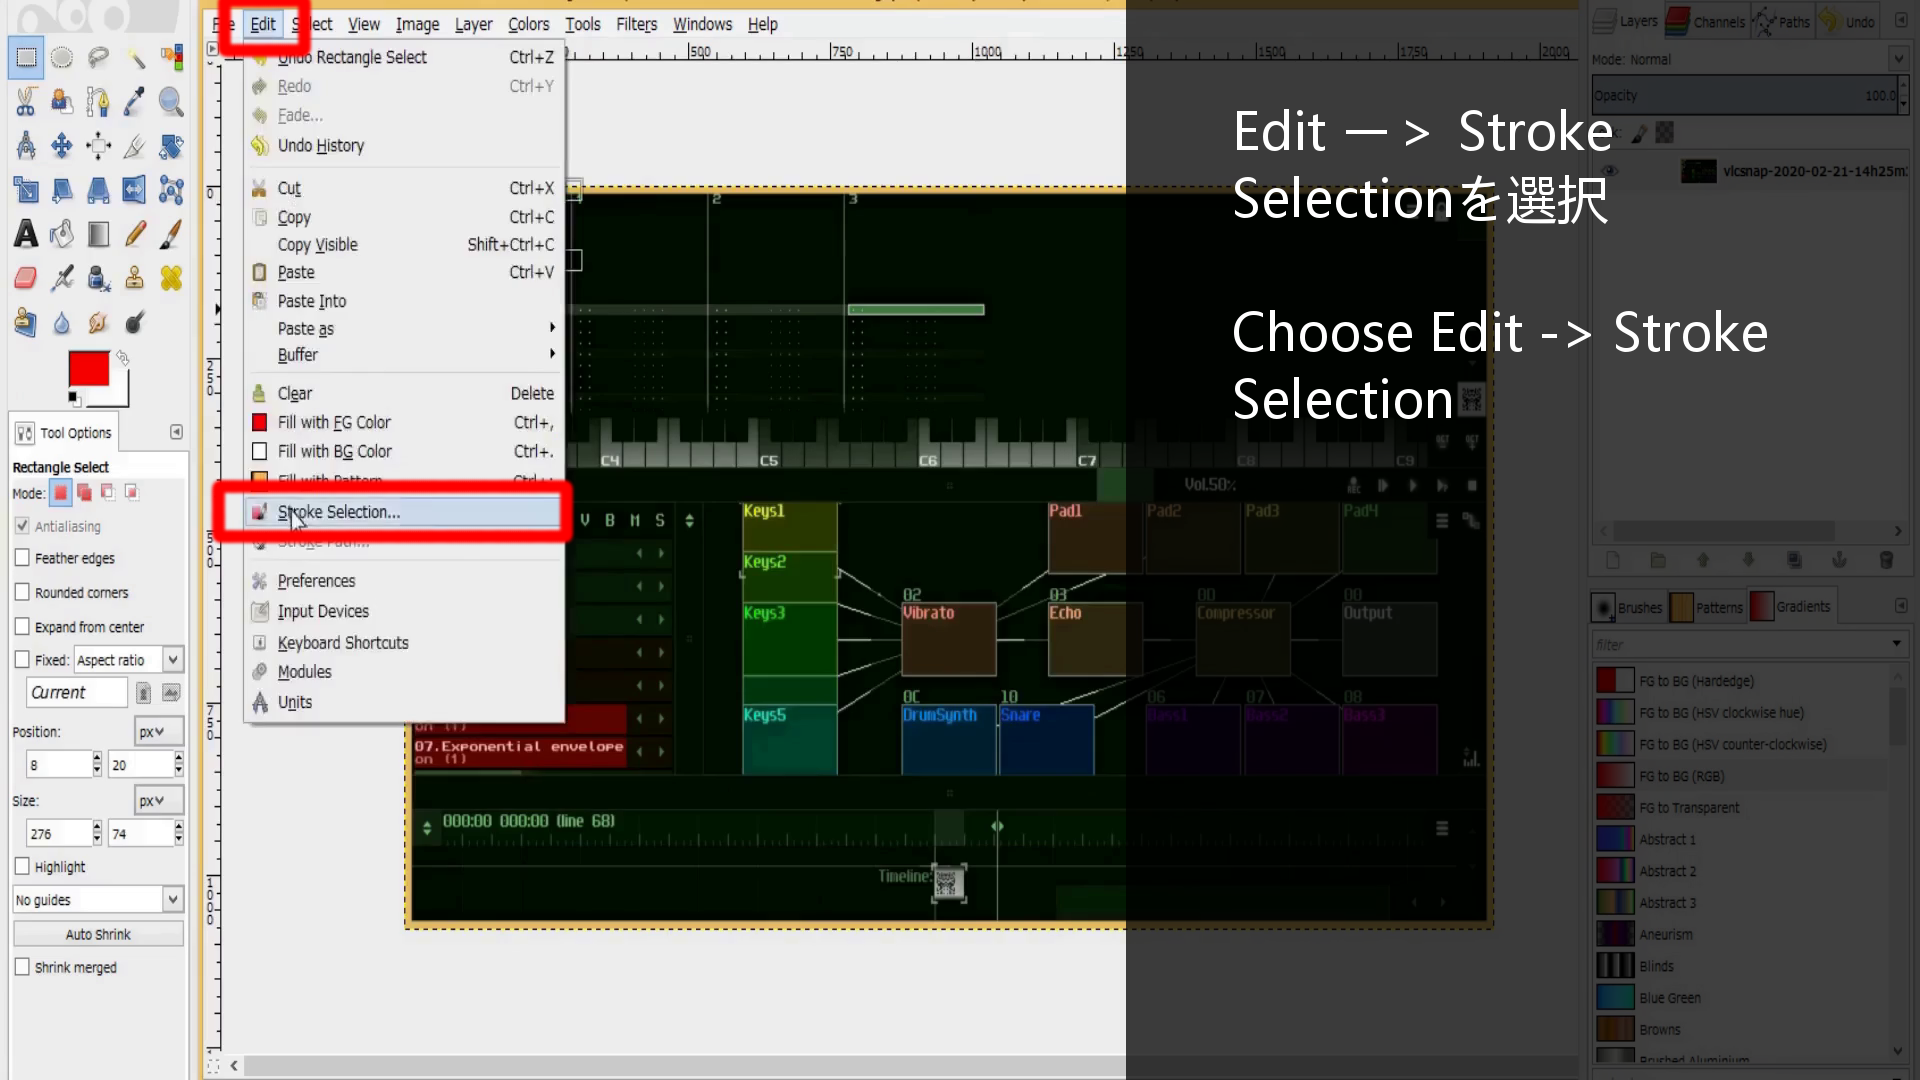
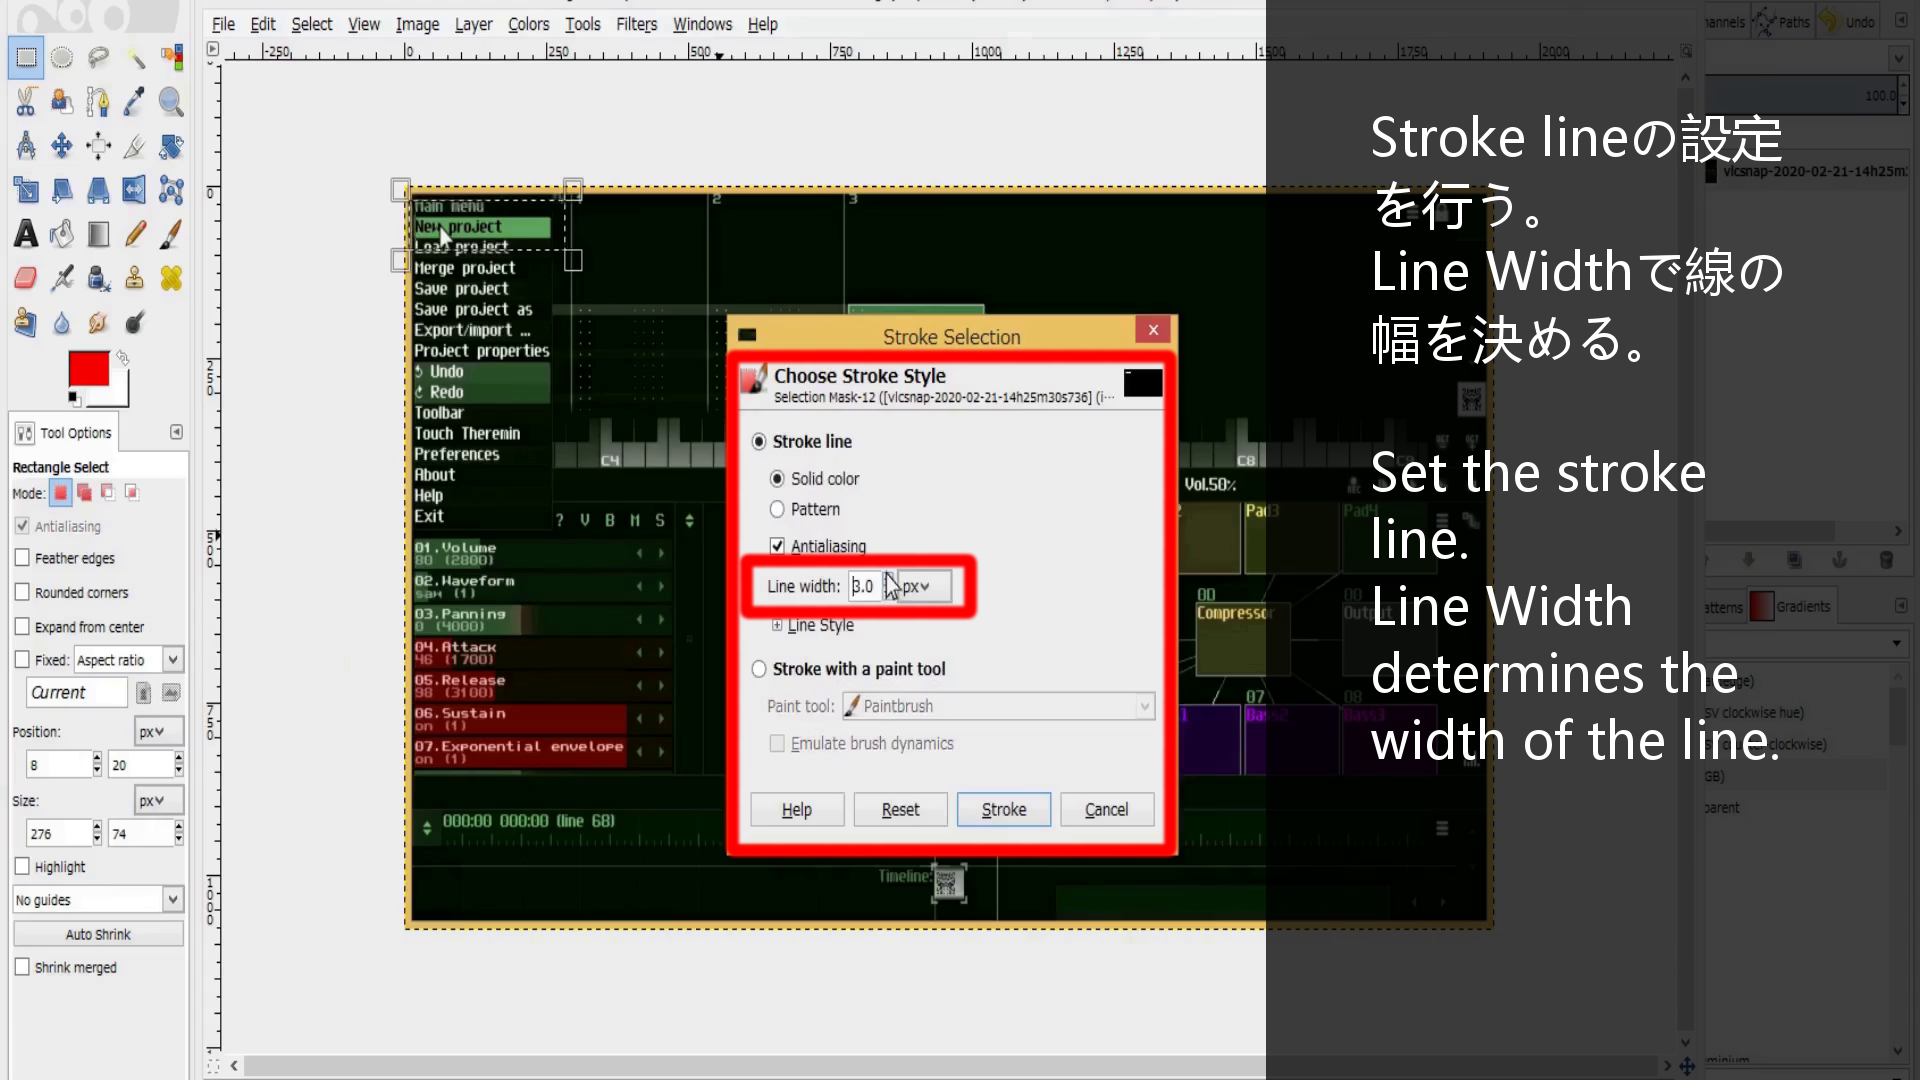
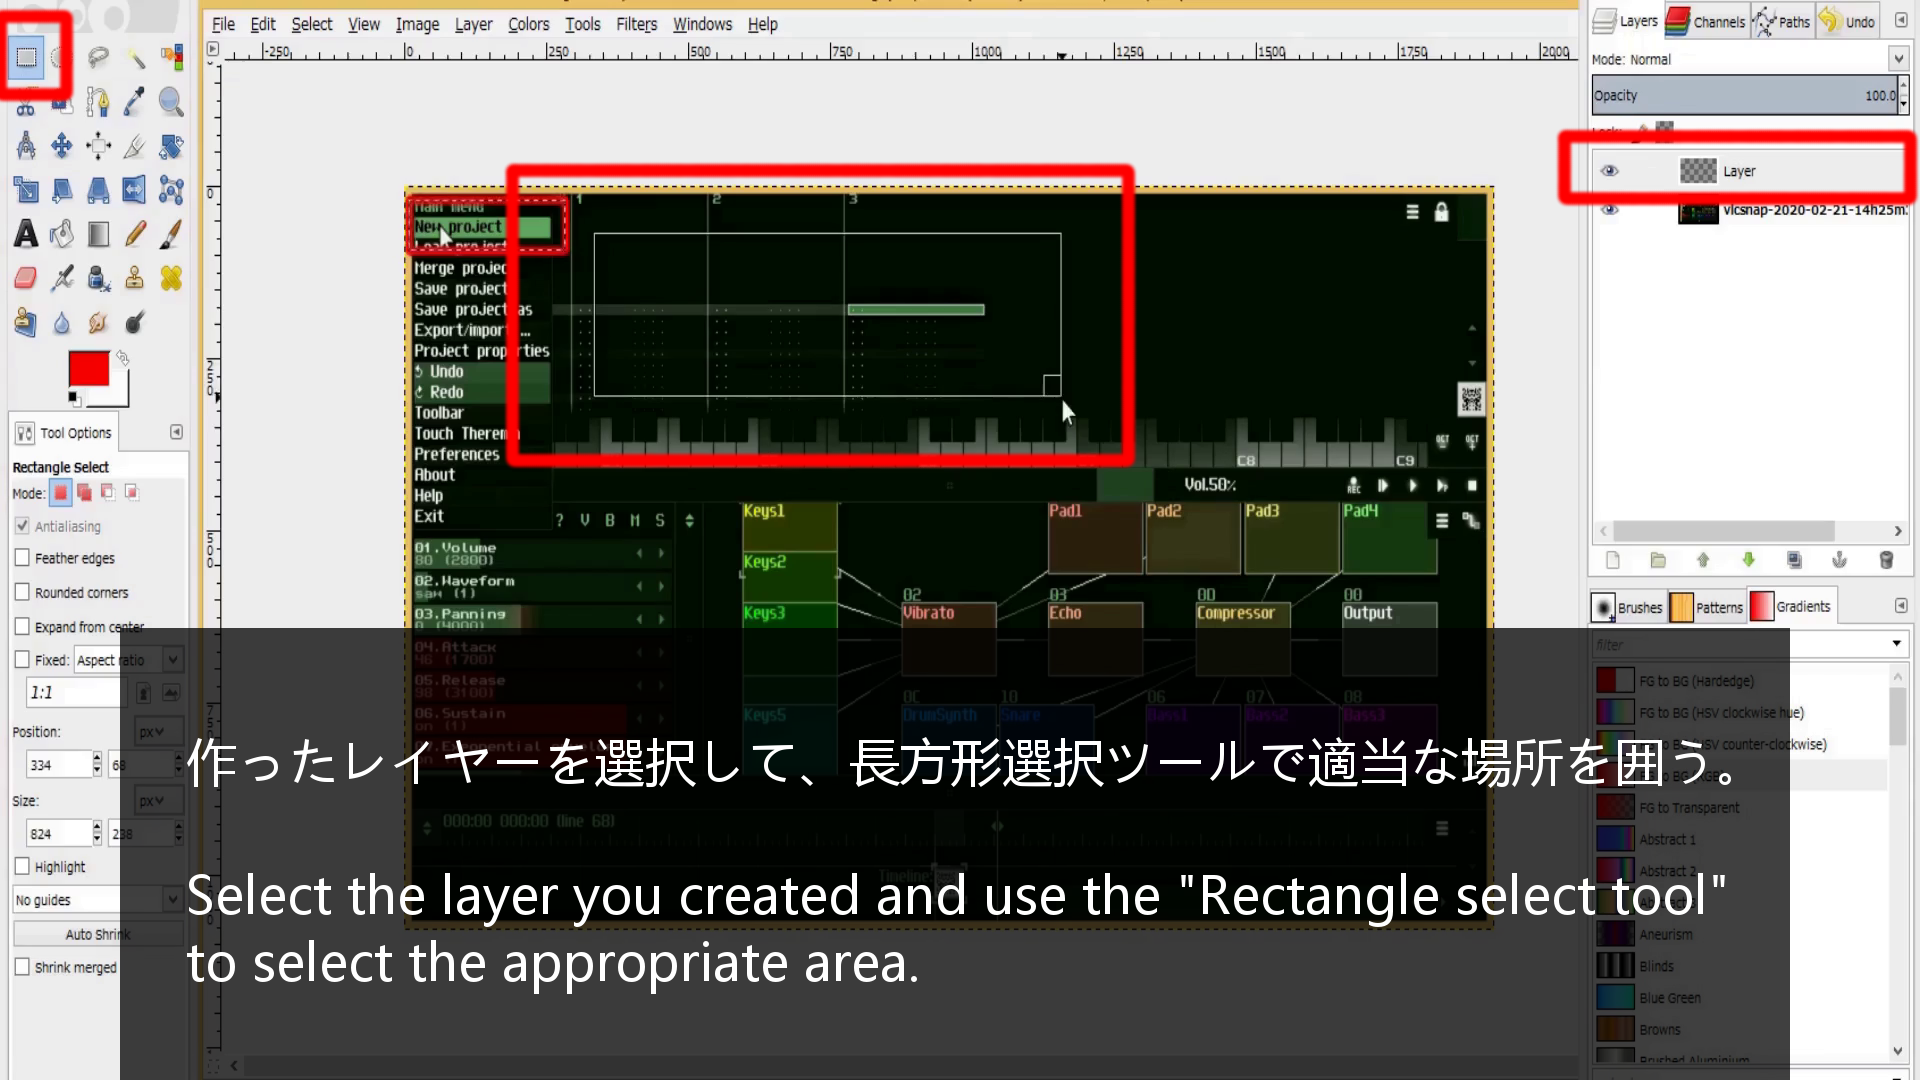
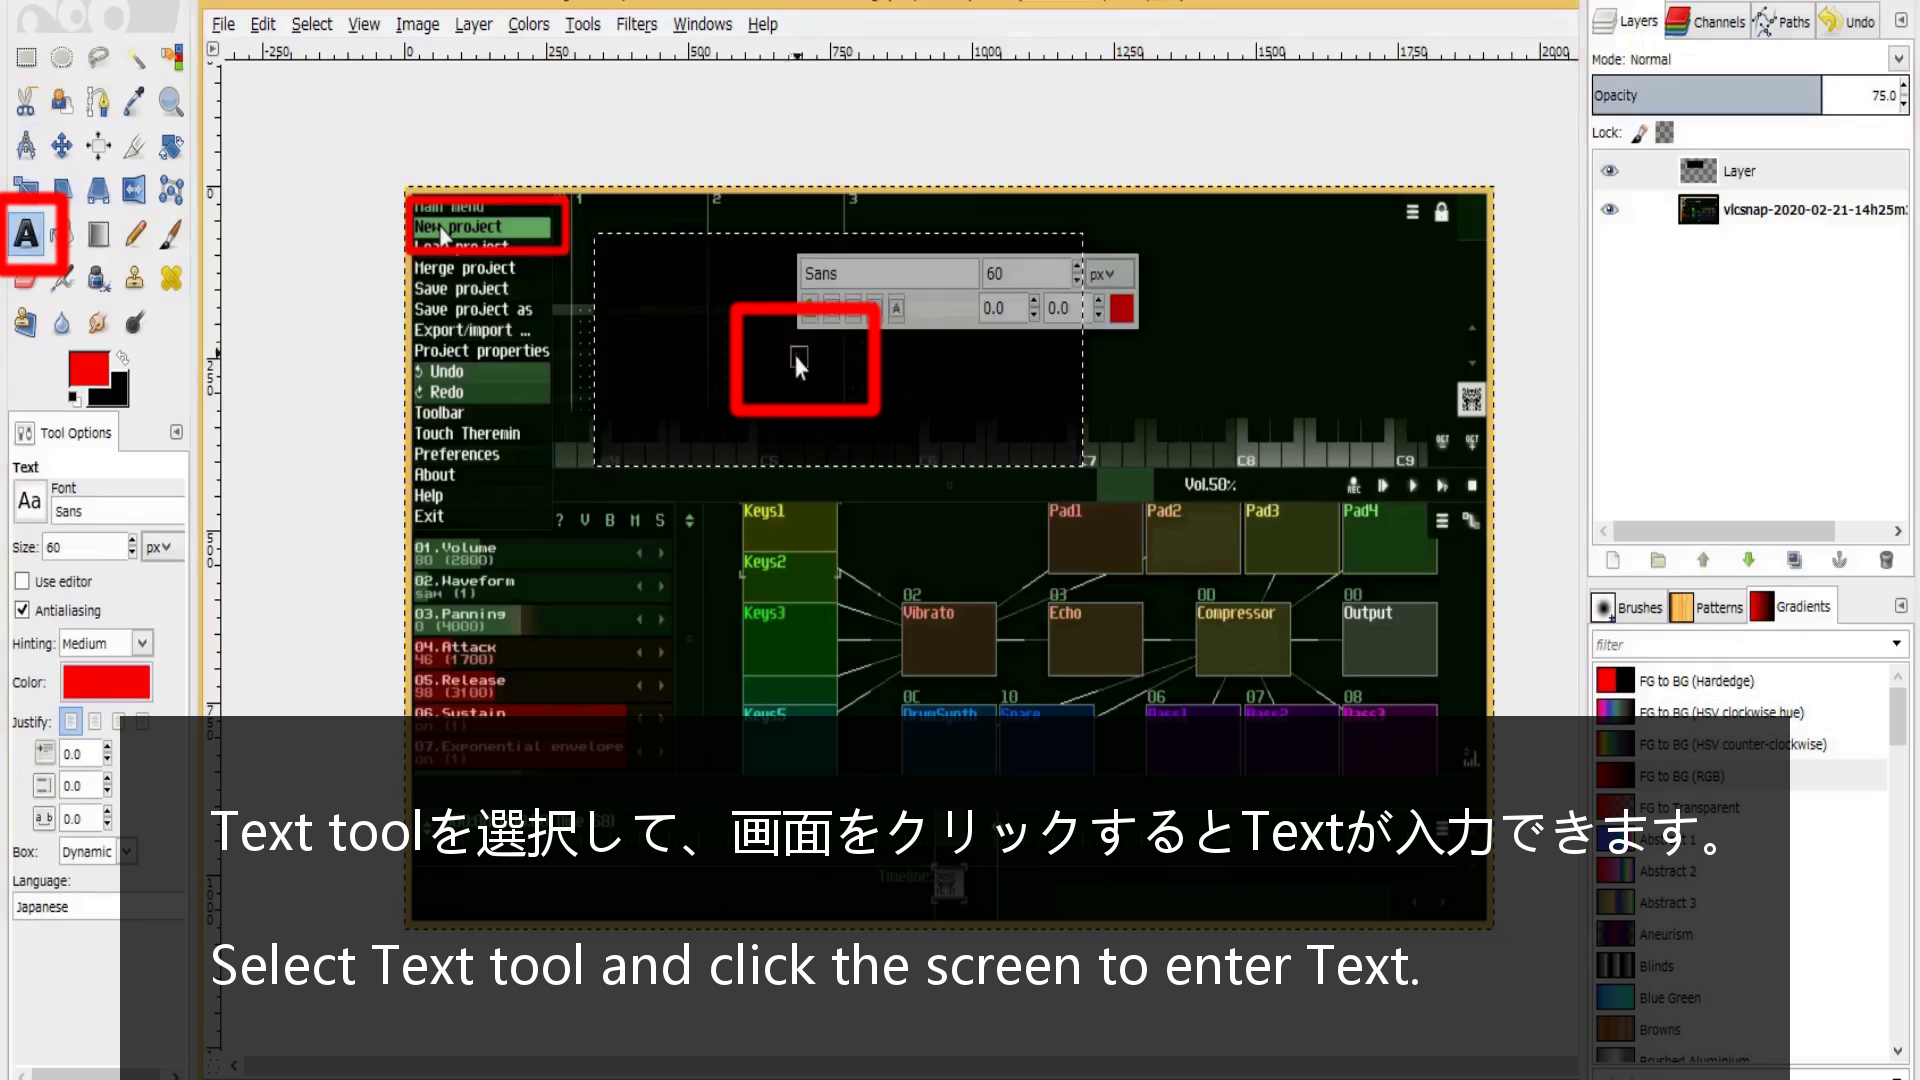
以下の画像で説明している手順は、伝えたい箇所を赤い枠で囲み、補足の説明のテキストを加えるやり方です。
The images below illustrate the process of drawing a red box around the points you want to focus on and adding additional explanatory text.
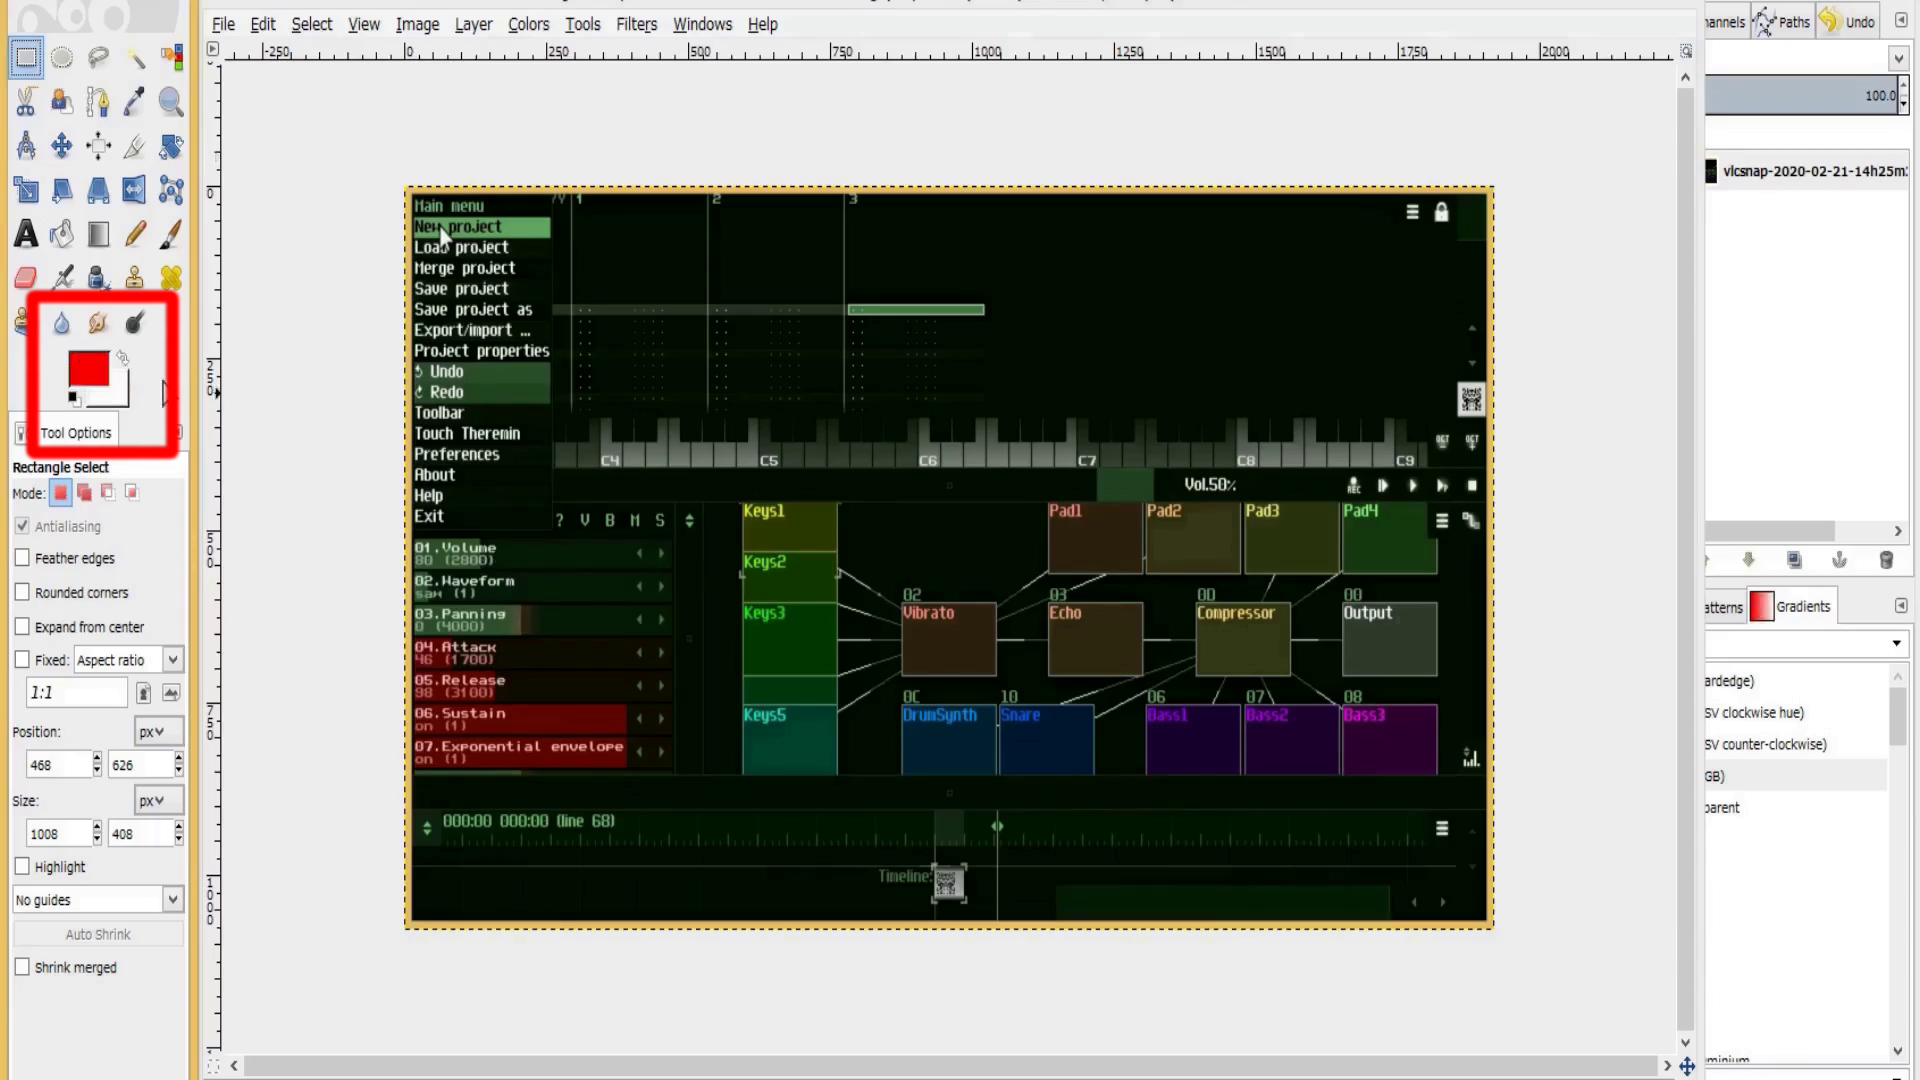
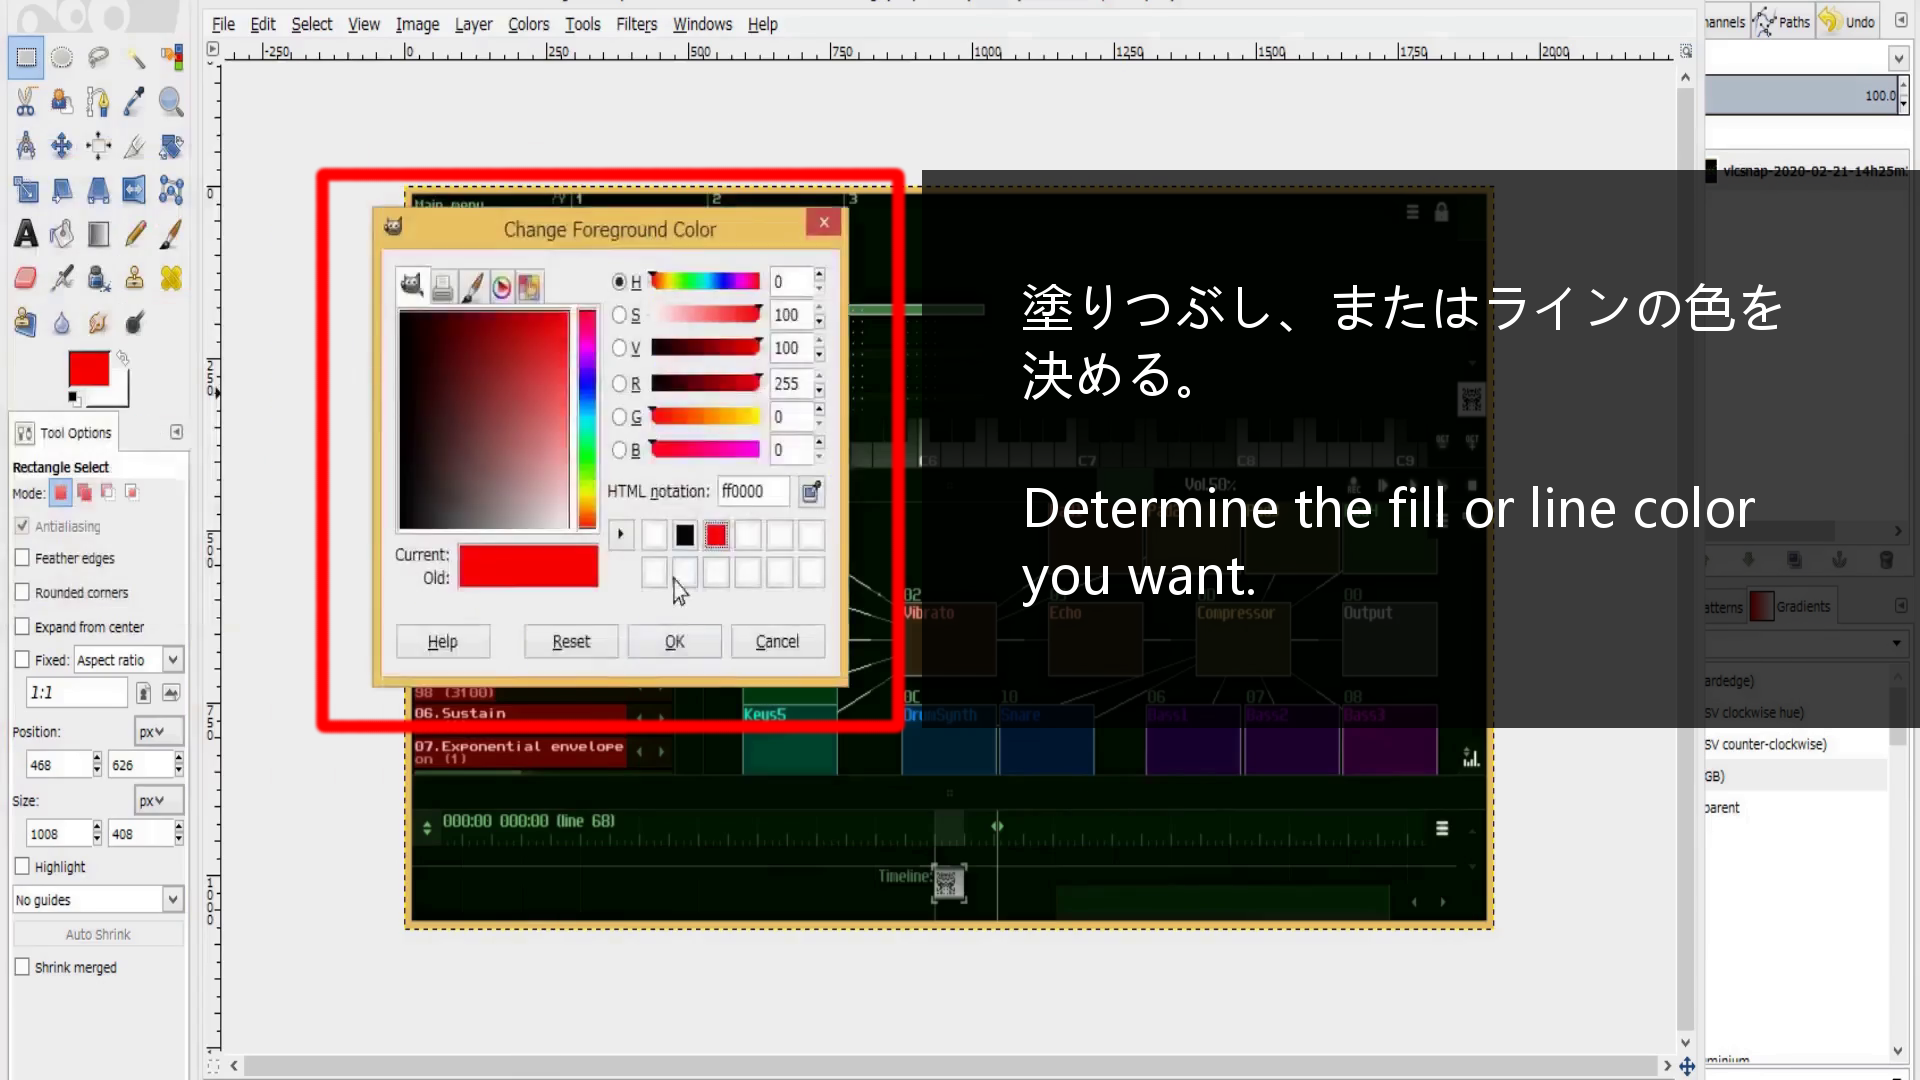
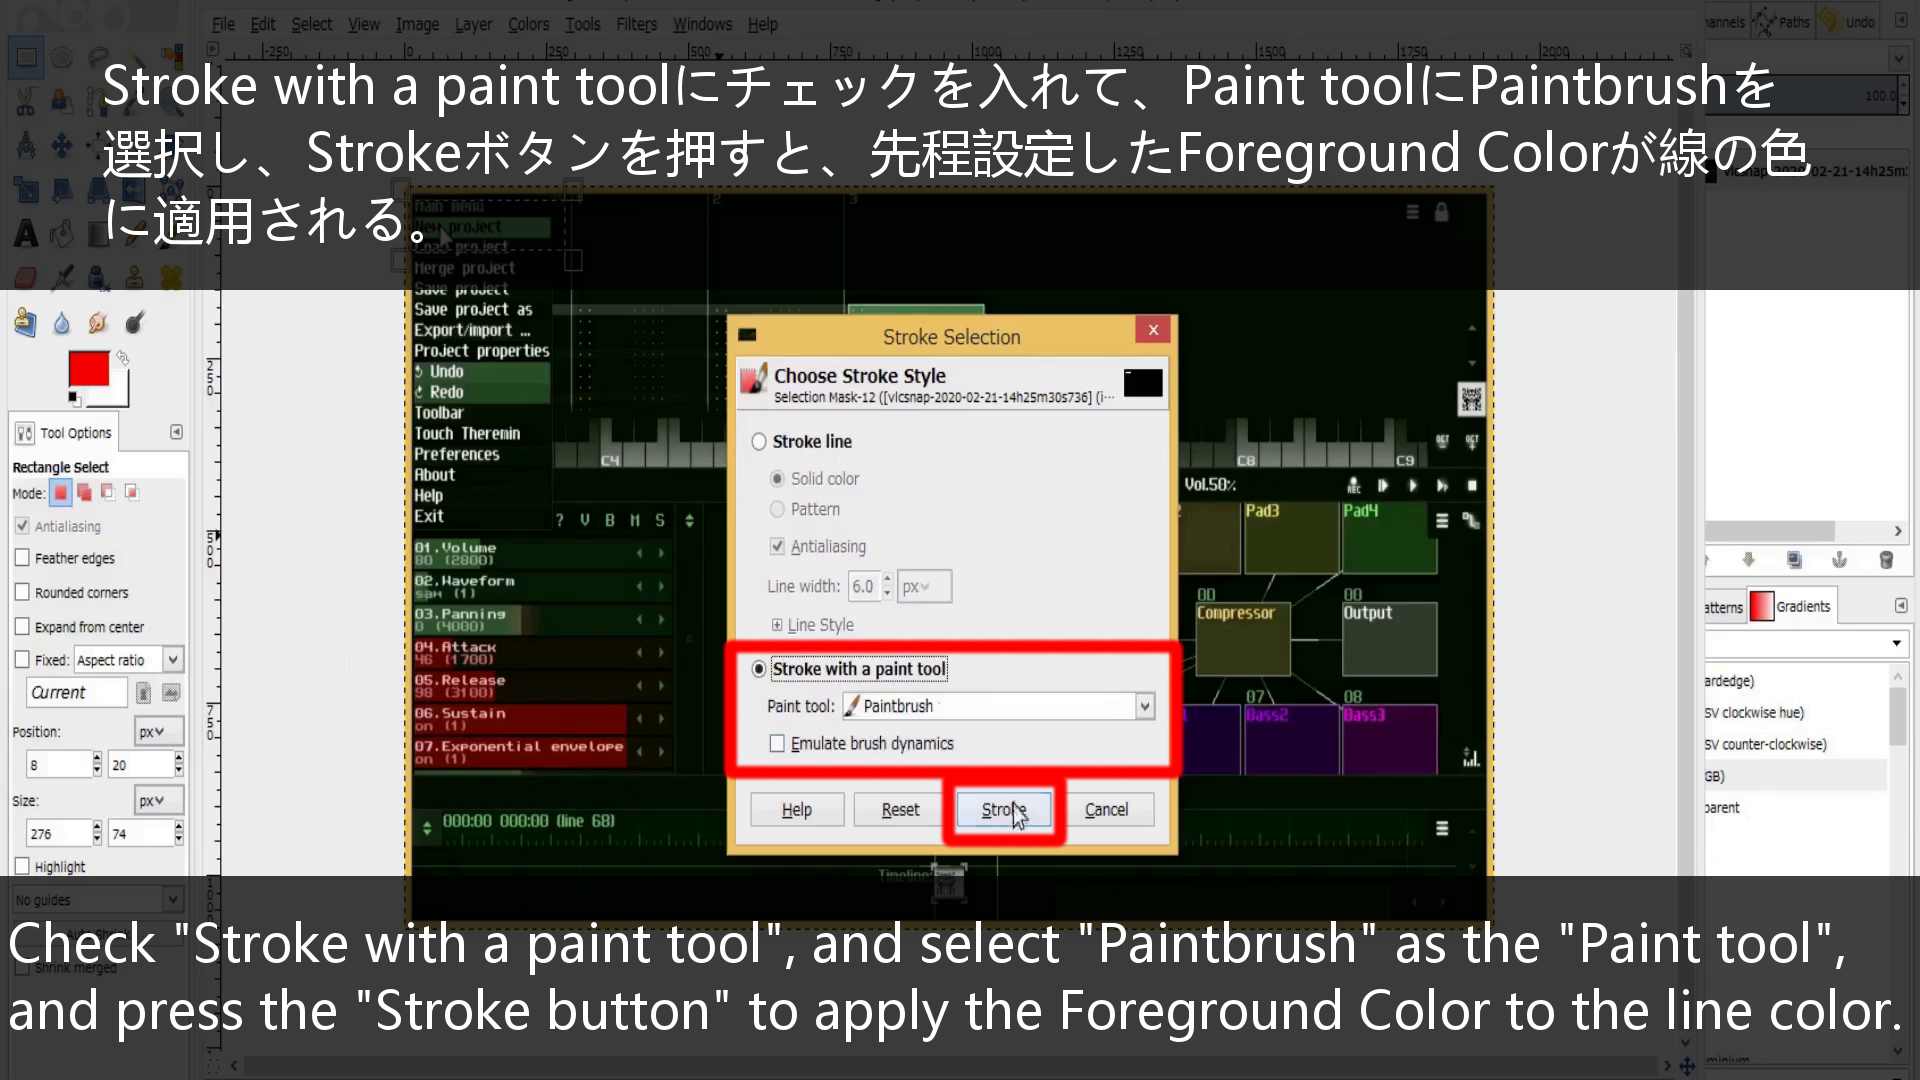
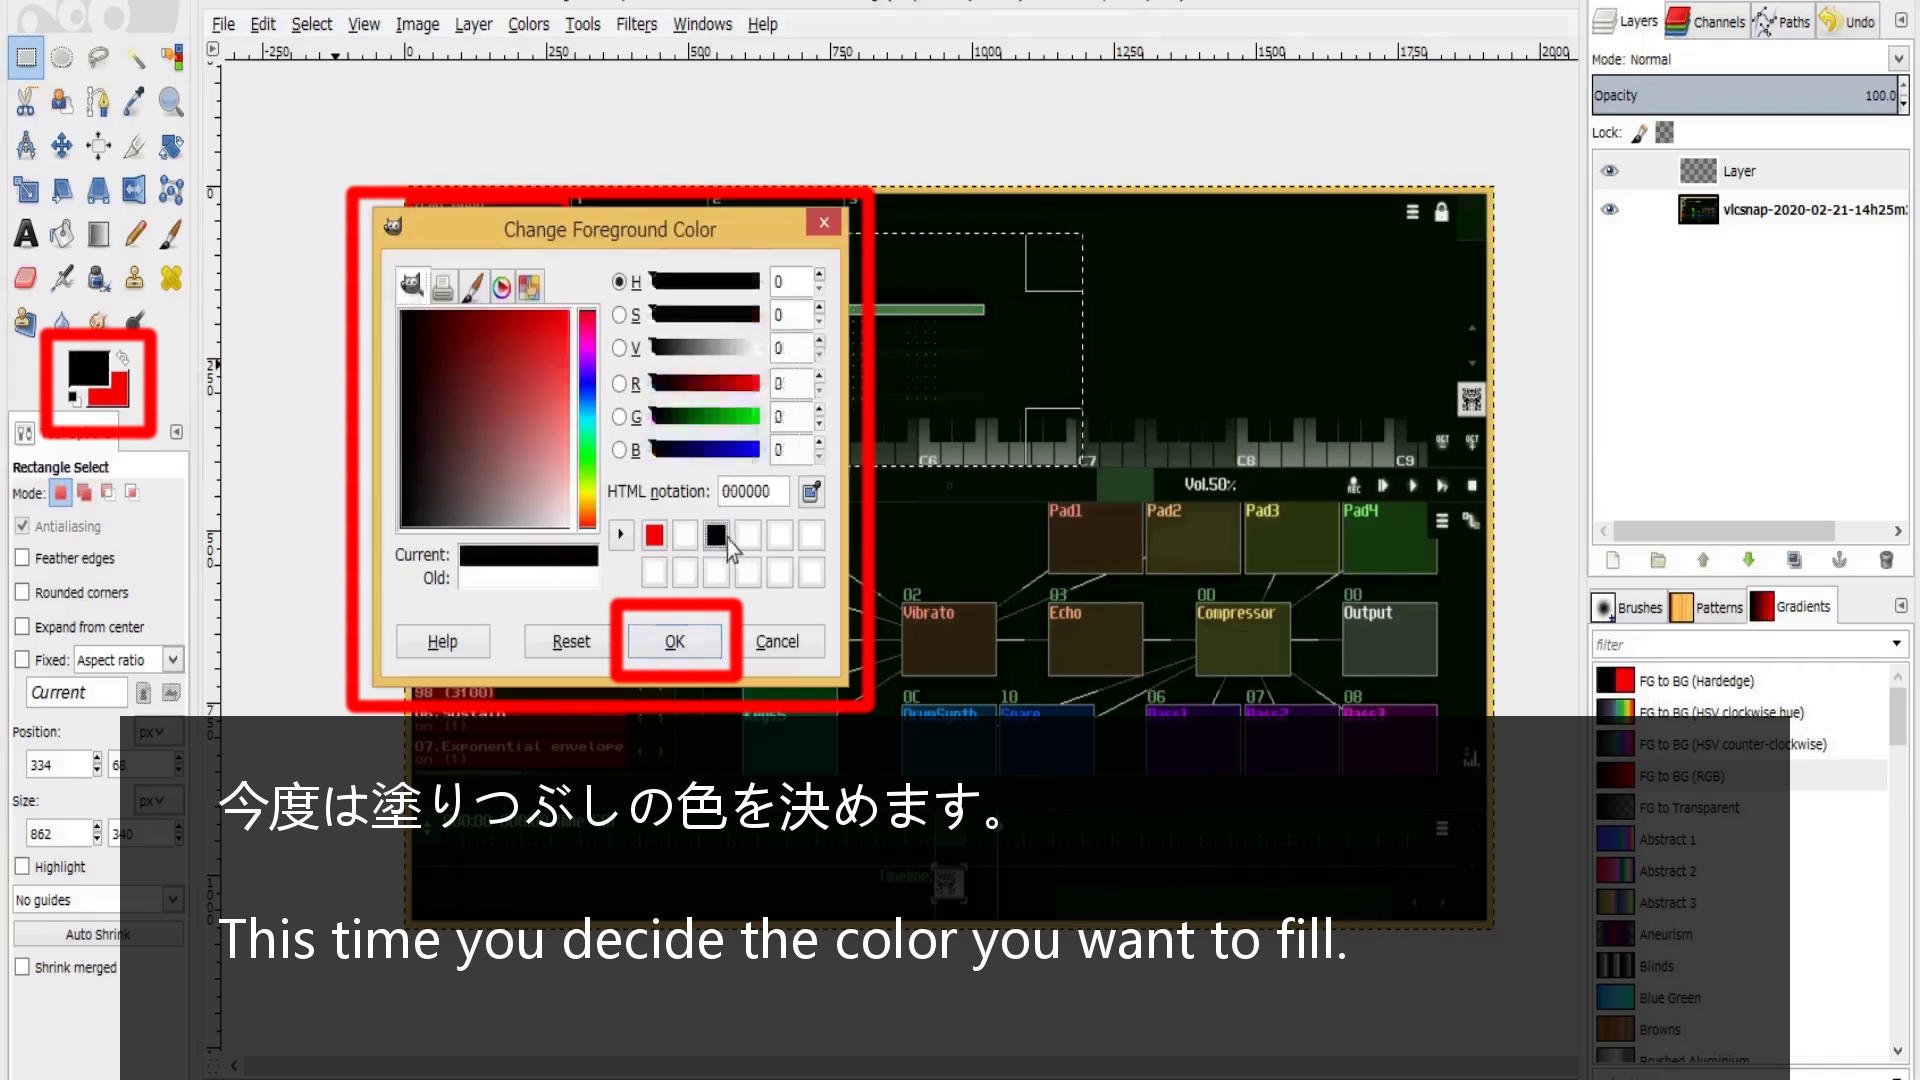
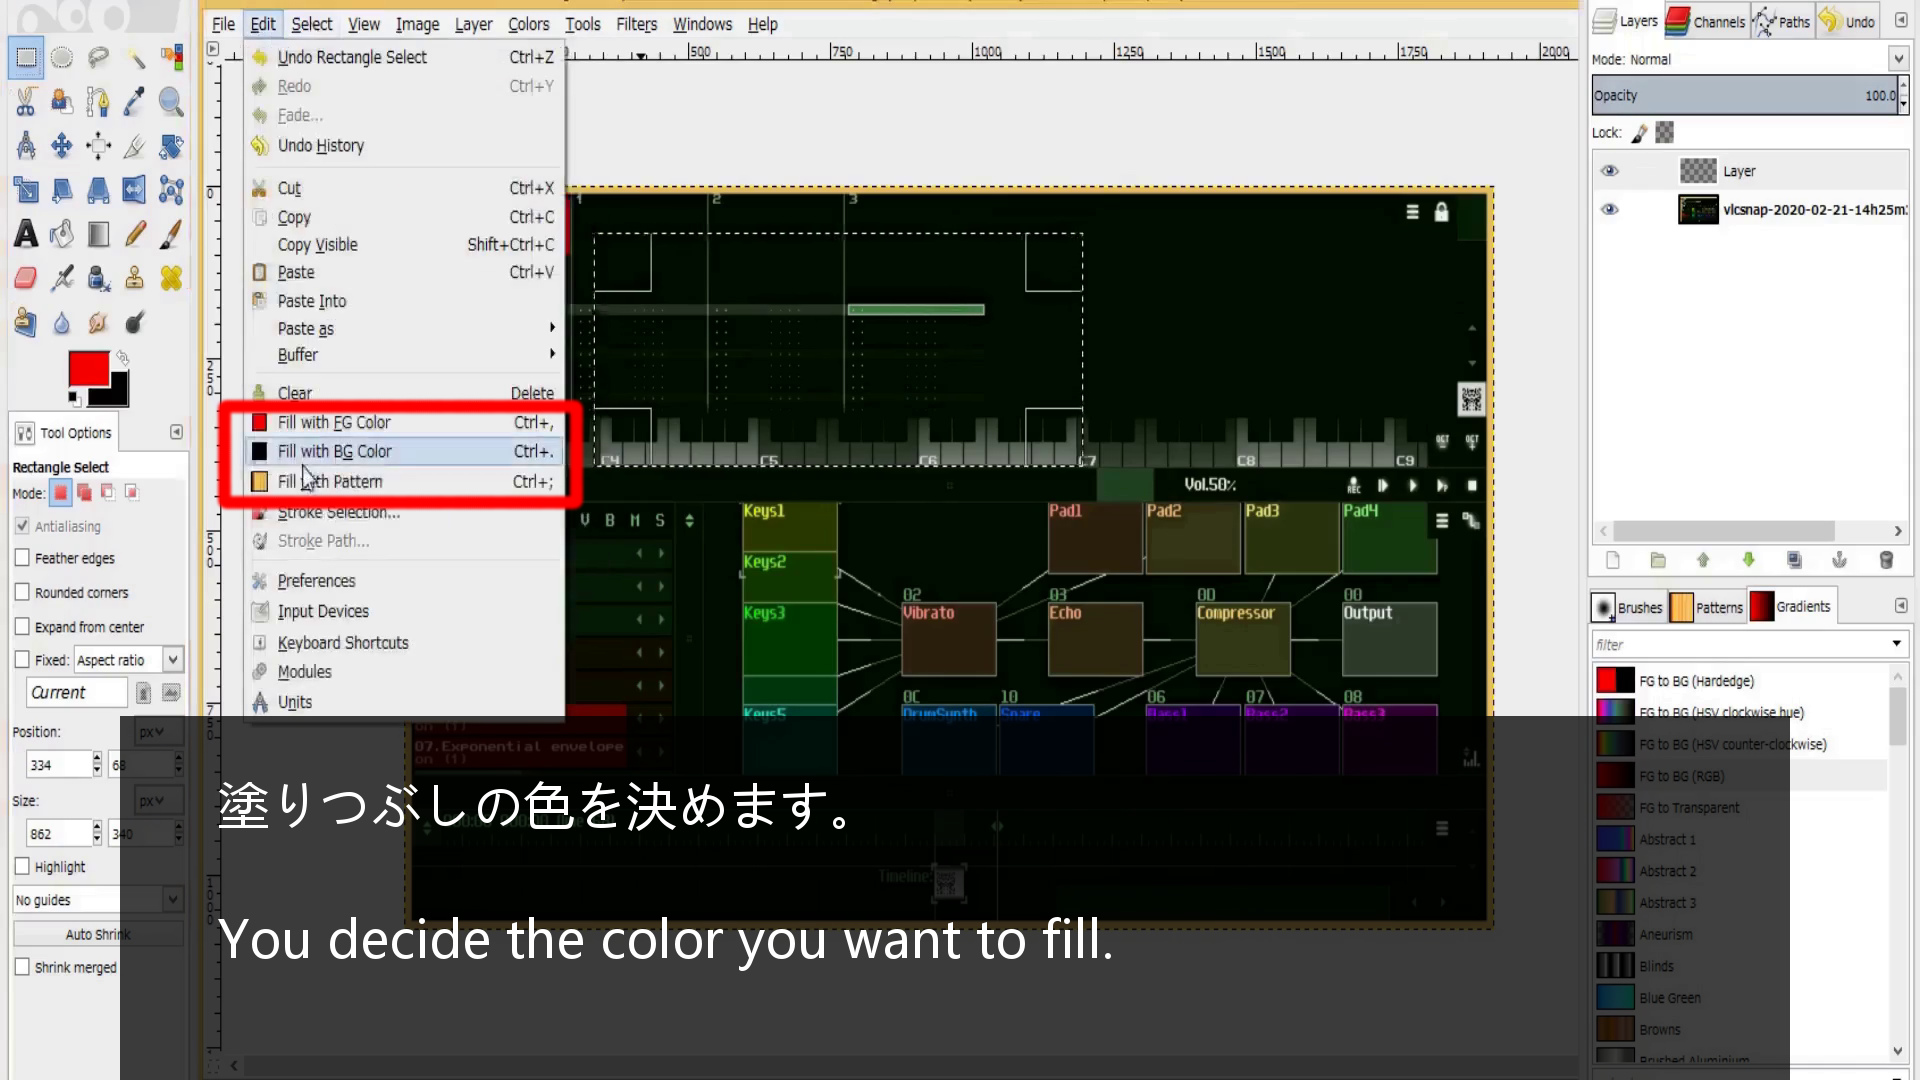
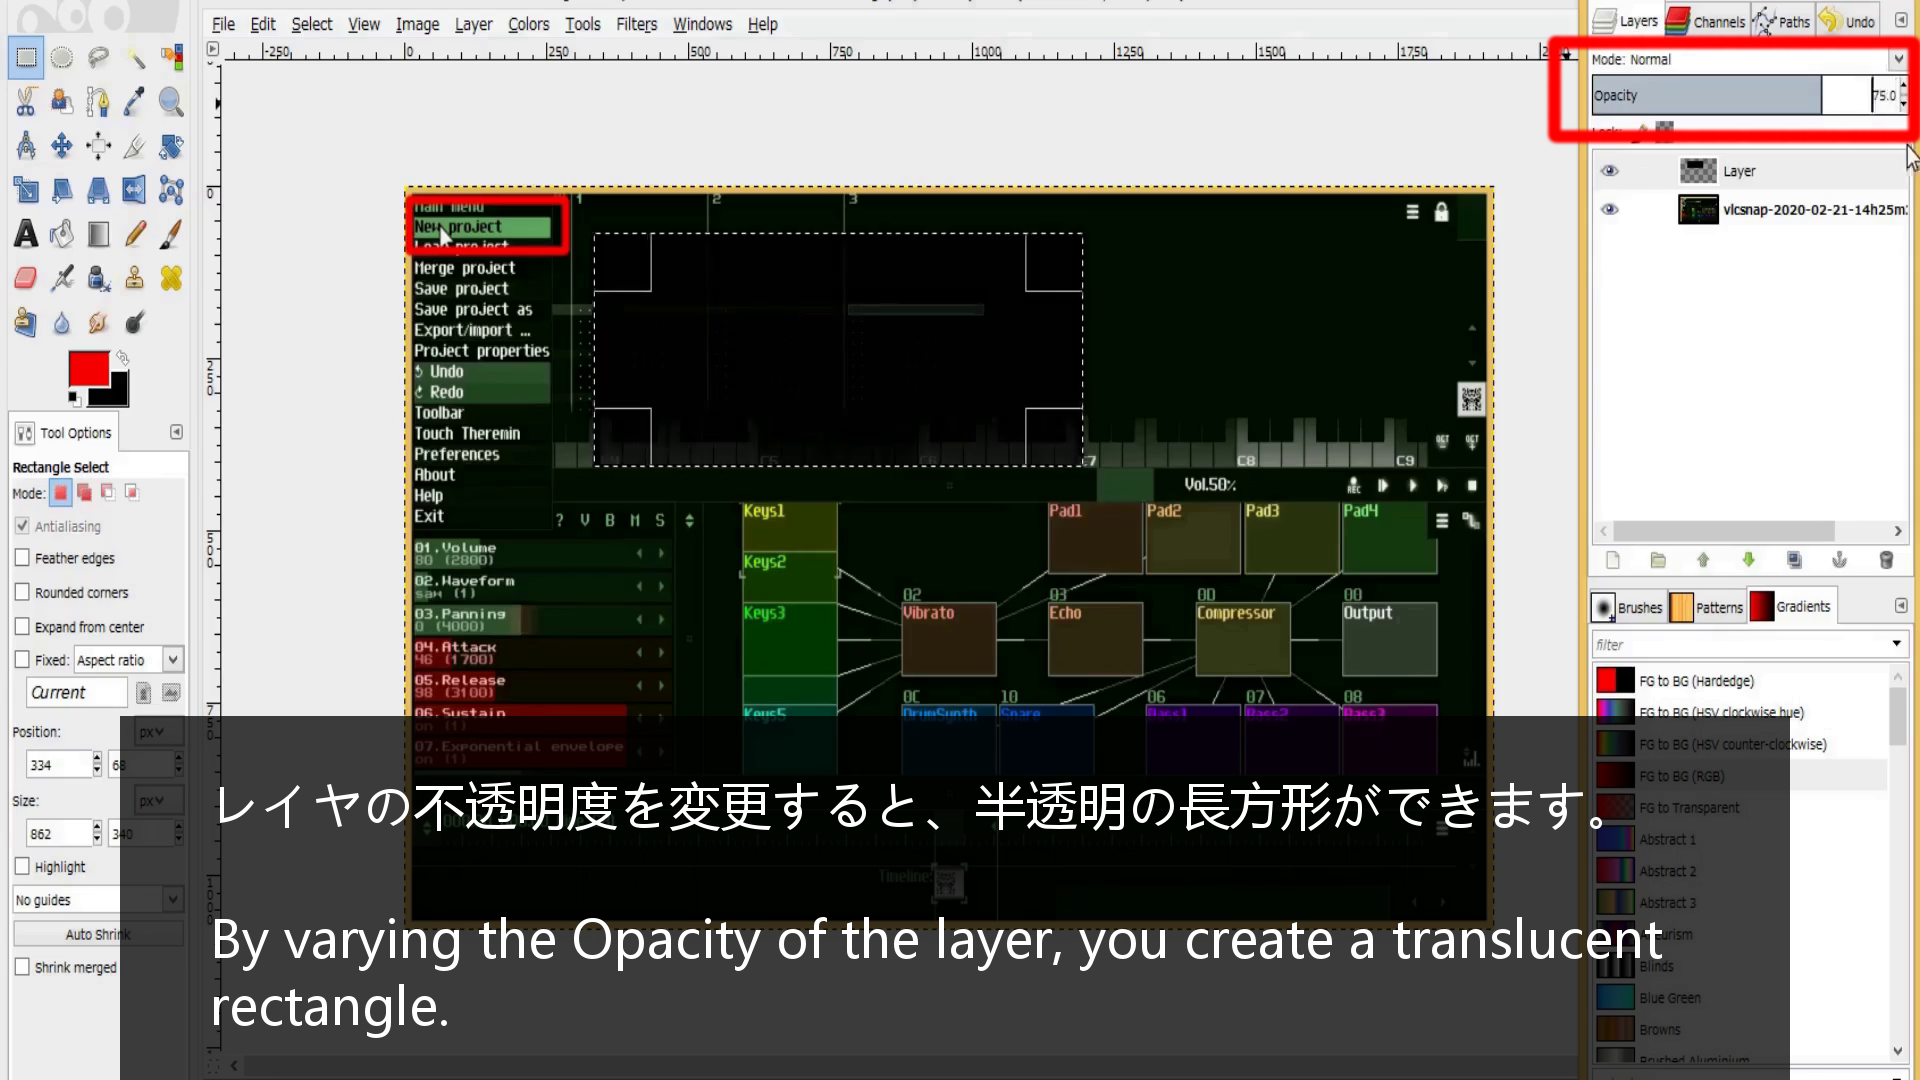
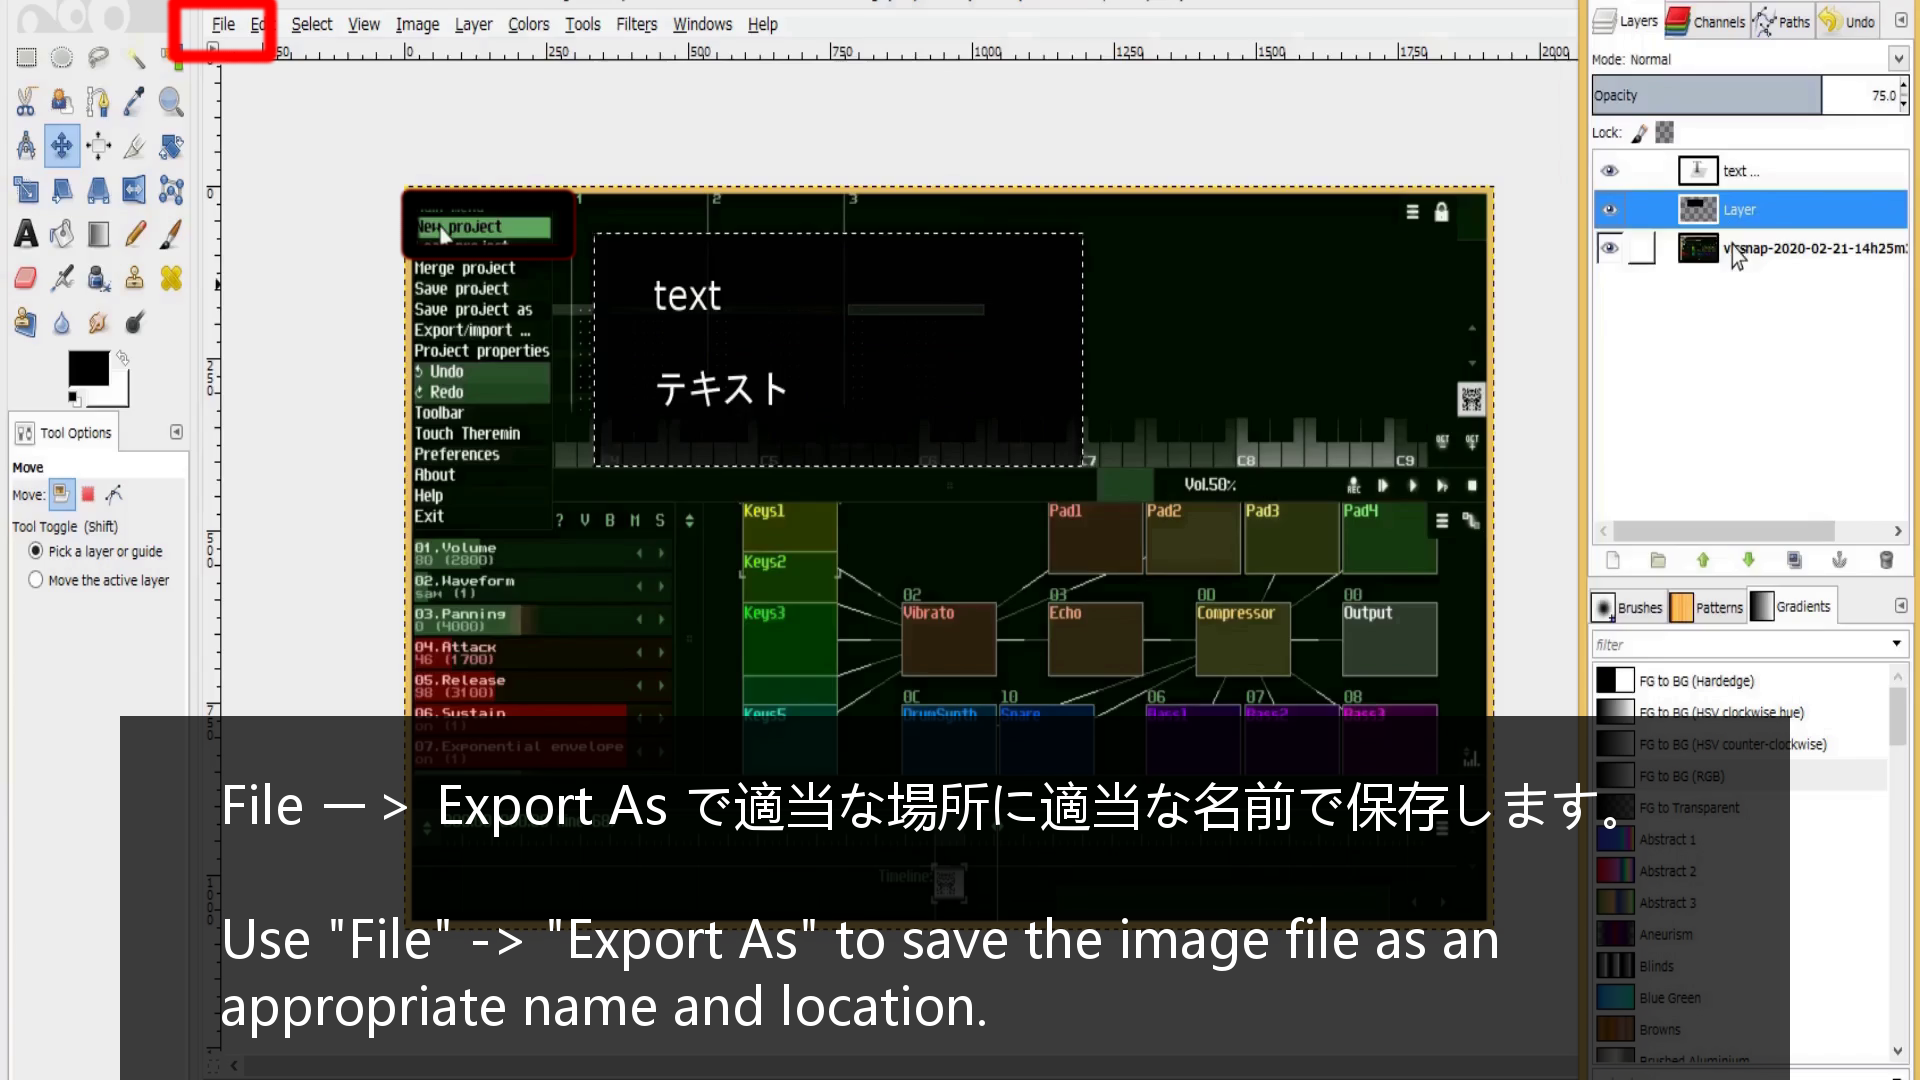
黒や白に塗りつぶされた半透明の長方形を、テキストのバックグラウンドカラーにする理由は単純です。
There is a simple reason to use a translucent rectangle filled with black or white as the background color for your text.
よりテキストを見やすくするため。これだけです。お洒落だからとか、皆がそうしているからとかではないことを理解してください。
To make text easier to read. That's all. Please understand that it is not because it is fashionable or because everyone does so.
そしてチュートリアル動画は手順を理解させるためのものなので、シンプルなテキストの表現で問題ないはずです。
And the tutorial videos are meant to help you understand the process, so a simple textual representation should suffice.
編集した画像をBlenderで組み合わせる
Combine edited images in Blender
次に編集した画像をBlenderで組み合わせる方法の説明です。
Next is a description how to combine edited images in Blender.
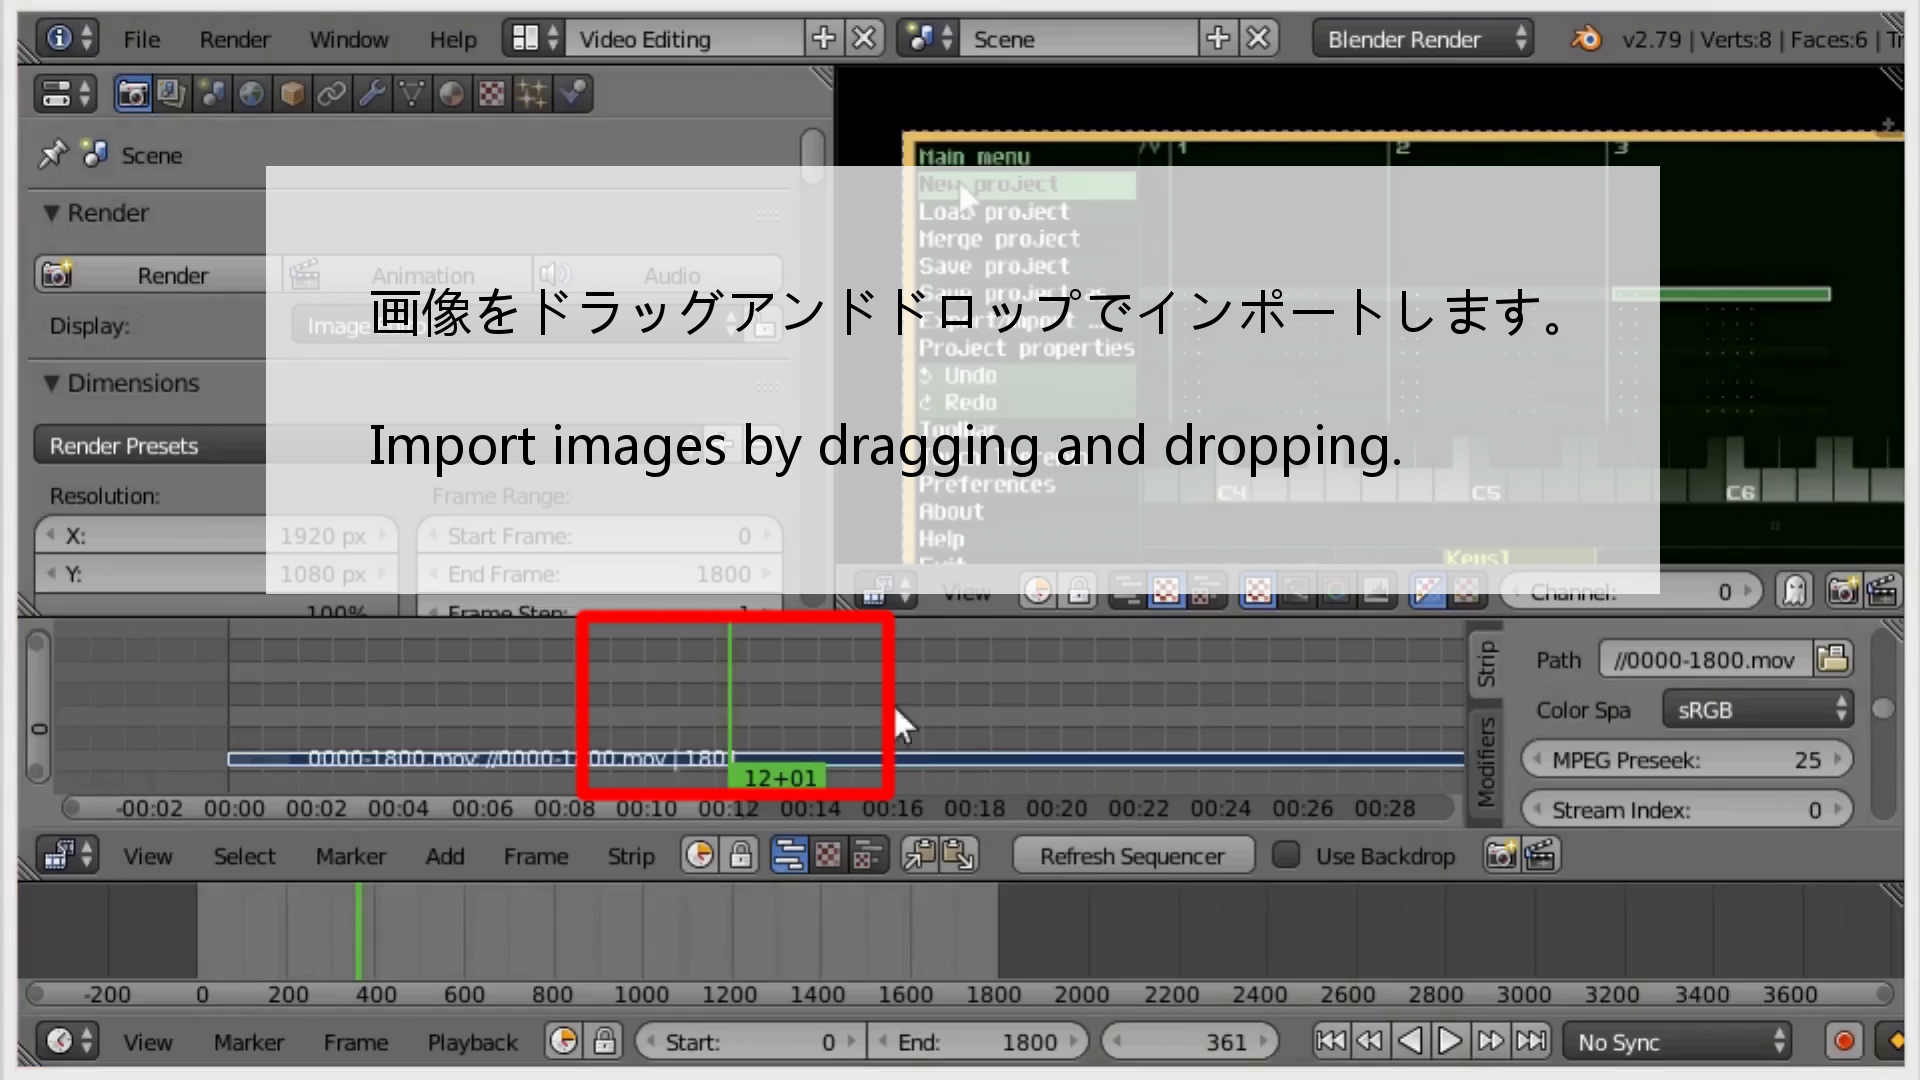
まずBlenderに動画をインポートします。
First, import the video into Blender.
そしてスナップショットを撮った動画の場所を切り取り、その間に編集した画像をインポートして、長さを調整していきます。
And then, Cut the location of the snapshot in the video, and then import the image and adjust its length between them.
今までに説明した方法で画像の位置と動画の位置と時間を調整していきます。
I will adjust the position of the image and the position and time of the video in the way I have explained so far.
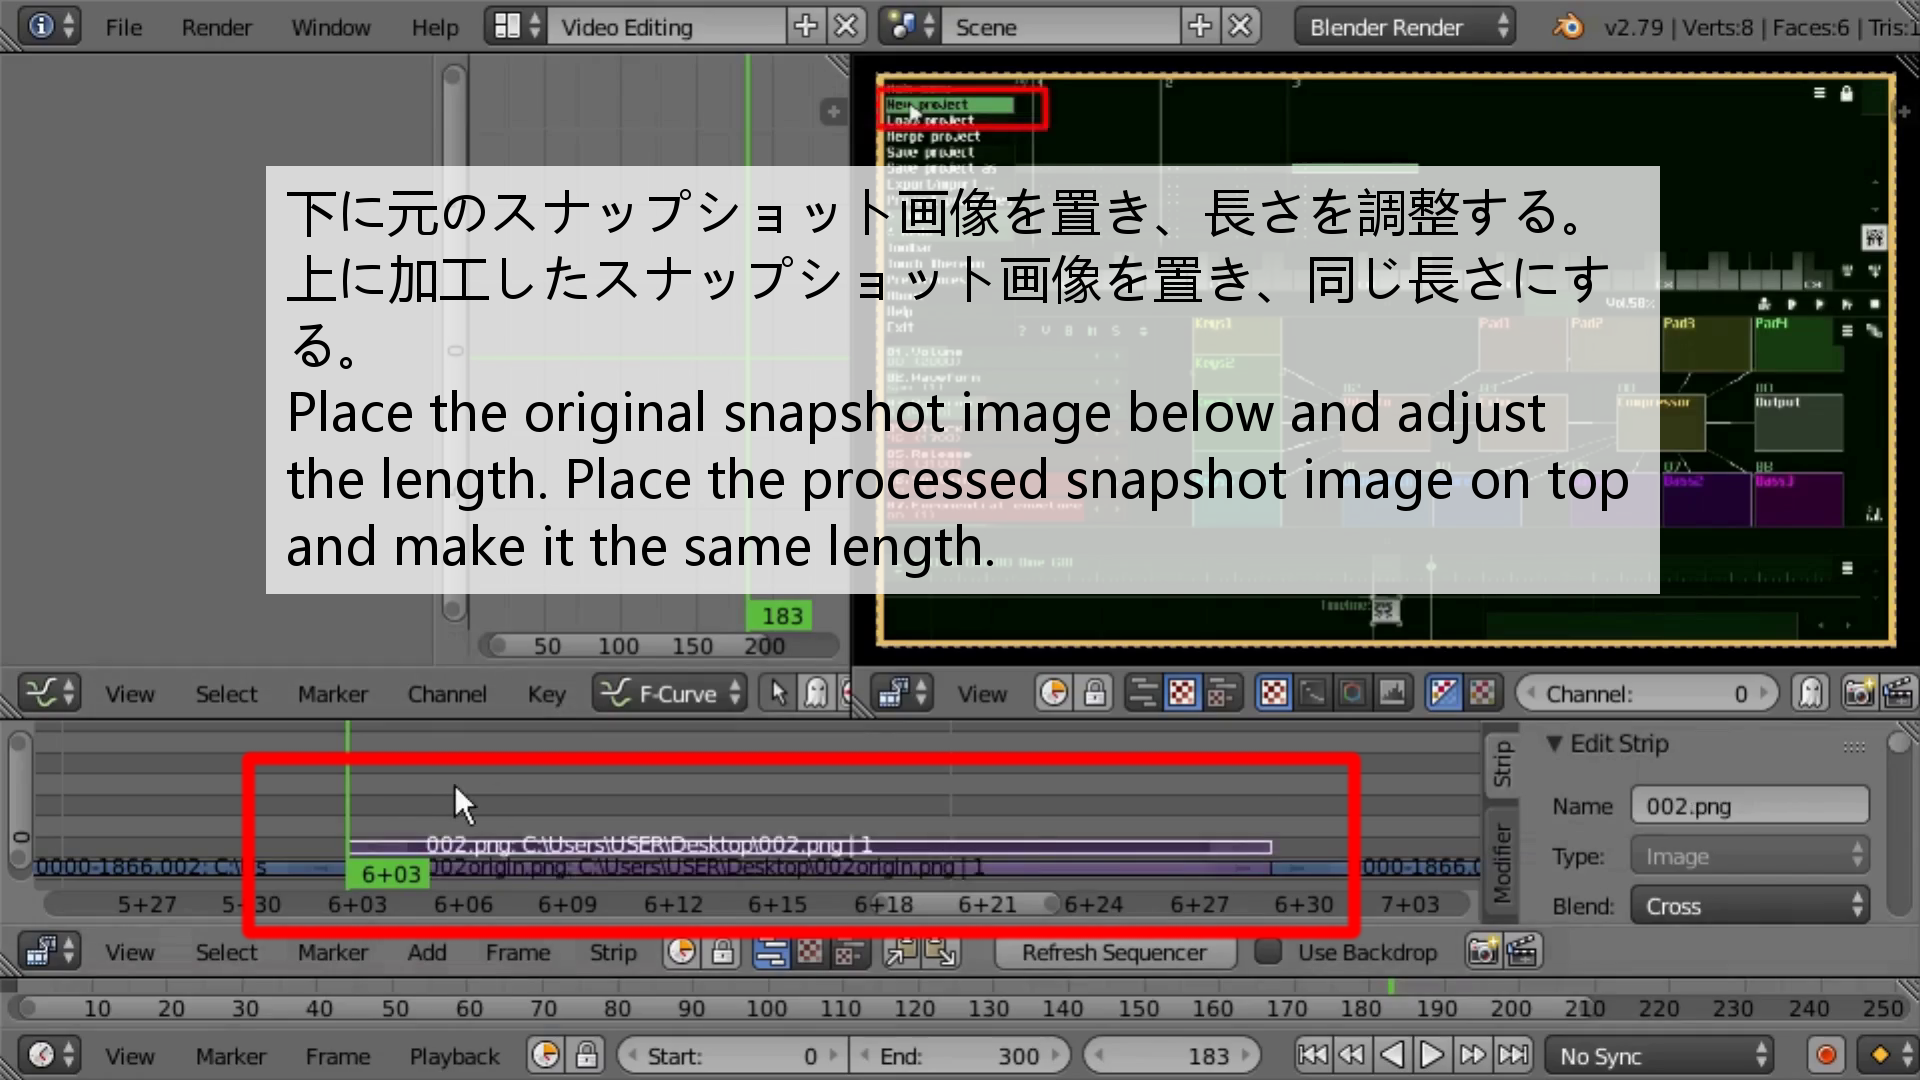
今回は説明したい箇所であることを分かりやすくさせるため、一旦その箇所の動画をポーズしたようにします。つまり、切り取った画像の再生時間を伸ばします。それから同じ画像だが編集した画像をその上に重ねます。そして、いきなり画像が変わると慌ただしくなってしまうので、不透明度をキーフレームを使用して変化させて、徐々に画面に浮かび上がらせるように再生させます。
This time, in order to make it easier to understand the point that I want to explain, I will pause the video for a moment. That is, the playback time of the cut image is extended. Then you overlay the same but edited image on top of it. Then, when the image suddenly changes, you feel rushed, so you change the opacity using keyframes so that it gradually appears on the screen.
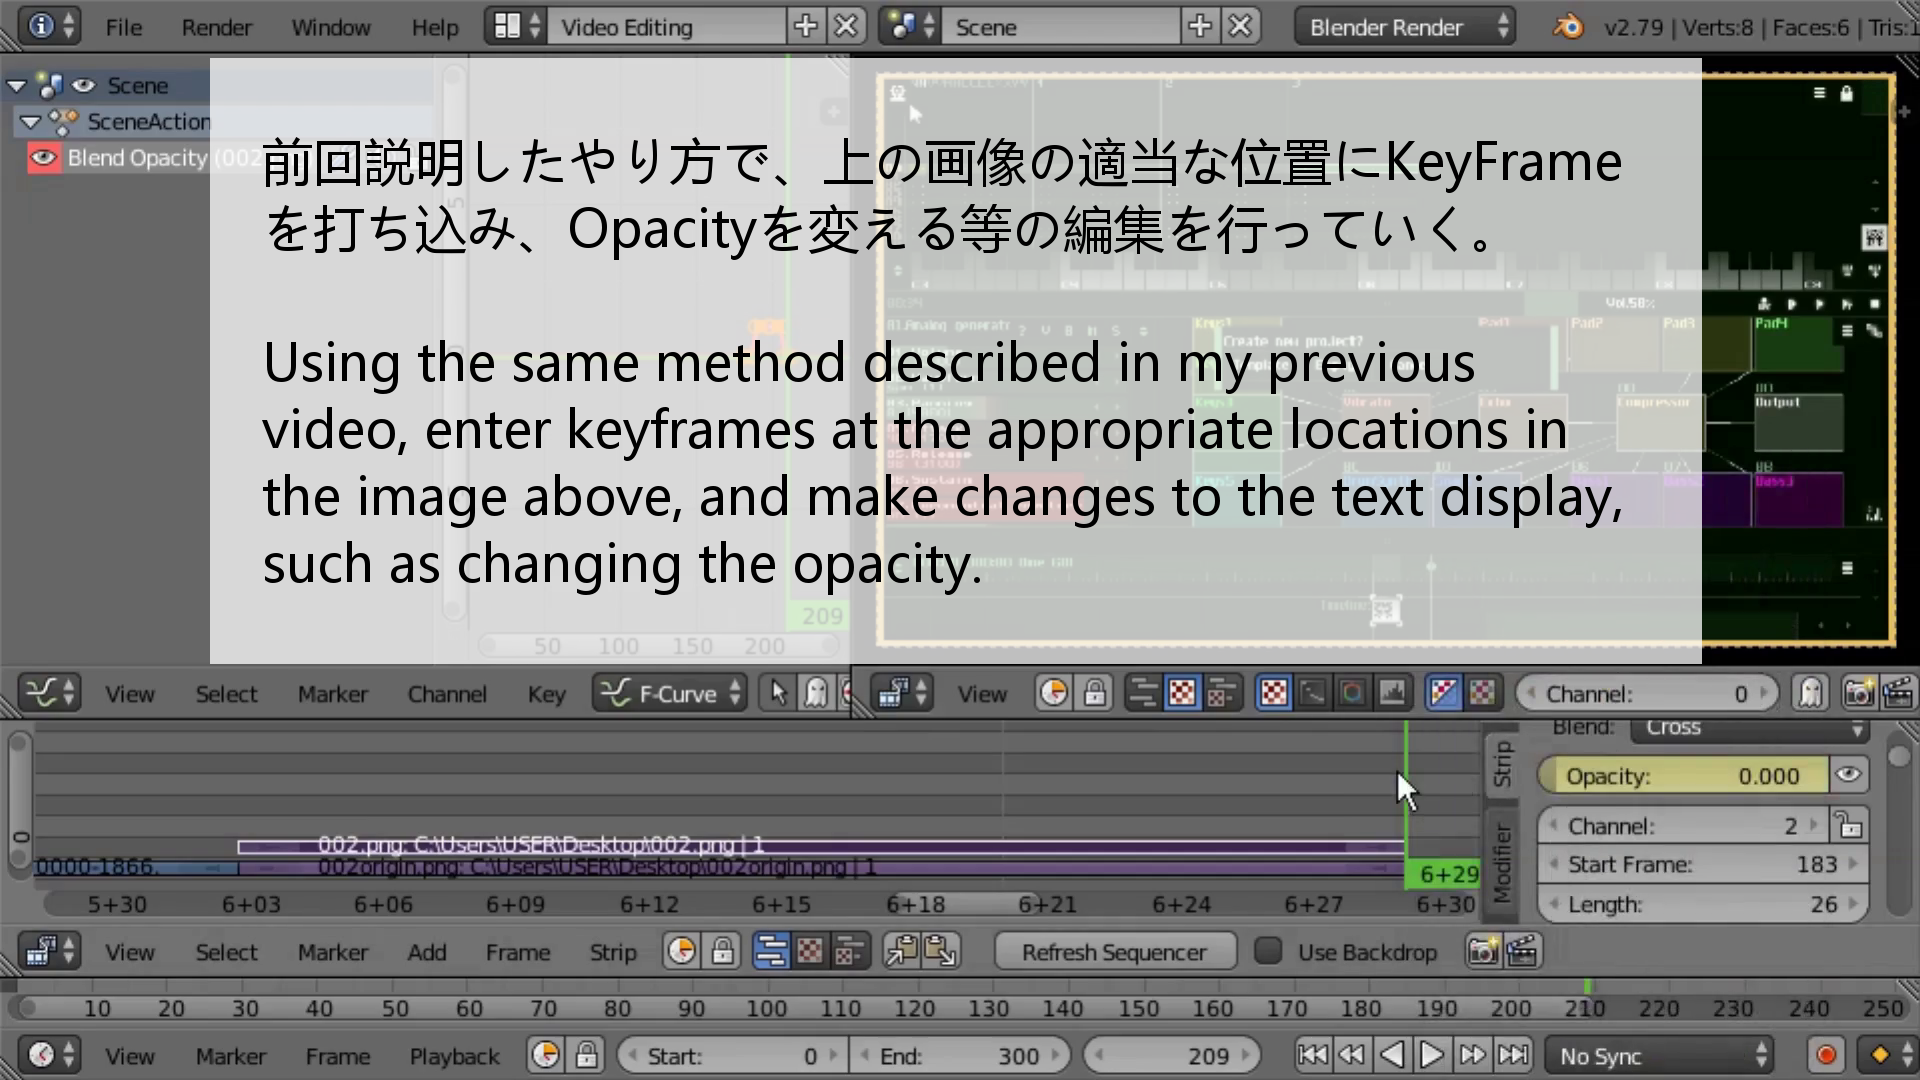
KeyFrameの扱い方は動画を見て理解するか、前回のブログを見てください。
See the video to understand how KeyFrame works, or check out the previous blog post.
後はこの作業を必要な数だけ繰り返します。
Repeat this process as many times as necessary.
編集が少し複雑になってしまう場合が多々あります。 その時は、編集作業中でも一度編集動画を短い時間に区切ってレンダリングして確認してみることをお勧めします。
If editing your video becomes complicated, it's a good idea to render the video you're editing in short chunks to see if it's working.
今回使用したソフトは素晴らしいことに全て無料で使用できます。 作ってくれた偉大なる先人達に感謝です。 さらにMac、Windows、Linuxどれでも動きます。 無駄に高いソフトを購入しなくても、簡単な動画ならこれで十分です。 まだまだ色々なことがこれらのソフトを組み合わせてできます。 是非各自で創意工夫をして色々と作ってみてください。
The software I used this time can be used for free. I thank my great predecessors. It also supports Mac, Windows and Linux. You don't have to buy expensive software. It's good enough for simple video editing. You can do more with this software. Please try making various things with your own creativity.
次回はギターTABアプリ作りの続きをします。
Next time, I will write a blog post about the last guitar TAB application.