Published Date : 2020年1月4日21:41
Processing入門
Introduction to Processing
This blog has an English translation
今回は意表を突いてProcessing入門の記事です。
This time, I'm going to write an introduction to Processing.
Processingは最近まで記事を書いていたp5.jsの親分です。
By the way, p5.js which I introduced in my previous blog post is a programming language based on Processing.
キャセイ・レアスとベンジャミン・フライによって作られたJavaベースのグラフィック機能に特化したプログラミング言語です。
Processing is a Java-based programming language specialized in visual functions, created by great "Casey Reas" and "Benjamin Fry".
p5.jsも良いですが、Processingは統合開発環境でもあります。 豊富なライブラリとエグザンプル、 色々な機能がワンパックで使えるので、とても便利です。
While p5.js is good, Processing is also an integrated development environment. It is very convenient because you can use a lot of useful libraries, examples and various functions in one pack.
何より、分かりやすく、すぐ視覚にプログラミングの結果がフィードバックされるので、 プログラミング初心者にはうってつけの言語です。
Most importantly, it's easy to understand and provides immediate visual feedback on the results of programming, making it a great language for beginners.
そして私に初めてプログラミングの楽しさを教えてくれたのはProcessingでした。
And it was Processing that taught me the joy of programming for the first time.
今回はProcessingの入門編ということで、簡単なスケッチから作成していきます。
This is an introduction to Processing, so We'll start with a simple "sketch".
目次
Table of Contents
Processingのセットアップ Setup Processing |
「Hello World」と日本語を取り扱う "Hello world" and how to handle Japanese |
簡単な応用 Try a simple application |
ページの最後へ Go to the end of the page. |
Processingのセットアップ
Setup Processing
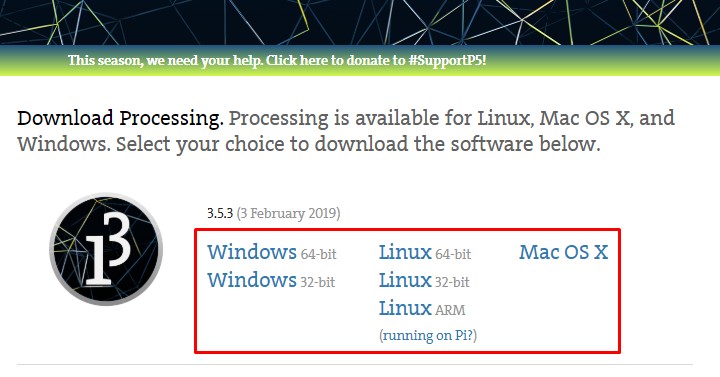
まずhttps://processing.org/download/にいき, Processingの実行ファイルが入った圧縮ファイルをダウンロードします。
First, Go to https://processing.org/download/ and download the compressed file containing the Processing executable.
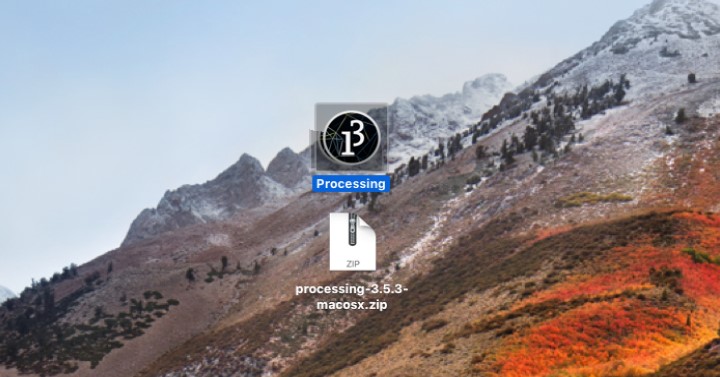
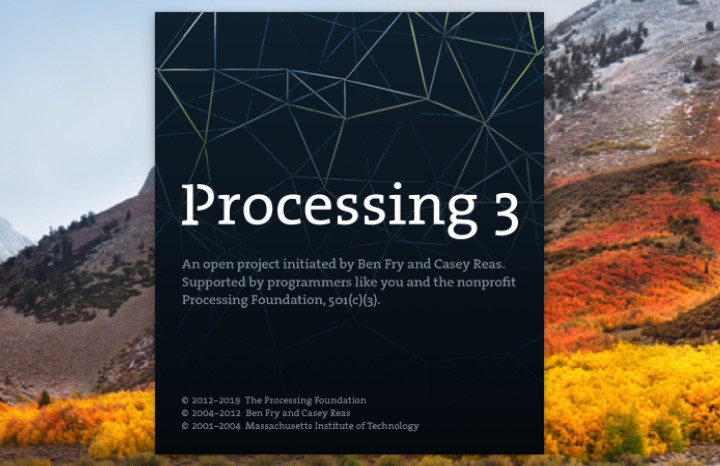
適当な場所へ圧縮ファイルを解凍して、実行ファイルをダブルクリックして起動しましょう。
Unzip the compressed file to a location and double-click the executable to launch it.
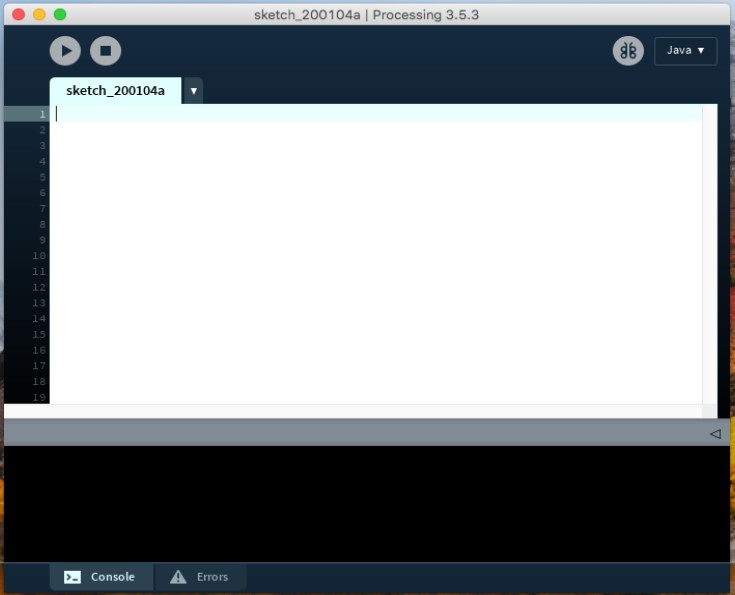
エディターが立ち上がります。後は「スケッチ」と呼ばれるファイルにコーディングしていくだけです。
The editor opens, All you have to do is code it in a file called "Sketch".
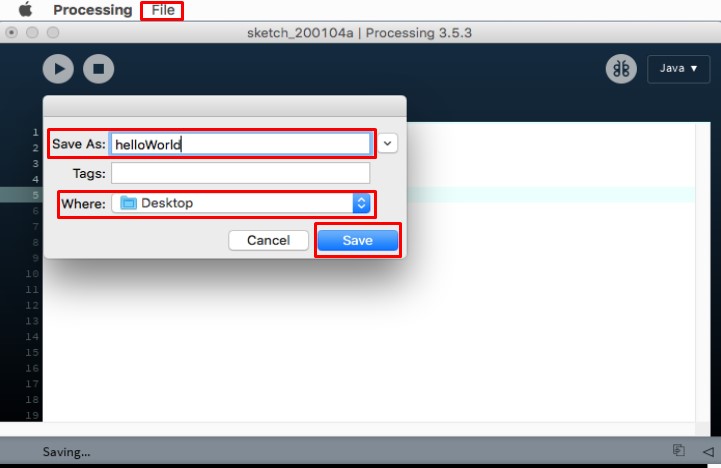
Processingのファイルの拡張子は「pde」となっていて、ファイルをセーブする時は「ファイル」から「名前を付けて保存」を選択して、適当な場所を選べばいいです。
Processing files have a "pde" extension, and you can save them by selecting "save as from file" and choosing the appropriate location.
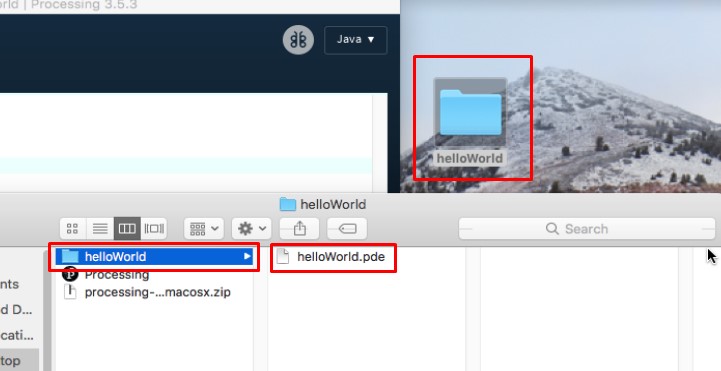
するとファイル名と同じフォルダが自動的に作られ、その中に保存したPDEファイルがあります。
This automatically creates a folder with the same name as the file, and the saved pde file is in it.
「Hello World」と日本語を取り扱う
"Hello world" and how to handle Japanese
それではHello Wroldを表示させましょう。
Let's display "Hello world"
void setup(){

}

void draw(){

}
Processingにはお決まりの、そして大事な関数が2つあります。
Processing has two familiar and important functions.
voidとは関数が返す型です。この場合何も返さない関数ということです。 例えばIntなら整数の値を返すように書かないとエラーになります。
void is the type returned by the function. In this case, the function returns nothing. For example, Int must be written to return an Integer value or an error will result.
Setup関数はProcessingのコードを動かした時に「一回だけ」実行されます。 そしてDraw関数は停止ボタンが押されるまで「ループ」し続けます。
The setup function is executed "only once" when the code in Processing is run. The draw function then continues to "loop" until the stop button is pressed.
void setup(){
  println("Hello world");
}

void draw(){
}
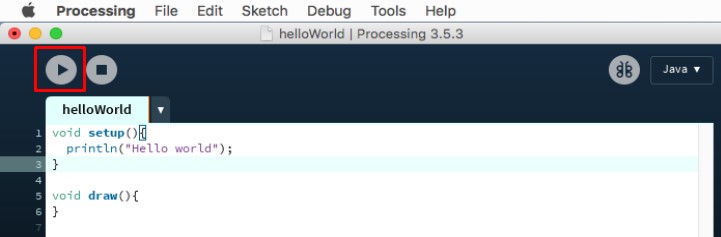
上のコードを実行すると、一回だけProcessingエディターのコンソール画面に「Hello World」と表示されます。
If you run the above code, you will see "Hello world" on the Processing editor's console screen only once.
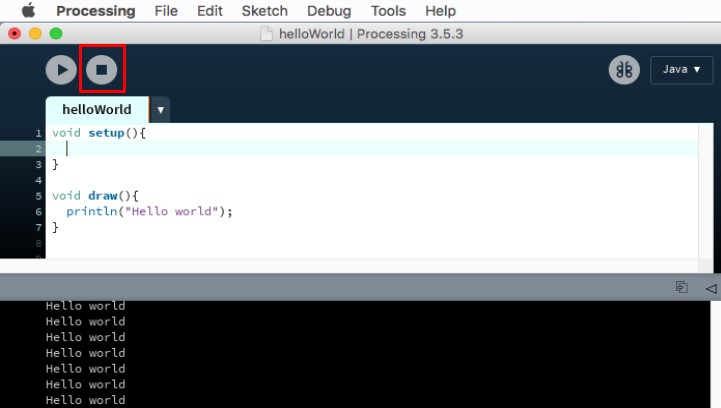
実行する場合は以下のボタンを押します。
Press the following button to execute.
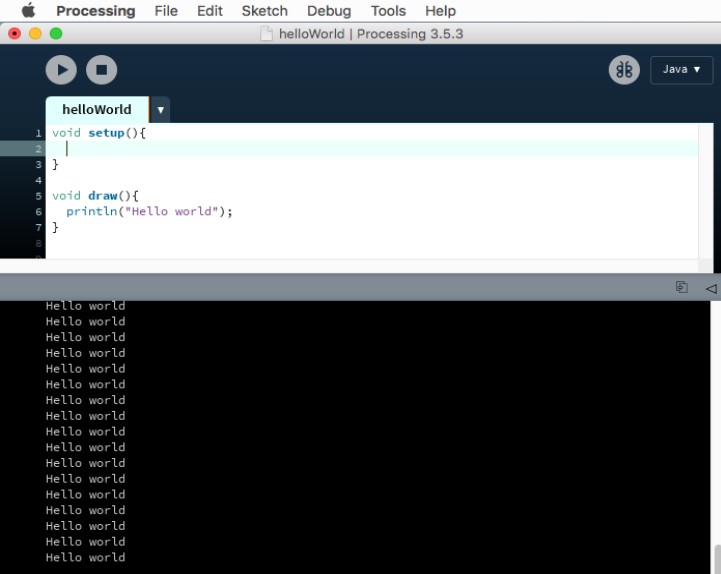
もしDraw関数に書くと停止ボタンが押されるまでコンソール画面に「Hello World」が表示され続けます。
If you write the code in the Draw function, the console screen will continue to display "Hello World" until you press the stop button.
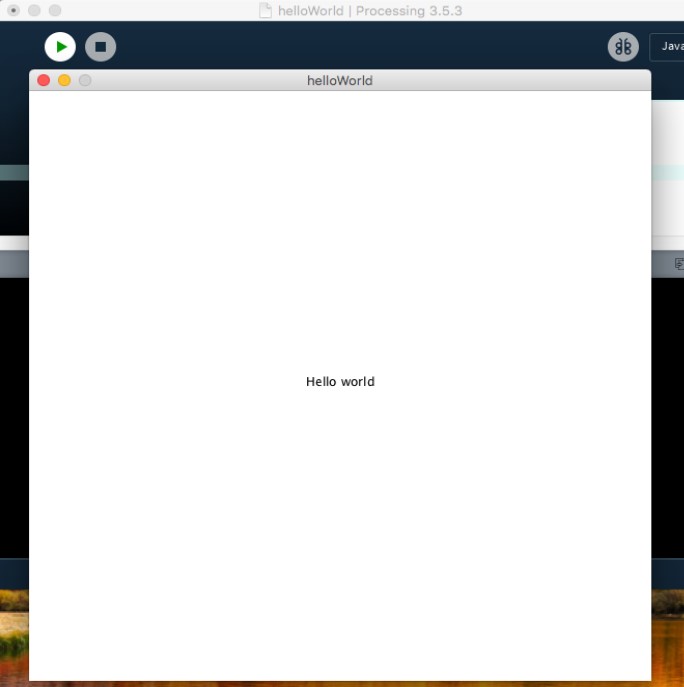
次はテキストとして画面に表示させてみましょう。
Next, let's display it as text on the screen.
void setup(){
  size(600, 600);
  background(255);
  textAlign(CENTER);
  fill(0);
  text("Hello world", width/2, height/2);
}

void draw(){
}
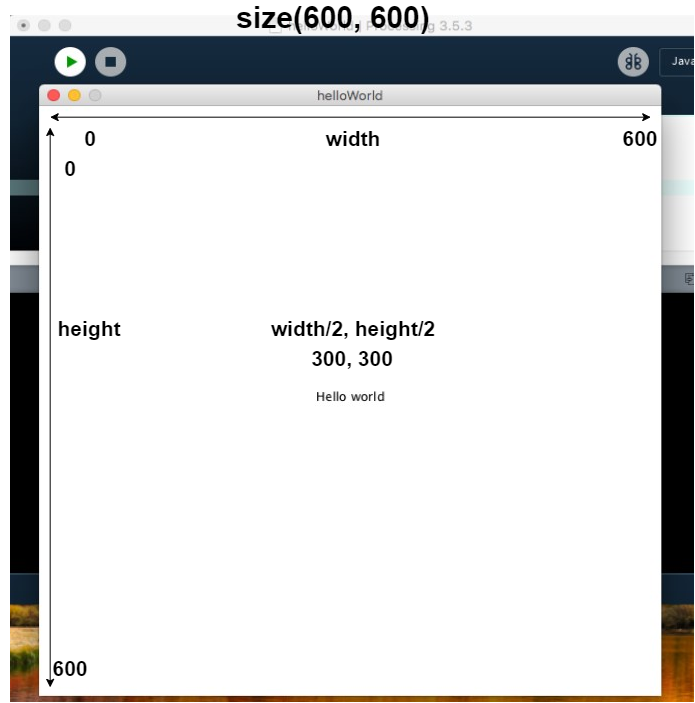
sizeは表示するキャンバスのサイズを決めます。 backgroundの色は(255)、つまり白にします。 textAlignでテキストの中央にあたる部分にXとYの座標がくるように設定します。 テキストの色をfillで黒(0)にします。 text(”表示させたい文字”、 Xの座標、 Yの座標)。 widthとheightには最初に設定したキャンバスの横幅と縦幅が変数として収められています。 これはProcessingが自動で行ってくれます。
size function determines the size of the canvas to display. The background function sets the backgound color (255 is white). textAlign function sets the X and Y coordinates to the middle of the text. Make the text color black (0) with fill function; text("text you want to display", X coordinate, Y coordinate). The "width" and "height" contain the width and height of the canvas as variables. Processing does this automatically.
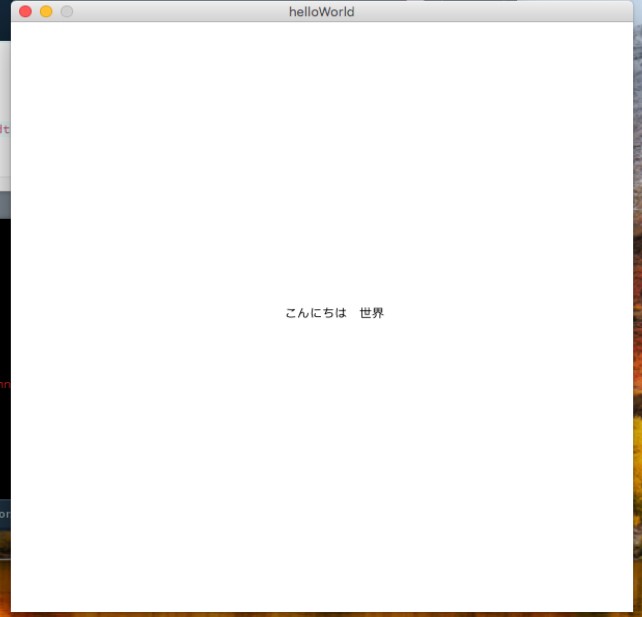
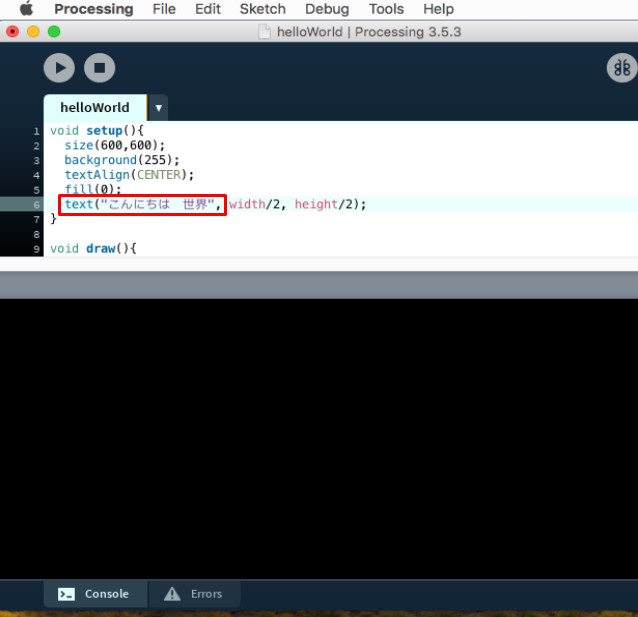
Hello Wolrdの代わりに日本語で「こんにちは世界」と表示させてみましょう。
Let's to display "Hello world" in Japanese instead of English.
void setup(){
  size(600, 600);
  background(255);
  textAlign(CENTER);
  fill(0);
  text("こんにちは 世界", width/2, height/2);
}

void draw(){
}
でもエディターではこのように表示されてしまいます。
But in the editor, it looks like this.
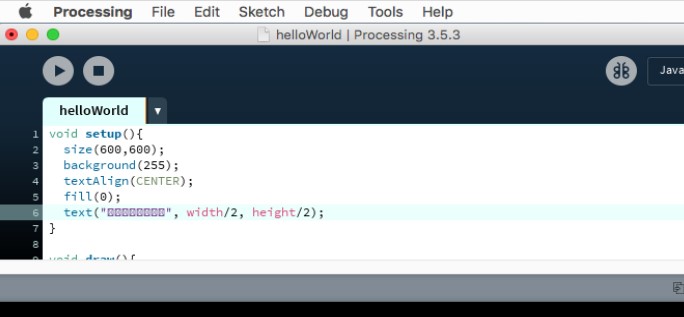
これだとわかりにくいので、日本語を表示できるようにしましょう。
This is difficult to understand, so let's make it possible to display Japanese.
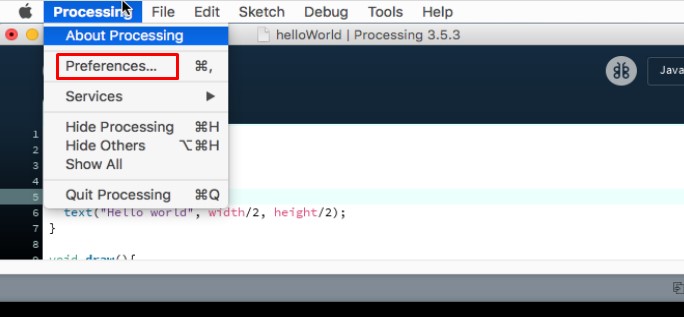
Windowsなら「file」から「Preferences」を、Macなら「Processing」から選びます。
Choose "Preferences" from "file" on Windows, or from "Processing" on Mac.
Windowsなら言語を「日本語」に設定してフォントを「MS ゴシック」にします。 Macならフォントを「Menlo」にするだけです。
On Windows, set the language to "Japanese" and the font to "MS Gothic". On a Mac, just set the font to "Menlo".

Windowsだとさらに以下の様にしないとキャンバスに表示されないことがあります。
On Windows, you may need to do the following to display it on the canvas.
PFont = font;
font = createFont("MS Gothic",20);
textFont (font);
簡単な応用
Try a simple application
ではFor文を使ってキャンバスに複数の文字を表示させてみましょう。
Now let's use the For statement to display multiple characters on the canvas.
void setup(){
    size(600, 600);
    background(255);
    textAlign(CENTER);
    fill(0);
    for (int i = 0; i < 10; i++) {
        text(i + ": こんにちは 世界", width/2, 70 + (i * 50) );
    }
}

void draw(){
}
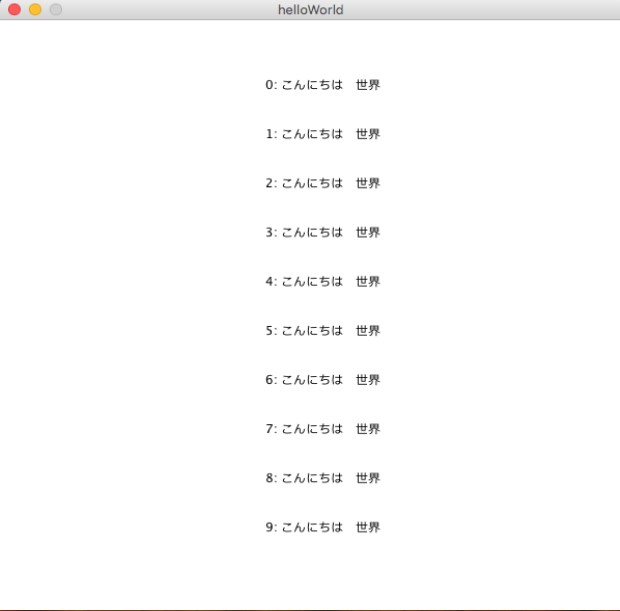
text(i + ": こんにちは 世界", width/2, 70 + (i * 50) );
インデックス番号が0から9まで合計10回ループされます。 そのインデックス番号を利用して、高さ70pxから50pxずつ下にずらして文字を表示させます。 ついでに文字の先頭に「+」を用いて、インデックス番号を表示させます。
The index number is looped a total of 10 times, from 0 to 9. It then uses the index number to move the string down every 50 px from 70 px in height. It then displays the index number with a "+" at the beginning of the text.
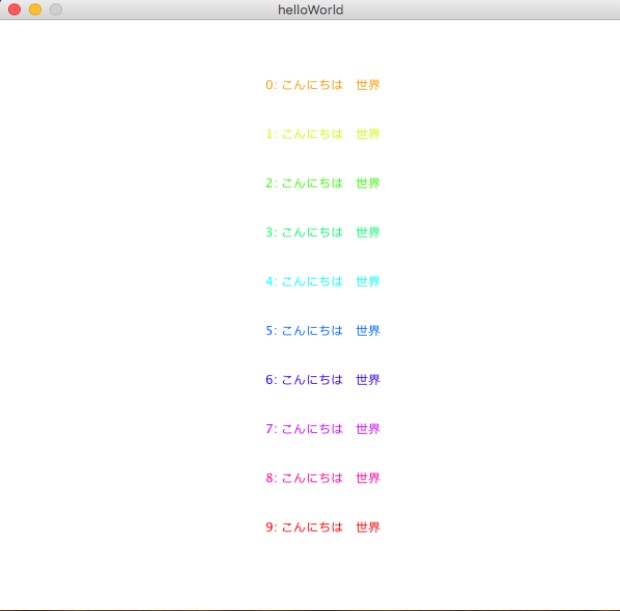
これだとつまらないのでテキストにカラーをつけてみましょう。
This is boring, so let's color the text.
void setup(){
    size(600, 600);
    background(255);
    textAlign(CENTER);

    colorMode(HSB, height, 255, 255, 255);

    for (int i = 0; i < 10; i++) {
        fill(height * (i + 1) / 10, 255, 255, 255);
        text(i + ": こんにちは 世界", width/2, 70 + (i * 50) );
    }
}

void draw(){
}
colorMode(HSB, height, 255, 255, 255);
カラーモードをHSBにします。 設定の内容は(”HSB”、”色相(Hue)のMAX値”、”彩度(Saturation)のMAX値”、明度(Brightness)のMAX値”、”透明度(transparency)(Alpha)のMAX値”)です。 RGBではなくHSBによって色を決める理由は、高さや横などの変数を利用して、Forループ等を使って様々な色を自在に操れるからです。
Sets the color mode to HSB. The setting is ("HSB", "Max value of hue", "Max value of saturation", "Max value of Brightness", "Max value of transparency (alpha)"). The reason that colors are determined by HSB instead RGB is that you can manipulate various colors freely using For loops, etc. using variables such as height and width.
実際このように色相環を10分割するような計算で七色を表現できます。
In fact, the For loop can represent rainbow colors because you can do a calculation like dividing the color wheel into 10 parts.
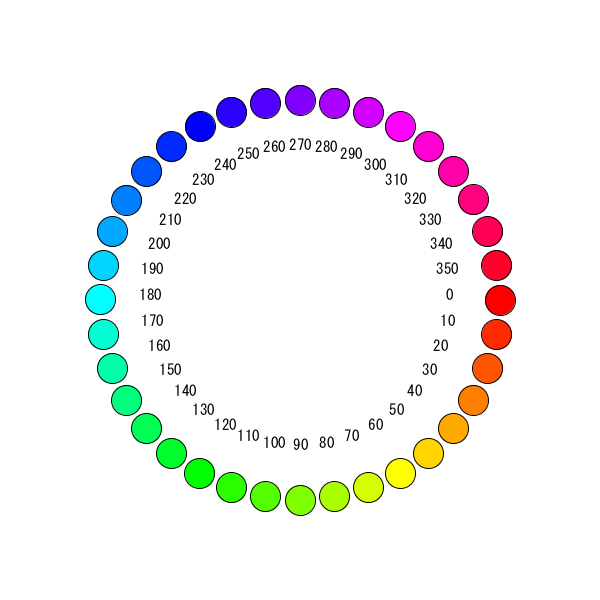
色相環を表現するのも簡単です。 ちょっとした三角関数を使えばいいだけです。
It is also easy to represent the color wheel. Just use a little trigonometric function.
void setup(){
  size(600, 600);
  background(255);

  textAlign(CENTER);
  textSize(15);

  colorMode(HSB, 360, 255, 255, 255);

  float cx = width/2;
  float cy = height/2;

  for (int i = 0; i < 36; i++) {
      fill(0);
      text(i*10, cx+(cos(radians(i*10))*150),cy+(sin(radians(i*10))*150));

      fill(i*10,255,255,255);
      ellipse(cx+(cos(radians(i*10))*200),cy+(sin(radians(i*10))*200),30,30);
  }
}

void draw(){
}
Draw関数を使うとアニメーションのようなことができます。
You can use the draw function to do something like an animation.
float count = 0;
int fps = 24;

void setup(){
  size(600, 600);
  background(360);
  frameRate(fps);

  textAlign(CENTER);
  textSize(12);

  colorMode(HSB, 360, 255, 255, 255);
}


void draw(){
  background(360);

  if (count > 36) {
    count = 0;
  }

  fill(0);
  text(str(i*10), mouseX+(cos(radians(i*10))*150),mouseY+(sin(radians(i*10))*150));
  noStroke();
  fill(i*10,255,255,255);
  ellipse(mouseX+(cos(radians(i*10))*200),mouseY+(sin(radians(i*10))*200),30,30);

  count++;

}
Draw関数は1フレームずつ描画されます。 なので、その都度Background関数で背景を塗りつぶして、動きを表現しています。
The Draw function draws one frame at a time. Each time, We use the Background function to fill the background to express the movement.
For文でループさせる代わりにWhileループを使うようなものです。
It's like using a While loop instead of a For statement.
これで一つの玉がクルクルと回っているように表現できます。
With this, you can express as if one ball is spinning.
後は画面の中央からXとYの座標を決めていたのをマウスの座標で決めるように設定しただけです。
All you have to do is determine the X and Y coordinates of the ball from the coordinates of your mouse, instead of the center of the screen.
- cx + (cos(radians(i*10))*200), cy + (sin(radians(i*10))*200)
+ mouseX + (cos(radians(i*10))*200), mouseY + (sin(radians(i*10))*200)
これで入門編は終わりですが、Processingは本当に色々な表現が簡単にできます。 是非色々と試してみてください。
This is the end of the introduction, but Processing really makes it easy to do a lot of different things. So, Please try various things.