Published Date : 2020年5月15日11:03
簡単なお遊びAndroidアプリの作り方 ~実装編~
How to make a simple Android app ~ Implementation version ~
This blog has an English translation
YouTubeにアップした動画、「【アンドロイドアプリ】How to make a simple Android app ~ Implementation version ~」の補足説明の記事です。
Here's a little more about the 「【アンドロイドアプリ】How to make a simple Android app ~ Implementation version ~」 video I uploaded to YouTube.
単純なAndroidアプリを作って遊んでみよう。~実装編~
Make and play with a simple Android app. ~ Implementation version ~
無駄な説明を省いて、忙しい時でも短時間で理解できるような動画です。
It's a video that can be understood in a short period of time even when you're busy, without any unnecessary explanation.
目次
Table of Contents
アプリを実装する
implement an app
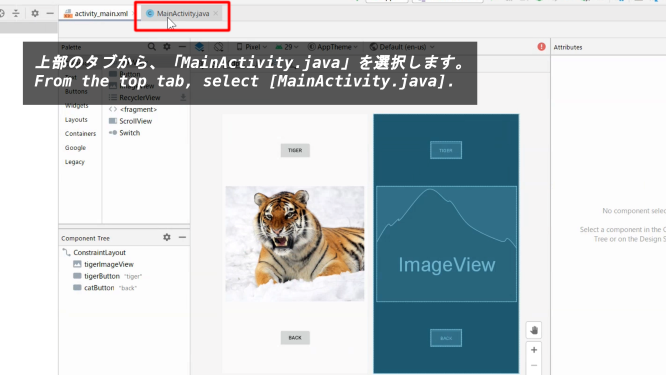
上部のタブから、「MainActivity.java」を選択します。
From the top tab, select [MainActivity.java].
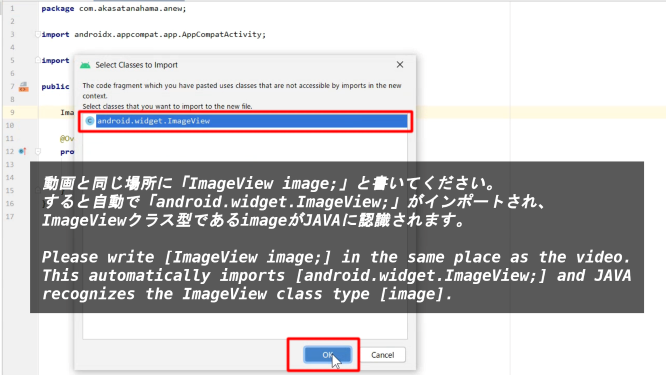
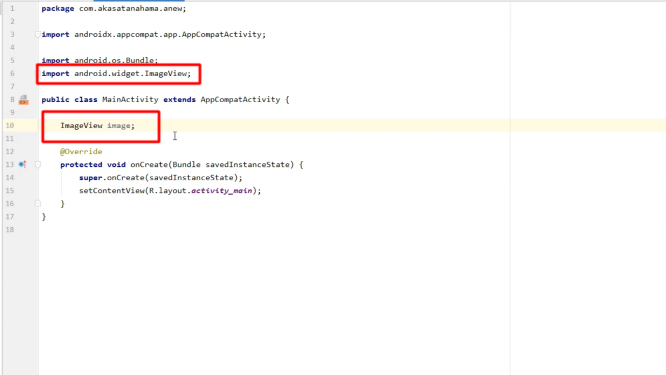
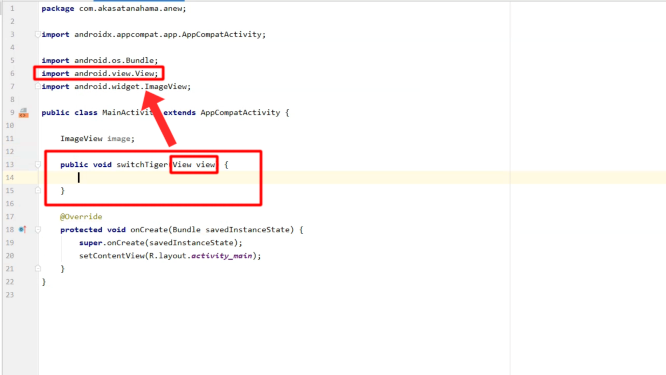
動画と同じ場所に「ImageView image;」と書いてください。すると自動で「android.widget.ImageView;」がインポートされ、 ImageViewクラス型であるimageがJAVAに認識されます。
Please write [ImageView image;] in the same place as the video. This automatically imports [android.widget.ImageView;] and JAVA recognizes the ImageView class type [image].
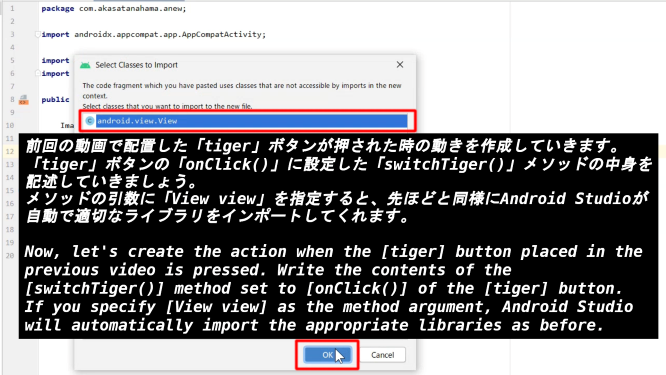
前回の動画で配置した「tiger」ボタンが押された時の動きを作成していきます。「tiger」ボタンの「onClick()」に設定した「switchTiger()」メソッドの中身を記述していきましょう。
Now, let's create the action when the [tiger] button placed in the previous video is pressed. Write the contents of the [switchTiger()] method set to [onClick()] of the [tiger] button.
メソッドの引数に「View view」を指定すると、先ほどと同様にAndroid Studioが自動で適切なライブラリをインポートしてくれます。
If you specify [View view] as the method argument, Android Studio will automatically import the appropriate libraries as before.
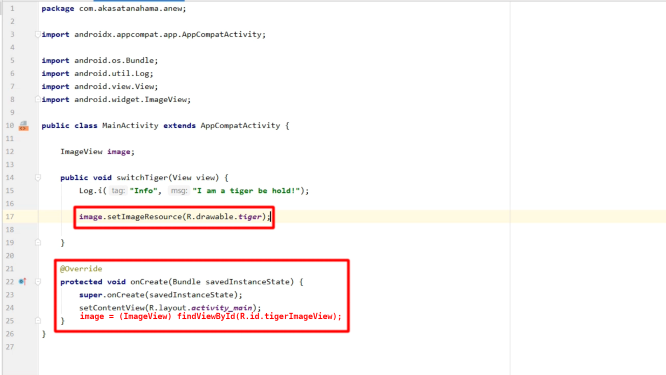
「Log.i("Info", "I am a tiger be hold!");」はボタンが押された時にコンソールに"I am a tiger be hold!"と表示させます。
[Log.i("Info" , "I am a tiger be hold!");" displays "I am a tiger be hold!" on the console when the button is pressed.

画面の一番下にある「protected void onCreate(Bundle savedInstanceState)」メソッドが呼び出された時(アプリを立ち上げると一番最初に実行されるメソッド)に「image = (ImageView) findViewById(R.id.tigerImageView);」が虎の画像を「image」に割り当てる。
アプリが起動された時のデフォルトで表示される画像です。
そして、「tiger」ボタンが押されたら、その「image」に再度「image.setImageResource(R.drawable.tiger);」で虎の画像を割り当てる。
虎の画像の時は虎の画像のままでいいが、猫の画像の時に「tiger」ボタンが押された時には虎に切り替えなければならないので、このような処理にしている。
When the [protected void onCreate(Bundle savedInstanceState)] method at the bottom of the screen is called (The first method executed when the app is launched), [image = (ImageView) findViewById(R.id.tigerImageView);] assigns the tiger image to [image].
This is the image that appears by default when the application is launched.
When the [tiger] button is pressed, the image of the tiger is assigned to the [image] by [image.setImageResource(R.drawable.tiger);] again.
In the case of a tiger image, the image of a tiger is fine, but when the [tiger] button is pressed in the case of a cat image, the image must be changed to a tiger, so this is the process.
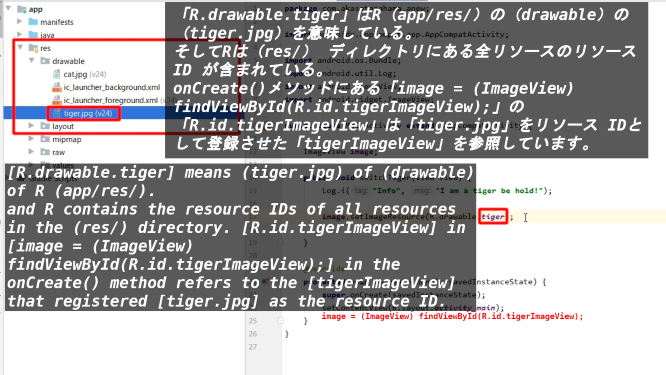
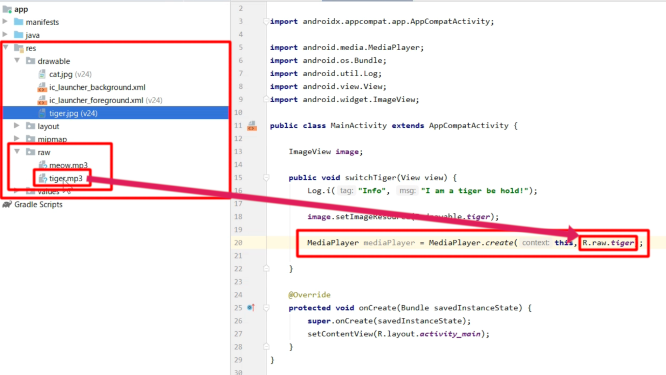
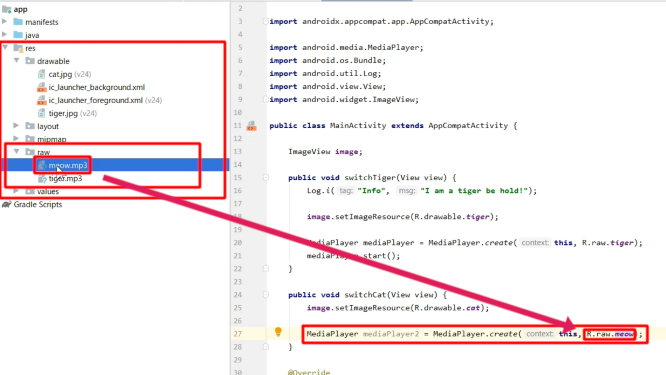
「R.drawable.tiger」はR(app/res/)の(drawable)の(tiger.jpg)を意味している。そしてRは(res/) ディレクトリにある全リソースのリソース ID が含まれている。 onCreate()メソッドにある「image = (ImageView) findViewById(R.id.tigerImageView);」の「R.id.tigerImageView」は「tiger.jpg」をリソース IDとして登録させた「tigerImageView」を参照しています。
[R.drawable.tiger] means (tiger.jpg) of (drawable) of R (app/res/). and R contains the resource IDs of all resources in the (res/) directory. [R.id.tigerImageView] in [image = (ImageView) findViewById(R.id.tigerImageView);] in the onCreate() method refers to the [tigerImageView] that registered [tiger.jpg] as the resource ID.
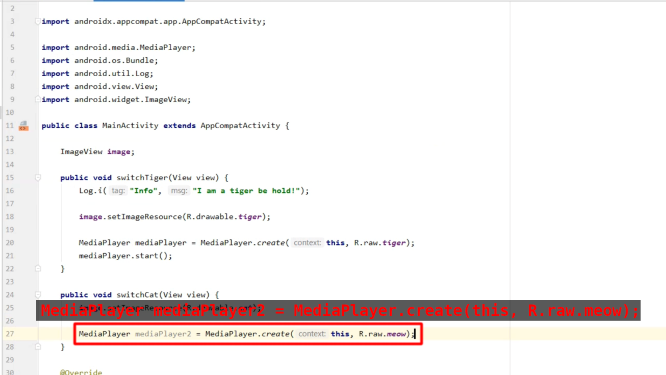
「MediaPlayer mediaPlayer」と書くと、先ほどと同様にAndroid Studioが自動で適切なライブラリをインポートしてくれます。
Just write [MediaPlayer mediaPlayer] and Android Studio will automatically import the appropriate libraries for you.
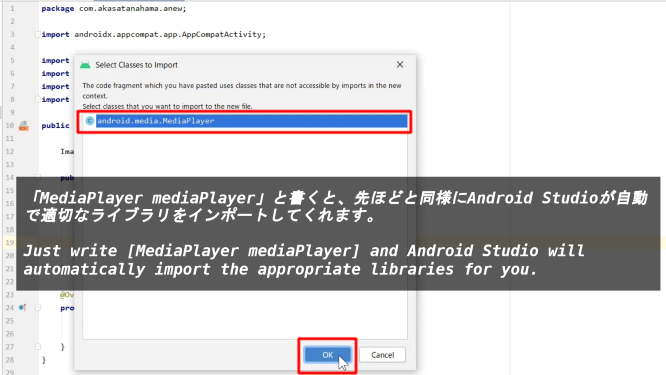
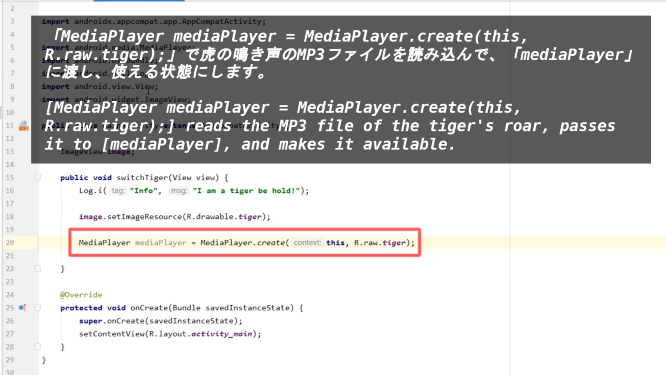
「MediaPlayer mediaPlayer = MediaPlayer.create(this, R.raw.tiger);」で虎の鳴き声のMP3ファイルを読み込んで、「mediaPlayer」に渡し、使える状態にします。
[MediaPlayer mediaPlayer = MediaPlayer.create(this, R.raw.tiger);] reads the MP3 file of the tiger's roar, passes it to [mediaPlayer], and makes it available.
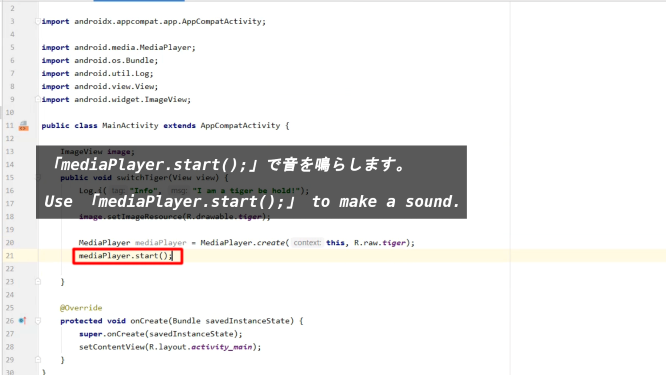
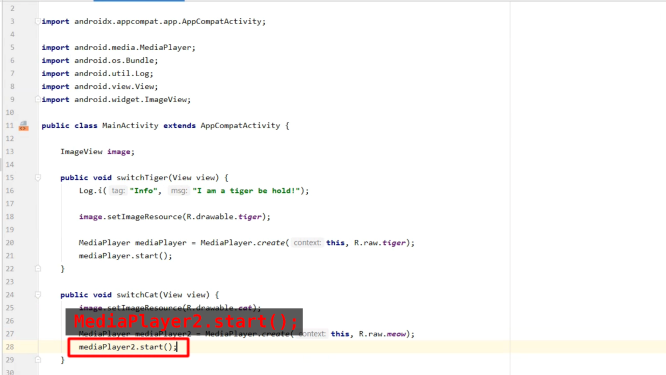
「mediaPlayer.start();」で音を鳴らします。
Use 「mediaPlayer.start();」 to make a sound.
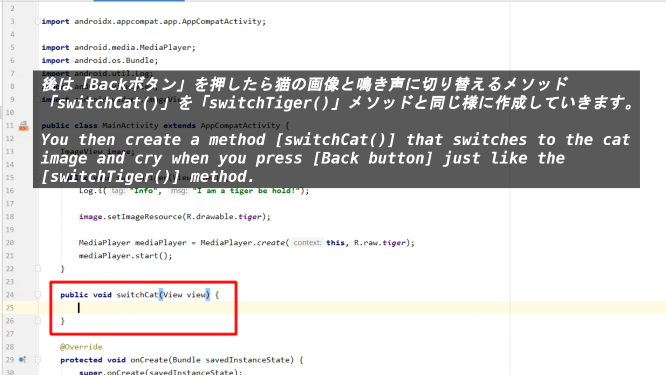
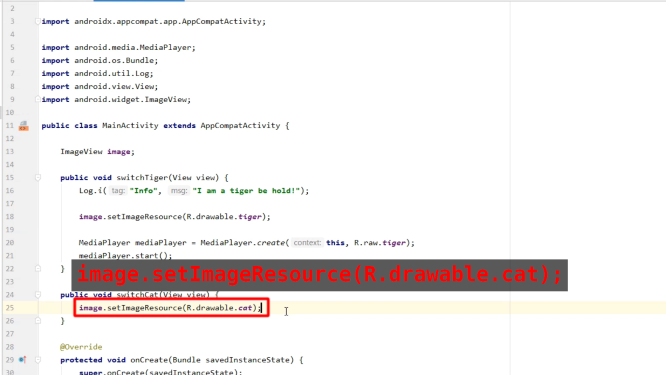
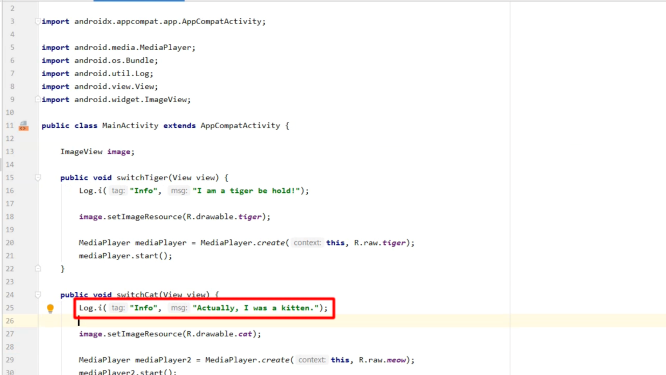
後は「Backボタン」を押したら猫の画像と鳴き声に切り替えるメソッド「switchCat()」を「switchTiger()」メソッドと同じ様に作成していきます。
You then create a method [switchCat()] that switches to the cat image and cry when you press [Back button] just like the [switchTiger()] method.
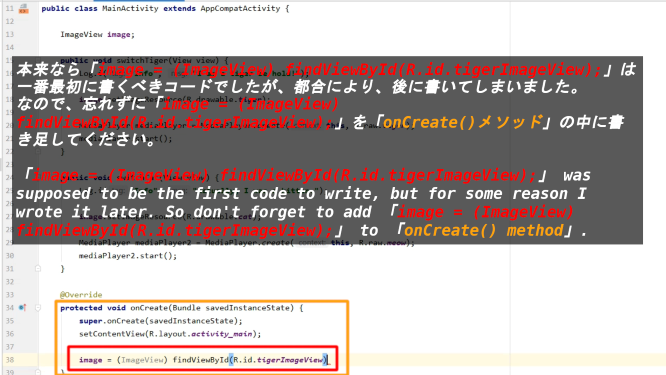
本来なら「image = (ImageView) findViewById(R.id.tigerImageView);」は一番最初に書くべきコードでしたが、都合により、後に書いてしまいました。なので、忘れずに「image = (ImageView) findViewById(R.id.tigerImageView);」を「onCreate()メソッド」の中に書き足してください。
「image = (ImageView) findViewById(R.id.tigerImageView);」 was supposed to be the first code to write, but for some reason I wrote it later. So don't forget to add 「image = (ImageView) findViewById(R.id.tigerImageView);」 to 「onCreate() method」.
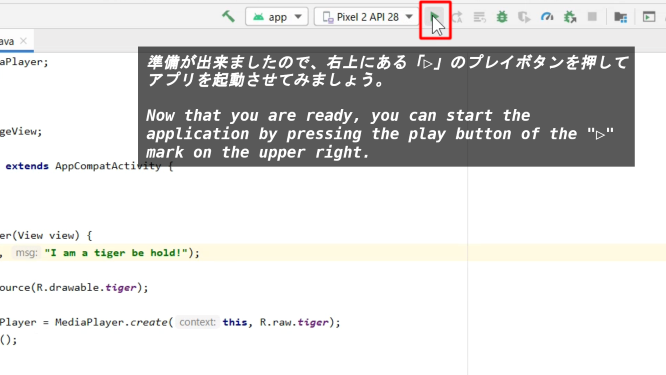
準備が出来ましたので、右上にある「▷」のプレイボタンを押してアプリを起動させてみましょう。
Now that you are ready, you can start the application by pressing the play button of the "▷" mark on the upper right.
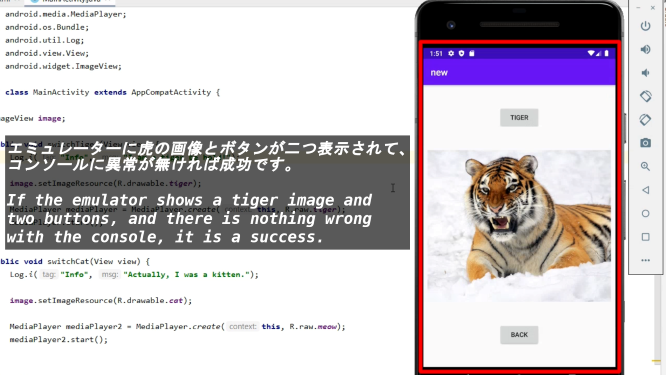
エミュレーターに虎の画像とボタンが二つ表示されて、コンソールに異常が無ければ成功です。
If the emulator shows a tiger image and two buttons, and there is nothing wrong with the console, it is a success.
最後に全てのコードを表示させておきます。
Finally, I'll show you all the code.
MainActivity.java
// あなたのパッケージネーム
// Your package name
package com.akasatanahama.anew;

import androidx.appcompat.app.AppCompatActivity;

import android.media.MediaPlayer;
import android.os.Bundle;
import android.util.Log;
import android.view.View;
import android.widget.ImageView;

public class MainActivity extends AppCompatActivity {

    ImageView image;

    public void switchTiger(View view) {
        Log.i("Info", "I am a tiger be hold!");

        image.setImageResource(R.drawable.tiger);

        MediaPlayer mediaPlayer = MediaPlayer.create(this, R.raw.tiger);
        mediaPlayer.start();
    }

    public void switchCat(View view) {
        Log.i("Info", "Actually, I was a kitten.");

        image.setImageResource(R.drawable.cat);

        MediaPlayer mediaPlayer2 = MediaPlayer.create(this, R.raw.meow);
        mediaPlayer2.start();
    }

    @Override
    protected void onCreate(Bundle savedInstanceState) {
        super.onCreate(savedInstanceState);
        setContentView(R.layout.activity_main);

        image = (ImageView) findViewById(R.id.tigerImageView);
    }
}
以上です。お疲れ様です。
That's all. Thank you for your hard work.