Published Date : 2020年2月18日22:43
BlenderとDrawoioとVLC media playerとGIMPを使って簡単なTutorial動画編集
Create a simple tutorial video using Blender, Draw.io, VLC media player, and GIMP
This blog has an English translation
BlenderとDraw.ioとVLC media playerとGIMPを使って簡単なTutorial動画を作ってみましょう。
Create a simple tutorial video using Blender, Draw.io, VLC media player, and GIMP.
これらのソフトは全て無料で使用できます。さらにMac、Windows、Linuxどれでも動きます。
You can use all of these software for free. In addition, all of these run on Mac, Windows, or Linux.
無駄に高いソフトを購入しなくても、簡単な動画ならこれで十分です。それではソフトのインストールから始めましょう。
You don't have to buy expensive software. This is enough for simple videos. Let's start with installing the software.
目次
Table of Contents
ソフトのインストールとセットアップ Software Installation and Setup |
Blenderの基本的な動画編集 Blender's basic video editing |
ページの最後へ Go to the end of the page. |
ソフトのインストールとセットアップ
Software Installation and Setup
まずは必要なソフトの入手とインストールから行います。
First, you get and install the necessary software.
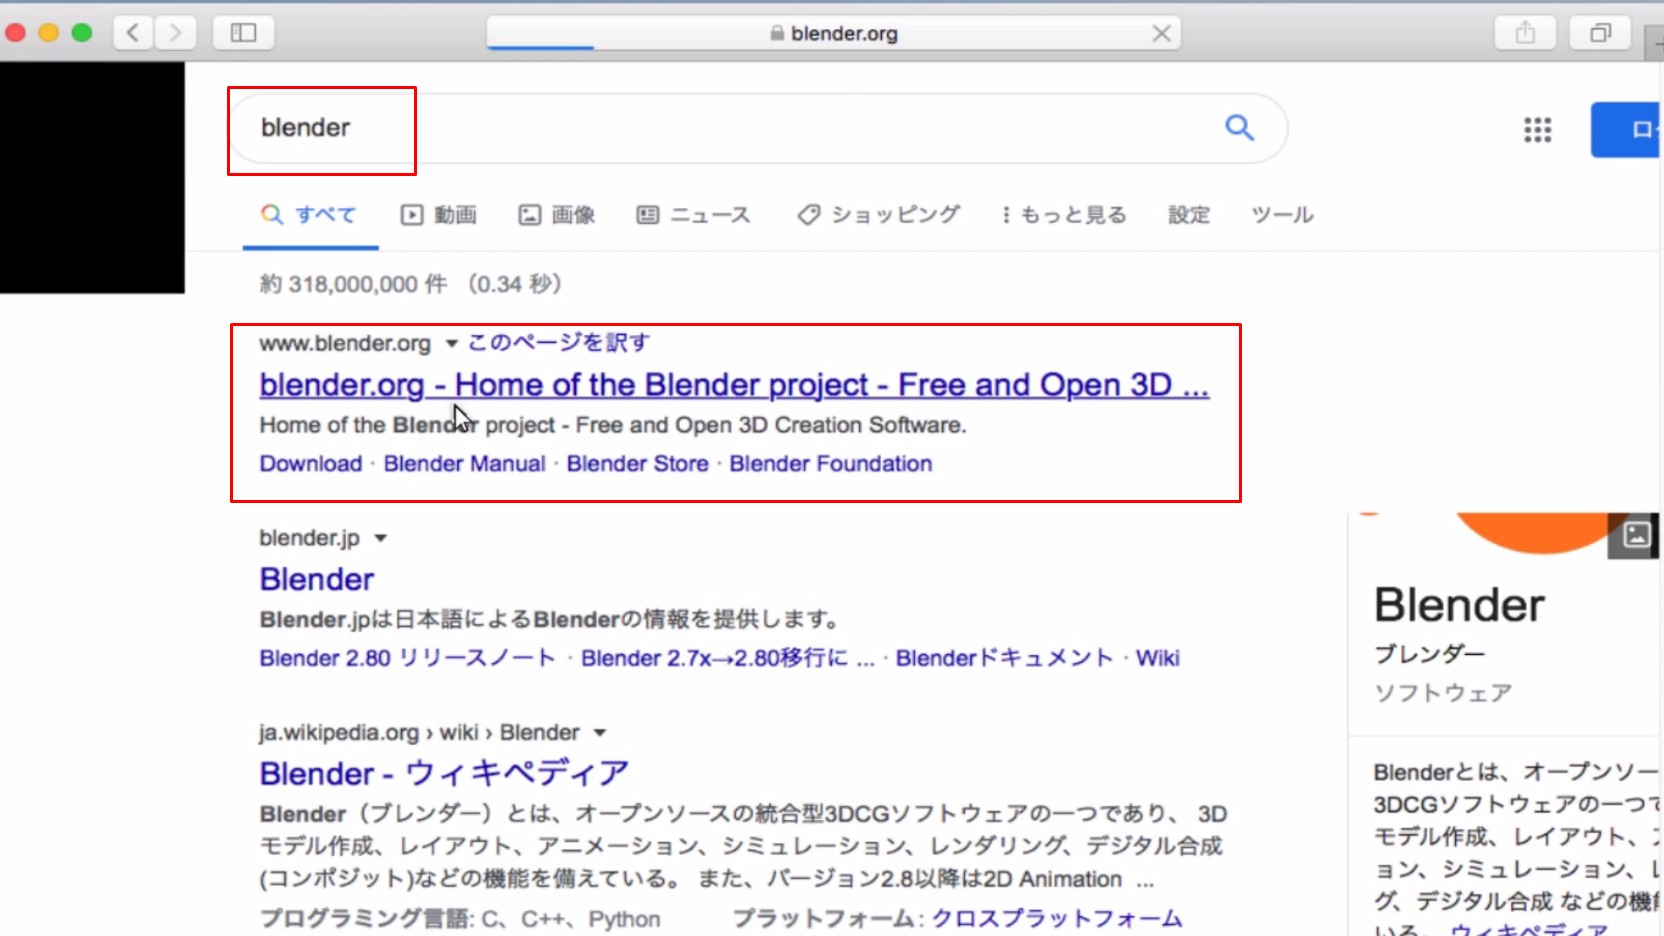
ブラウザでBlenderを検索
Search for Blender in the browser
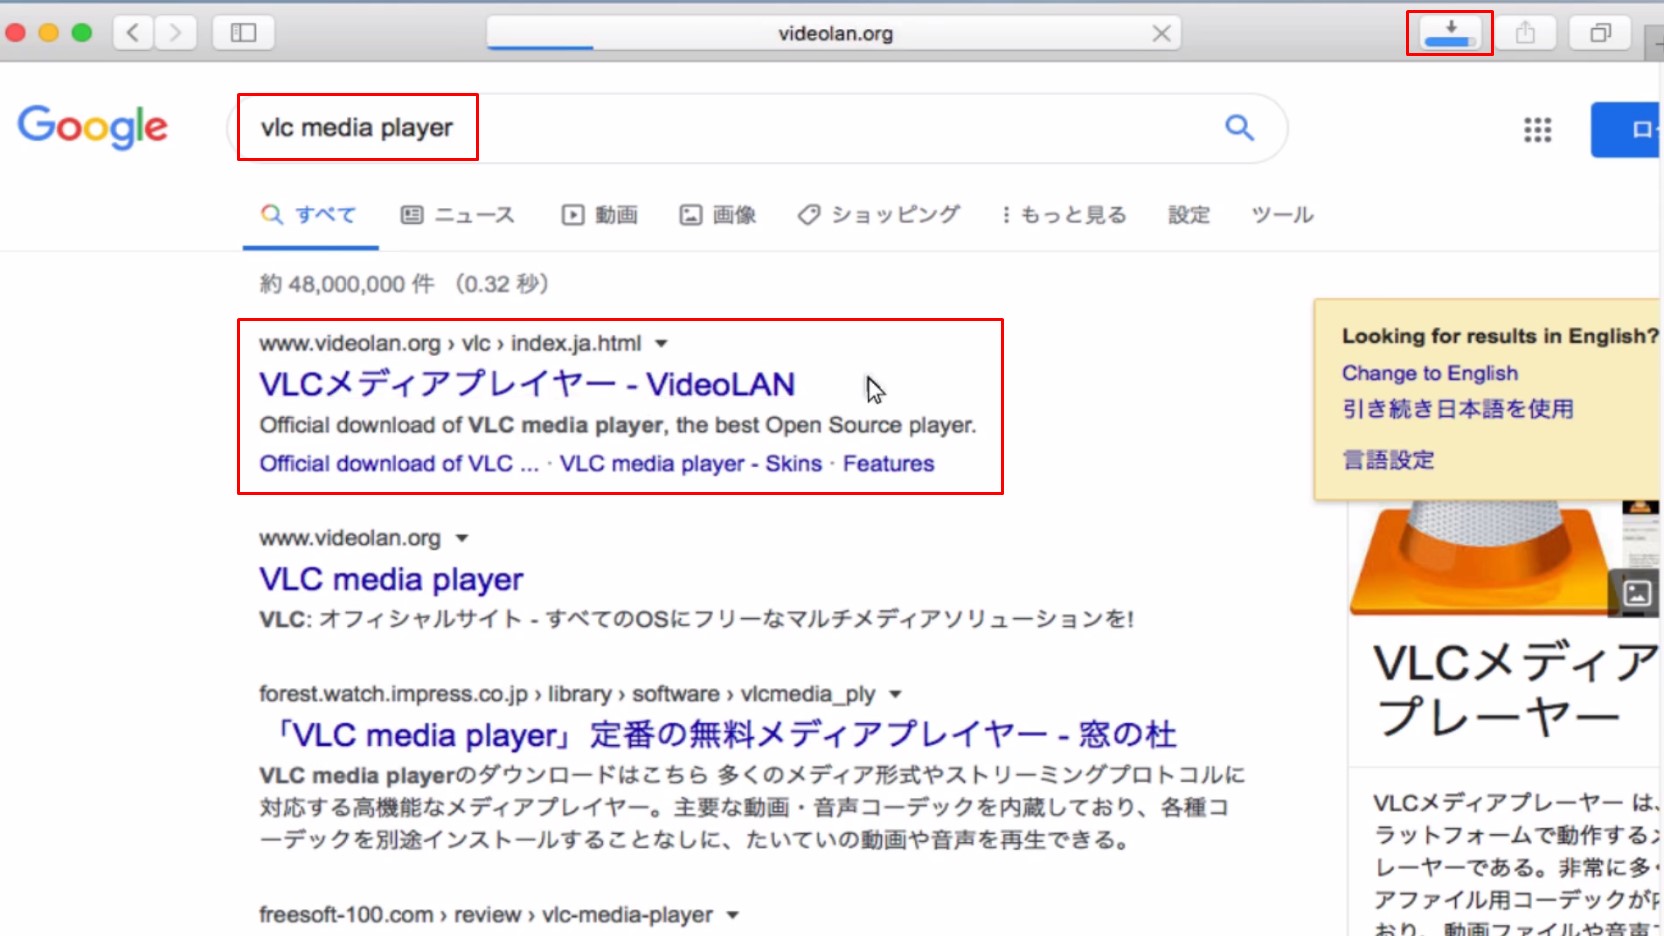
VLCを検索
Search for VLC media player
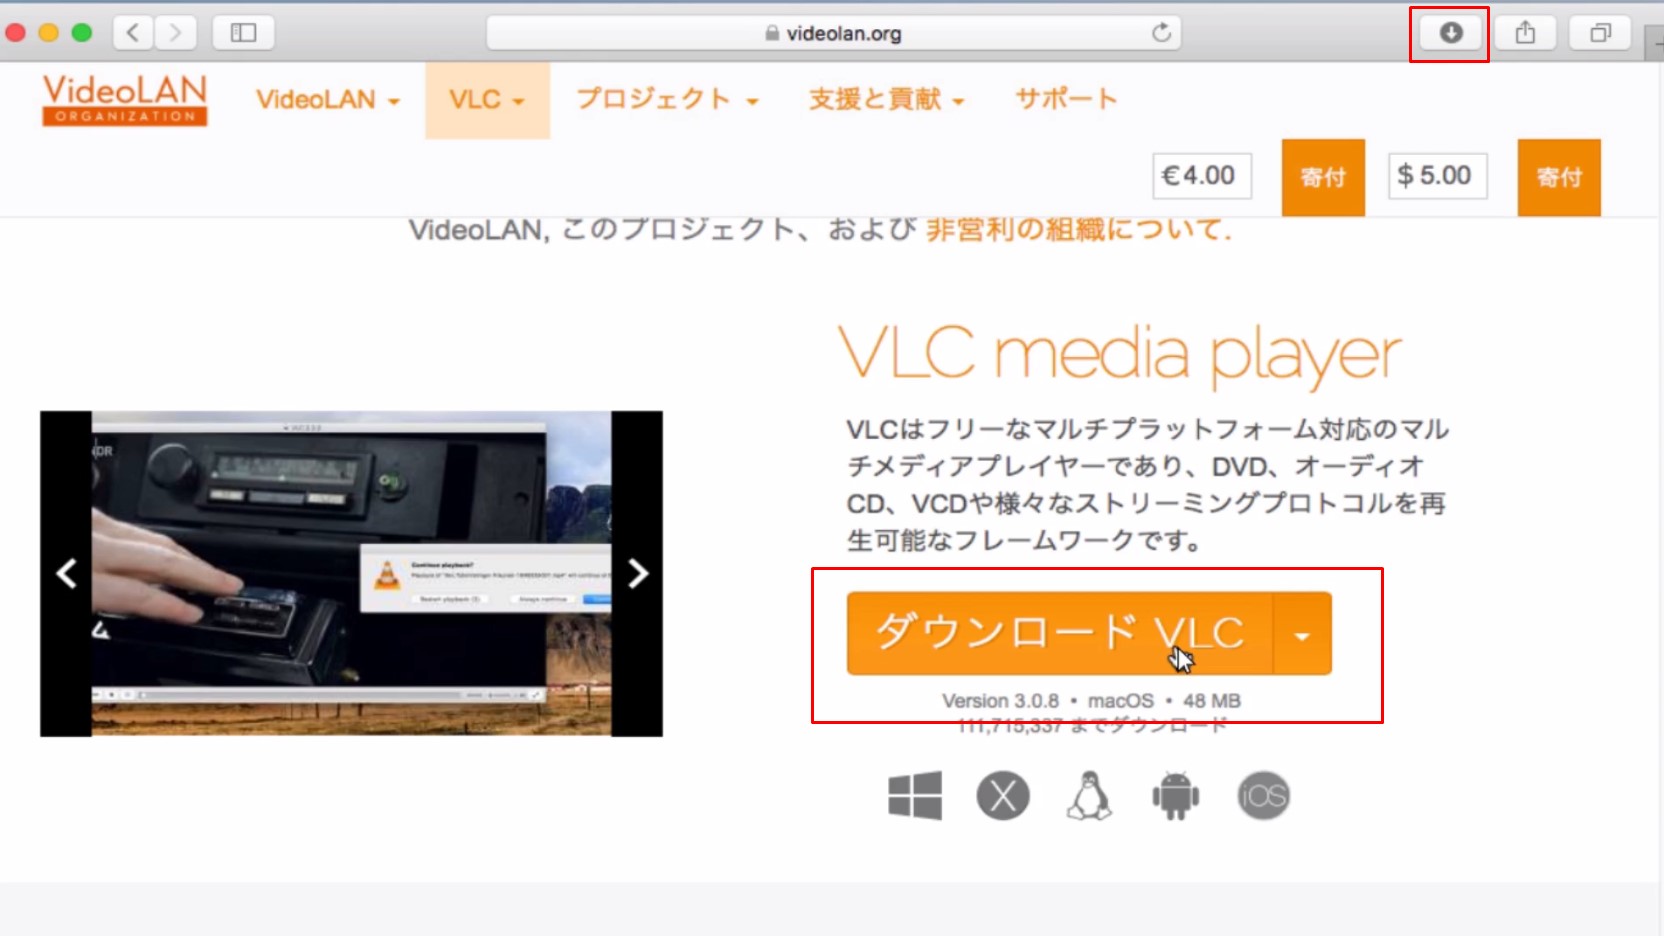
ダウンロード
Download
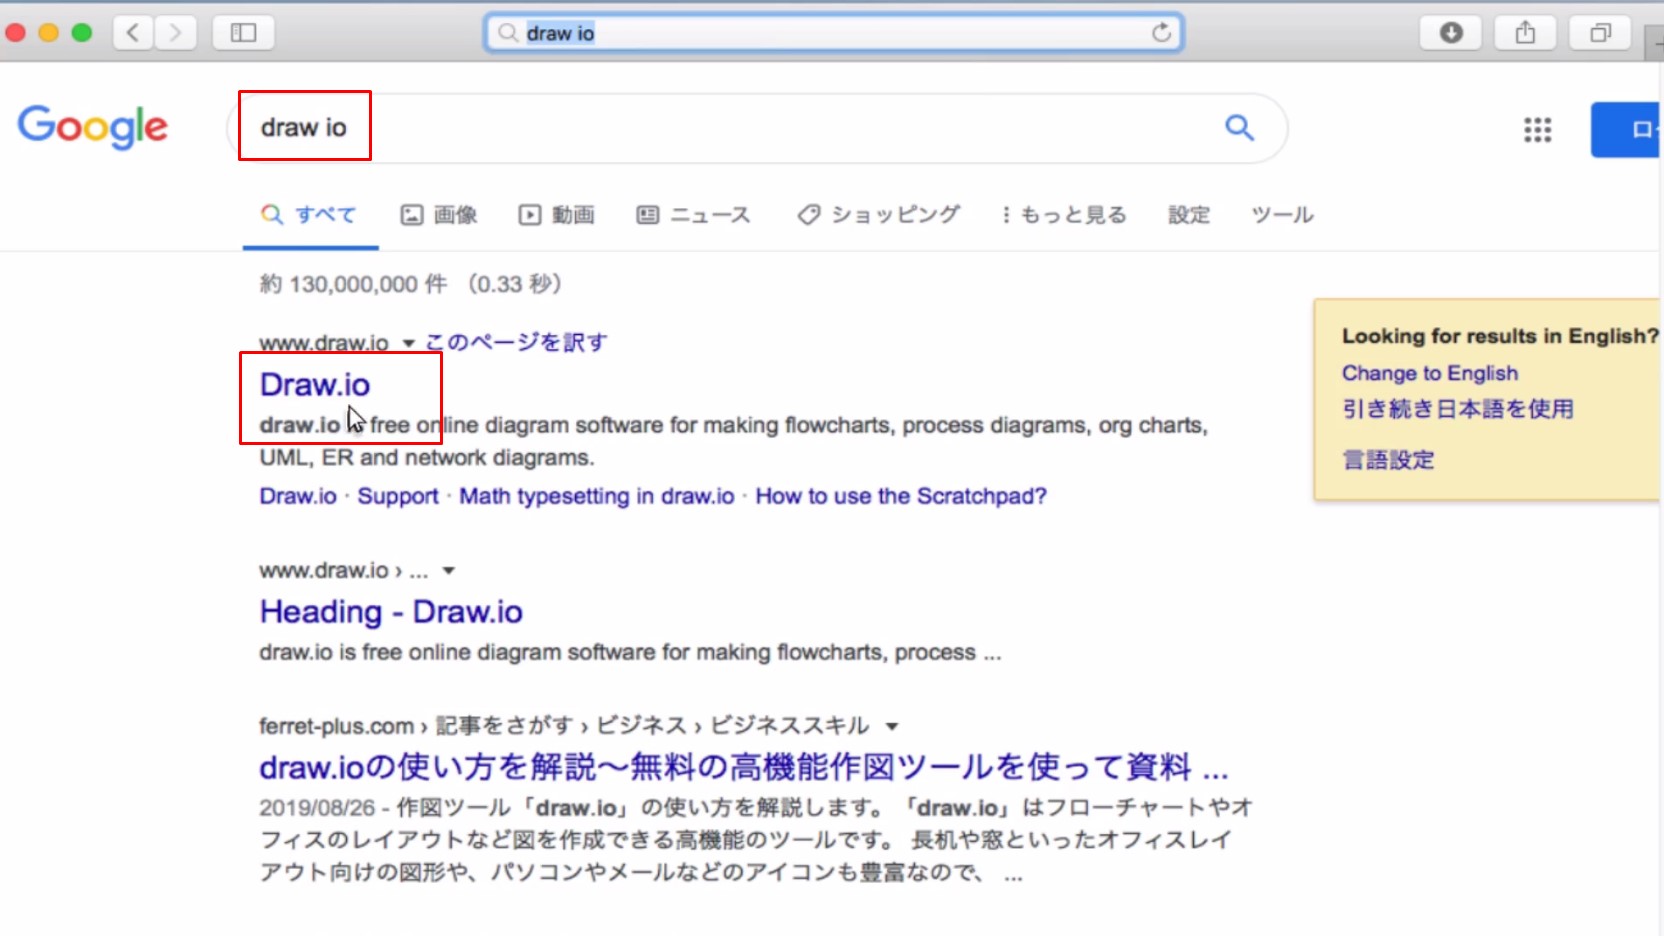
Draw.ioを検索
Search for Draw.io
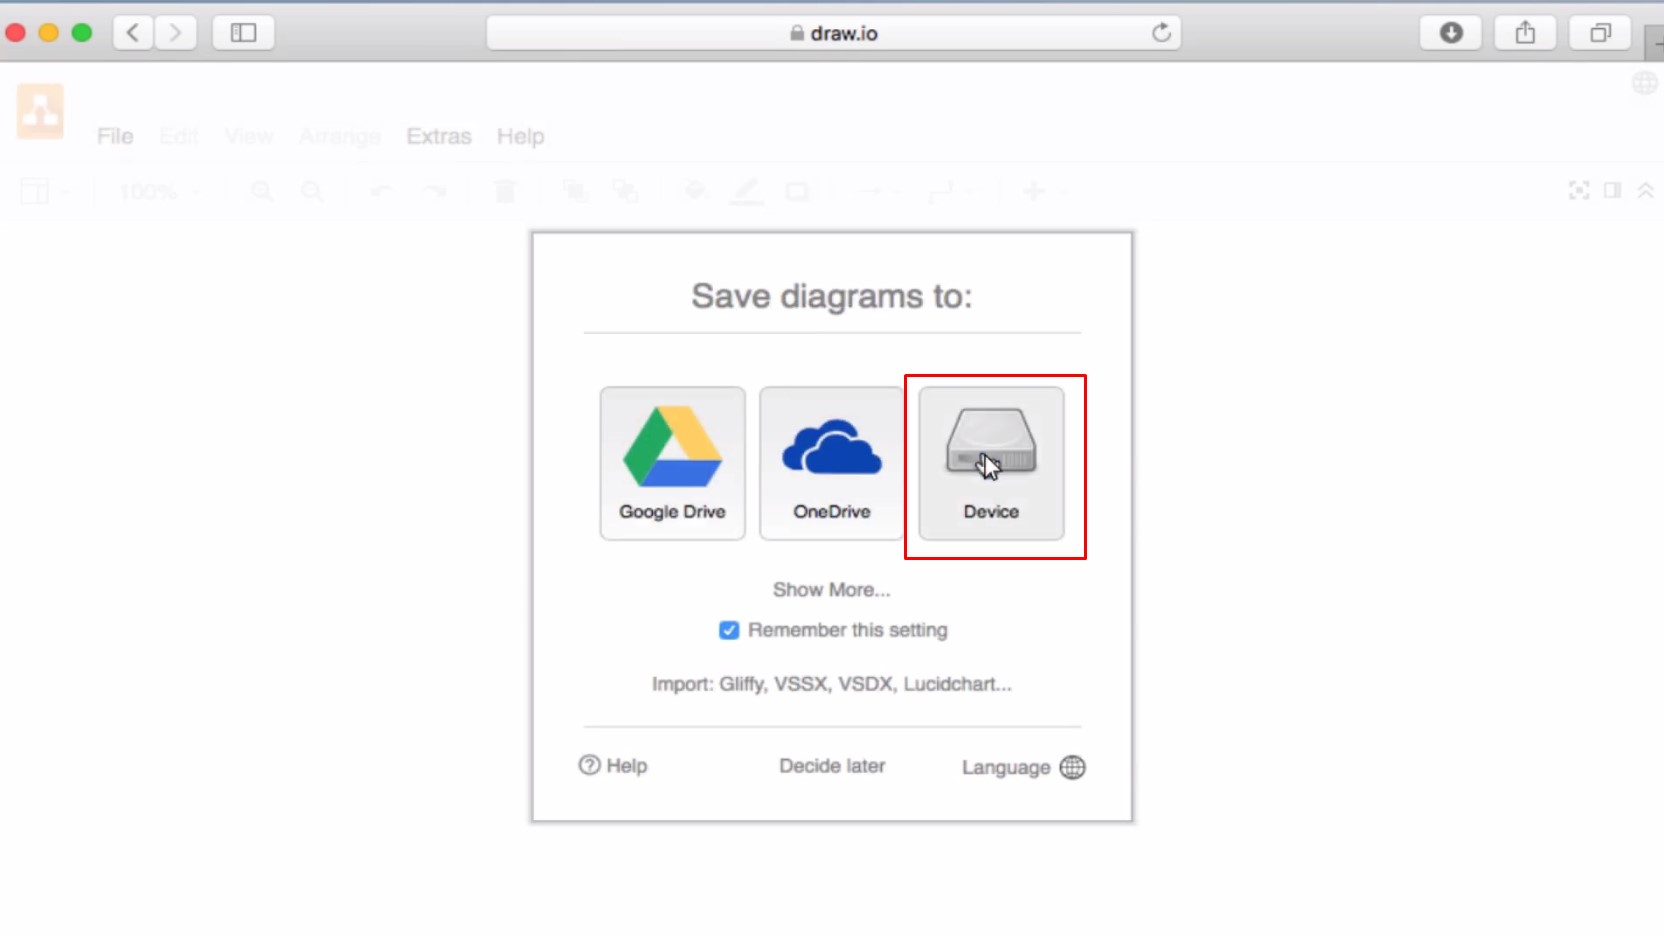
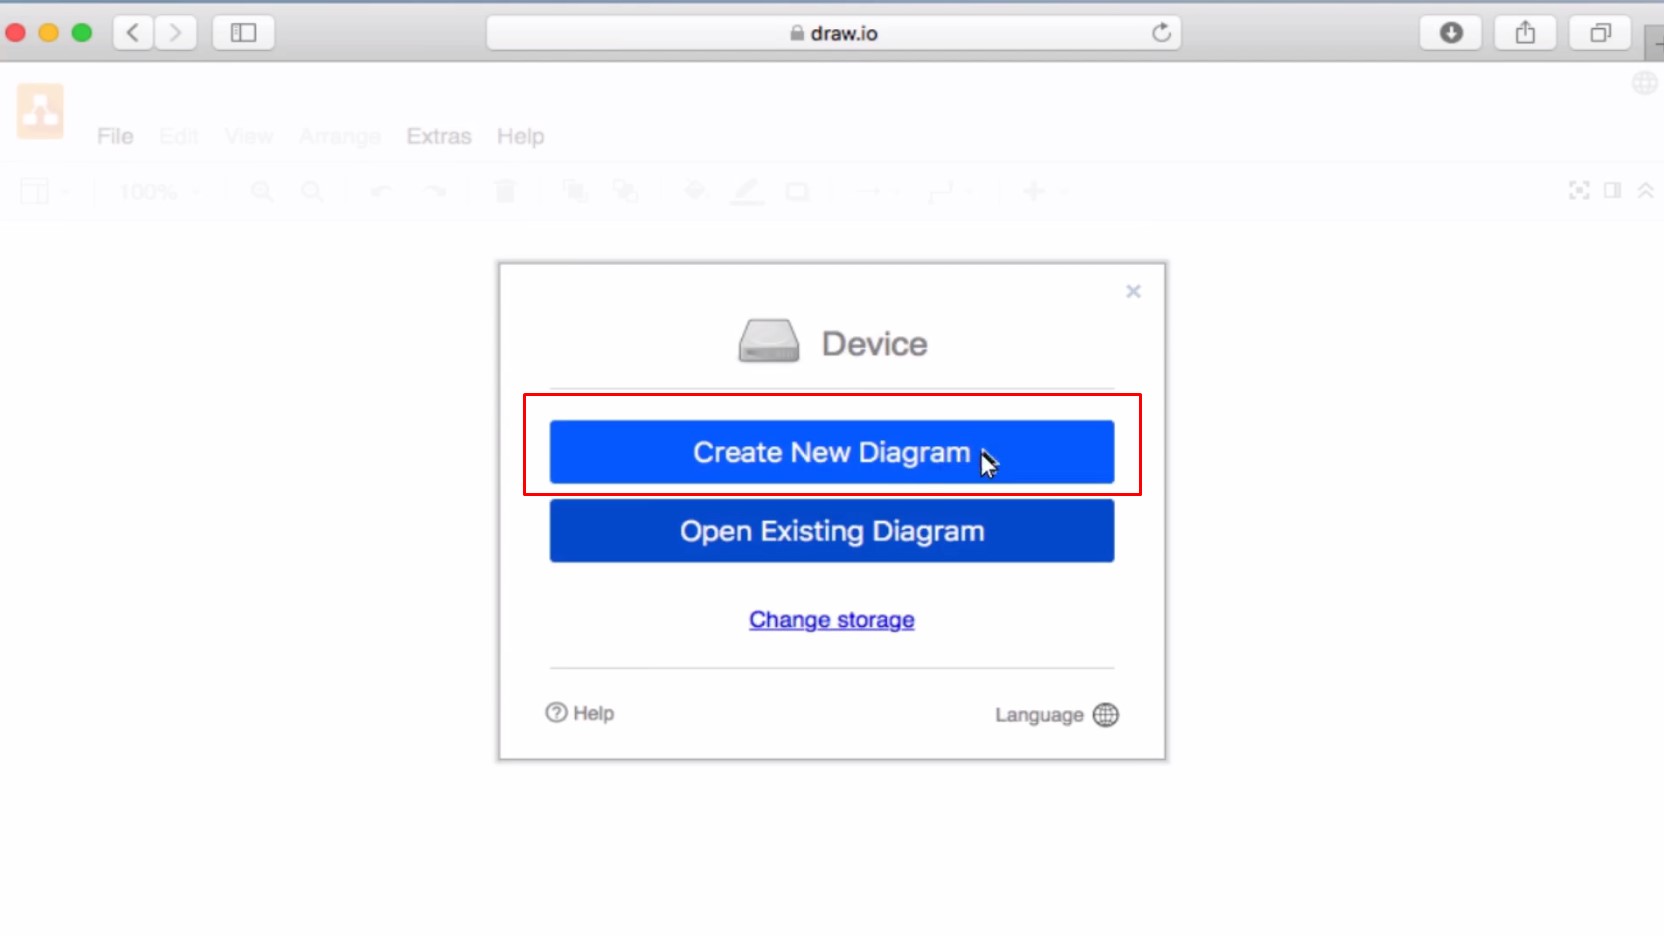

Device -> Create New Diagram -> Createを選択
Select Device -> Create New Diagram -> Create
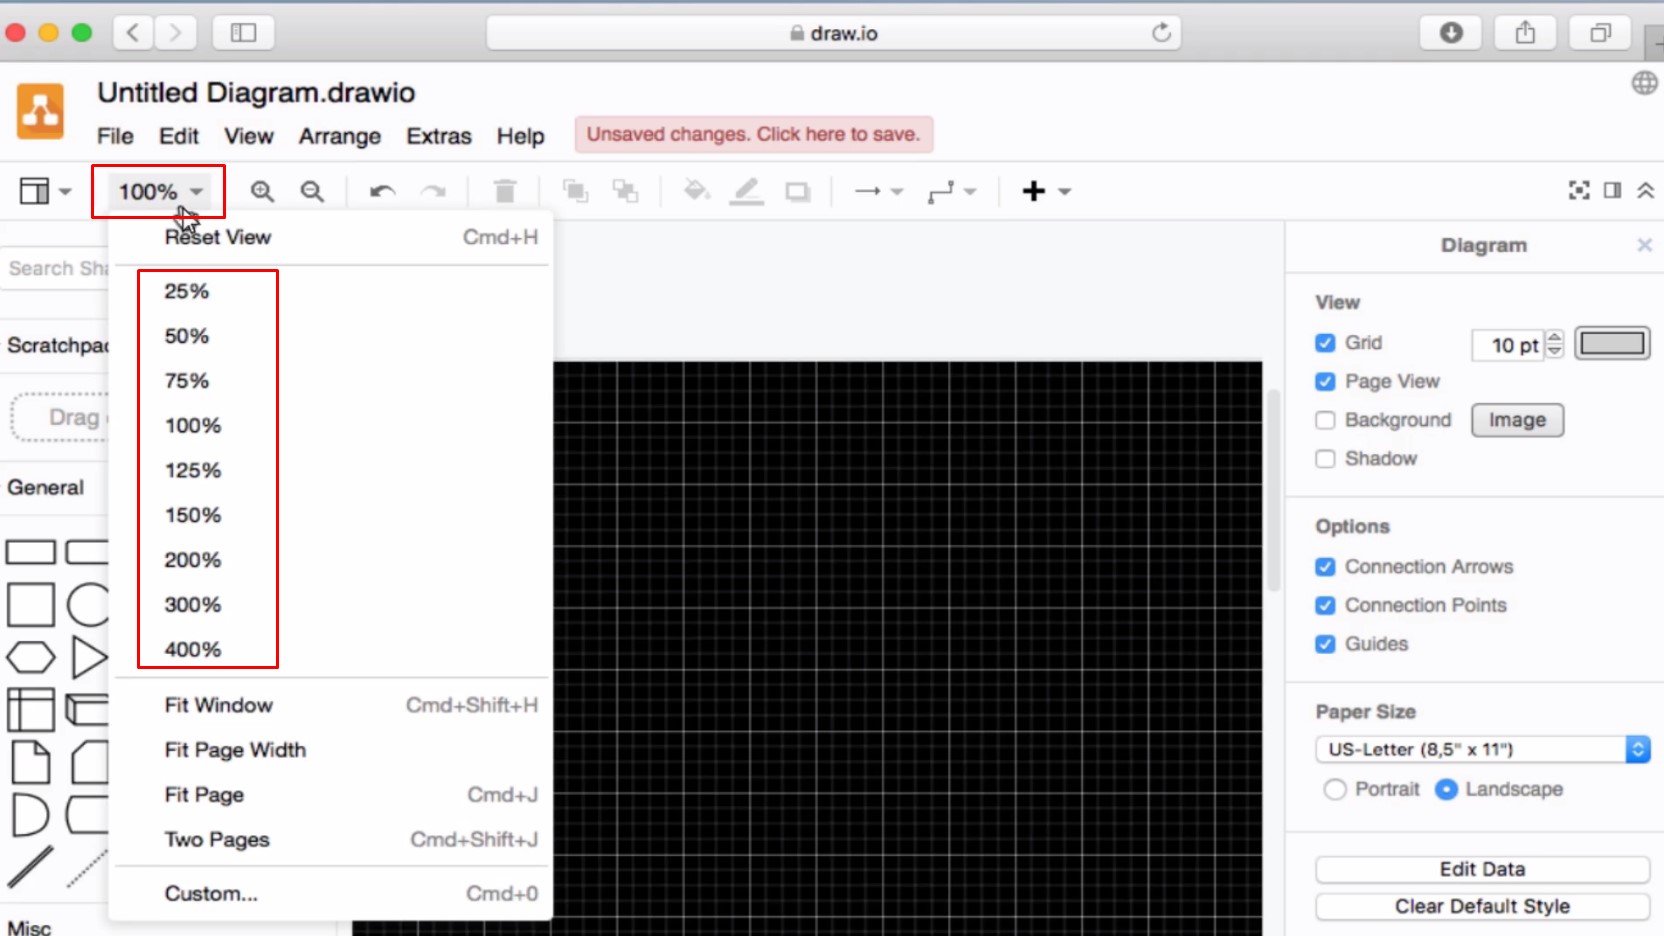
倍率調整
magnification adjustment
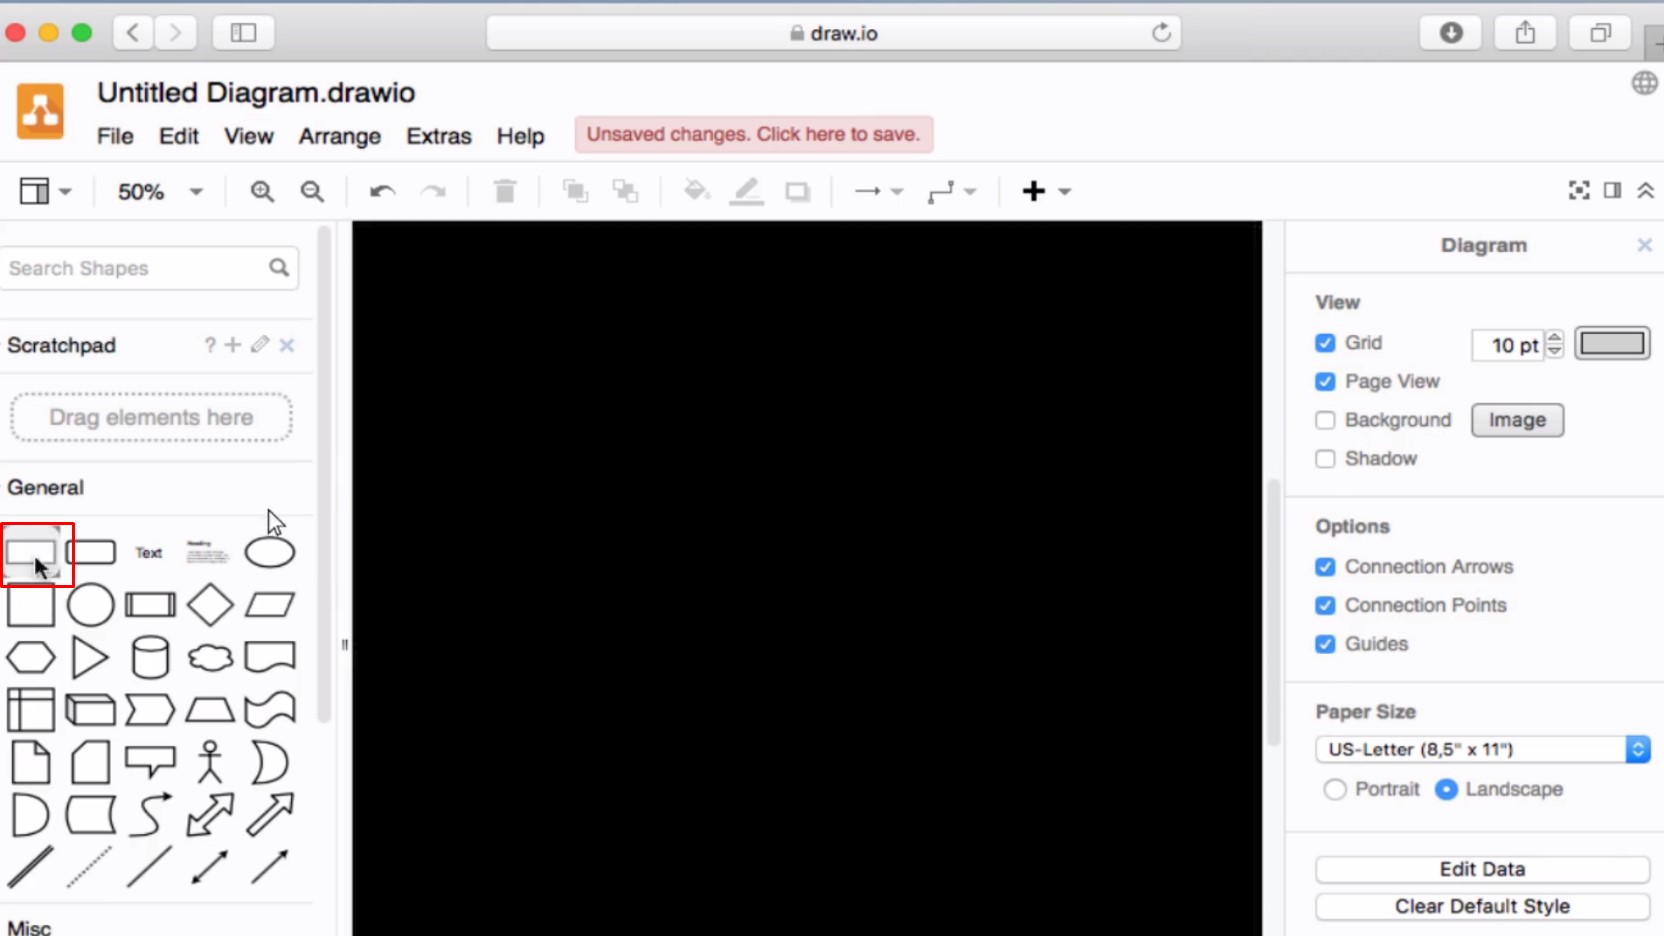
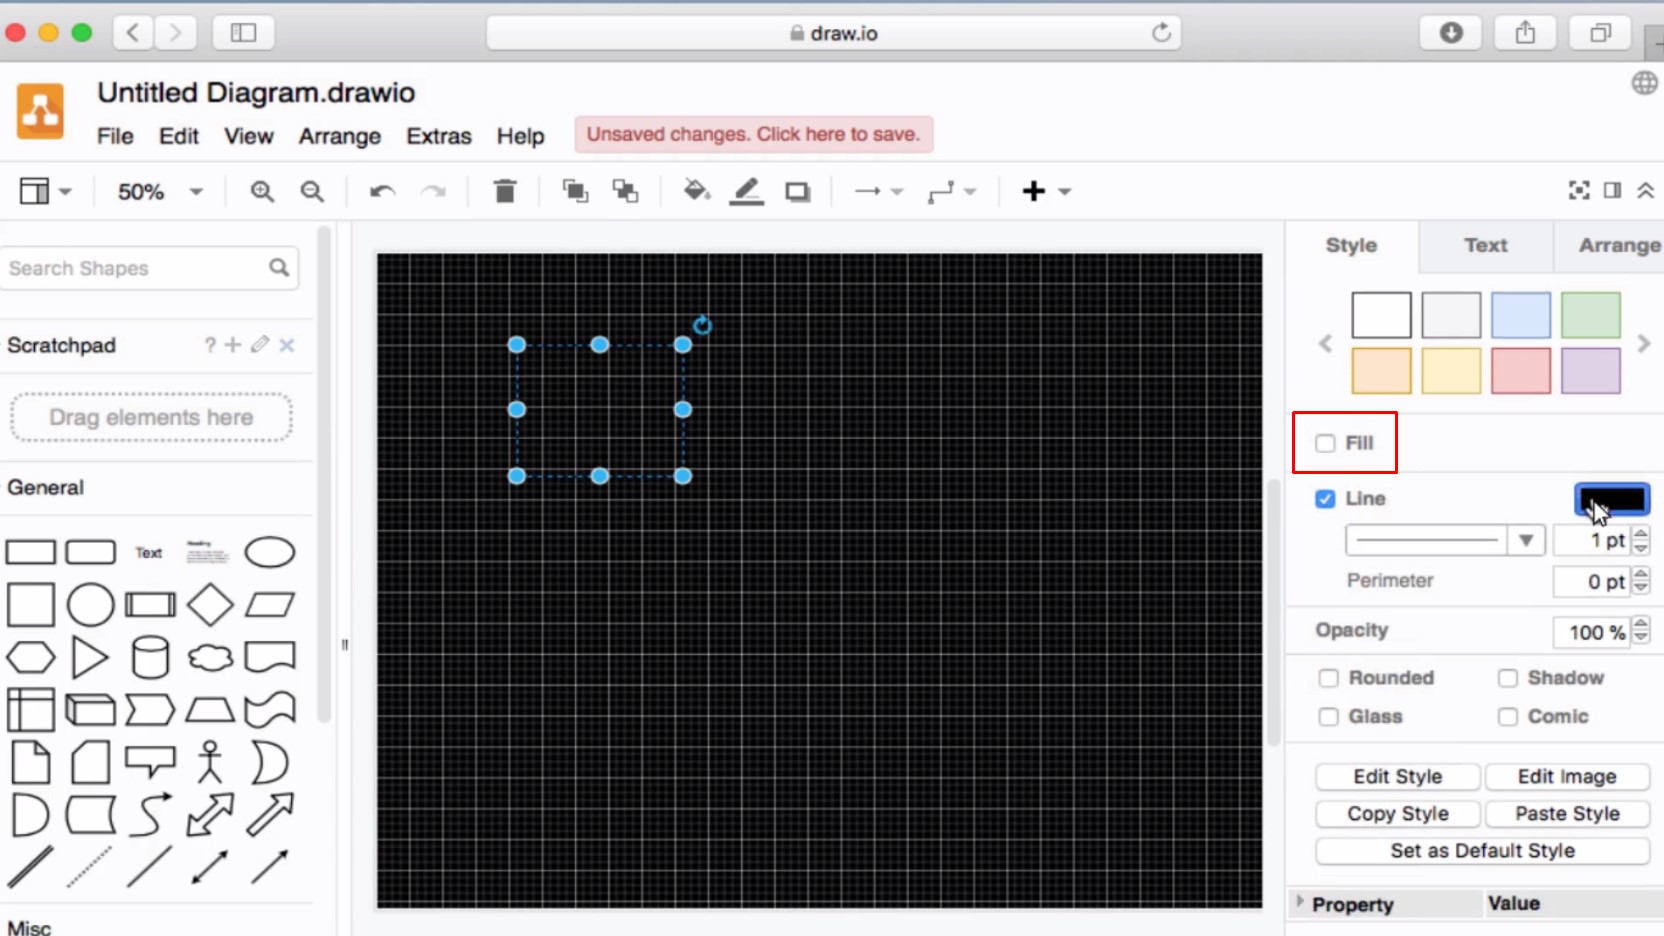
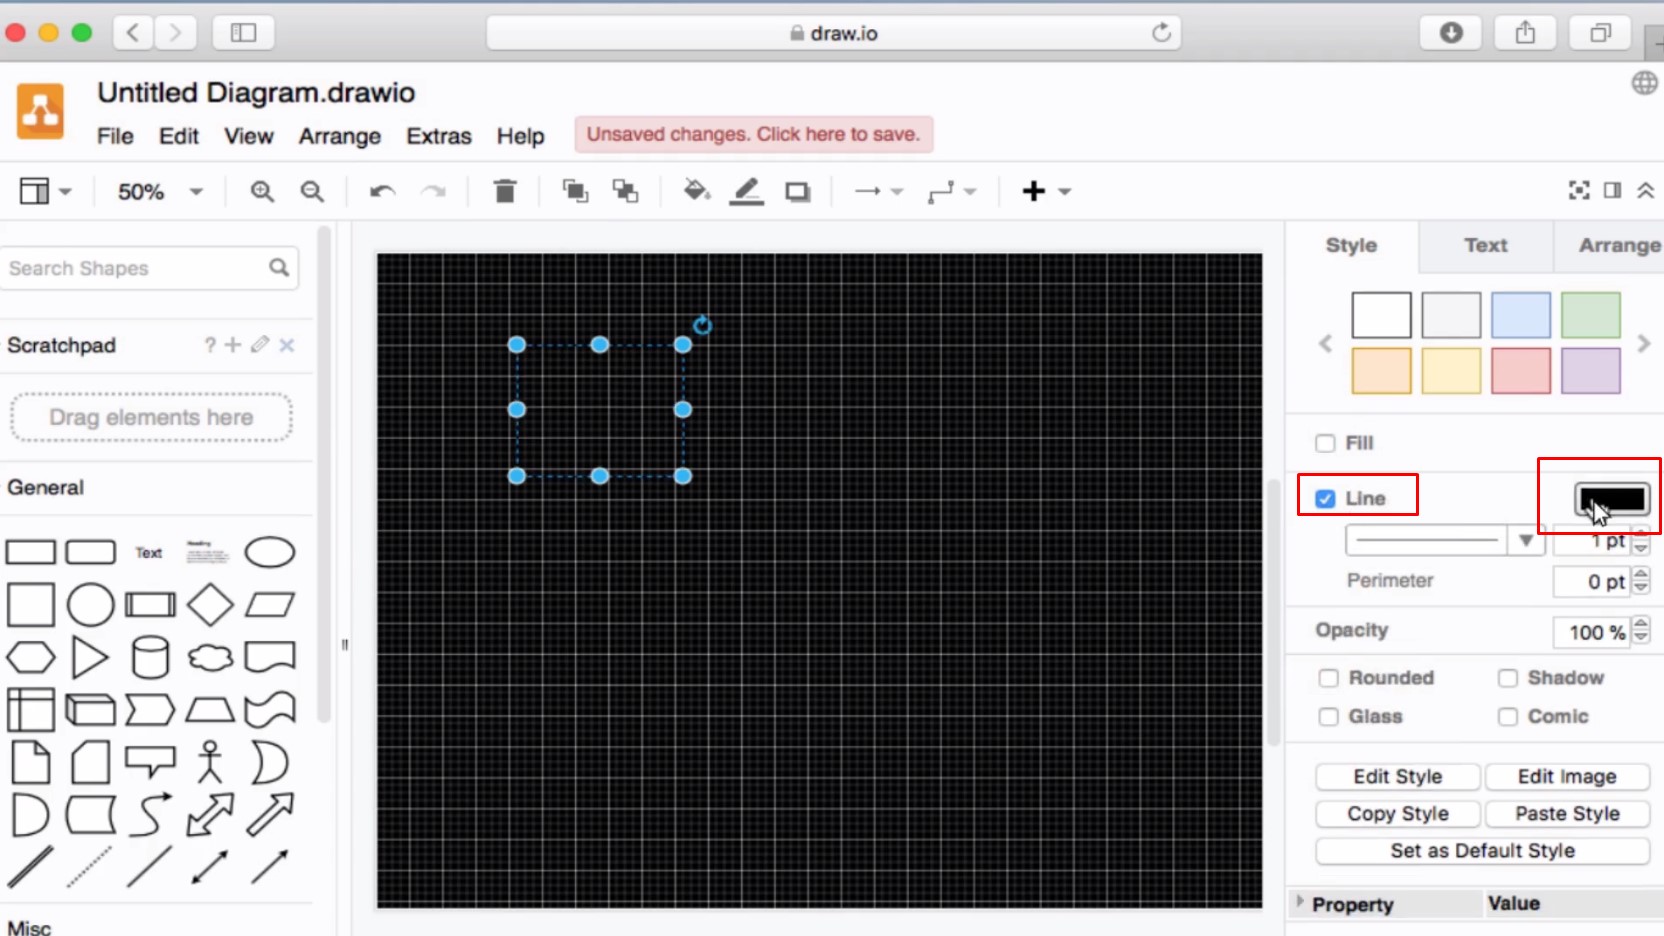
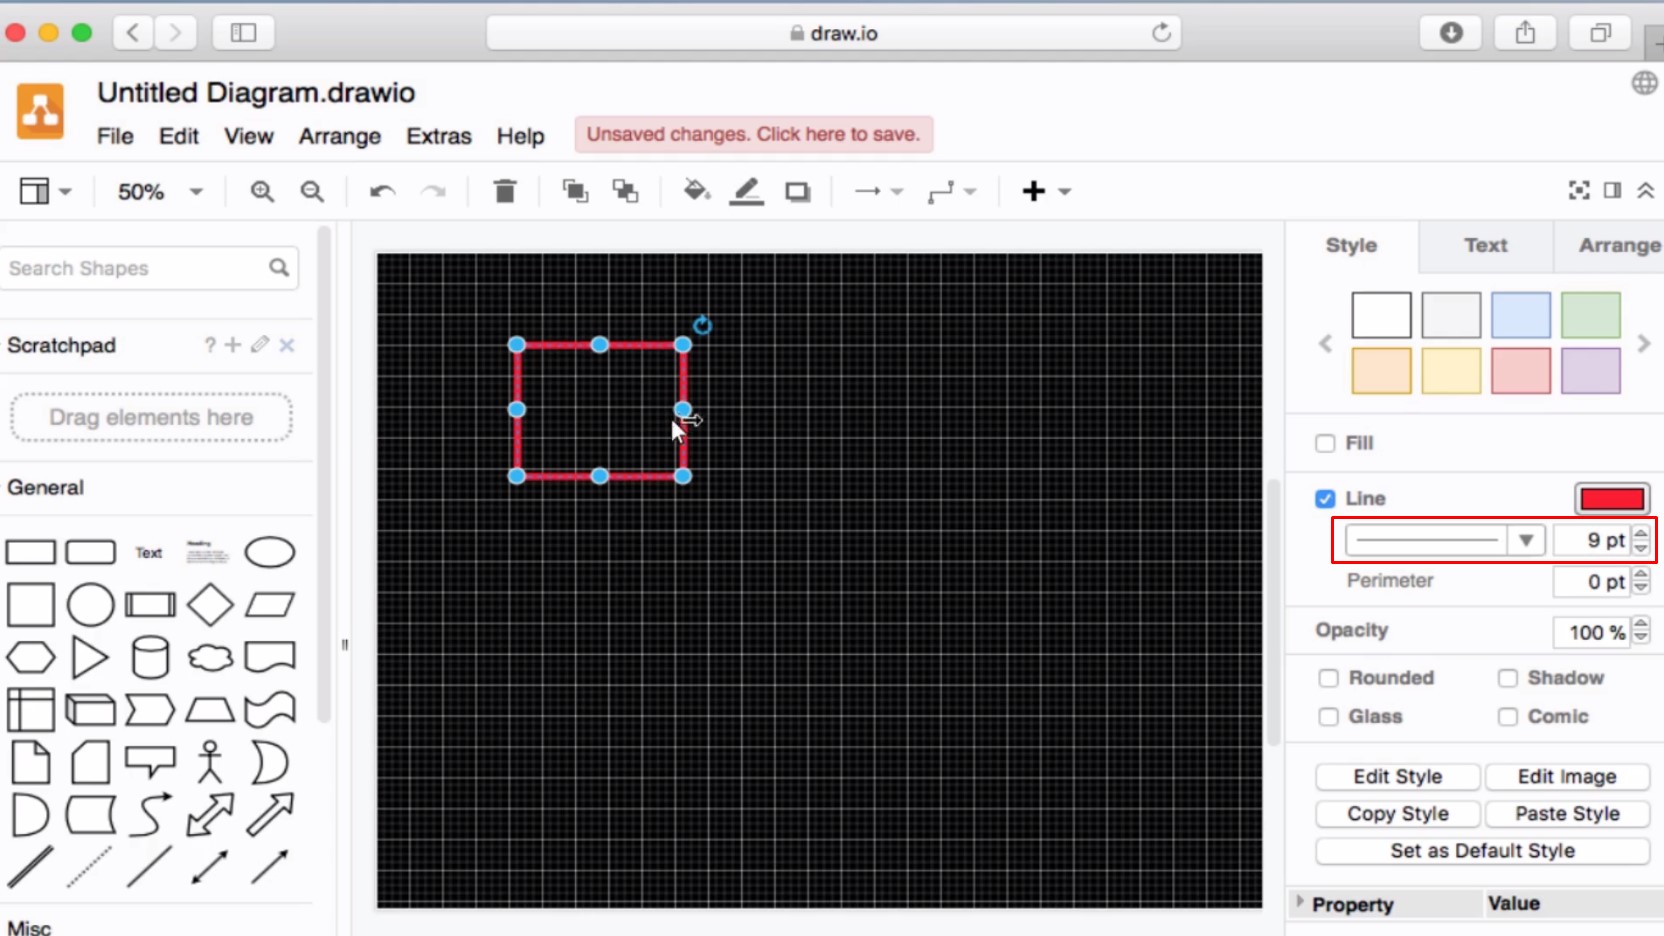
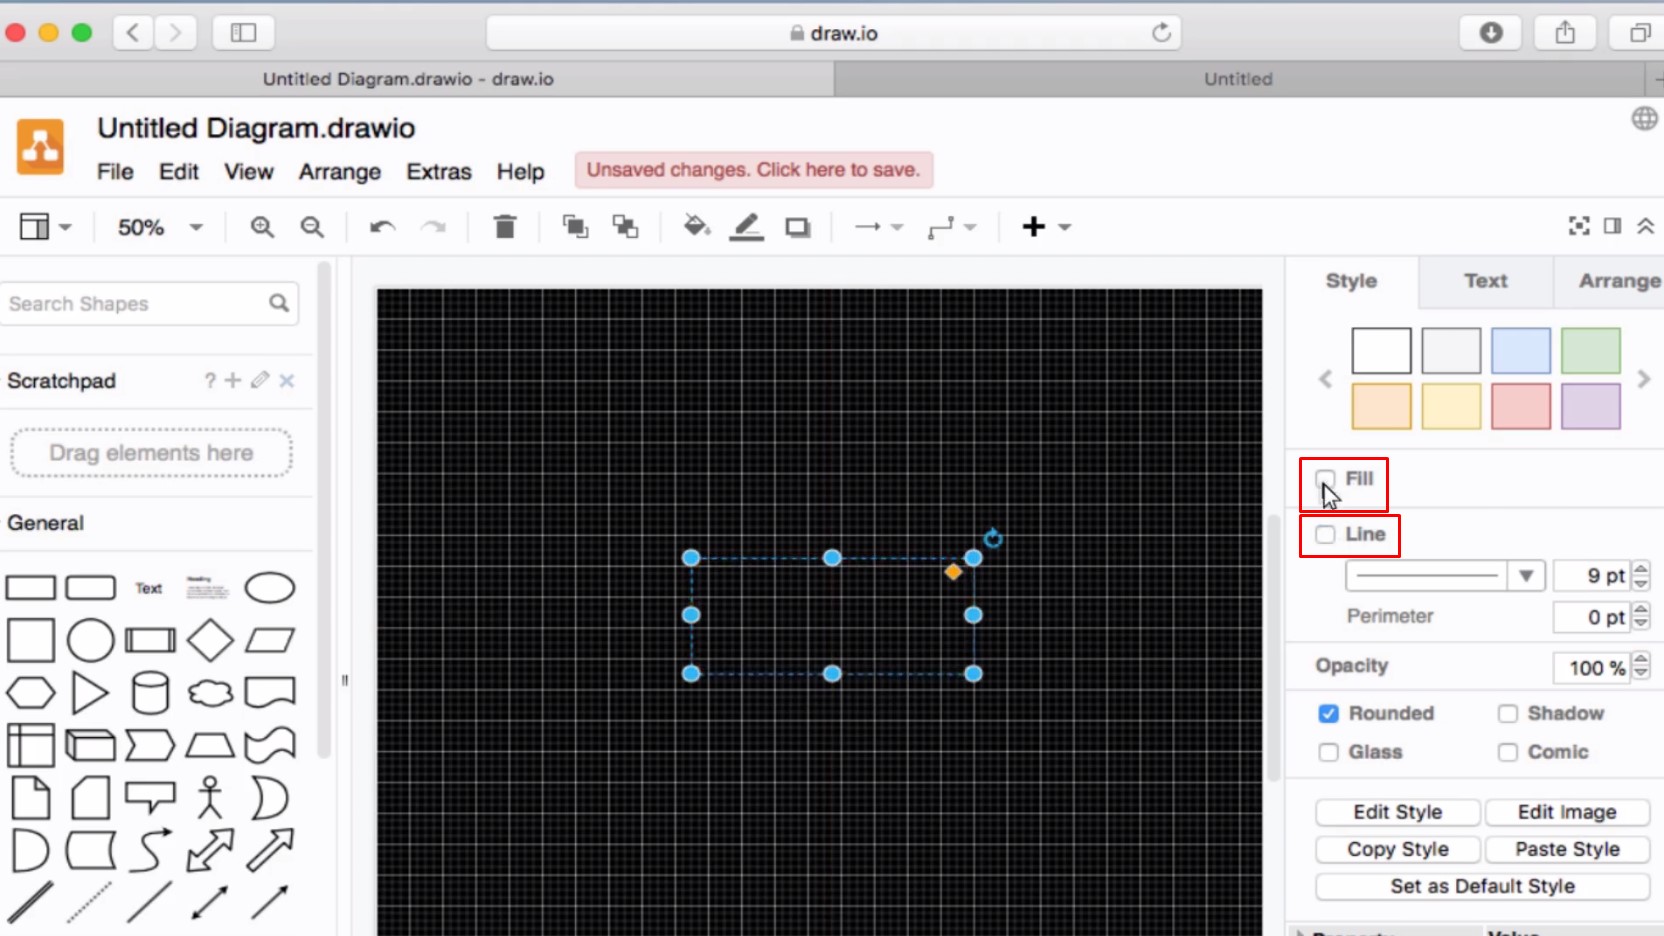
Rectangleを選択 -> fillのチェックを外す -> Line Colorを選択 -> Line Widthを調整
Select Rectangle -> uncheck Fill -> select Line Color -> Adjust Line Width
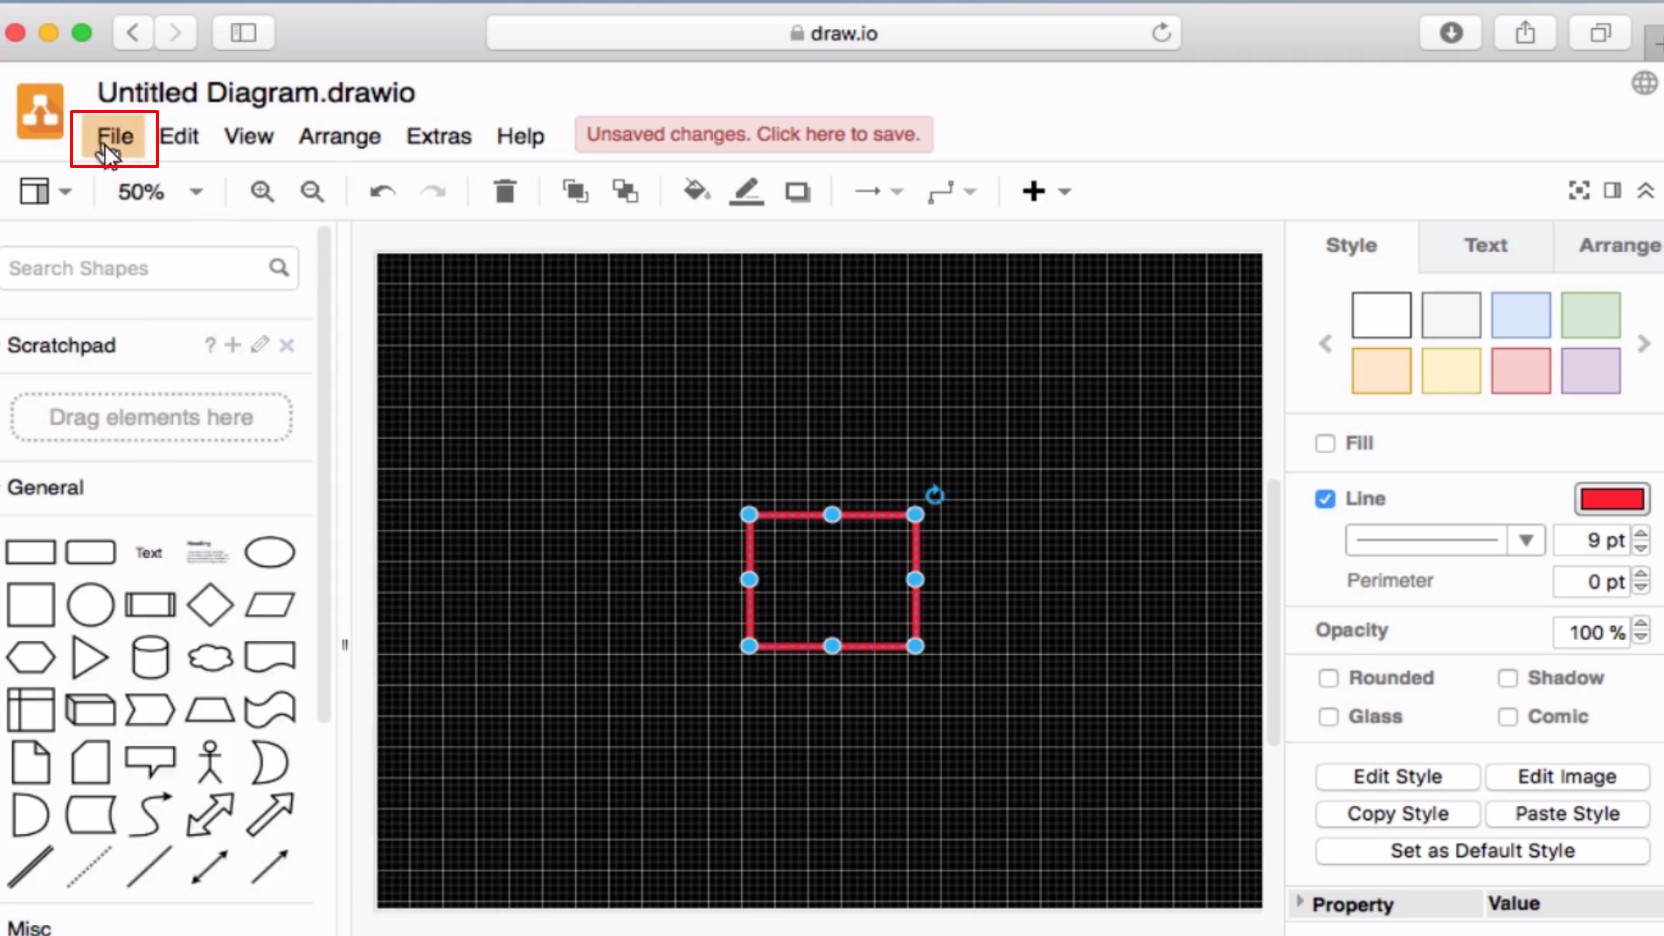
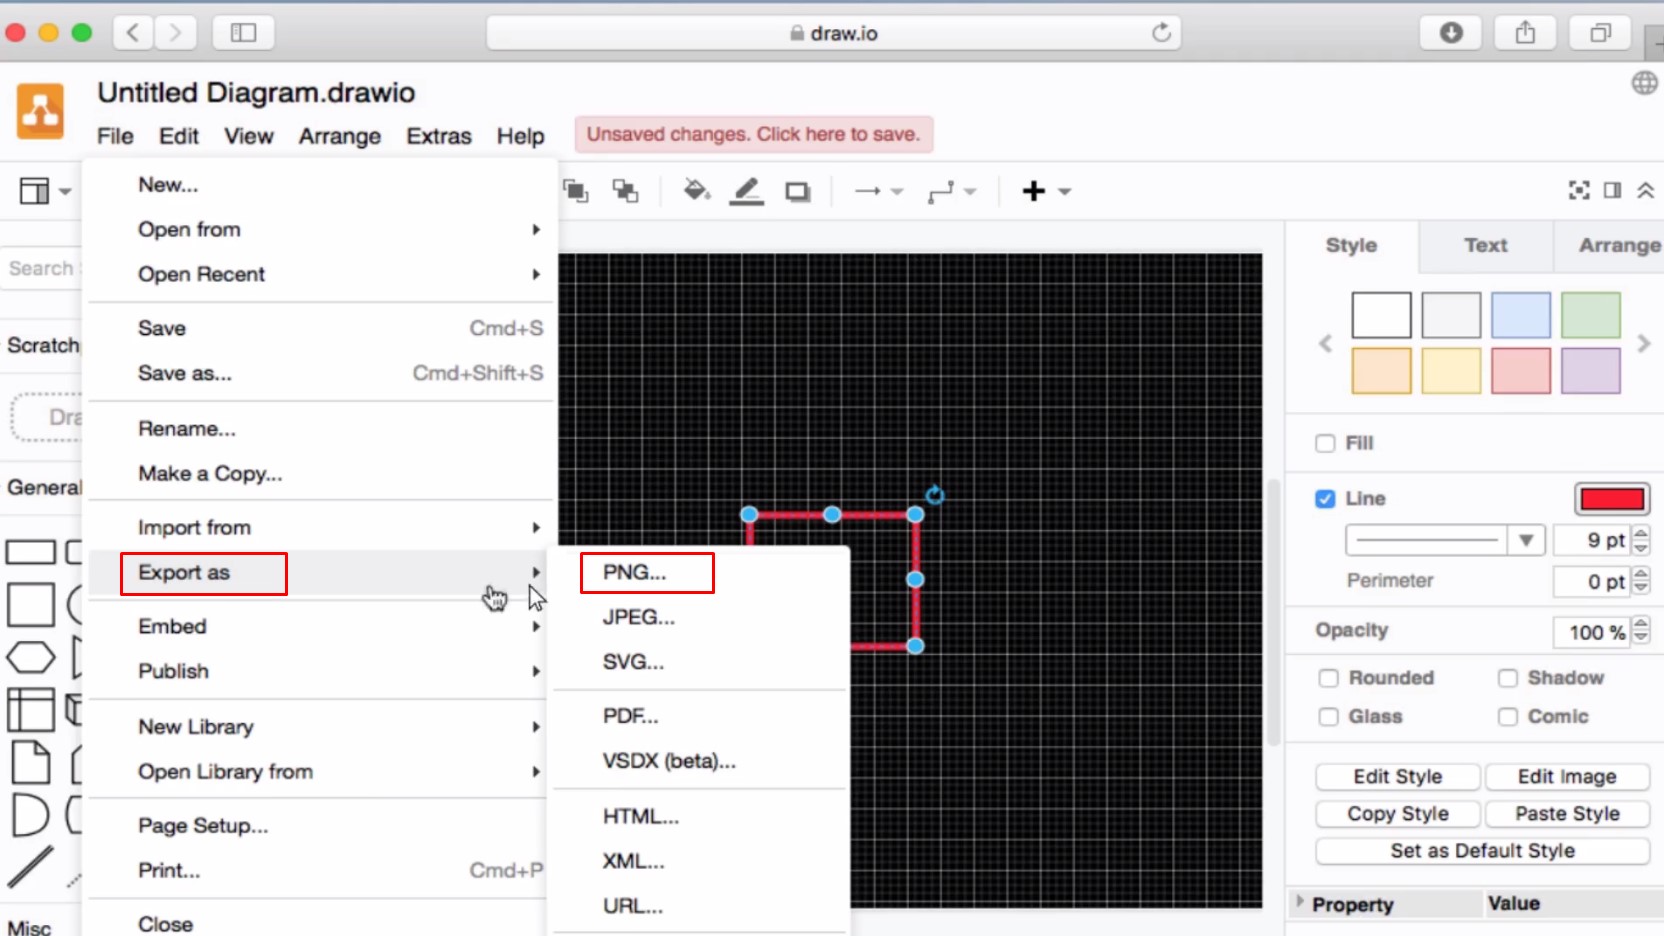
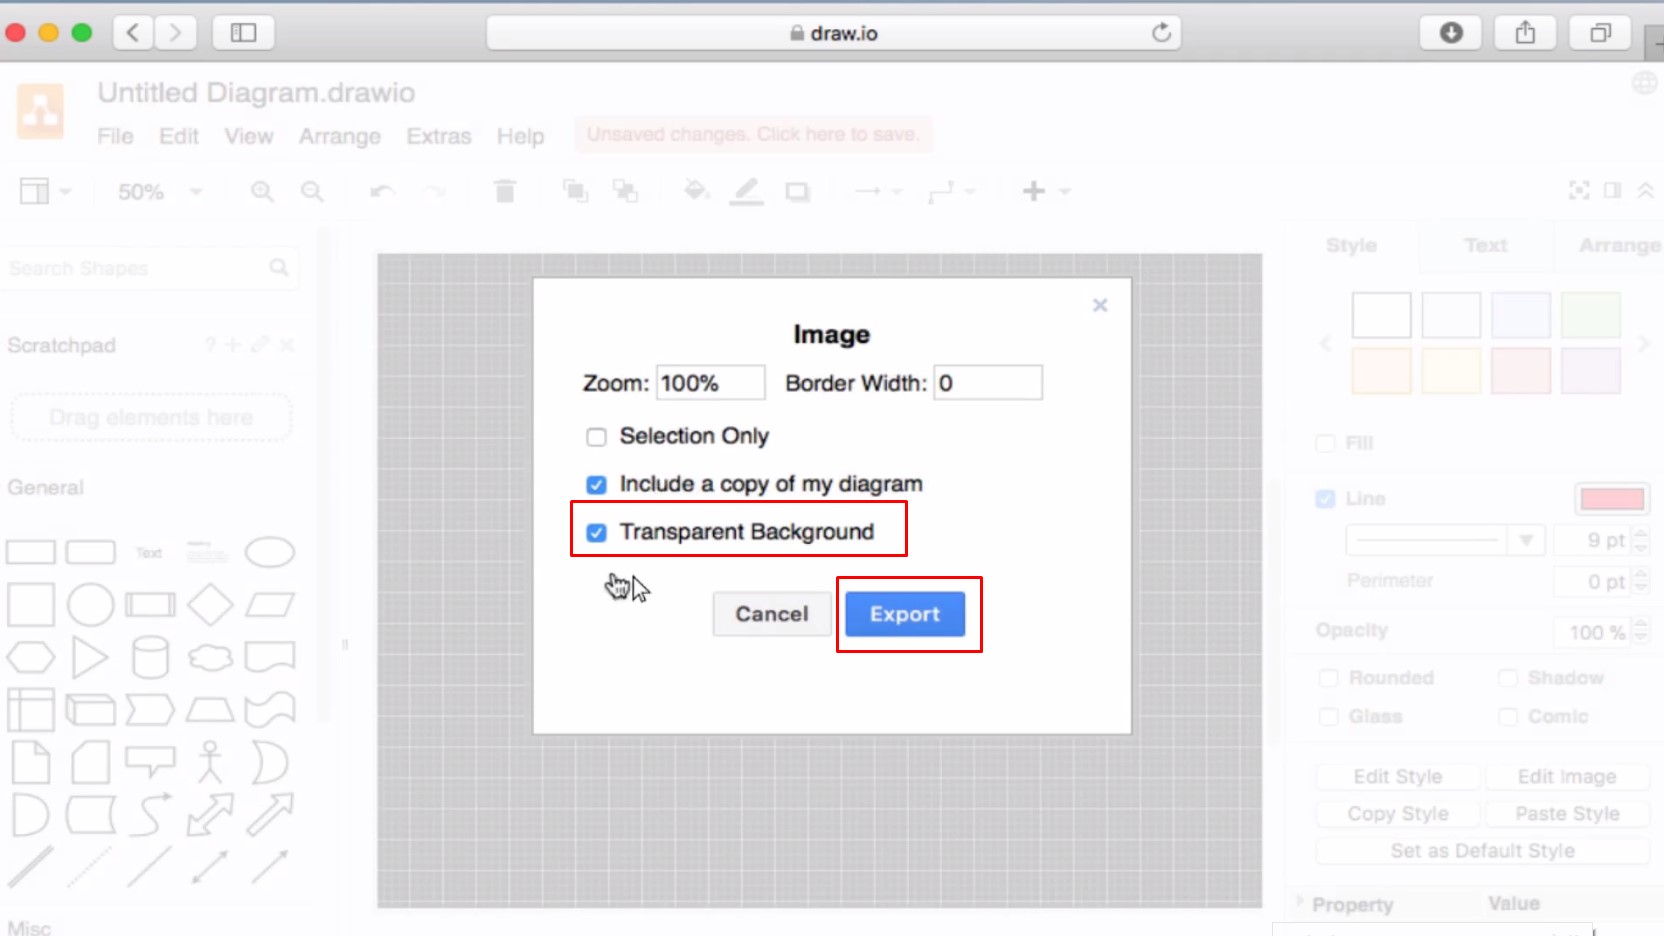
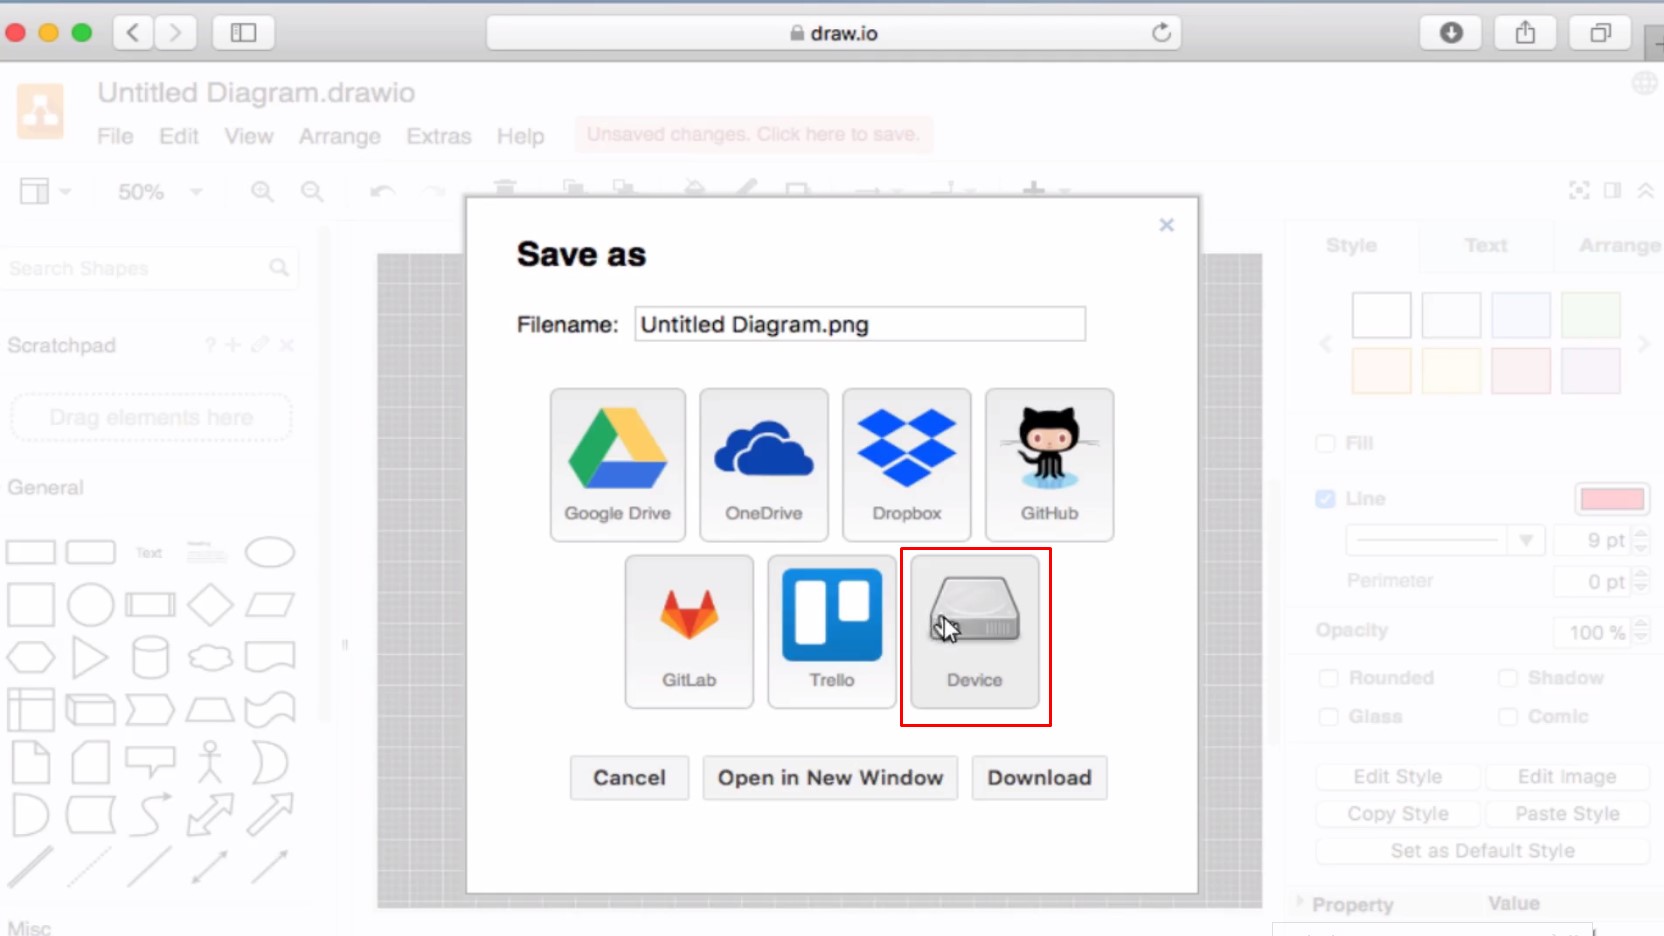
File -> Export png -> Transparent Background -> Deviceを選択
Select File -> Export png -> Transparent Background -> Device
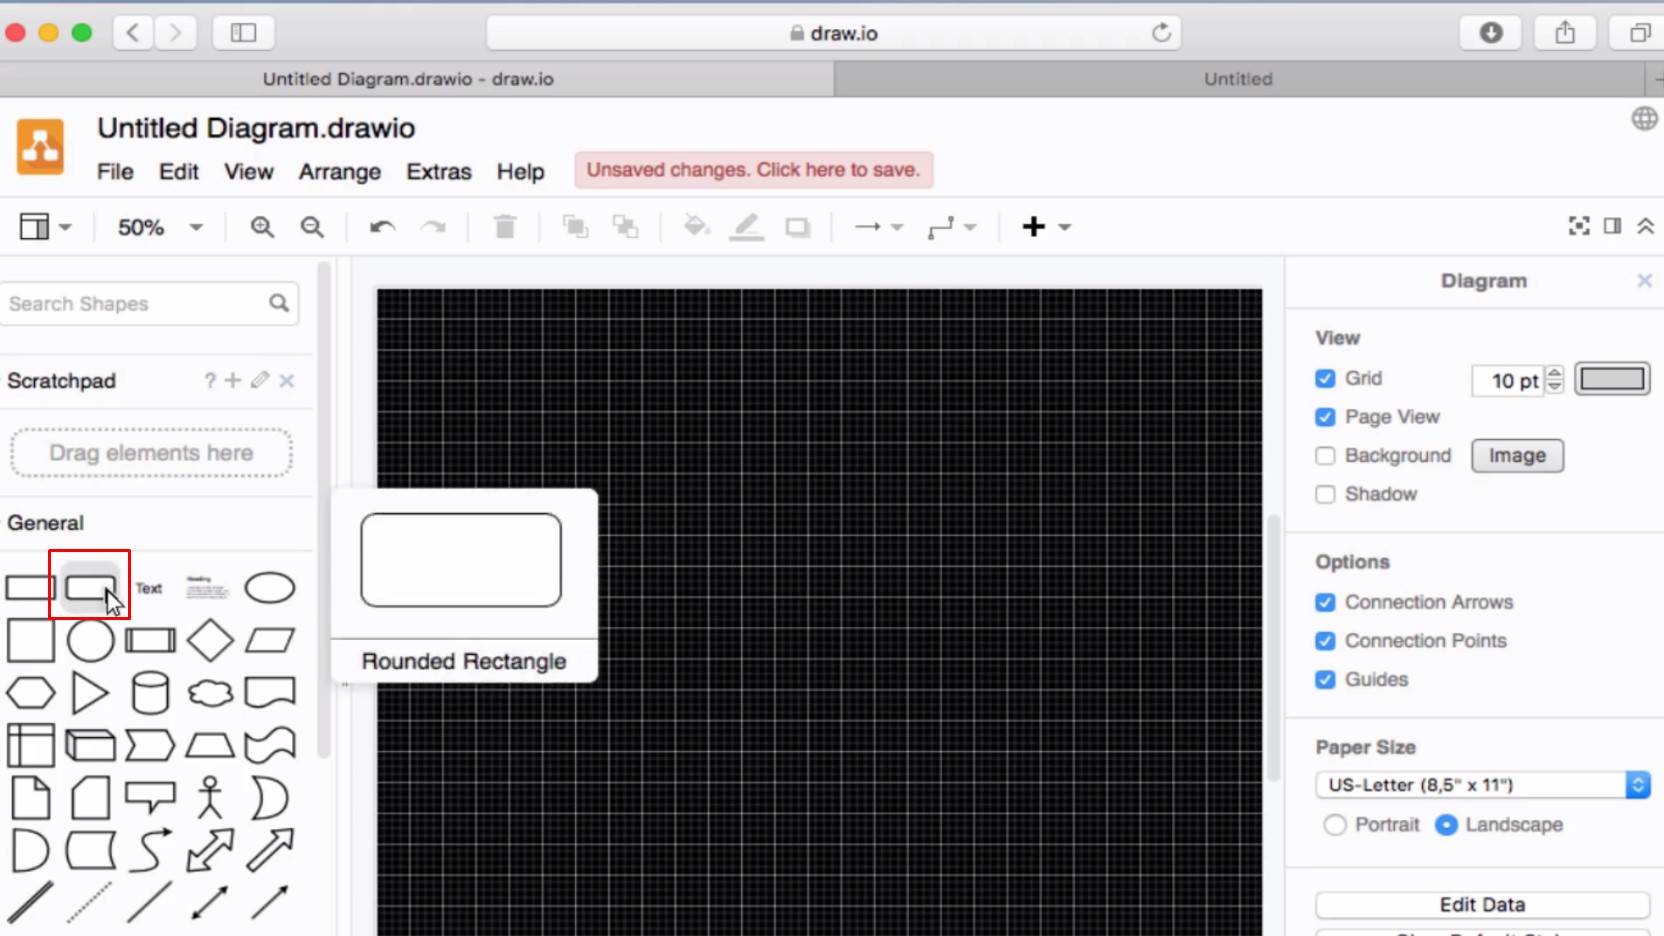
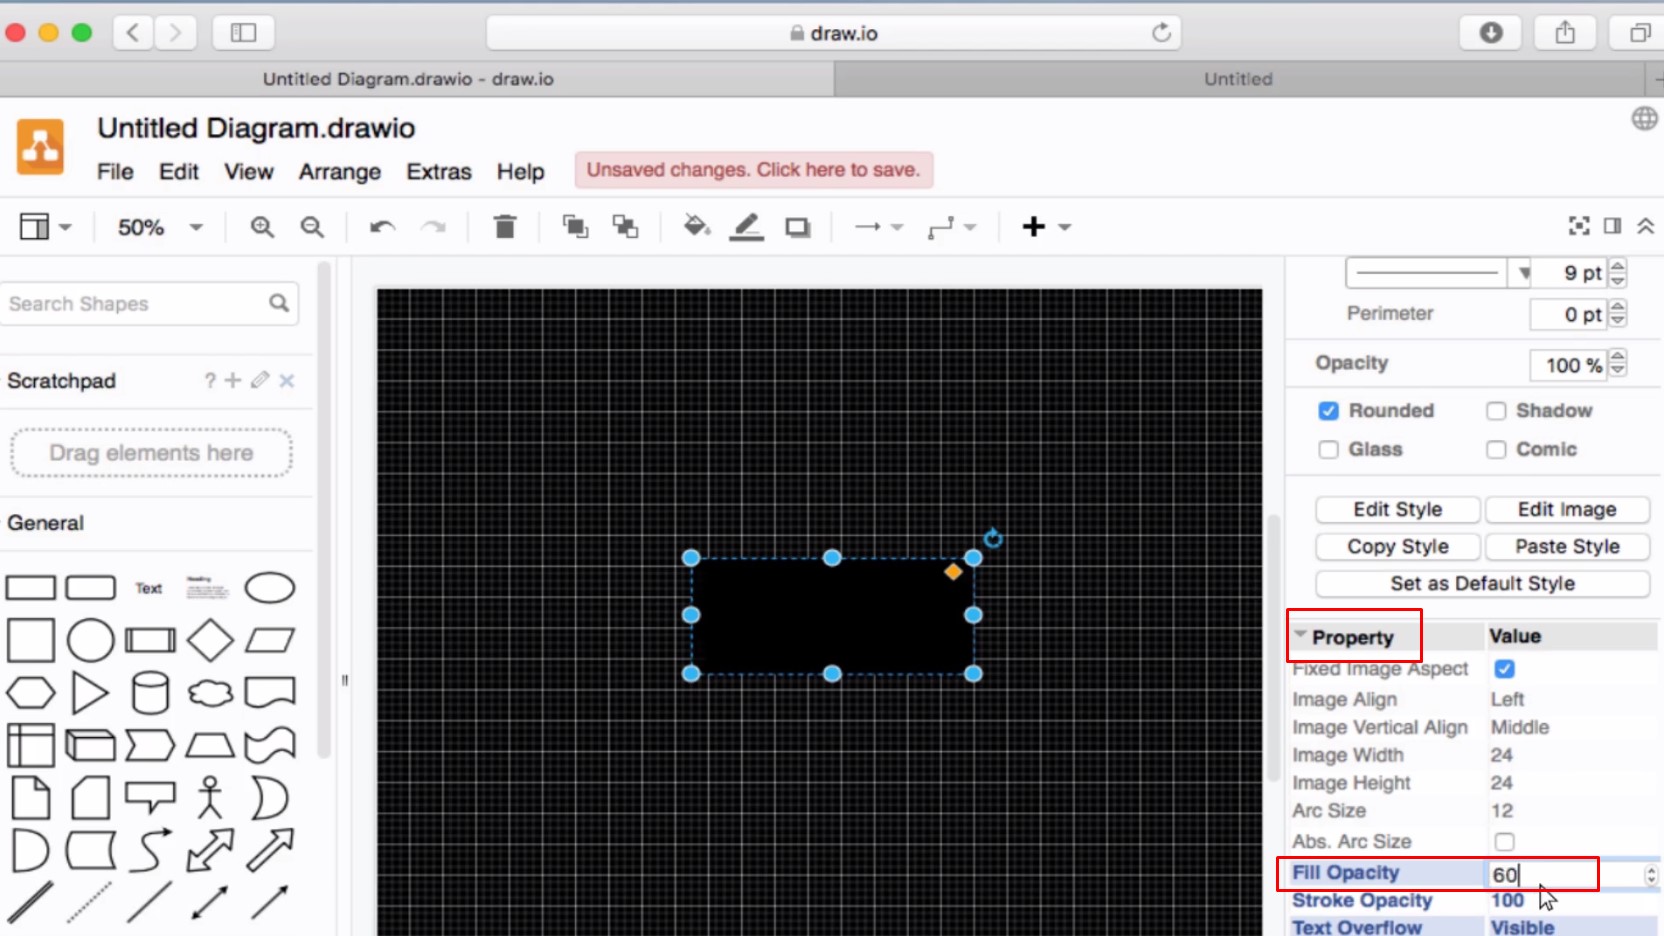
角が丸い長方形を選択 -> Lineチェックを外す -> Fill Color red -> Property Opacityを調整
Select a rectangle with rounded corners -> Uncheck Line -> Fill Color black -> Select Property and Adjust Opacity
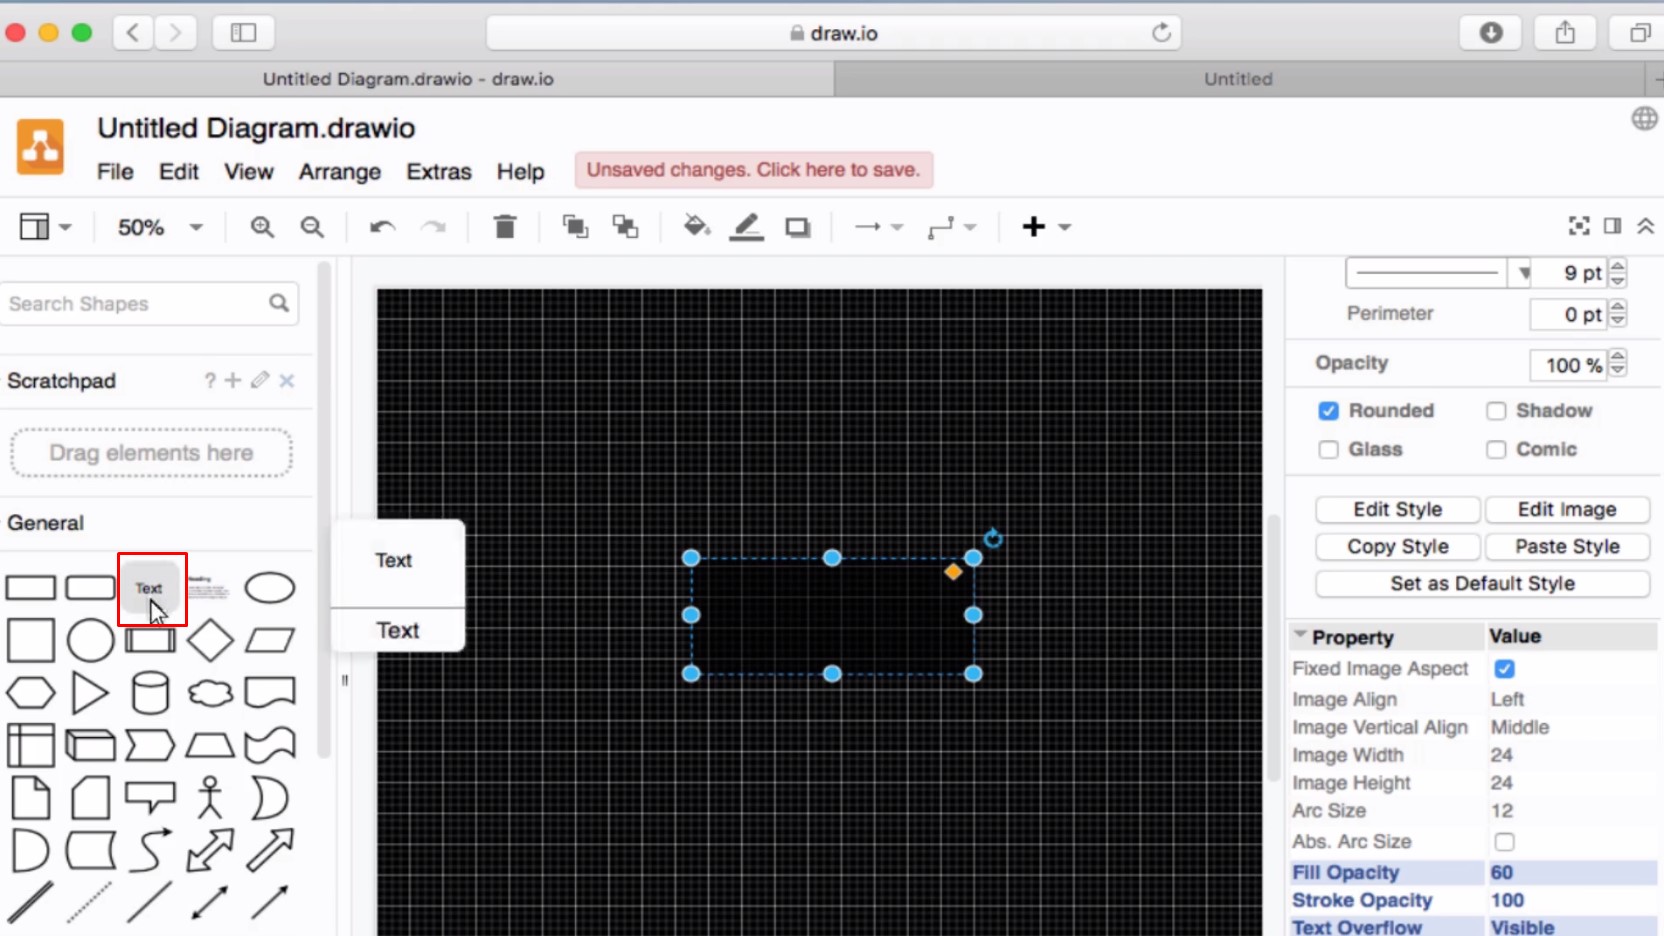
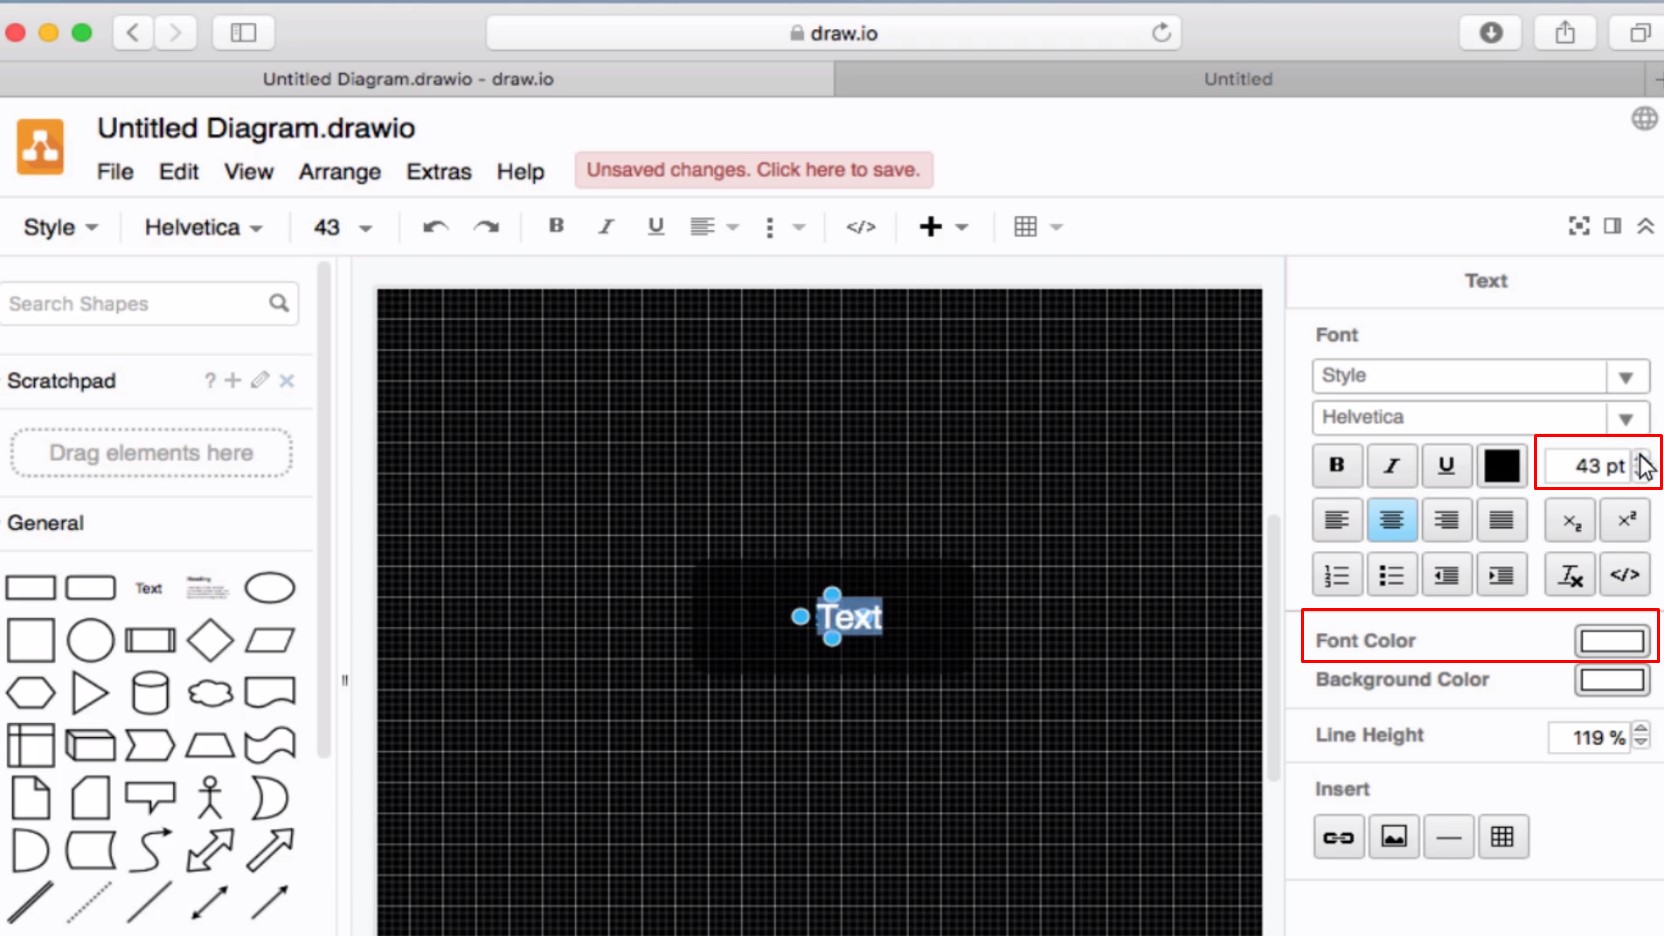
Textを選択 -> FontColor White -> FontSize調整 -> Export png
Select text -> FontColor White -> Adjust FontSize -> Export png
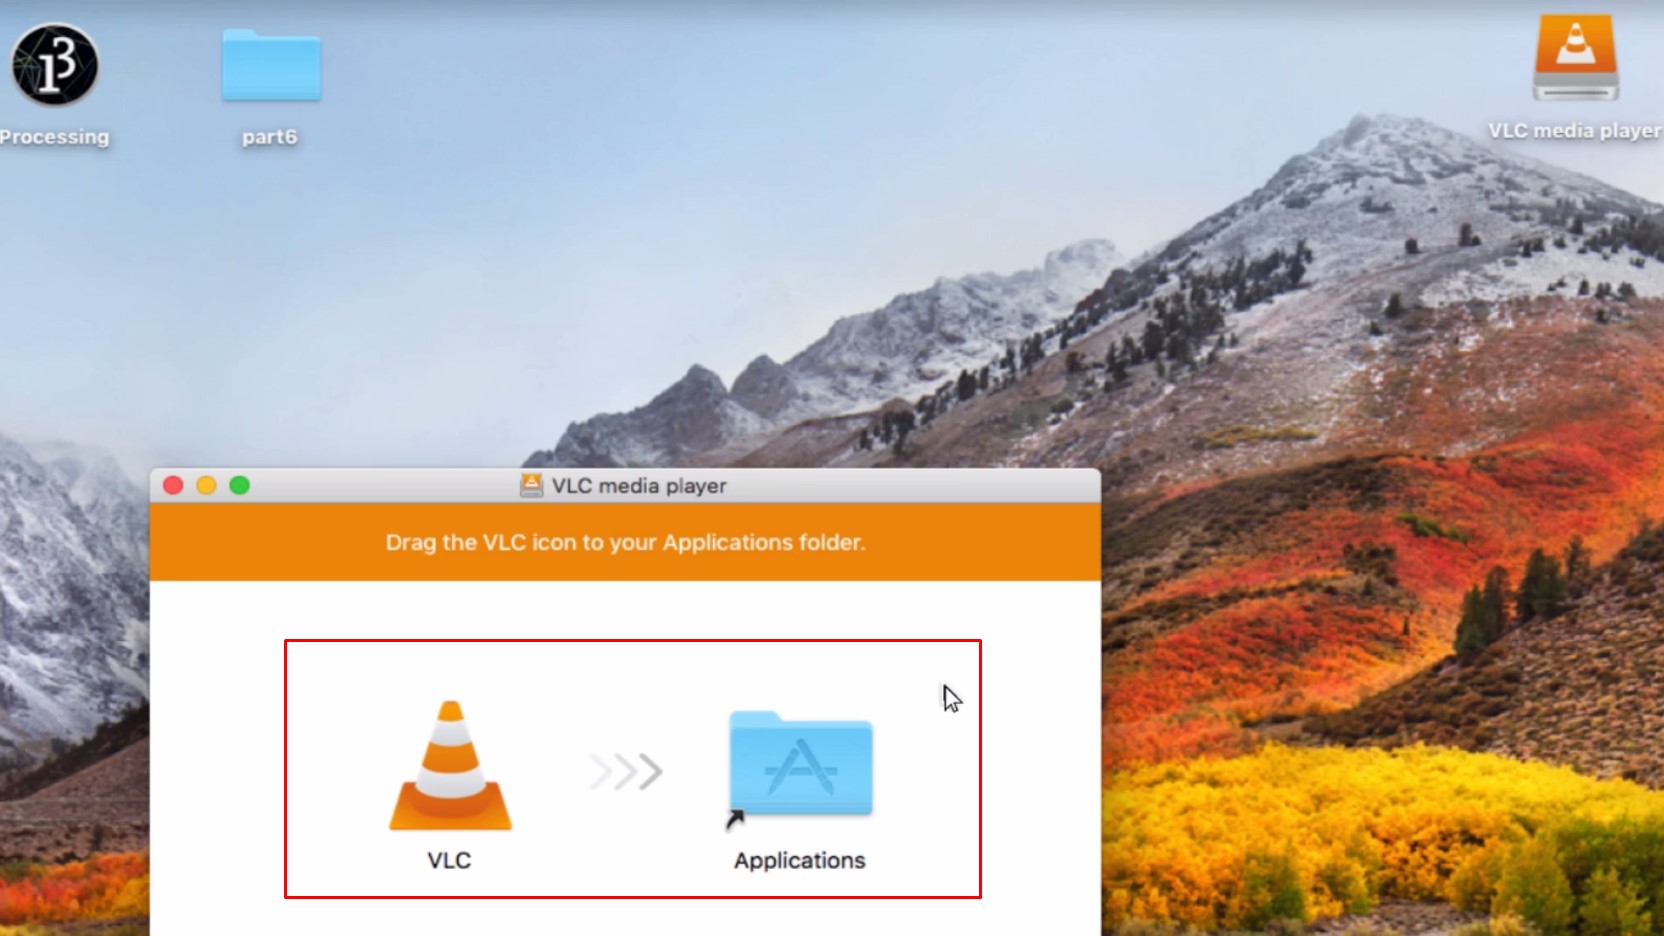
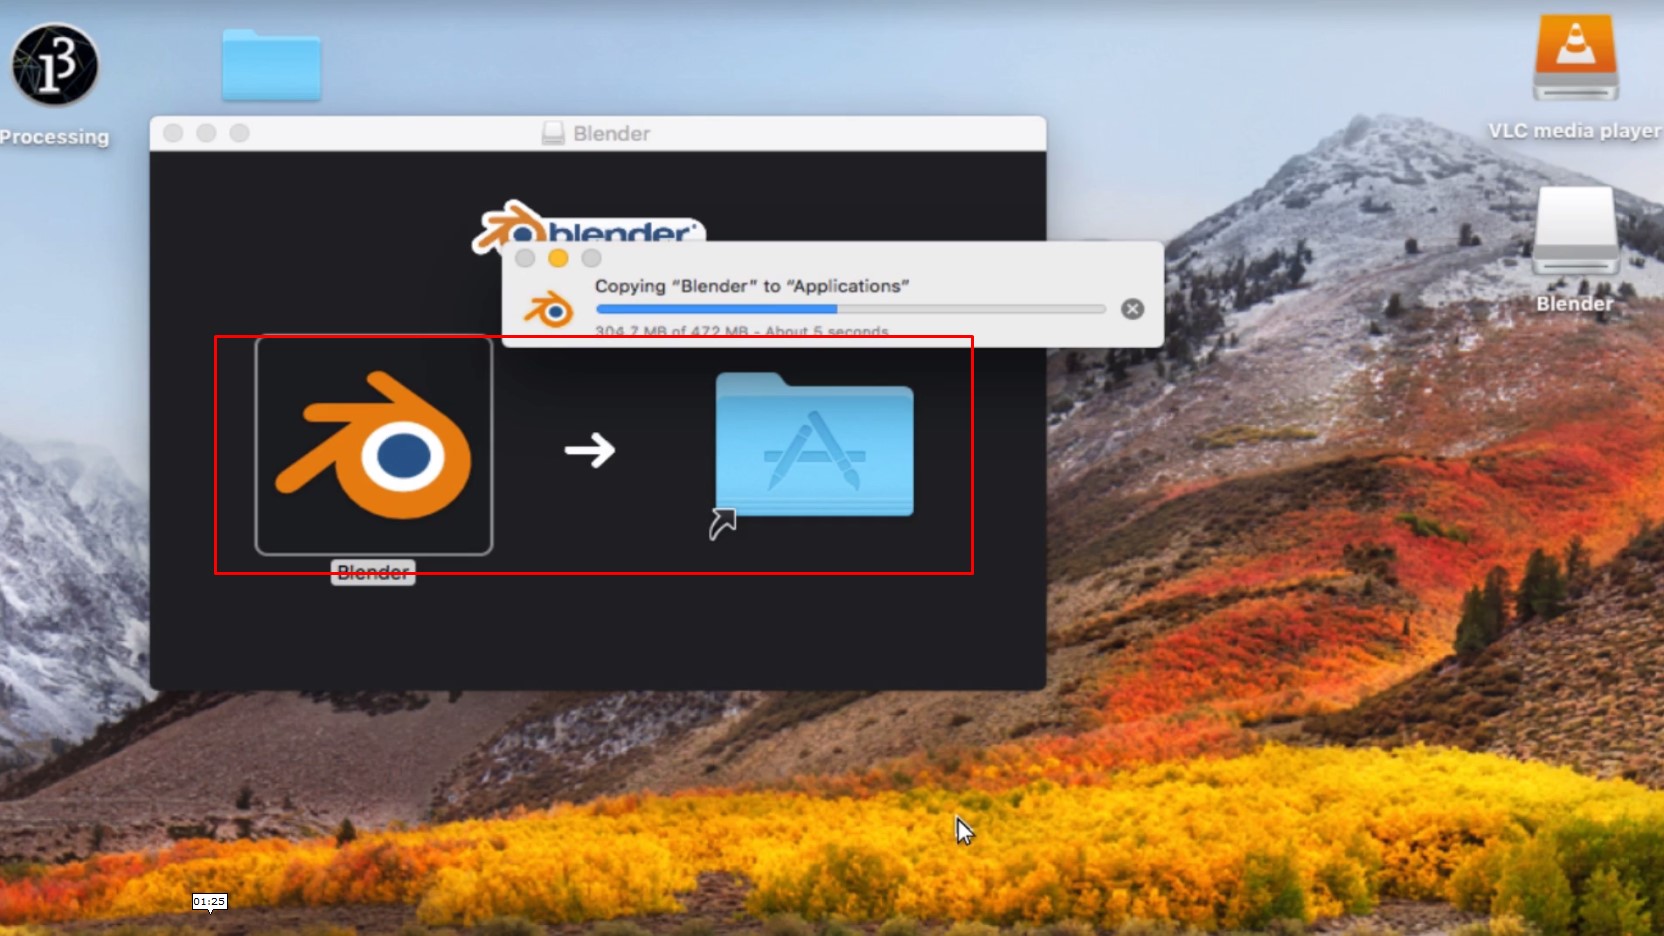
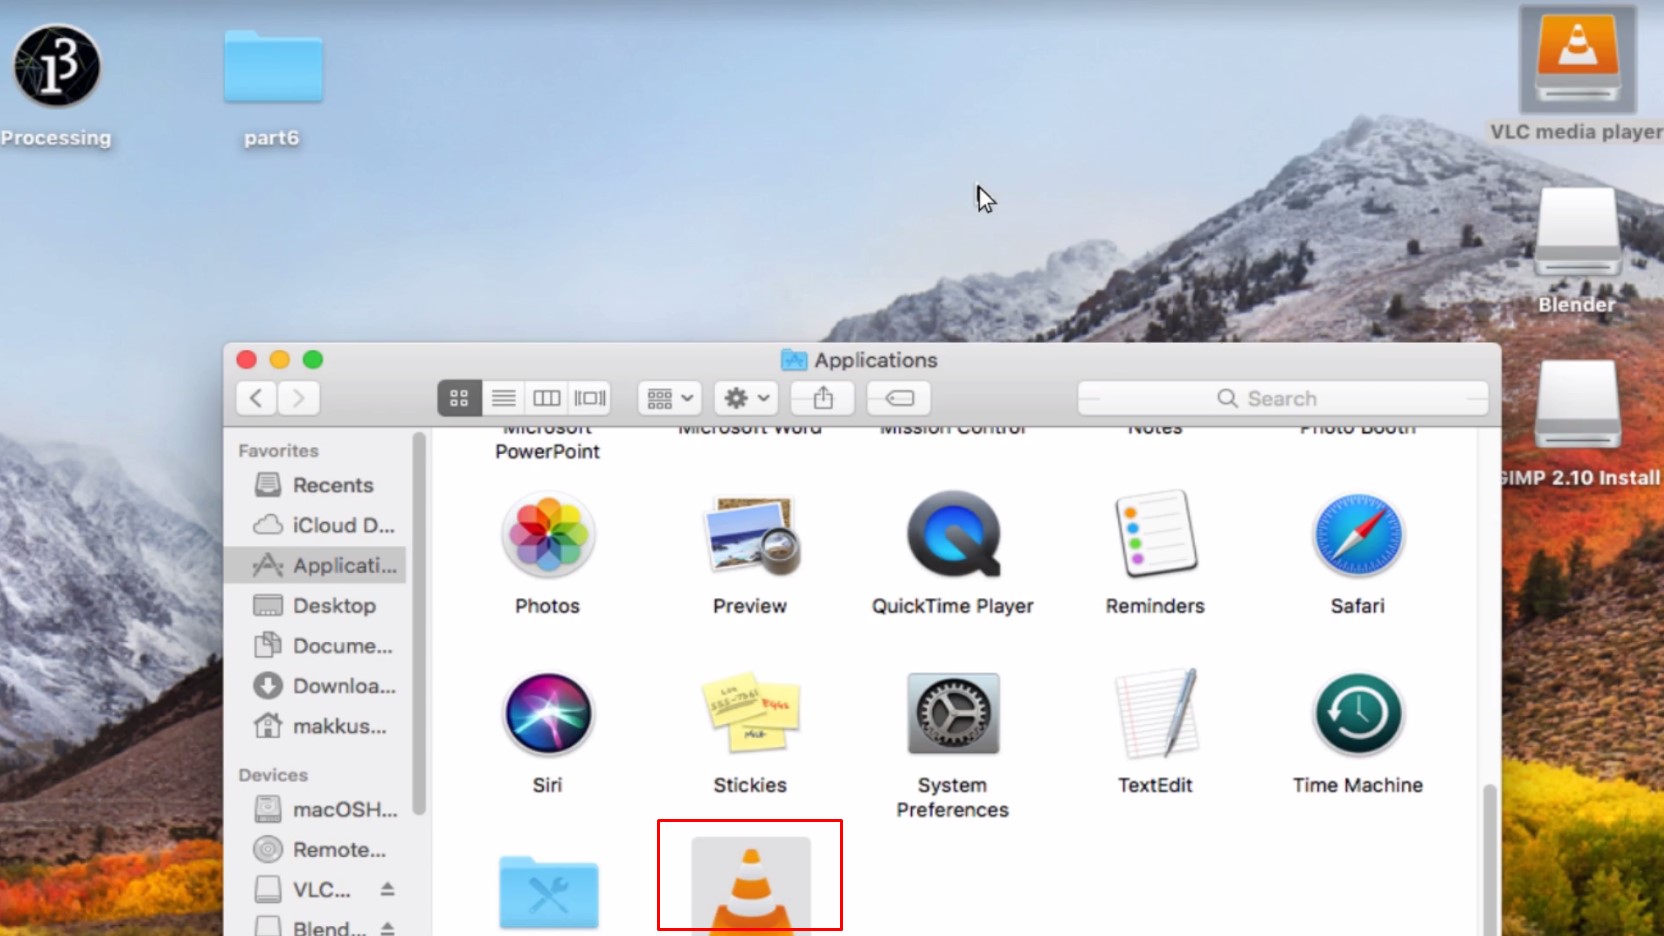
VLCのインストール and Blenderのインストール
Install VLC and Blender
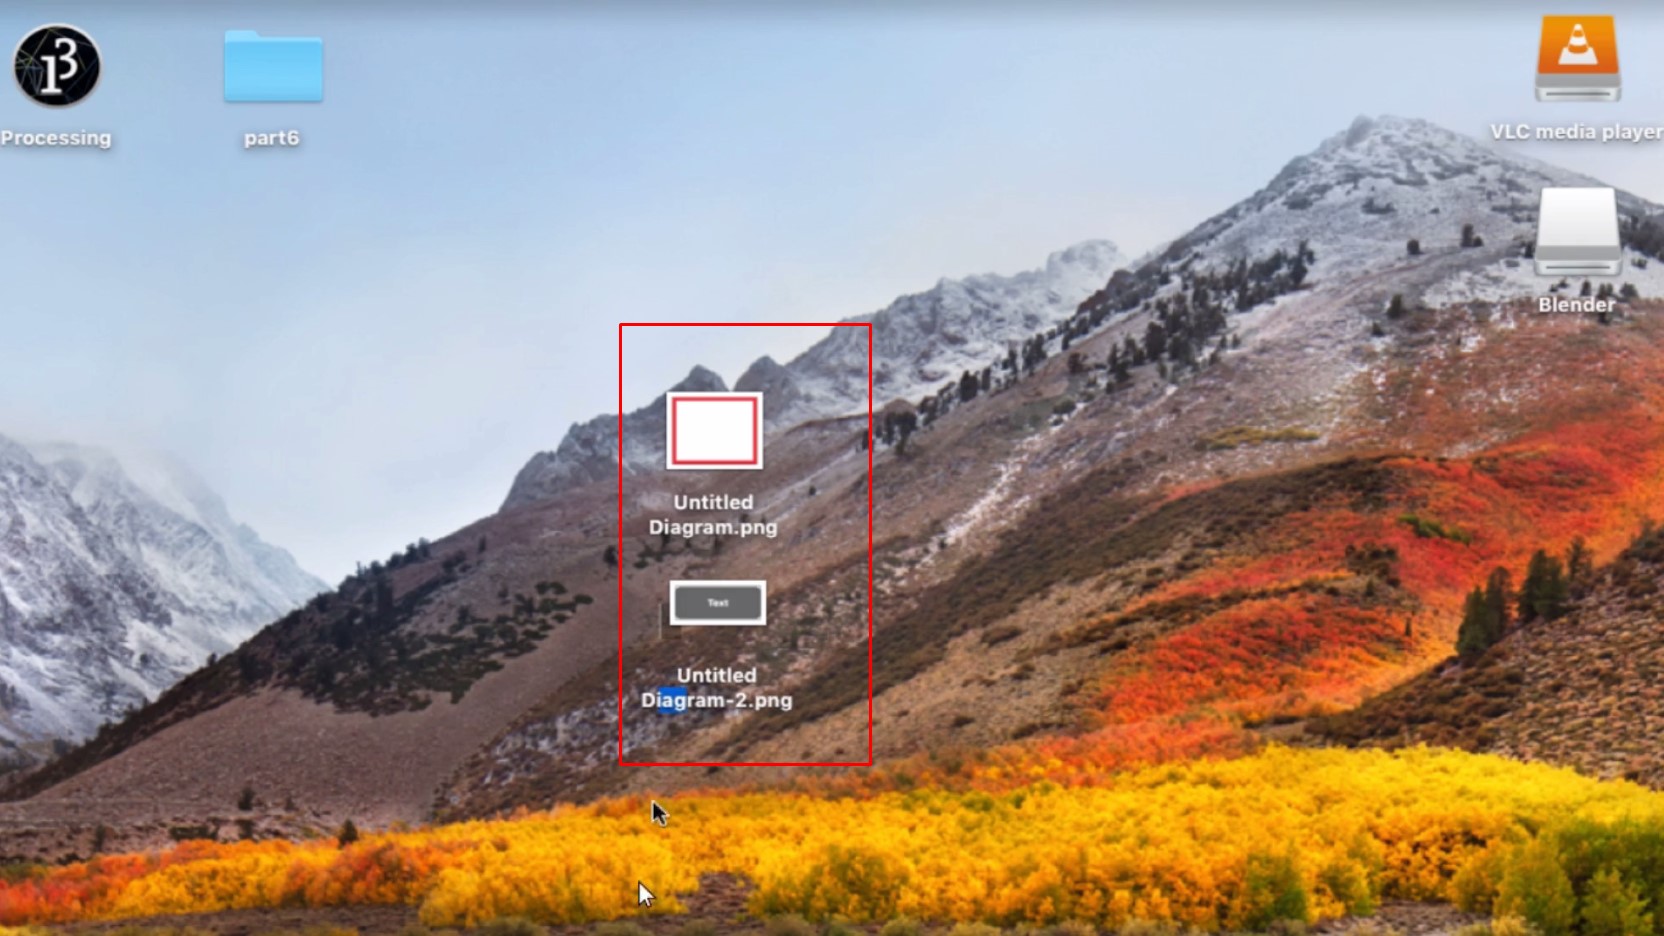
さきほどダウンロードしたpngを適当な場所に移動
Move the png you just downloaded to the appropriate location
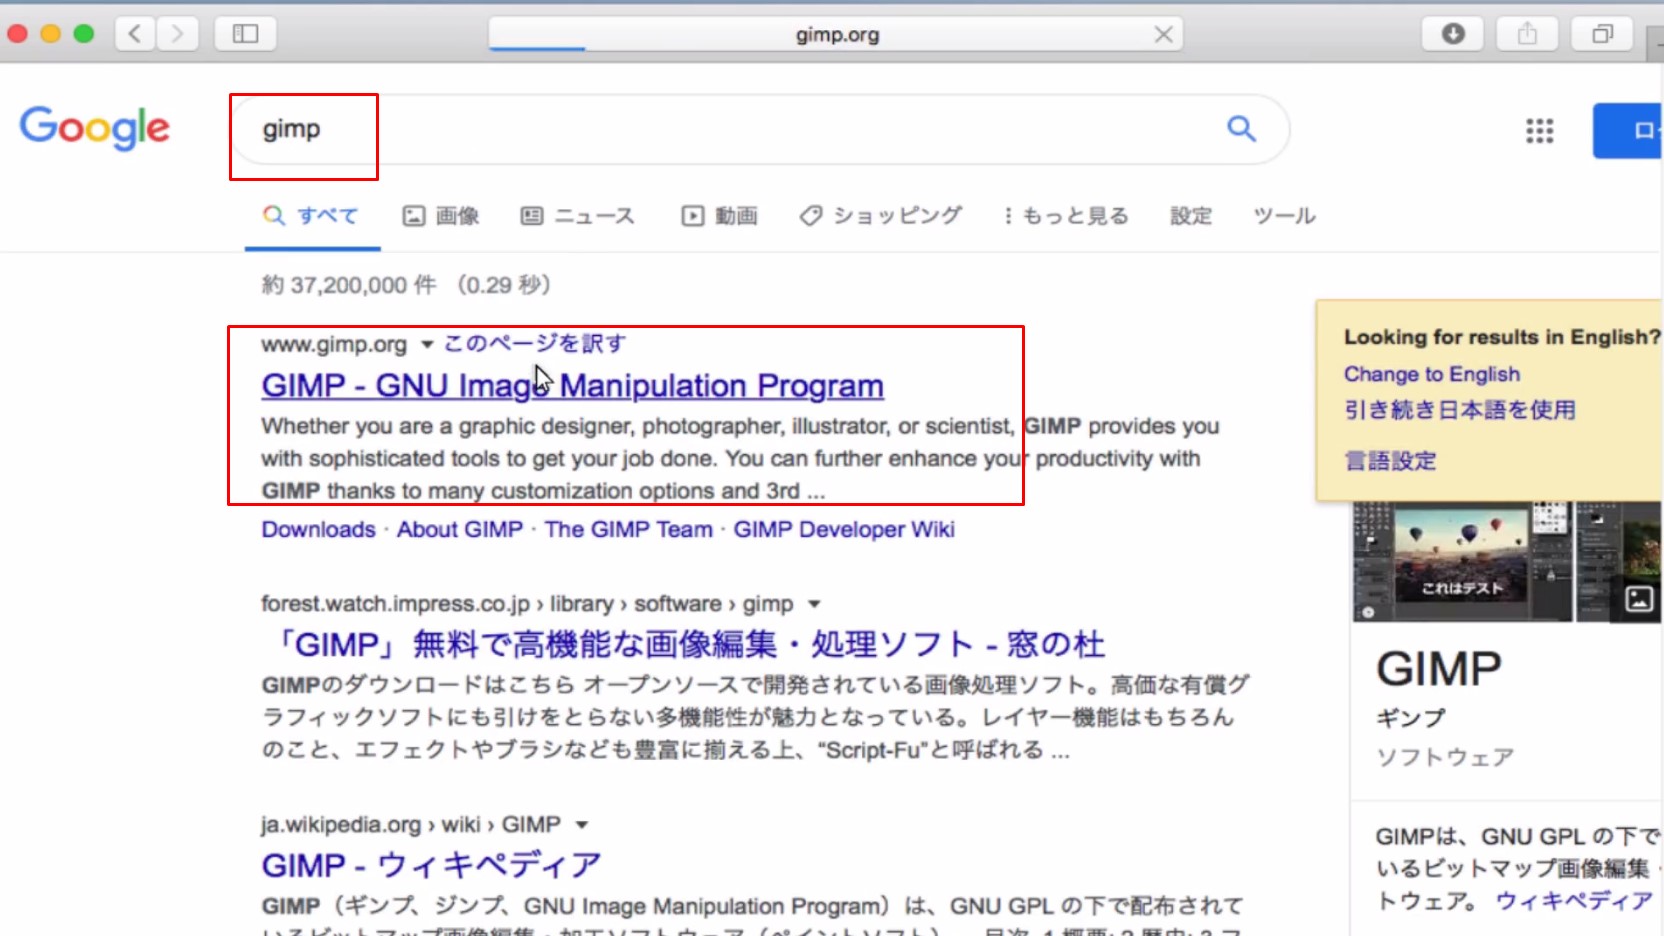
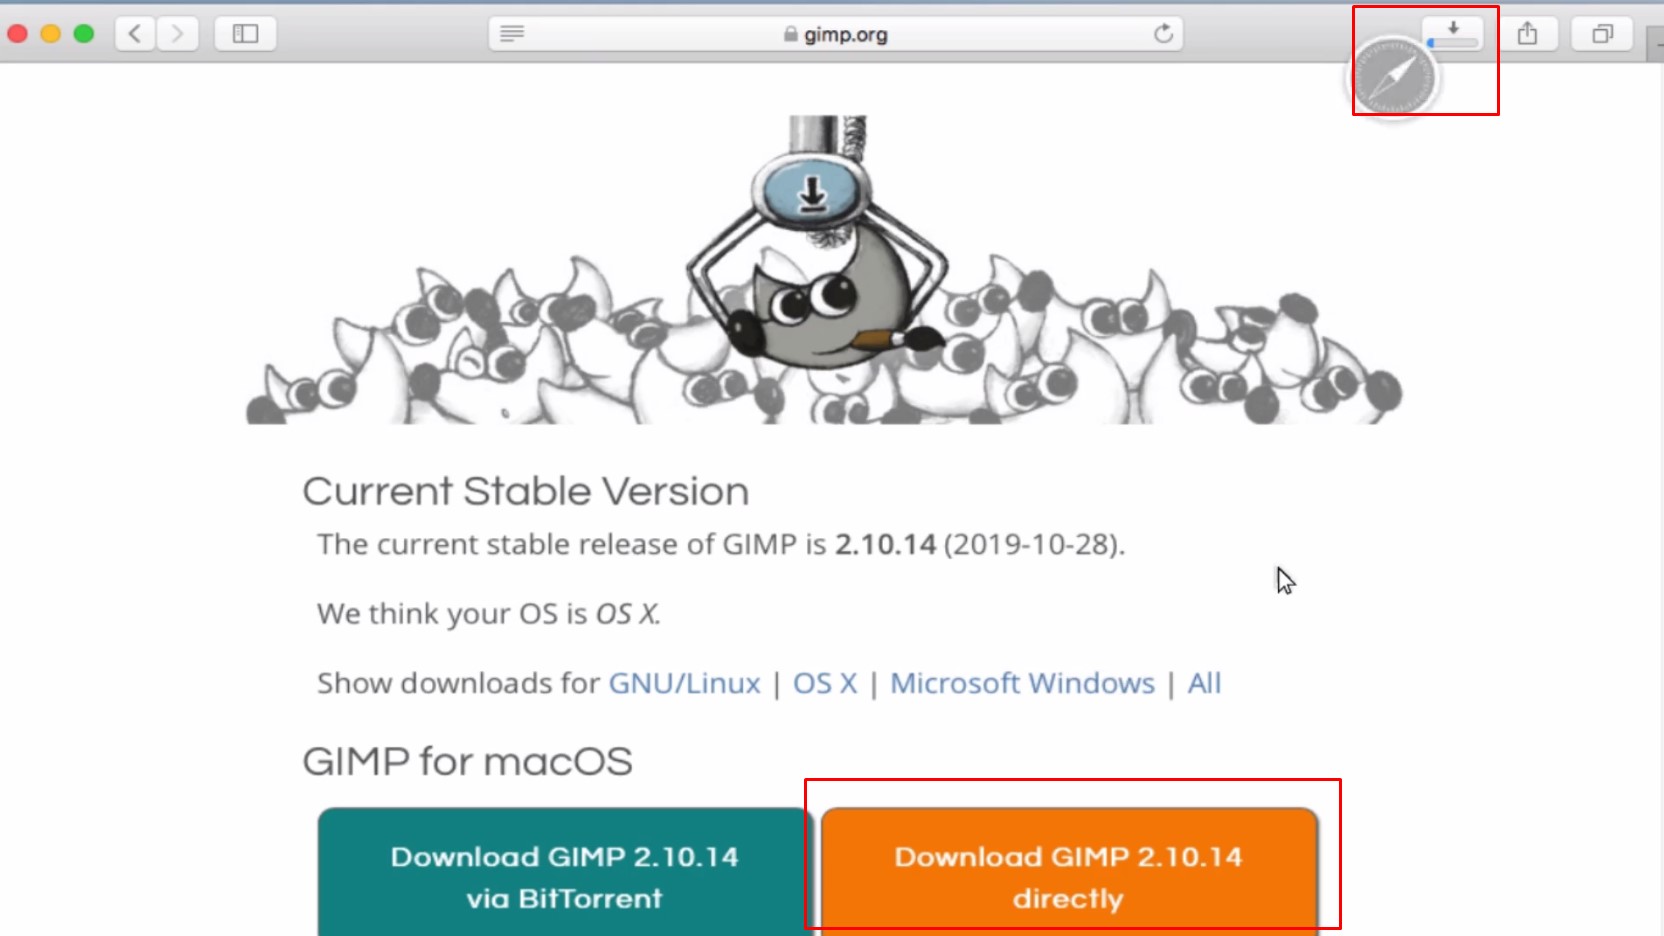

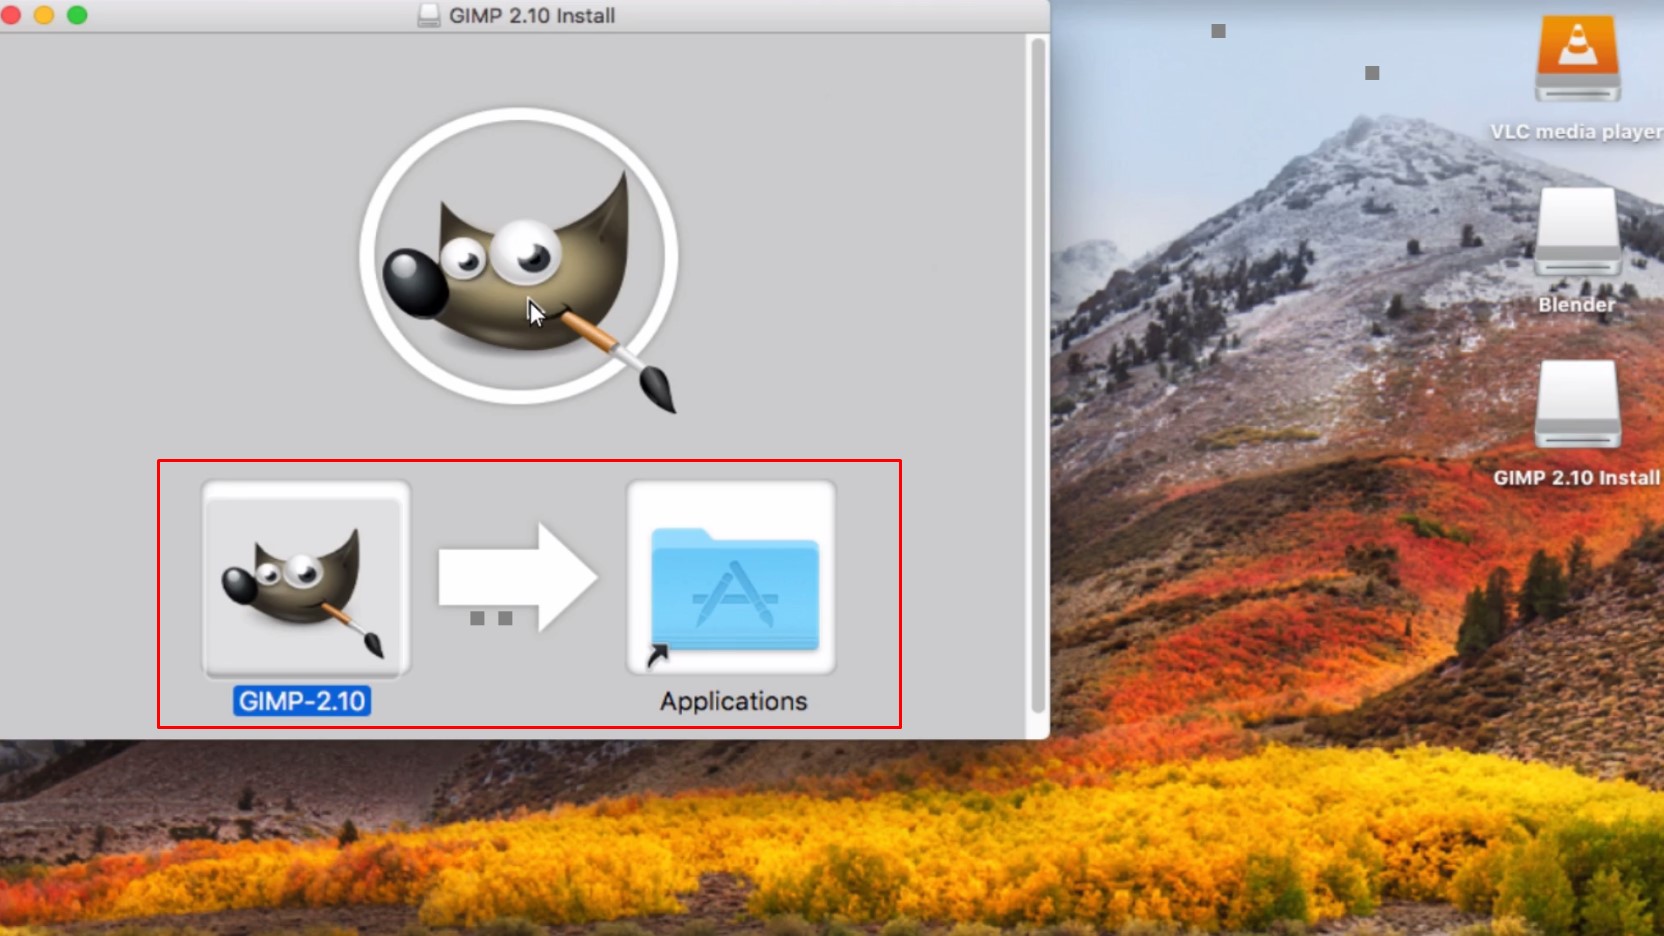
GIMPをブラウザで検索 -> ダウンロード -> インストール
Search for GIMP in the browser -> Download -> Install
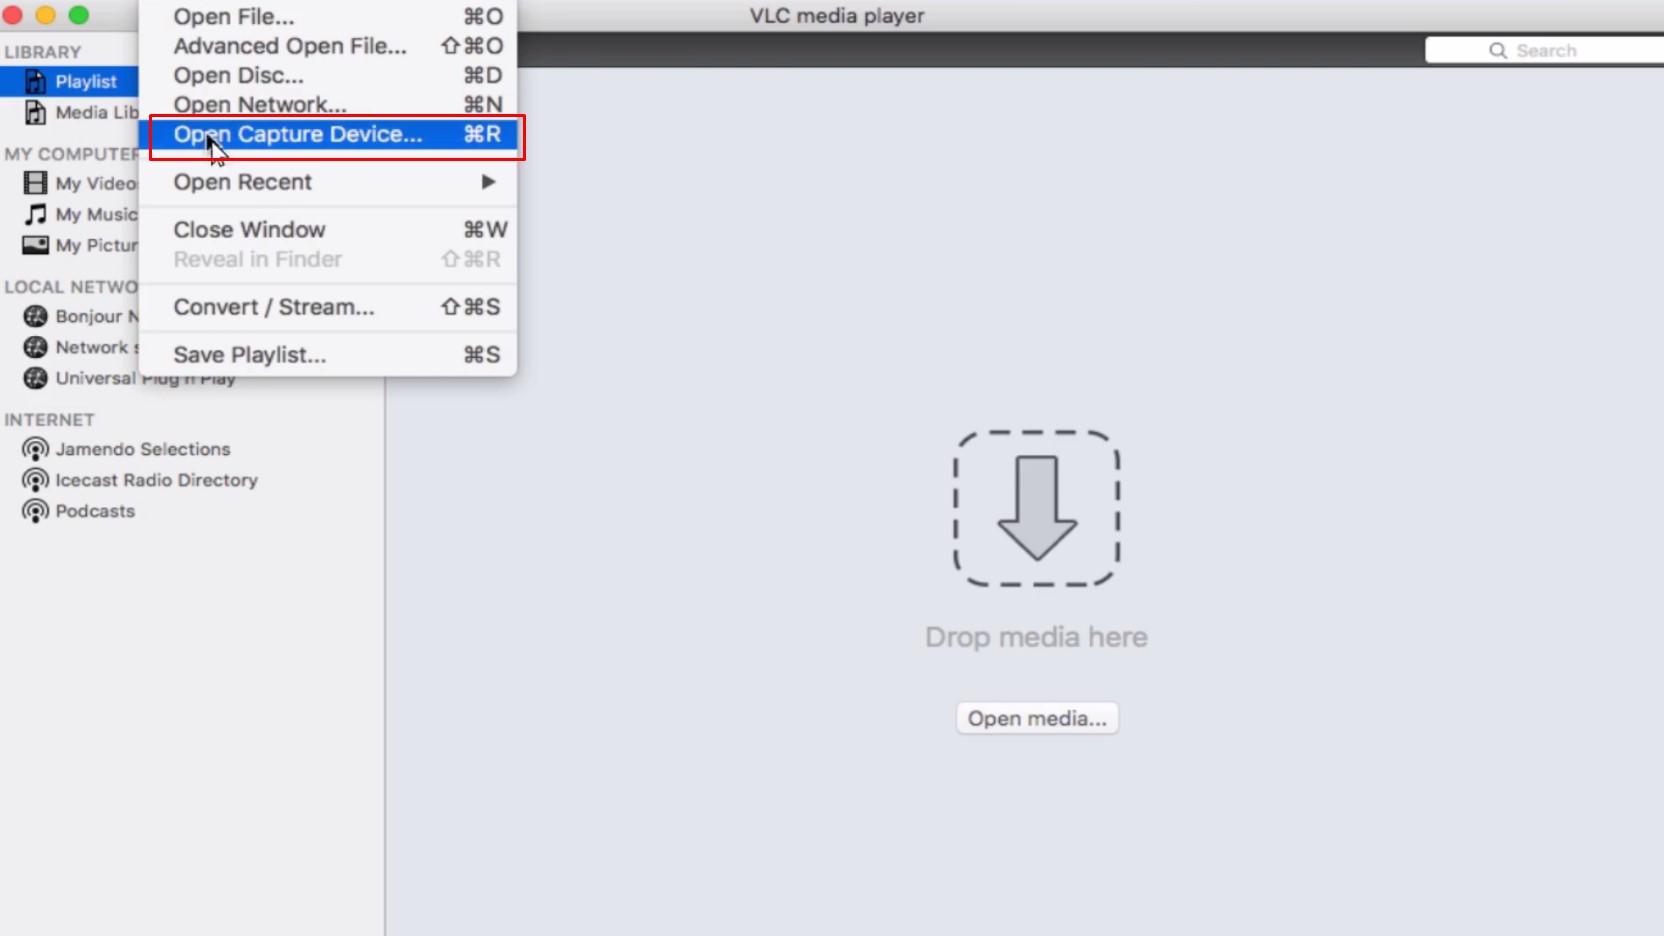
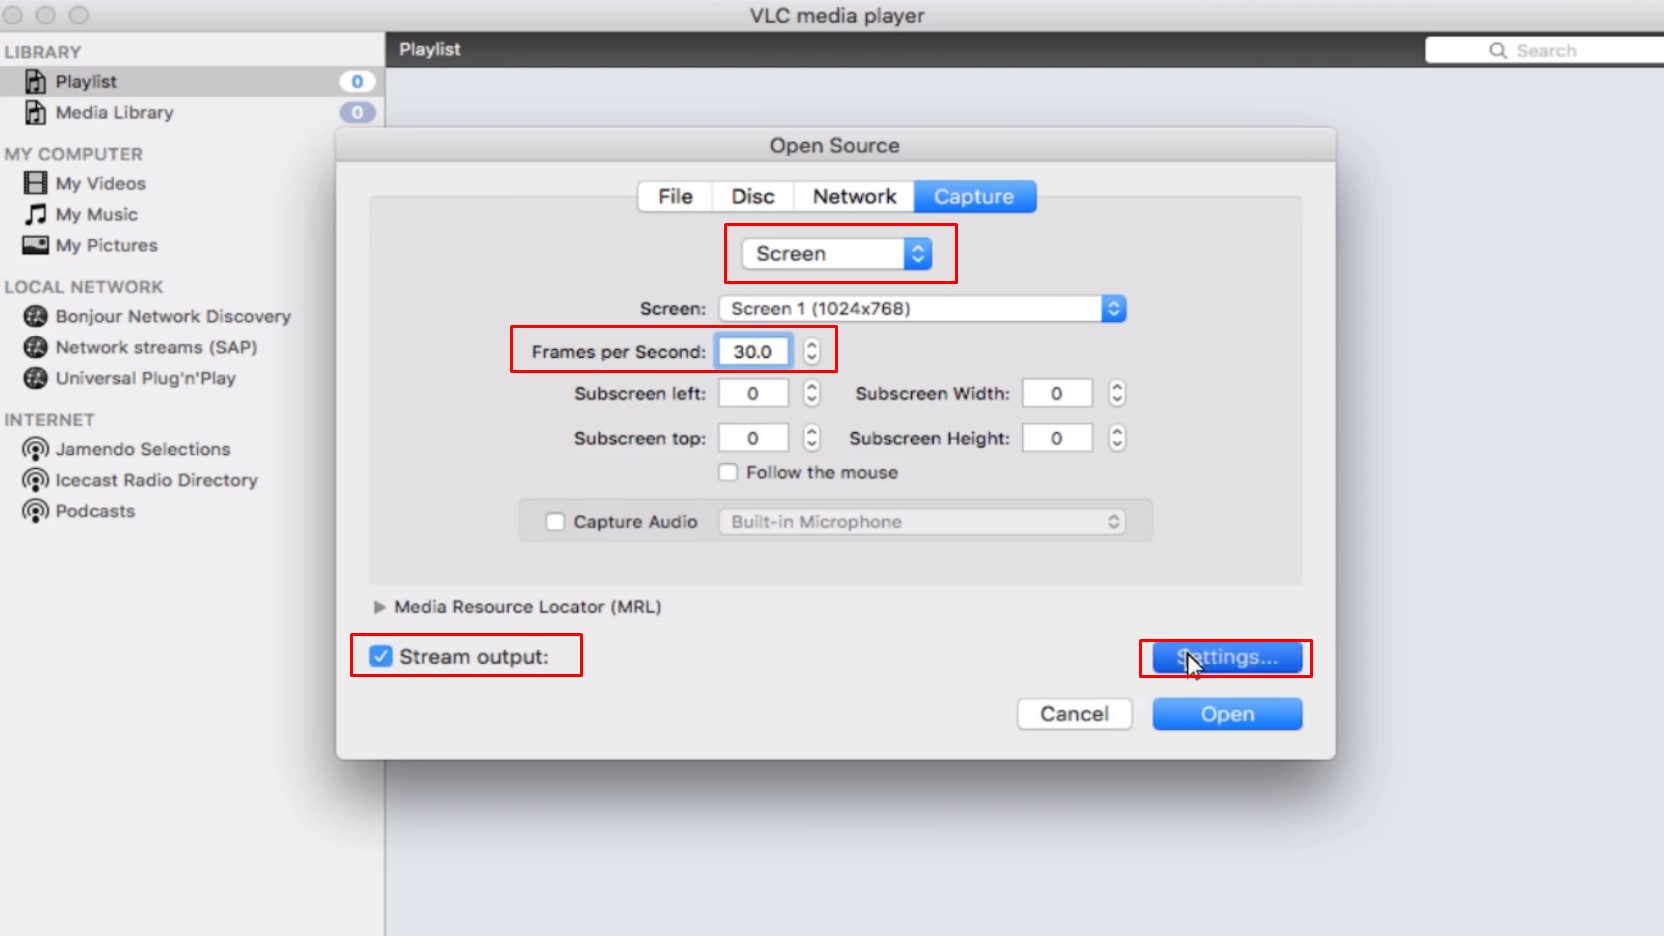
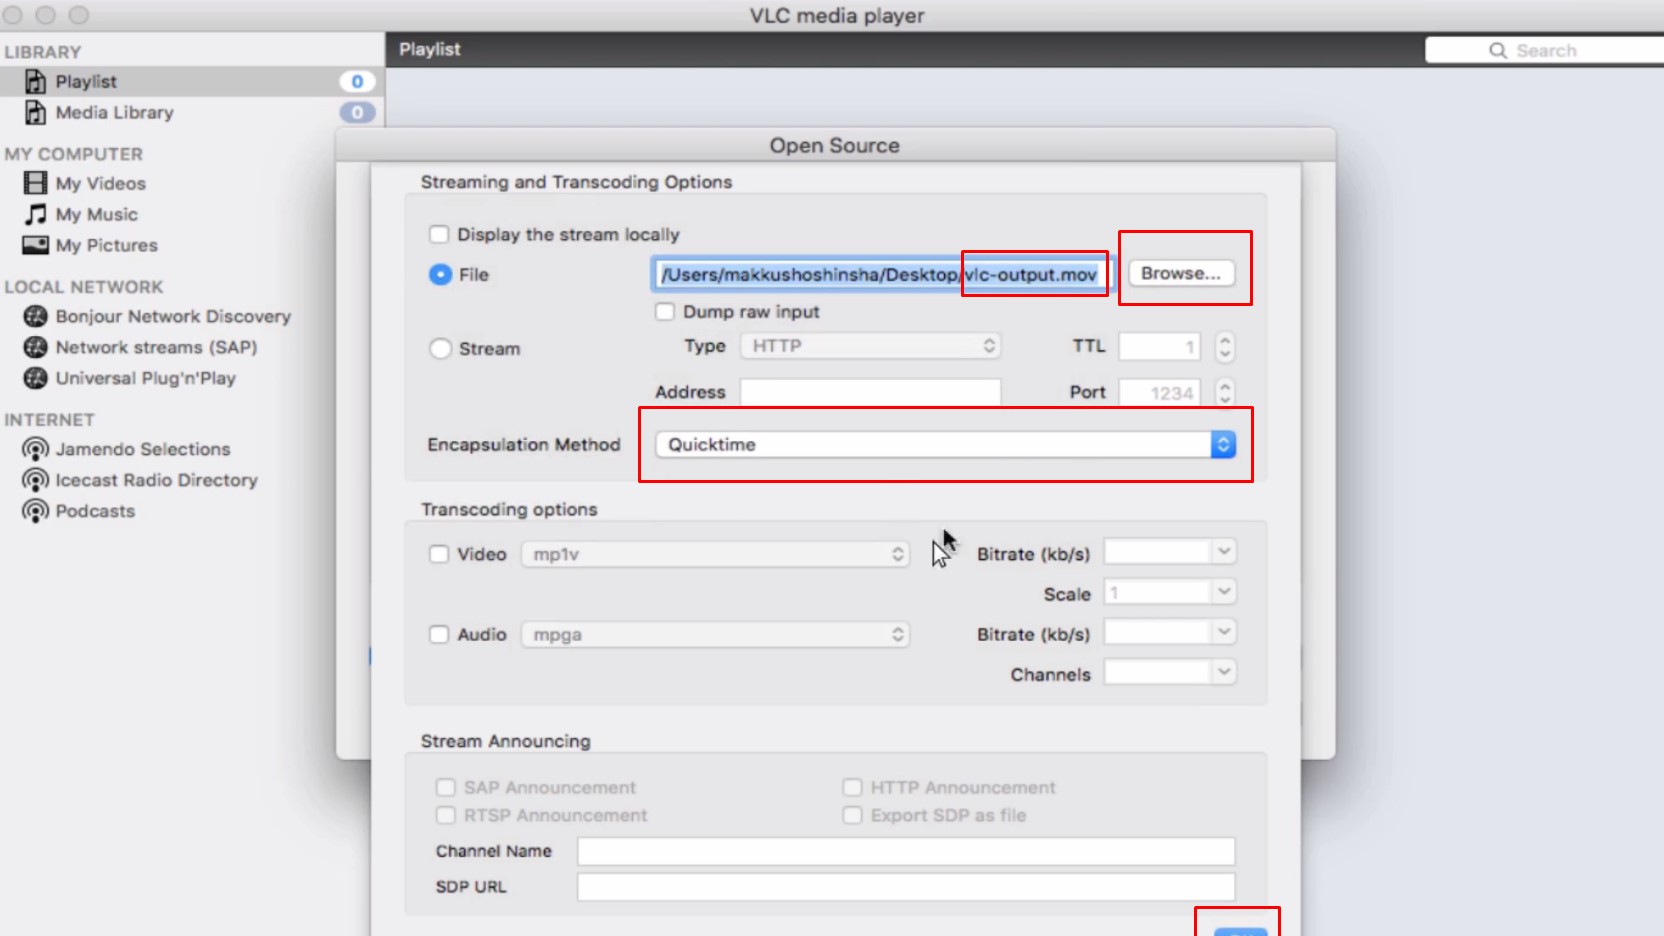
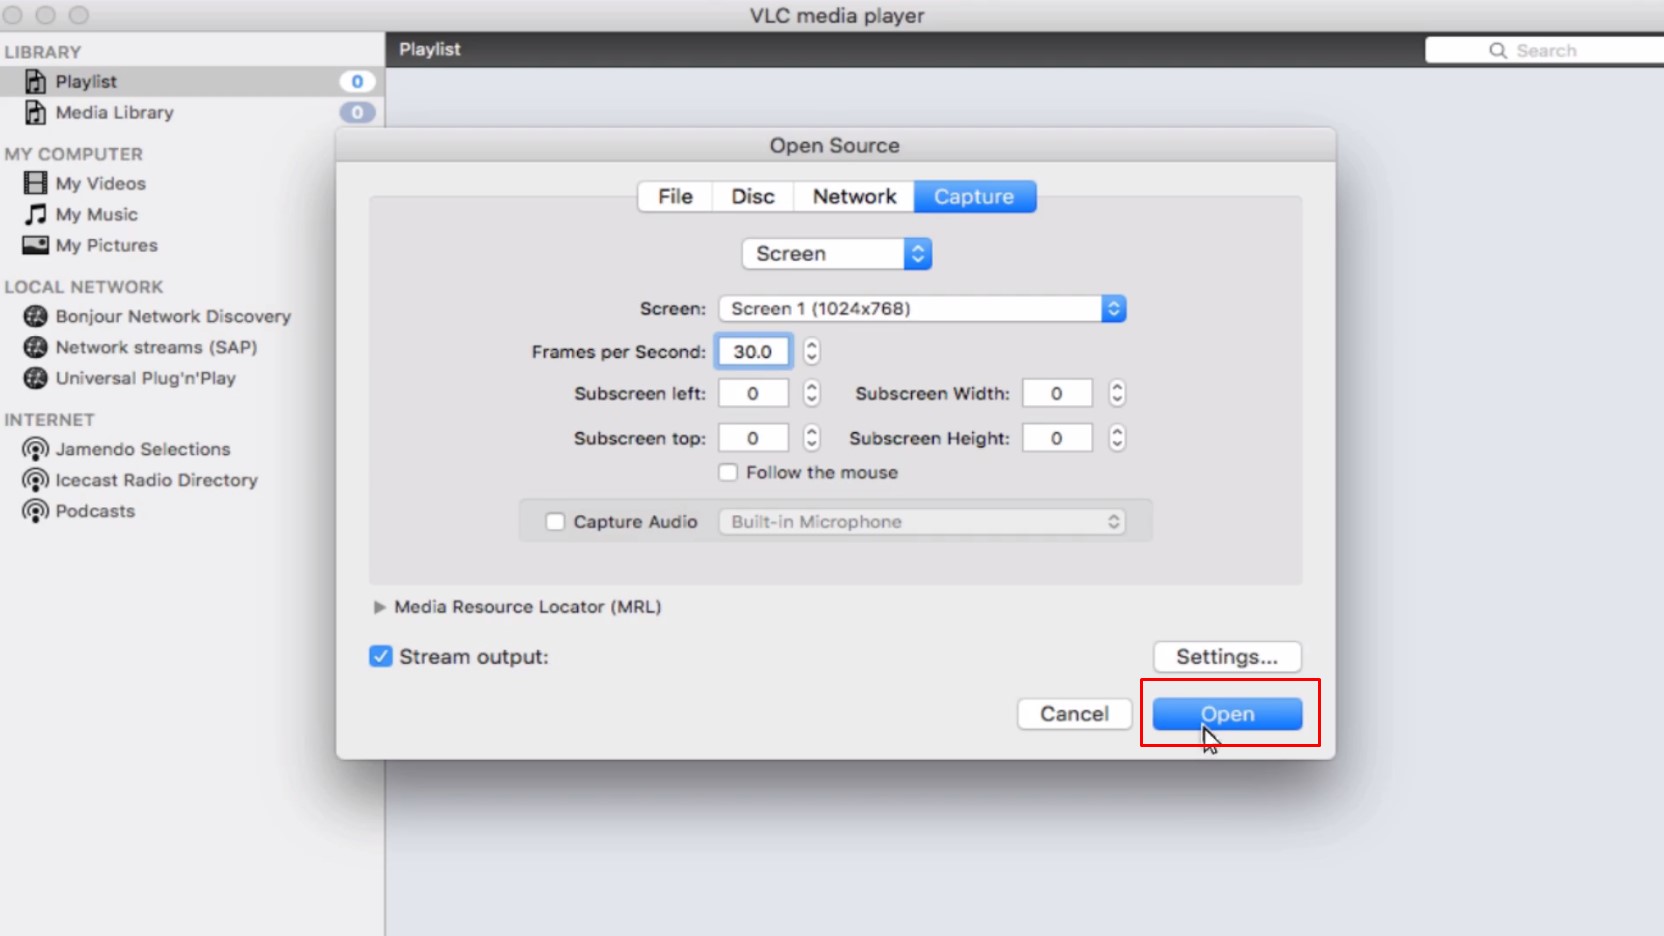
VLCを開く -> -> Fileを選択 -> Open Capture Device -> Screen -> 30fps -> Stream output -> Settings -> File -> Browse -> 適当な場所で保存してください -> Encapsulation Methodを選択 -> Quicktime -> Save -> Open -> 録画開始 -> 録画停止
Open VLC -> -> Select File -> Open Capture Device -> Screen -> 30fps -> Stream output -> Settings -> File -> Browse -> Save it in a suitable place. -> Select Encapsulation Method -> Quicktime -> Save -> Open -> Start Recording -> Stop Recording
Blenderの基本的な動画編集
Blender's basic video editing
次にBlenderの基本的な動画編集の説明です。
Next is a description of the Blender's basic video editing.
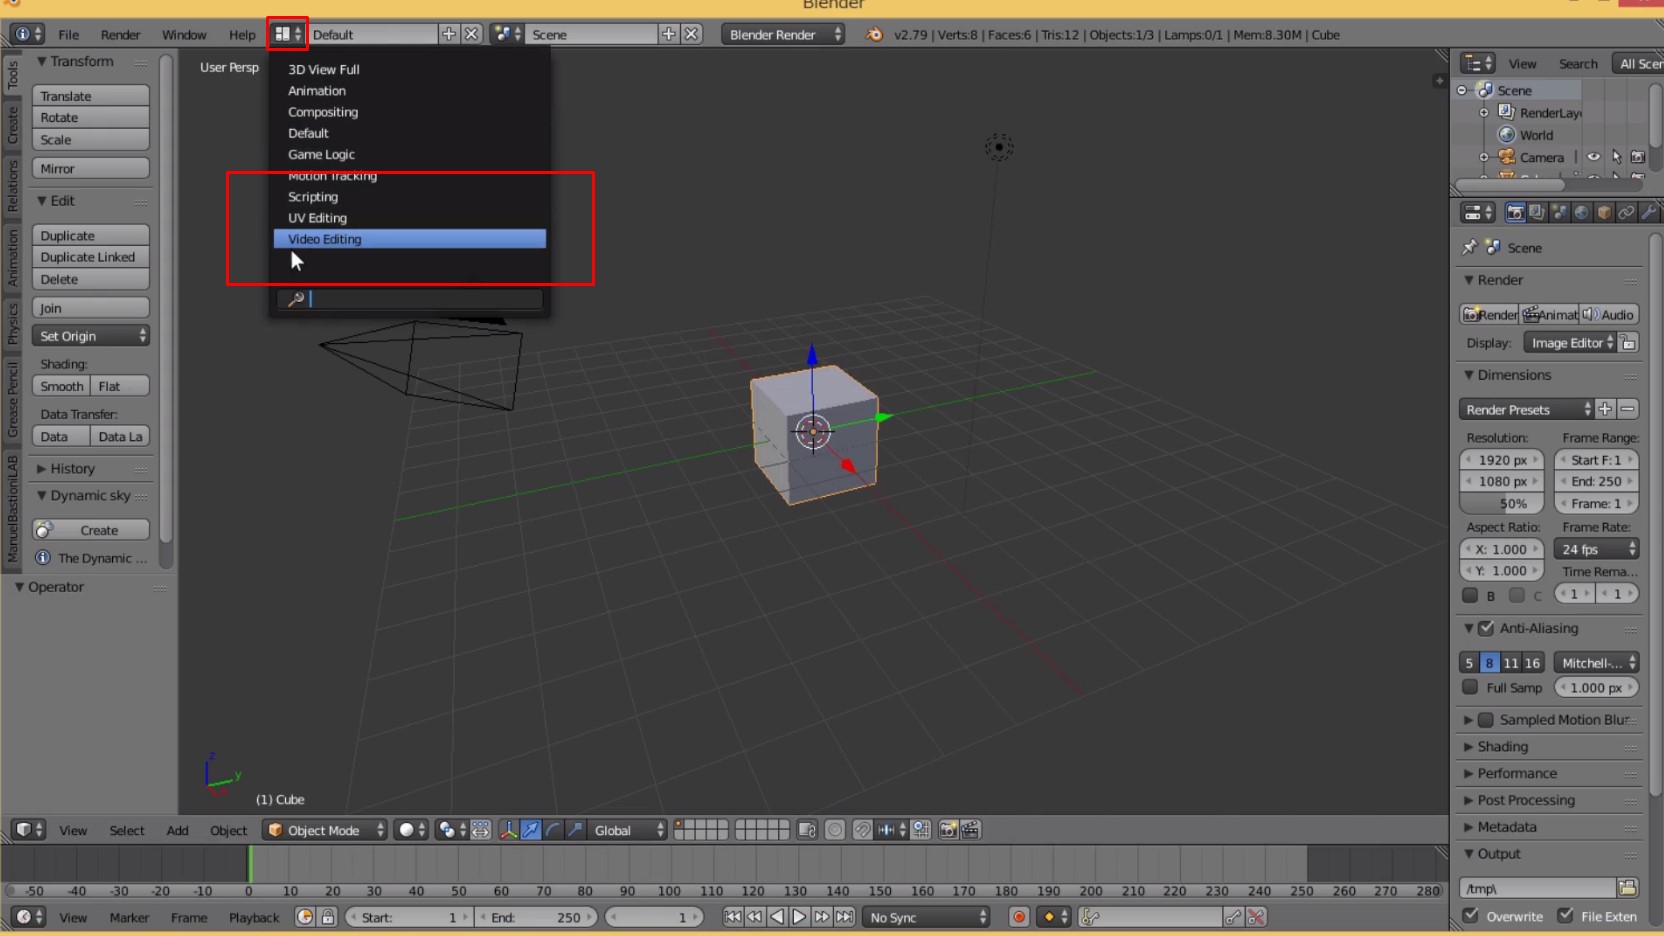
Blenderを開く -> Video Editing Mode 選択
Open Blender -> Select Video Editing Mode
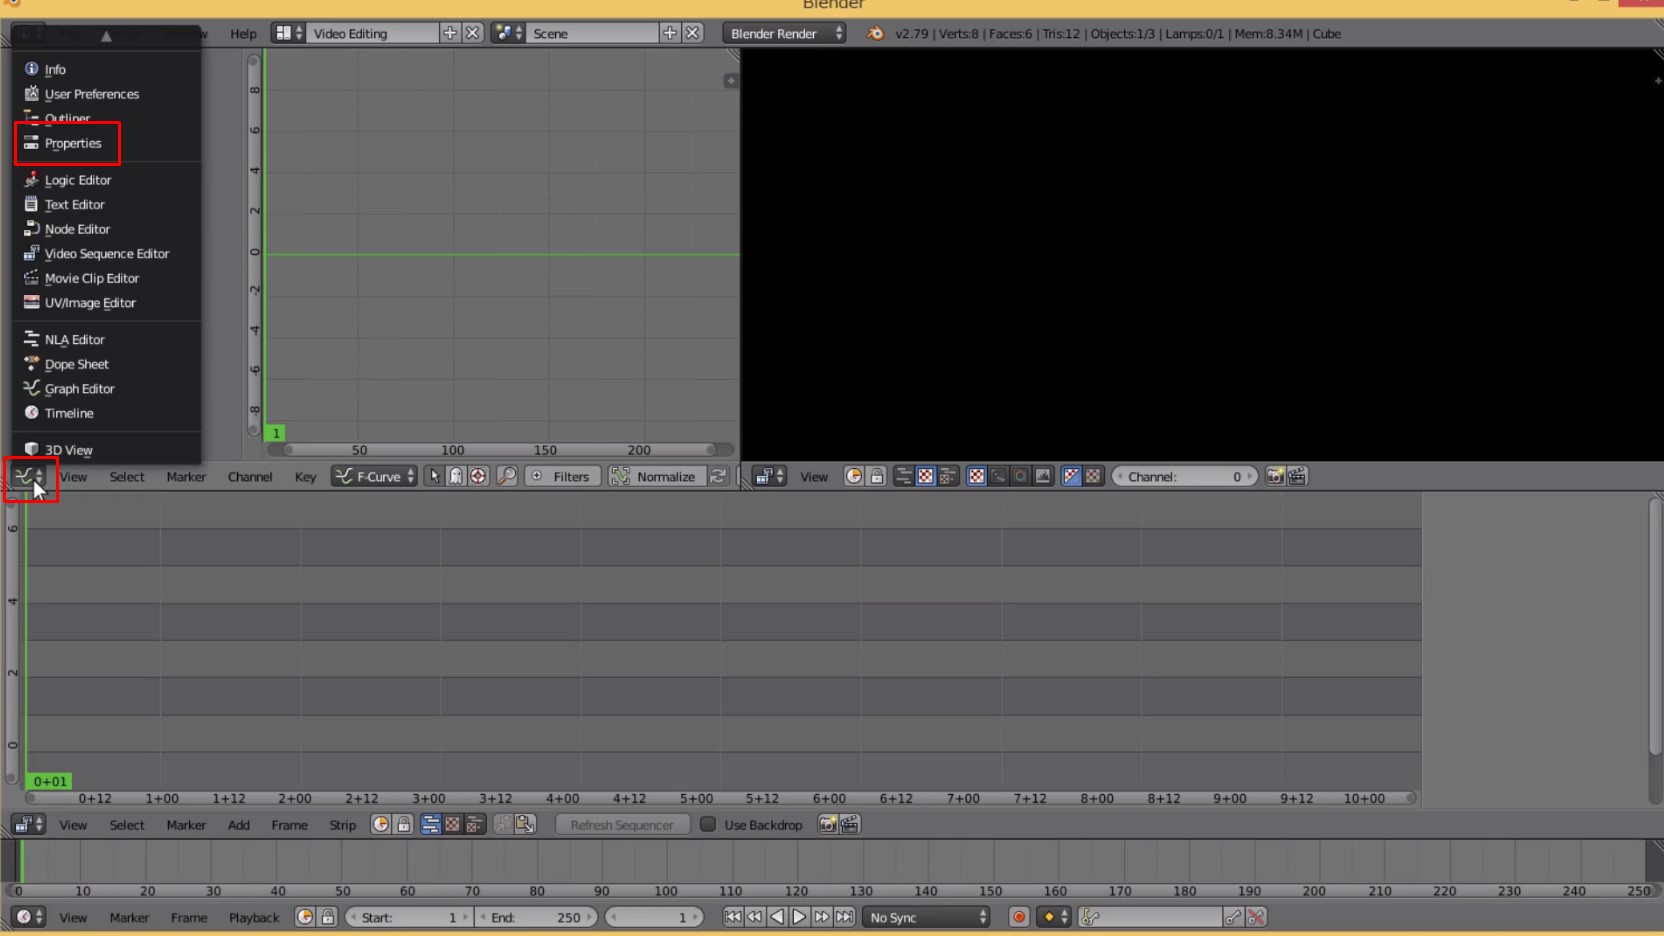
Properties 選択
Select Properties
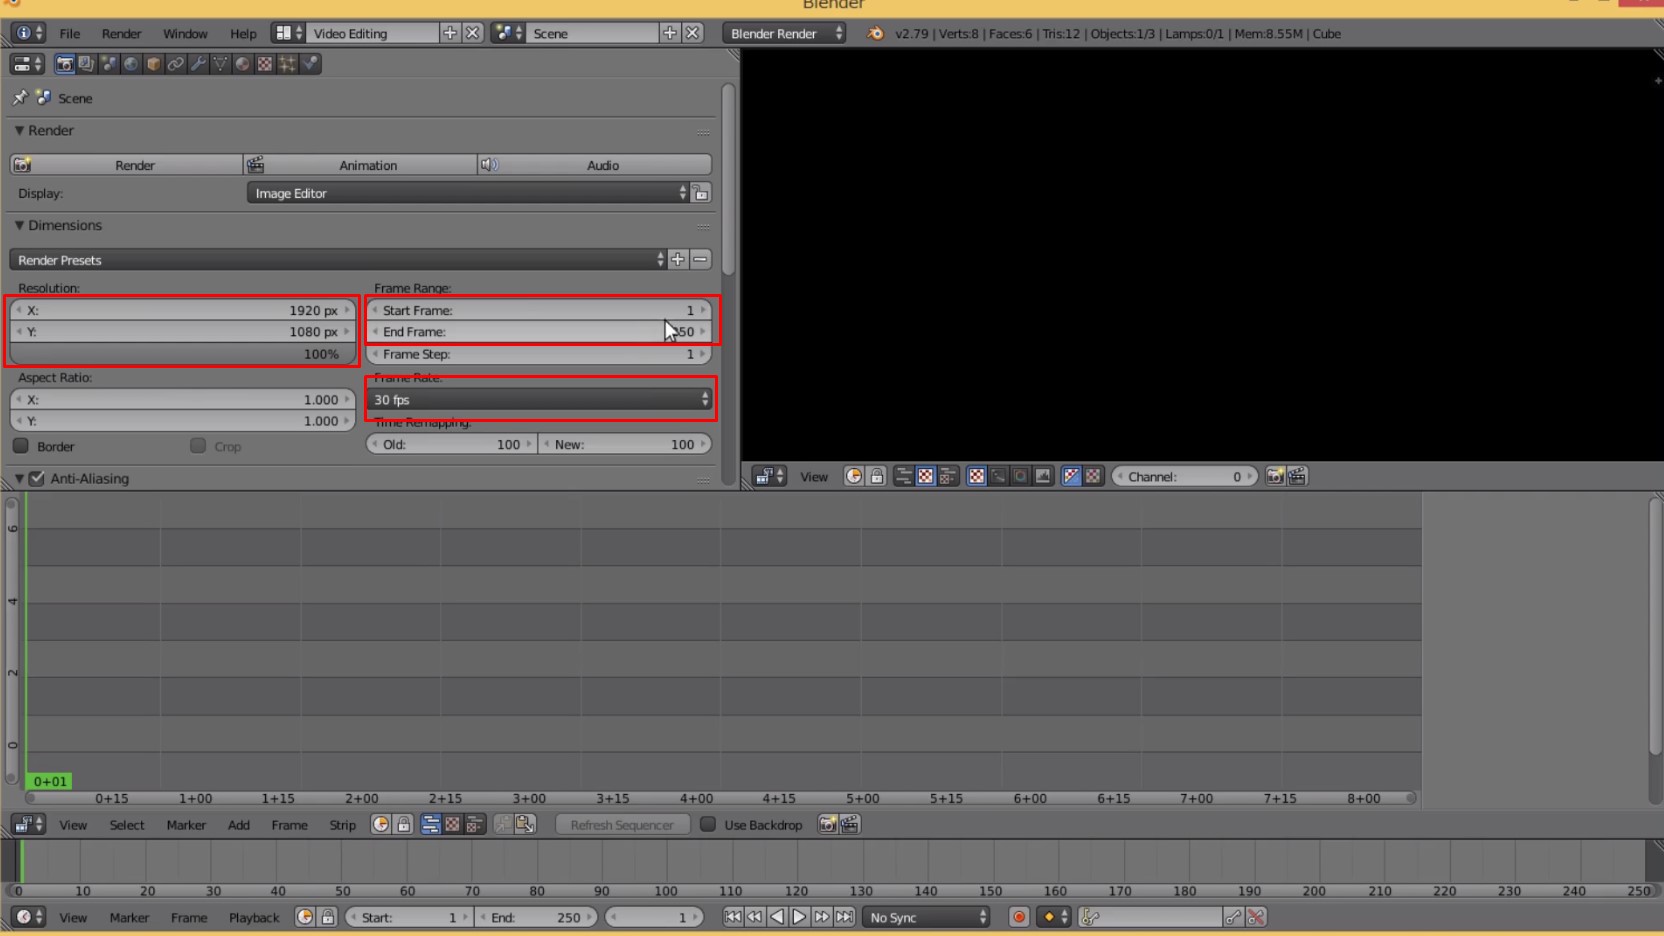
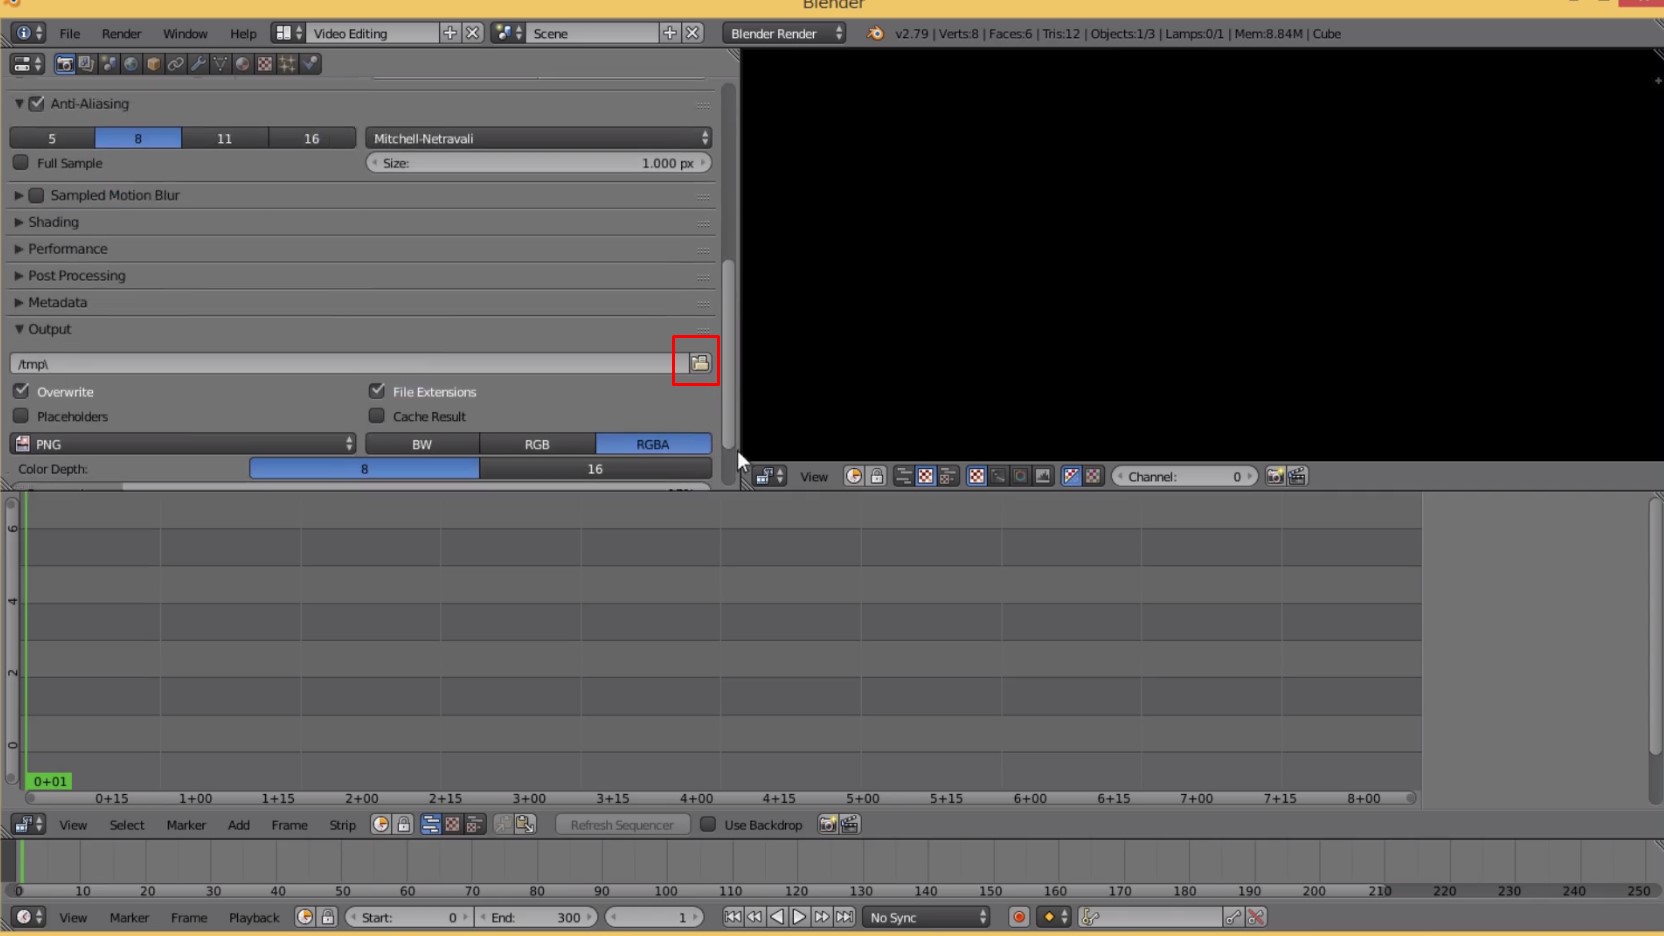
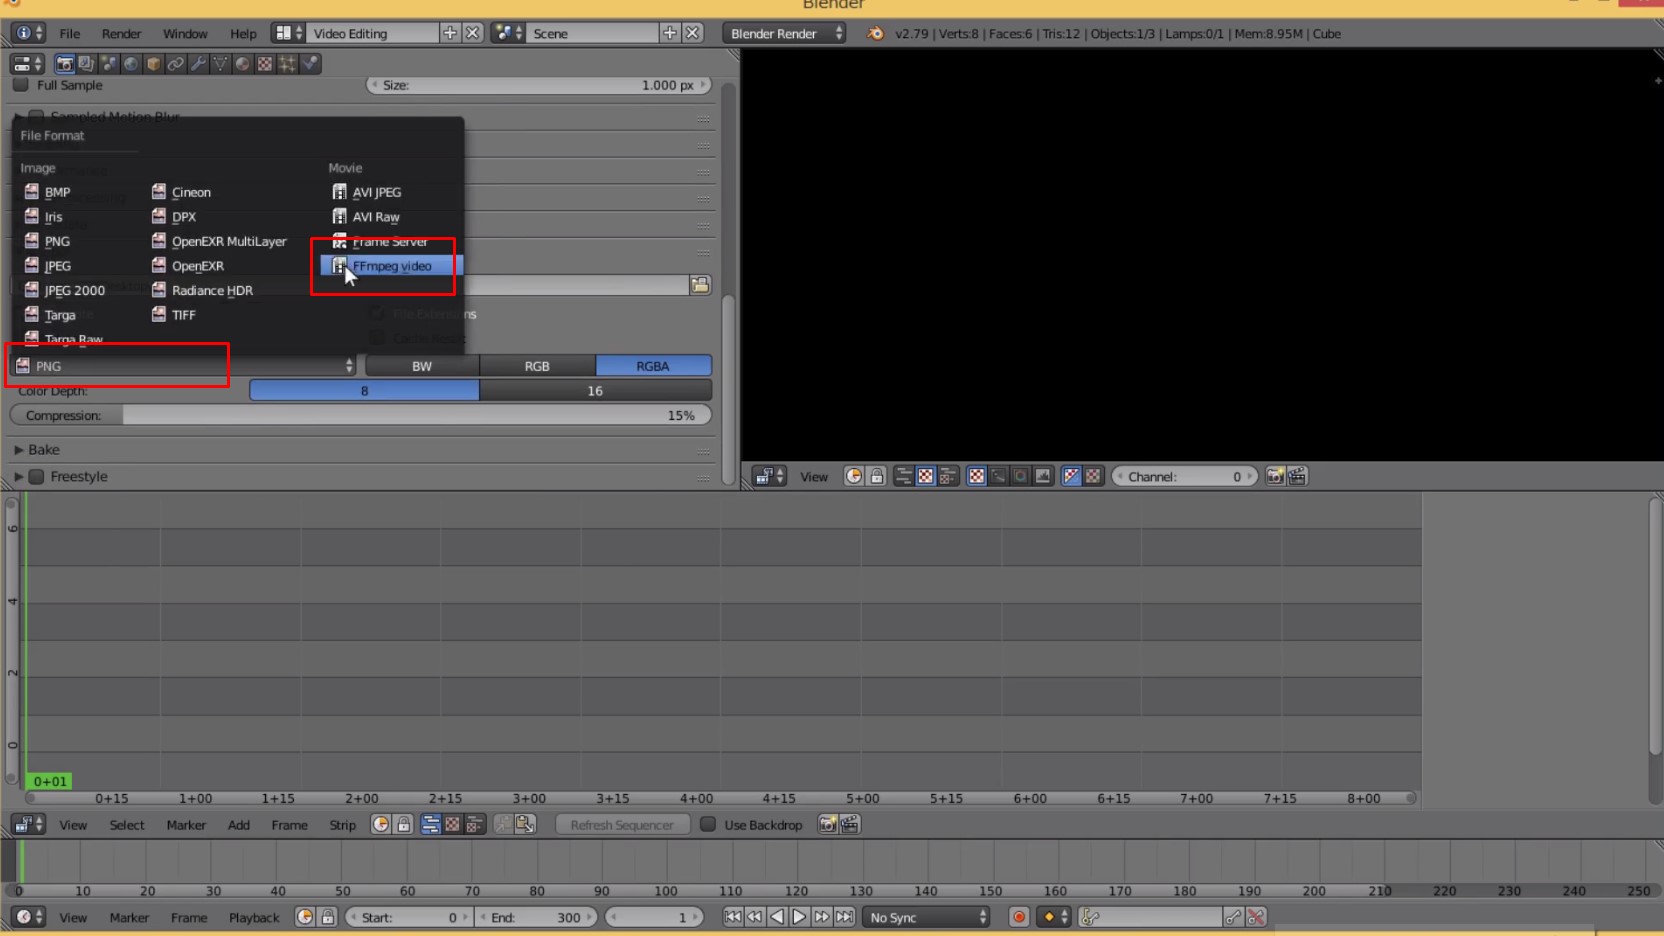
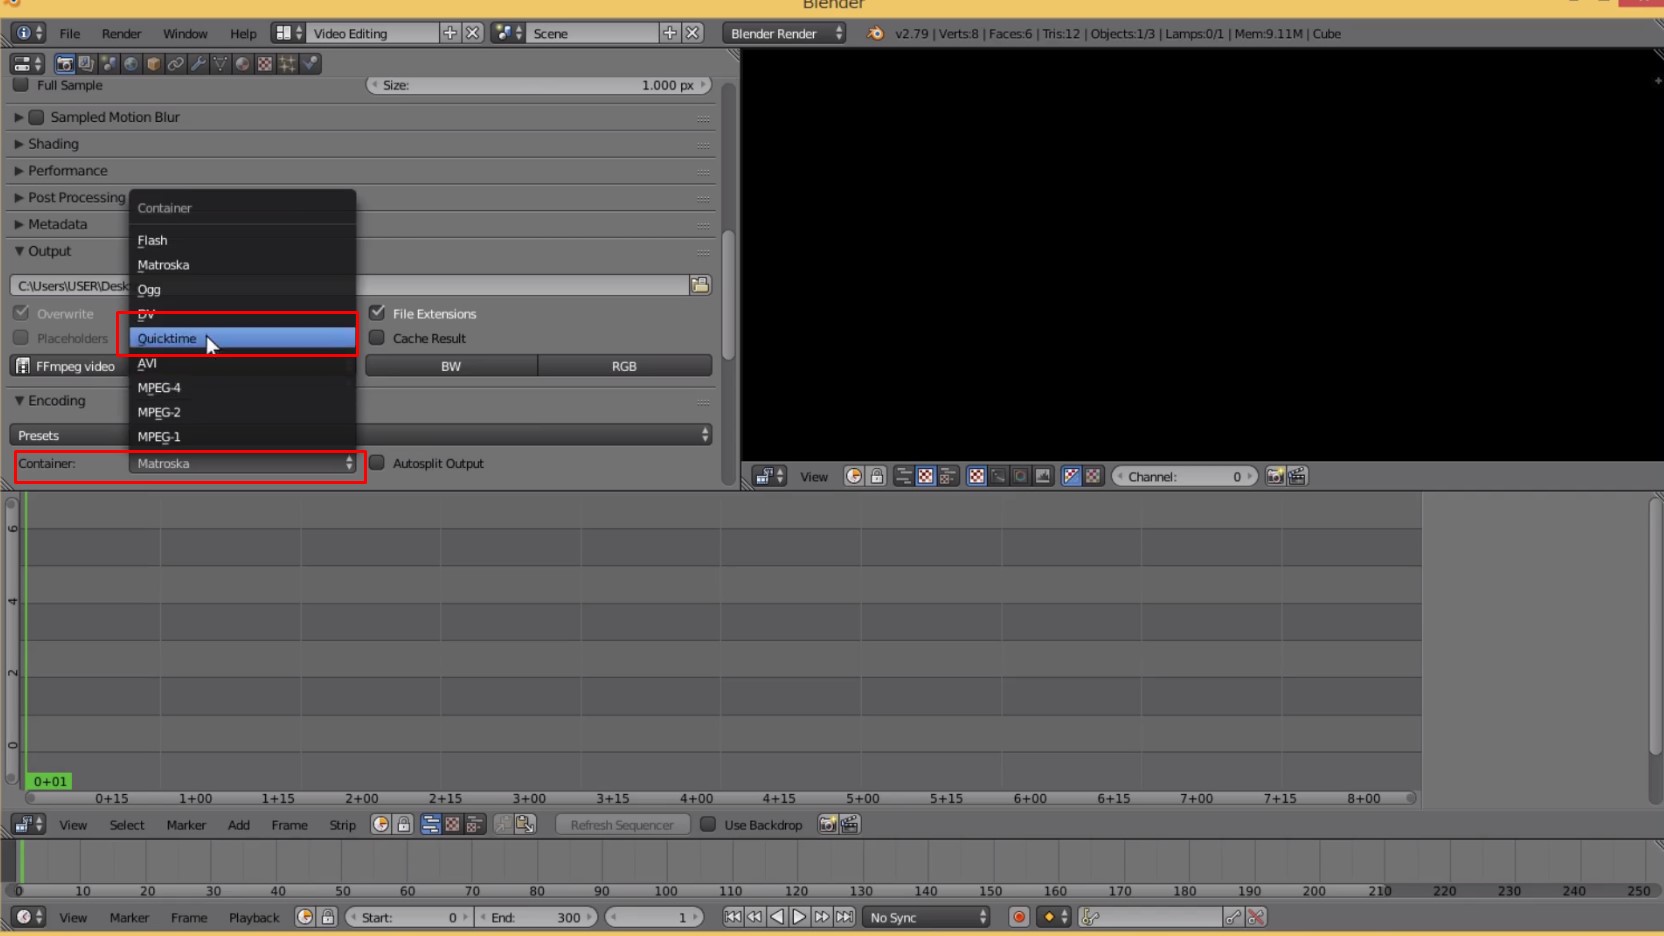
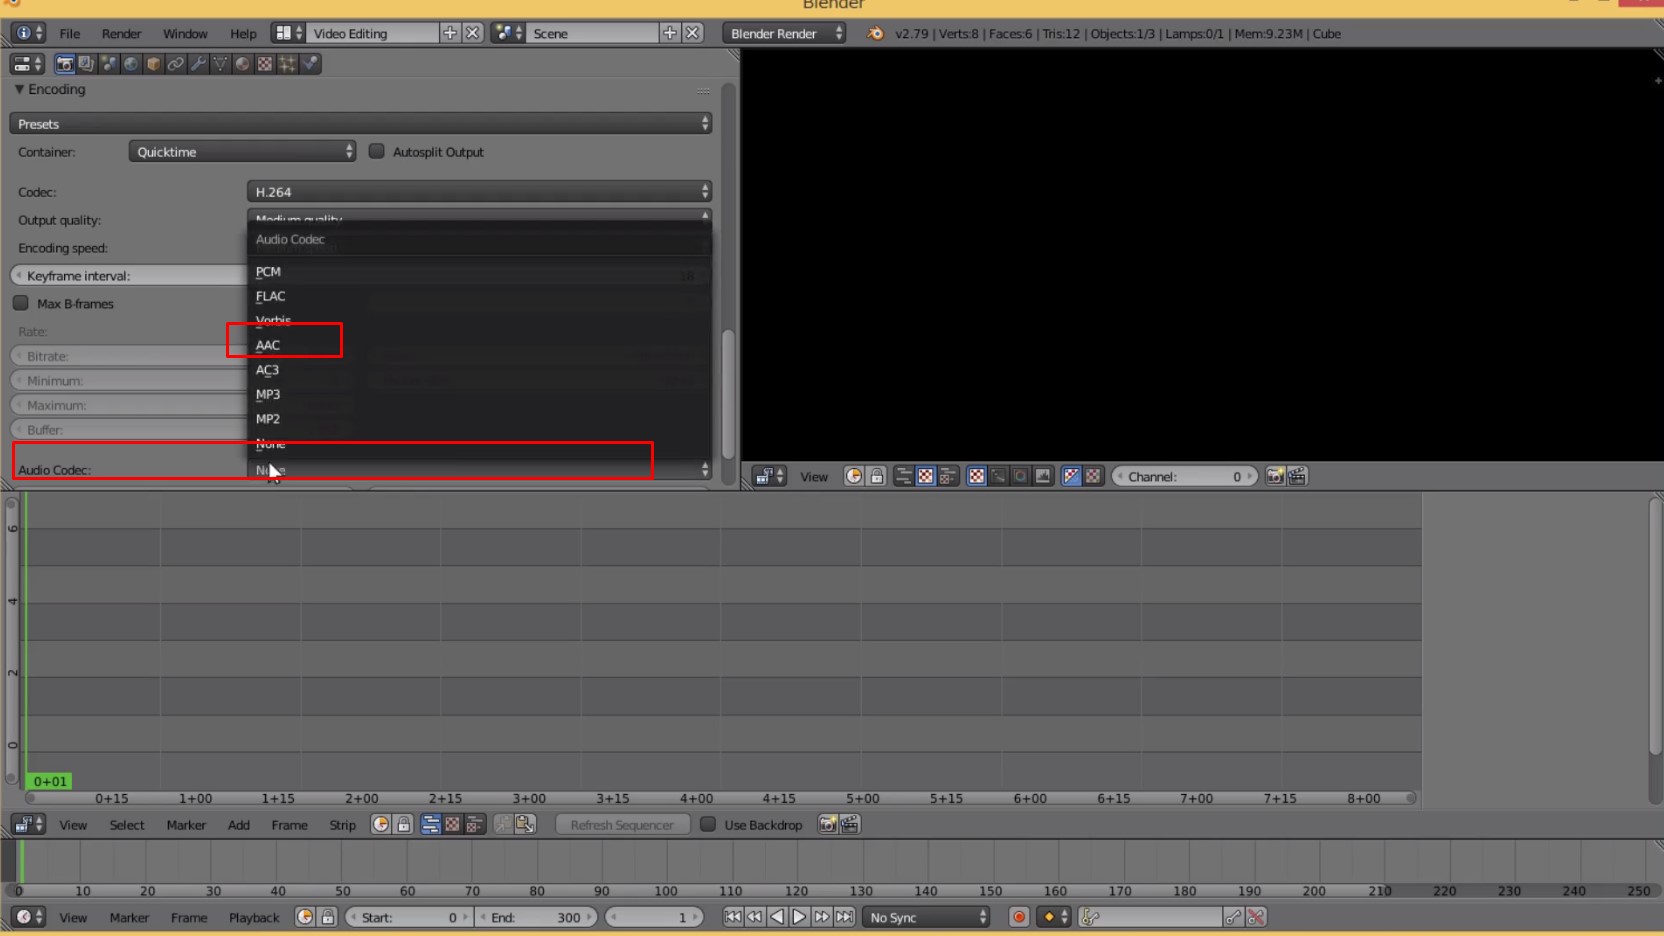
fps30 (一秒間に30フレーム) -> Set Frame range (Frame Stepを0にするとレンダリングできません。1に直してください。) *Output -> FFmpeg ー> Container ー> Quicktime *Audio Codec ー> AAC
fps30 (30 frames per second) -> Set Frame range (If Frame Step is 0, rendering fails. Please change it to 1.) *Output -> FFmpeg ー> Container ー> Quicktime *Audio Codec ー> AAC
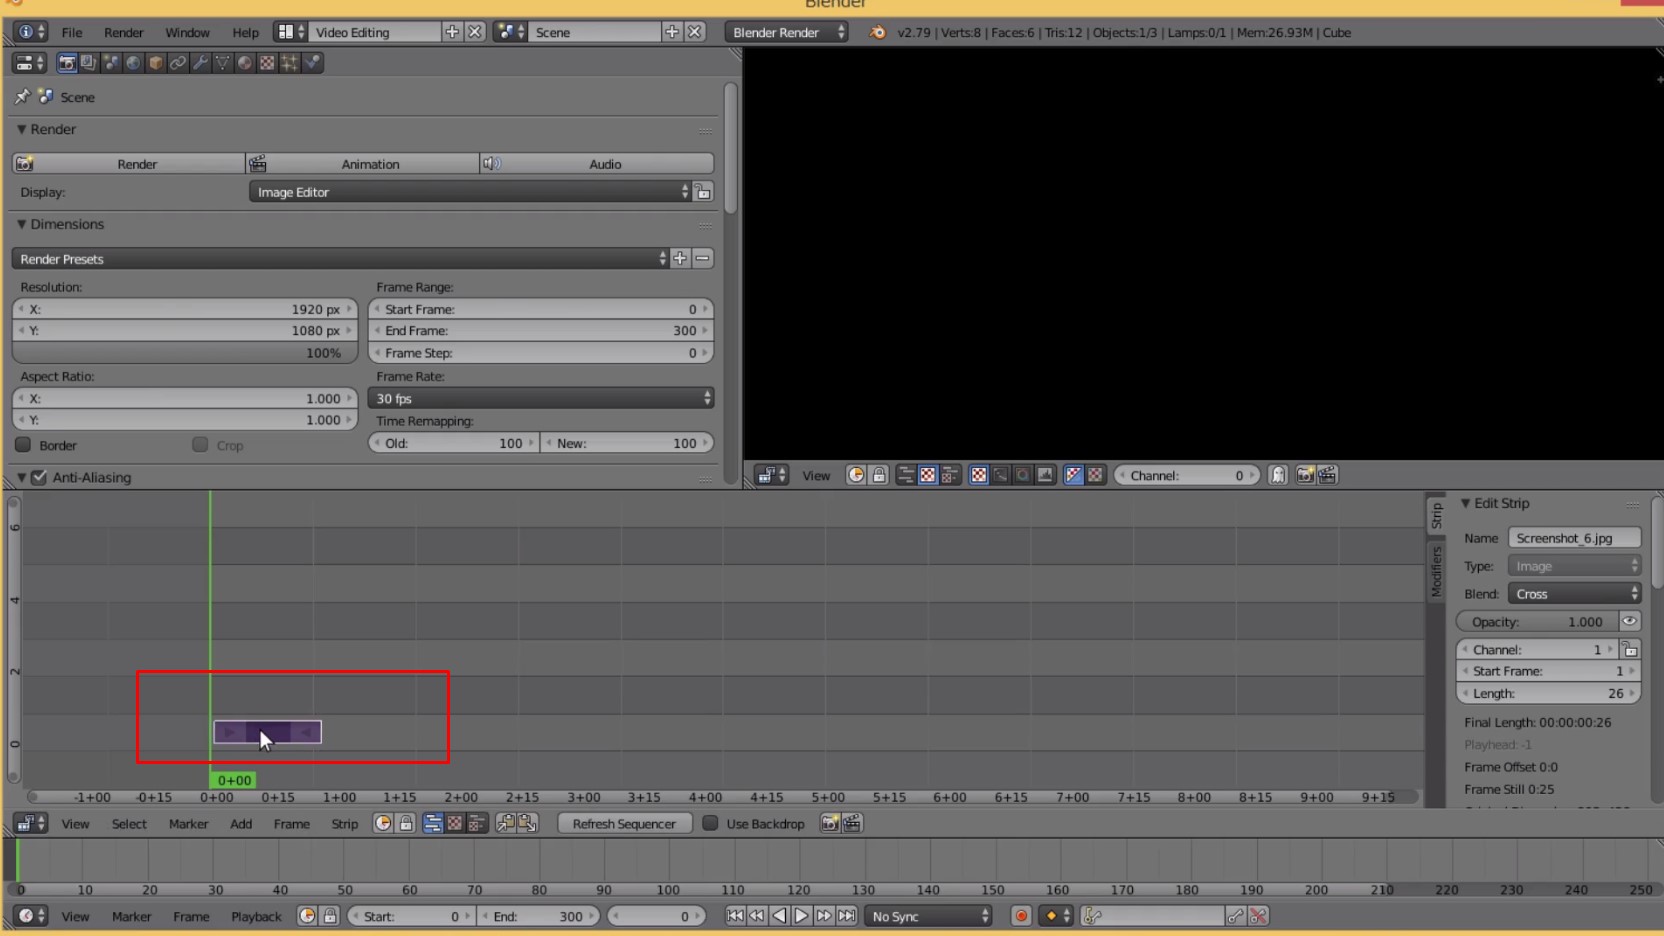
ファイルをドラッグアンドドロップ -> 右クリックで選択 -> そのままドラッグで移動 -> 両端にフレーム数が出るのでそれで位置を調整 -> 端を選択して動かすと長さの調整ができる
Drag and Drop - > Right Click to Select - > Drag to Move - > Frame Count at Both Ends to Adjust Position - > Select and Move Ends to Adjust Length
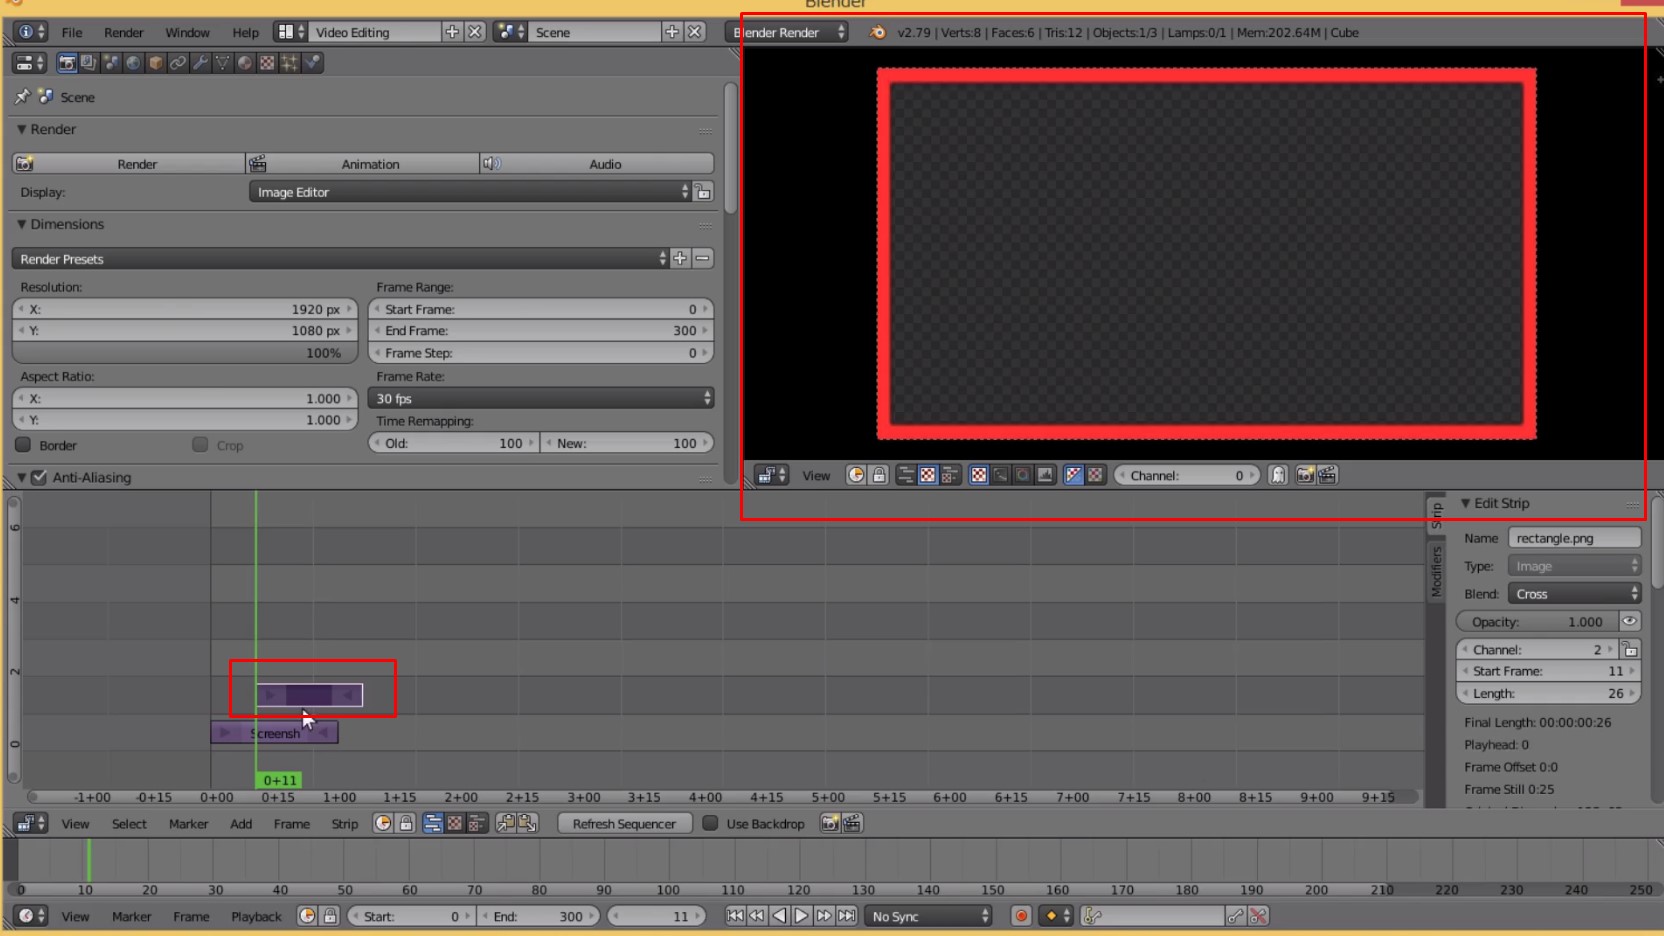
先程作ったpngをドラッグアンドドロップ
Drag and drop the png file you just made.
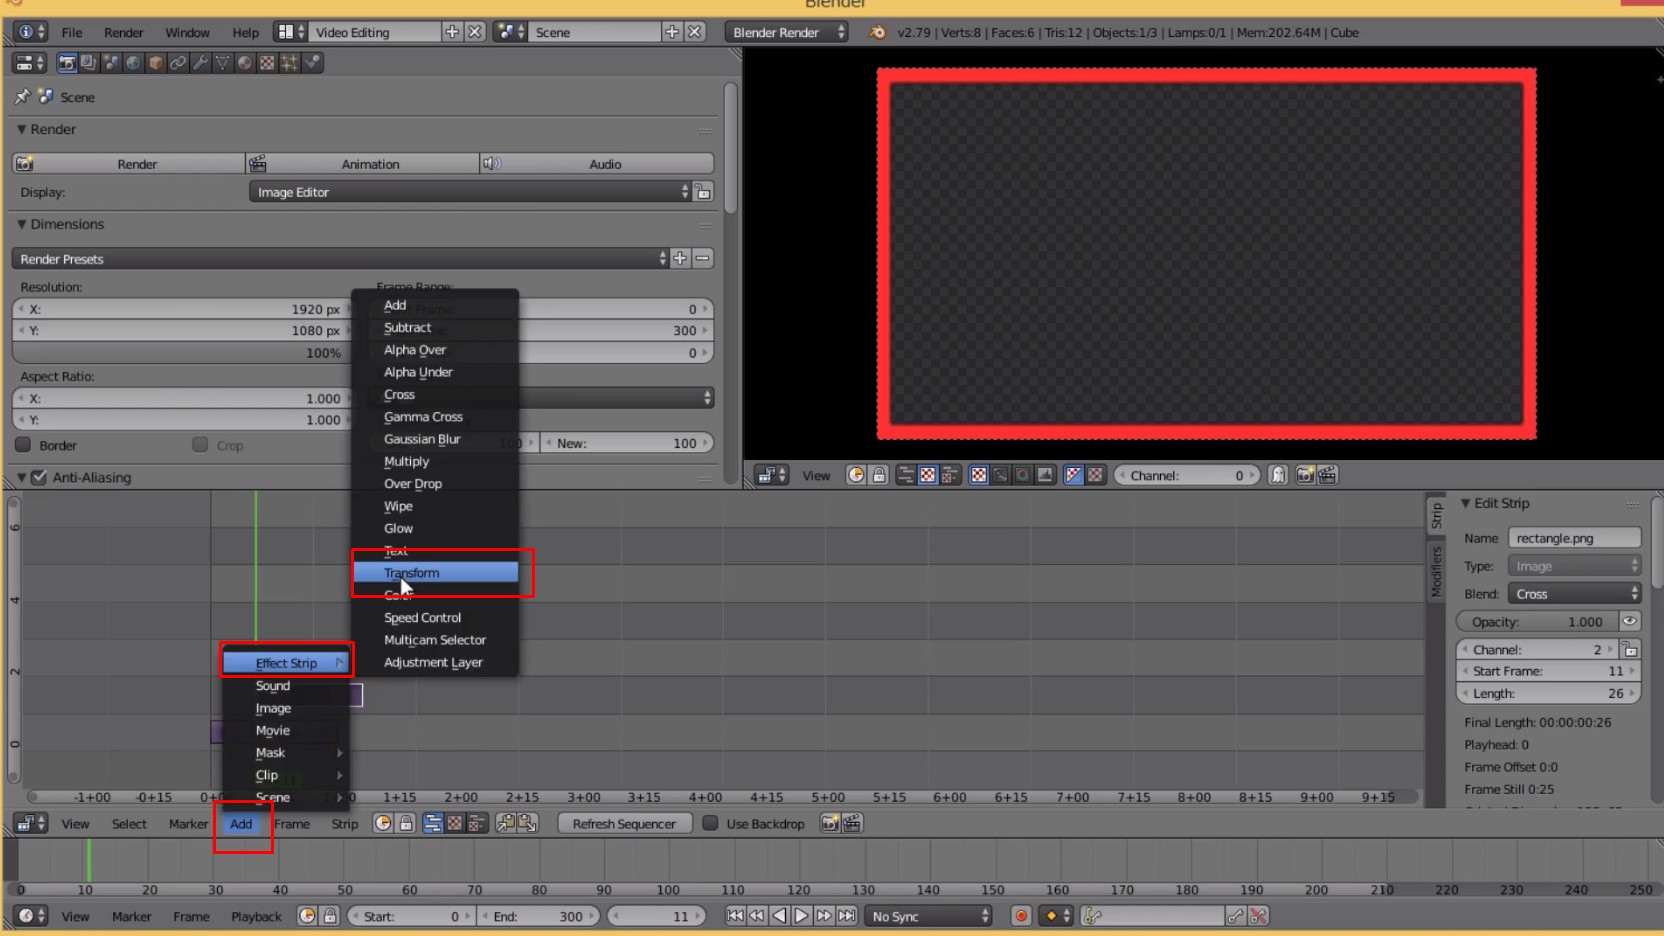
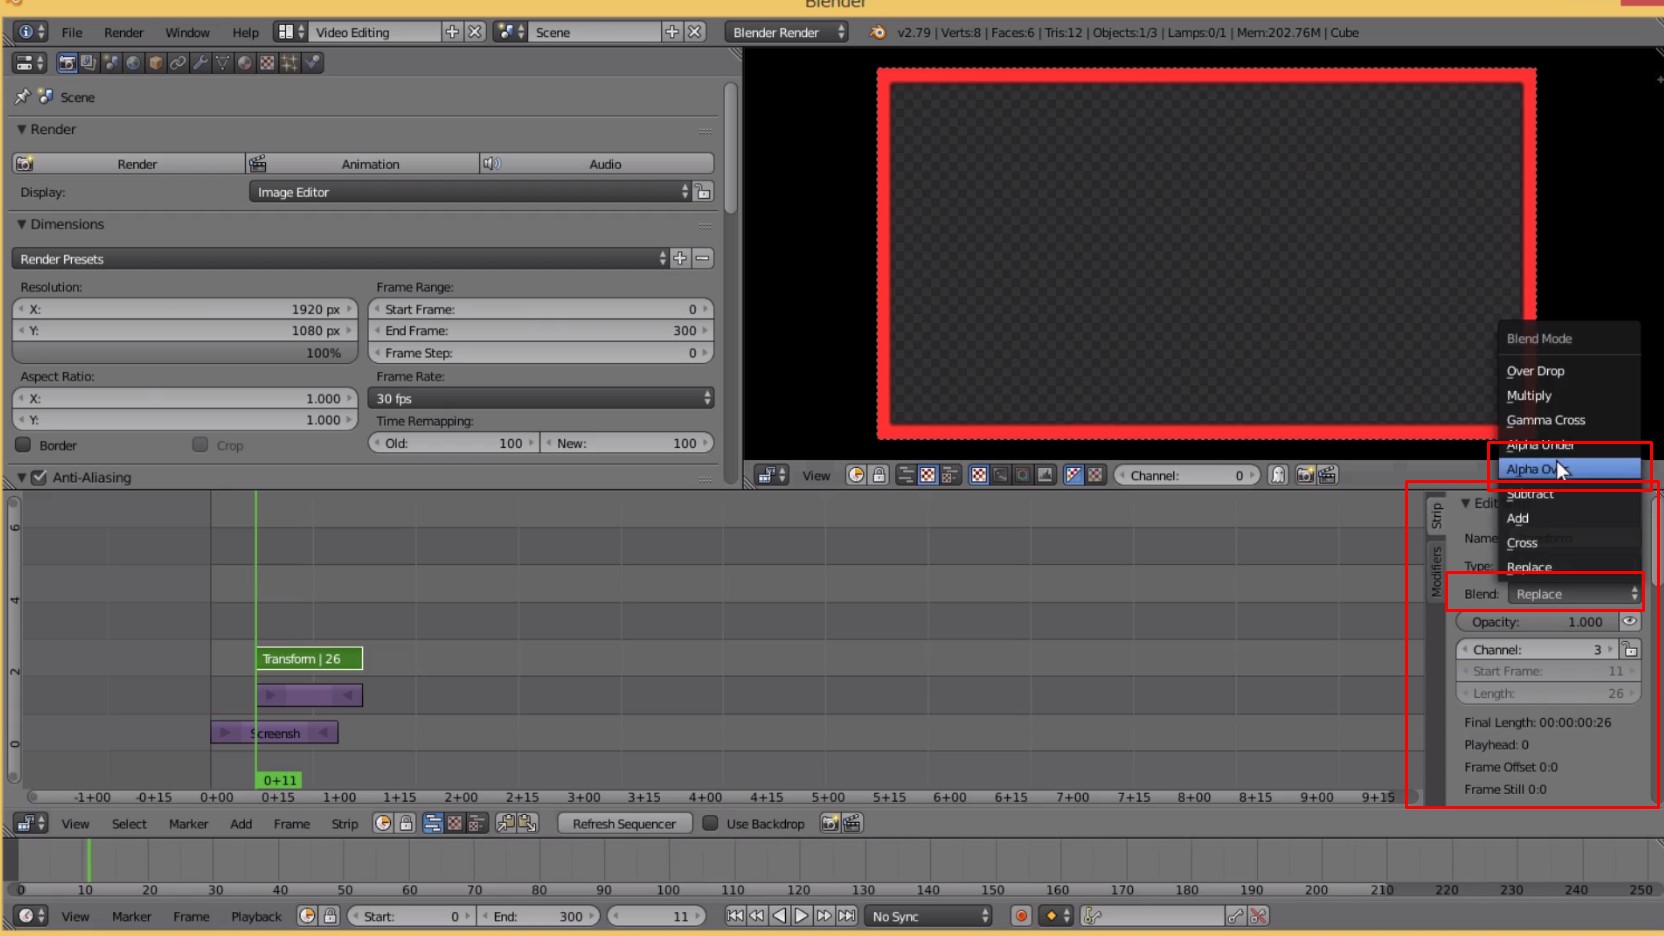
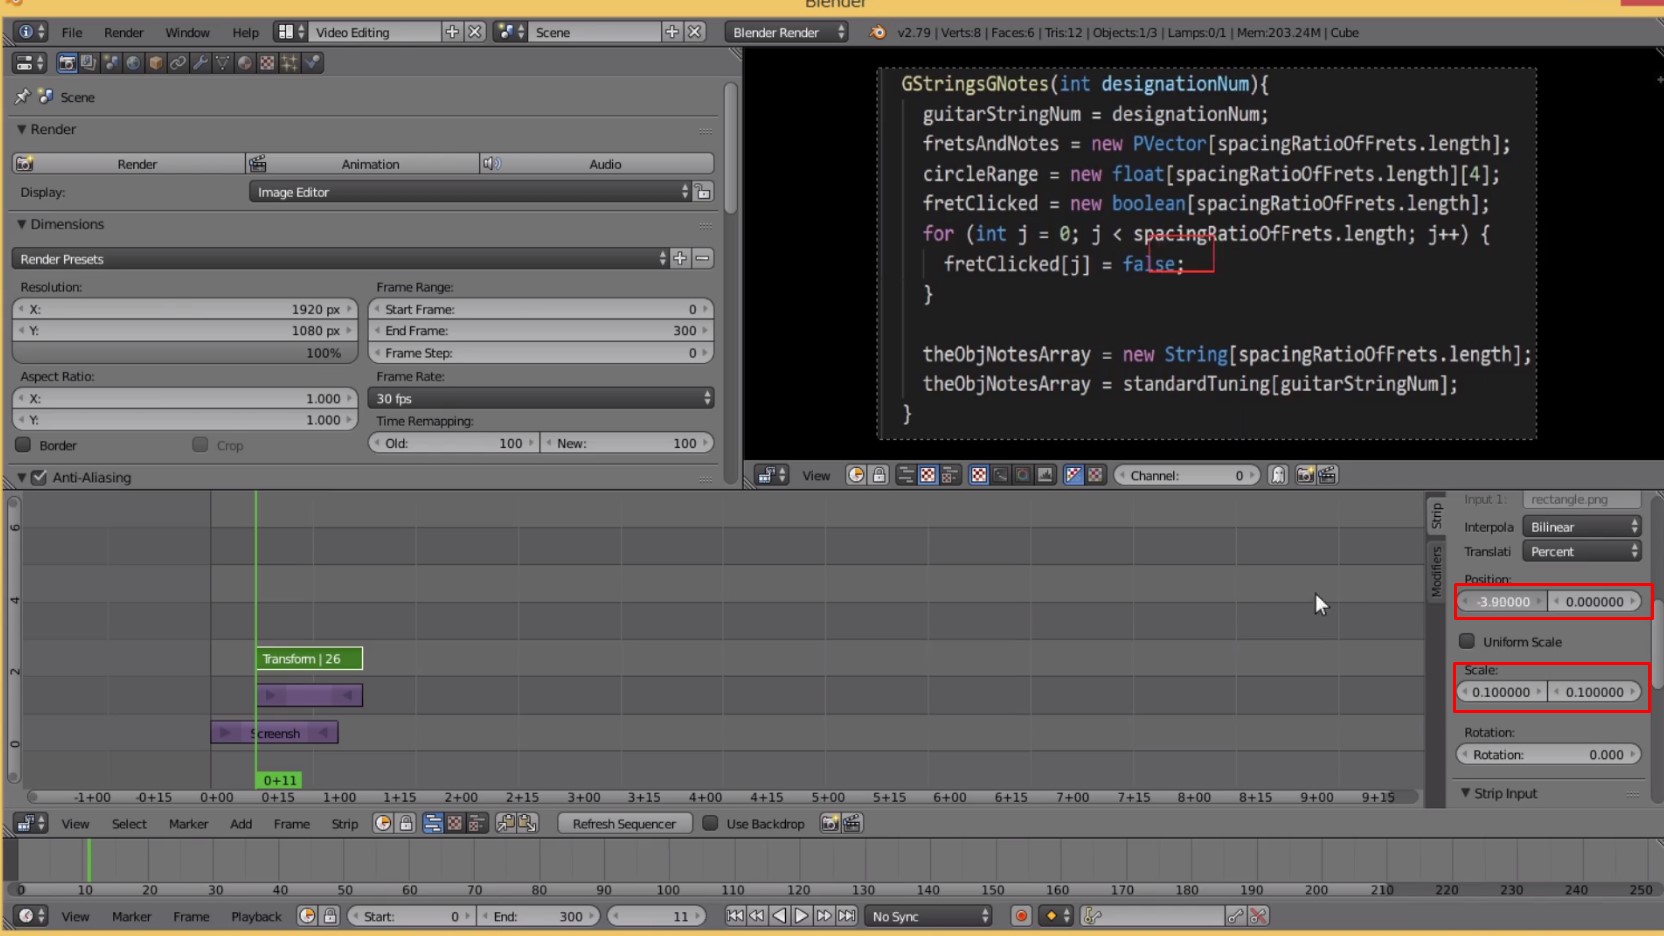
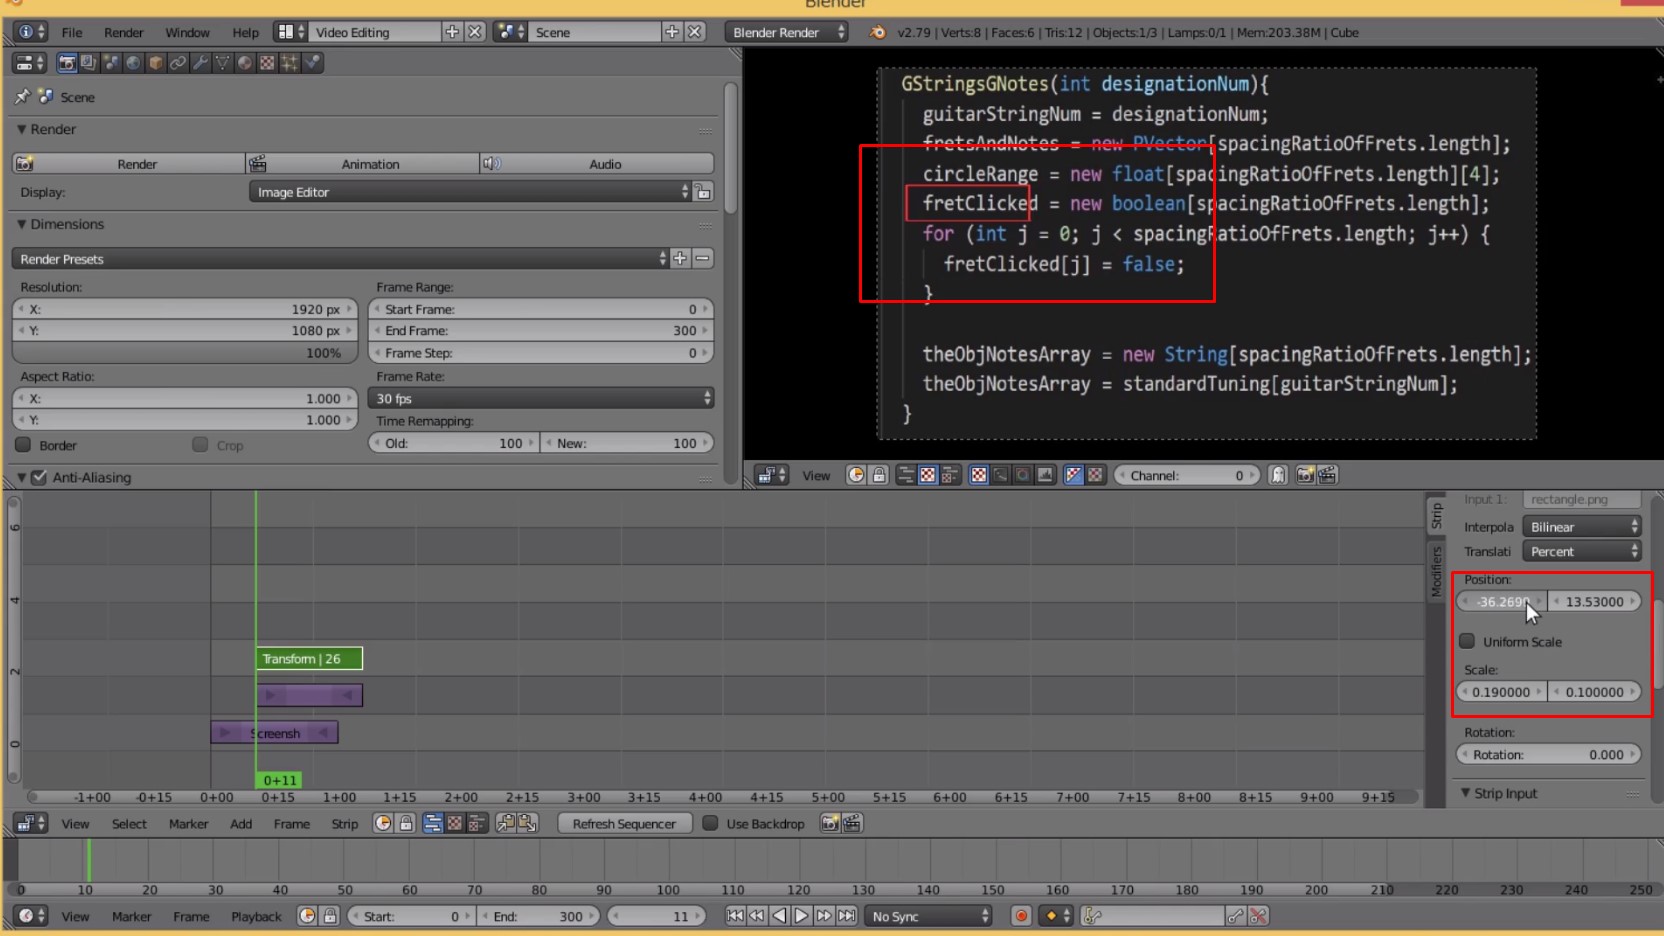
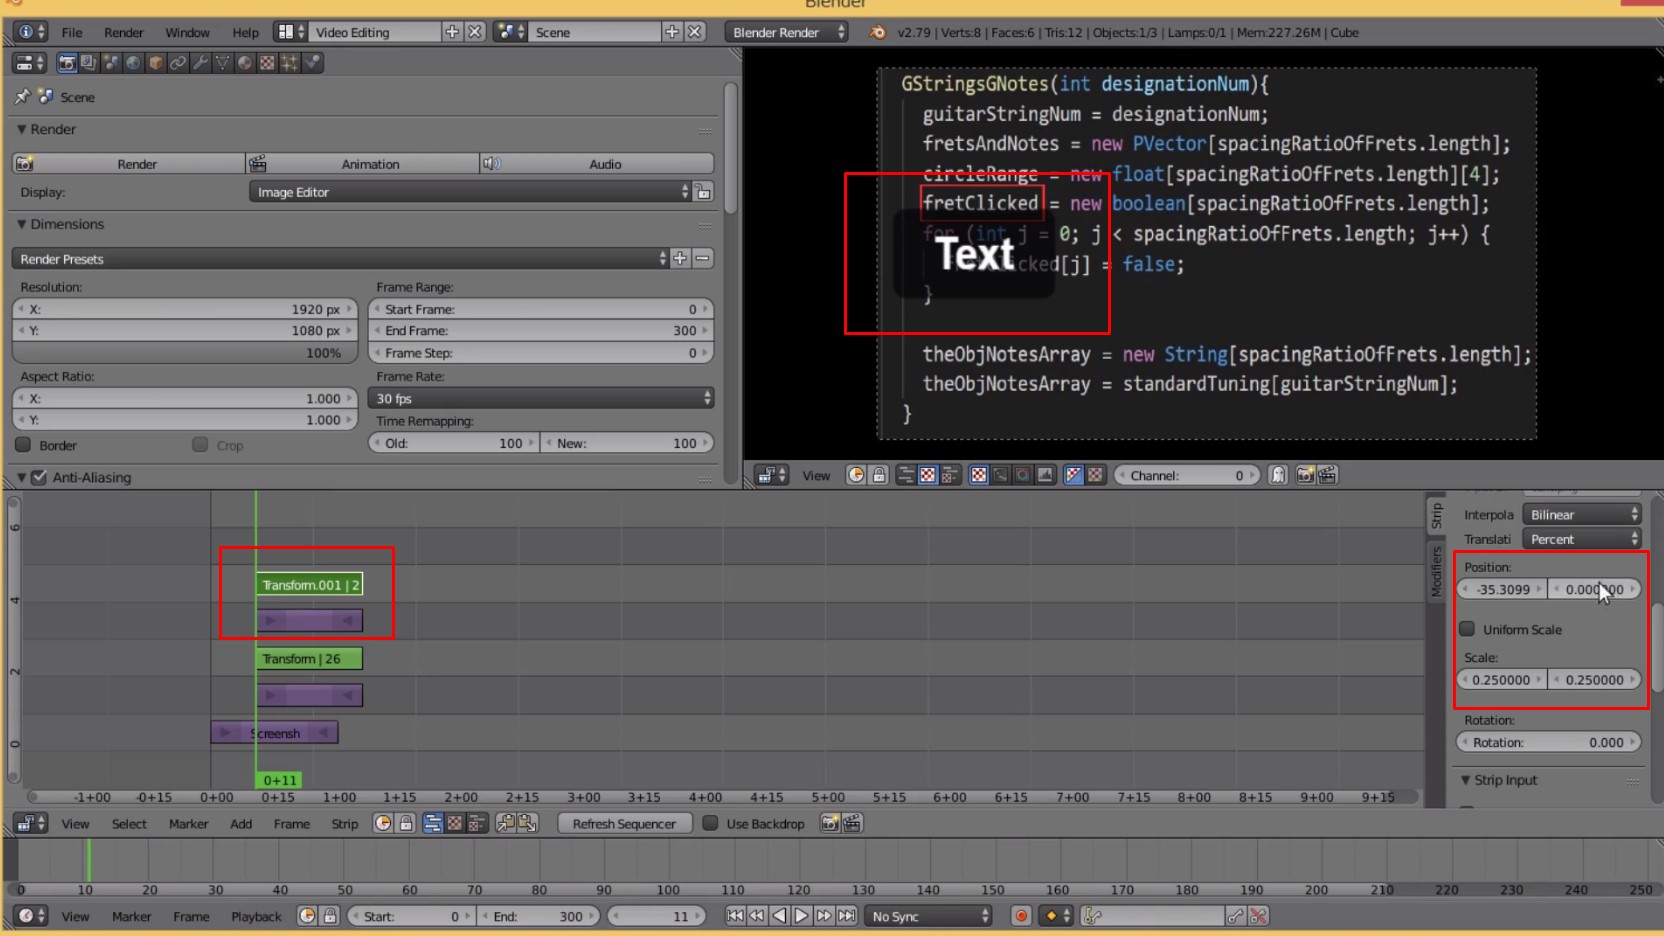
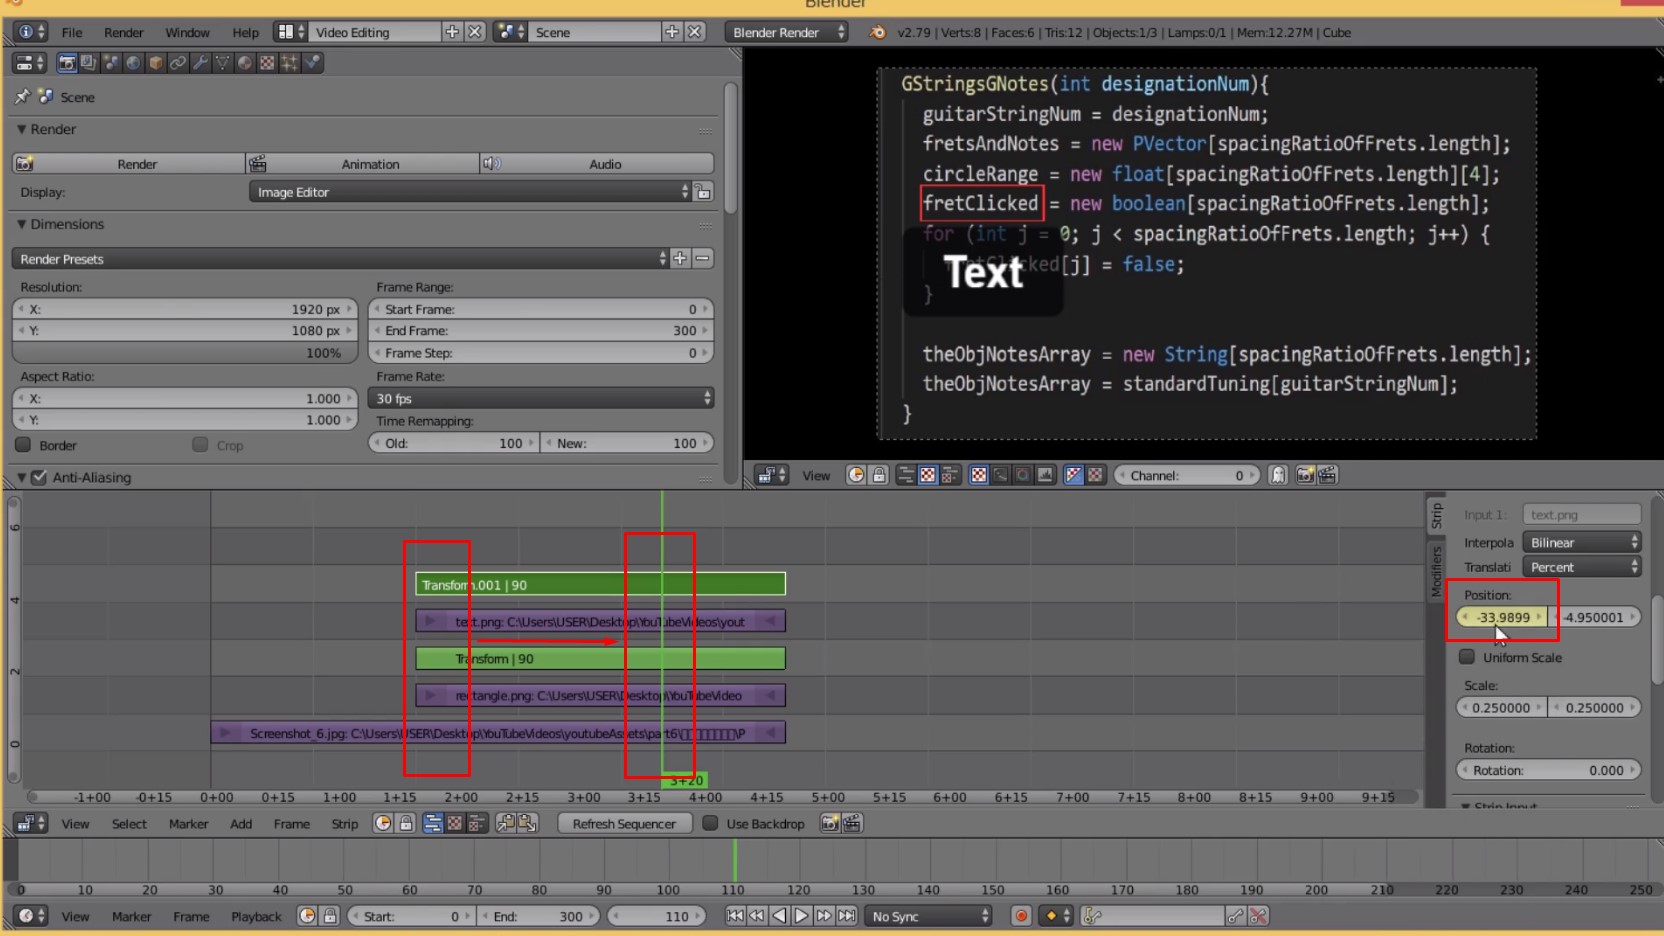
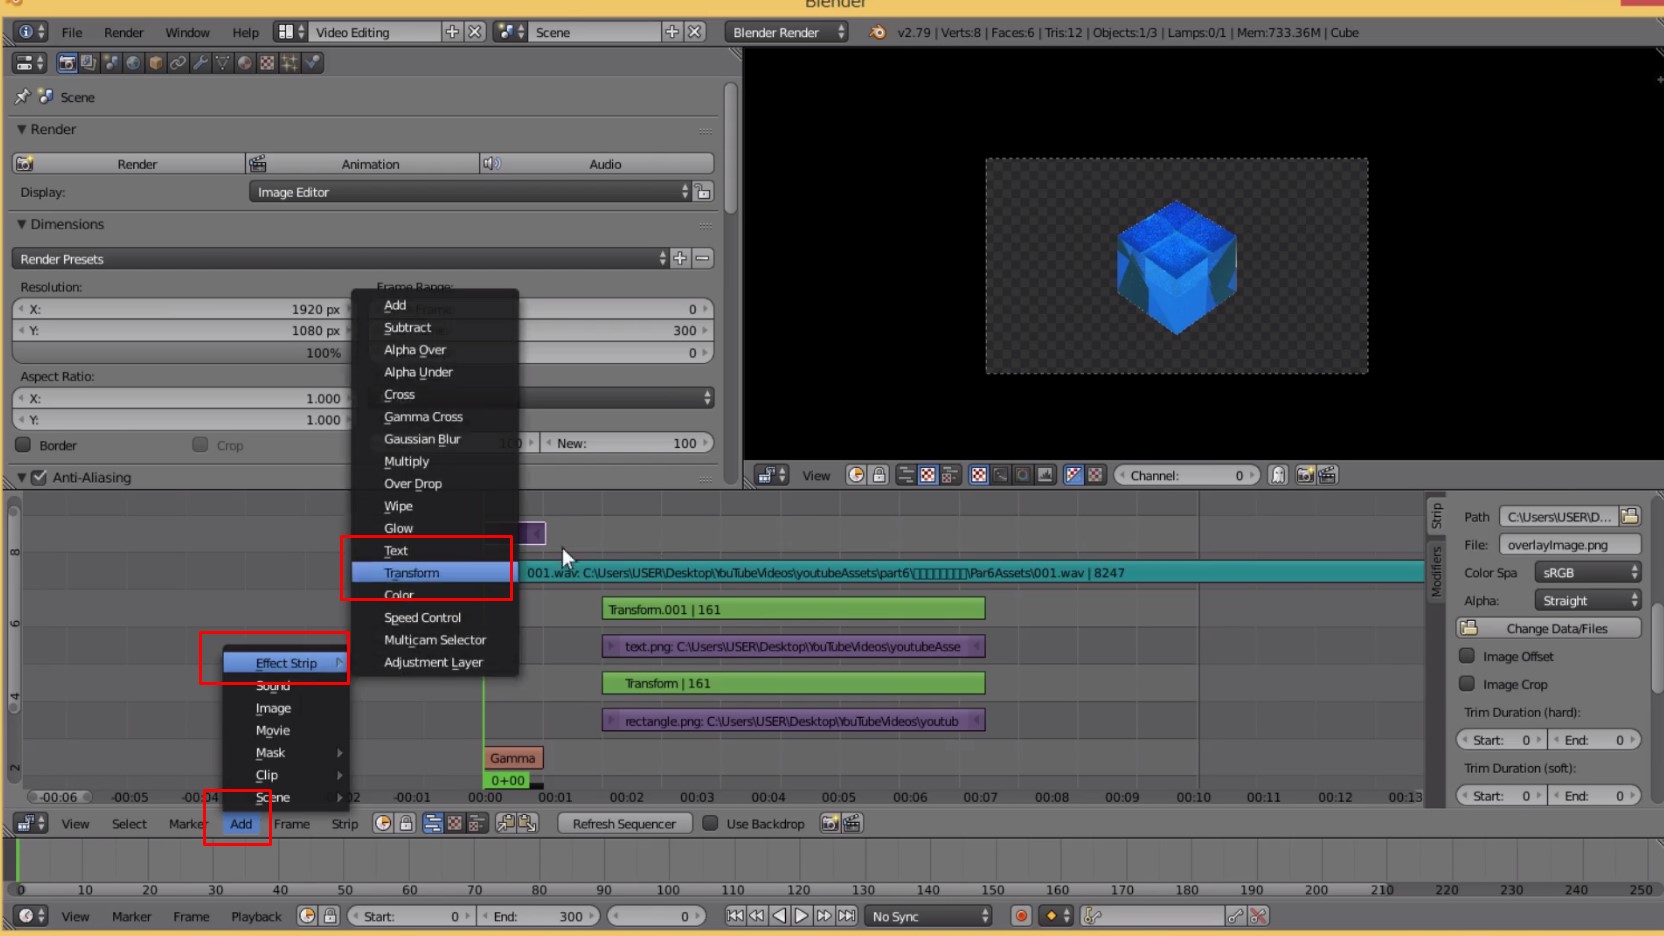
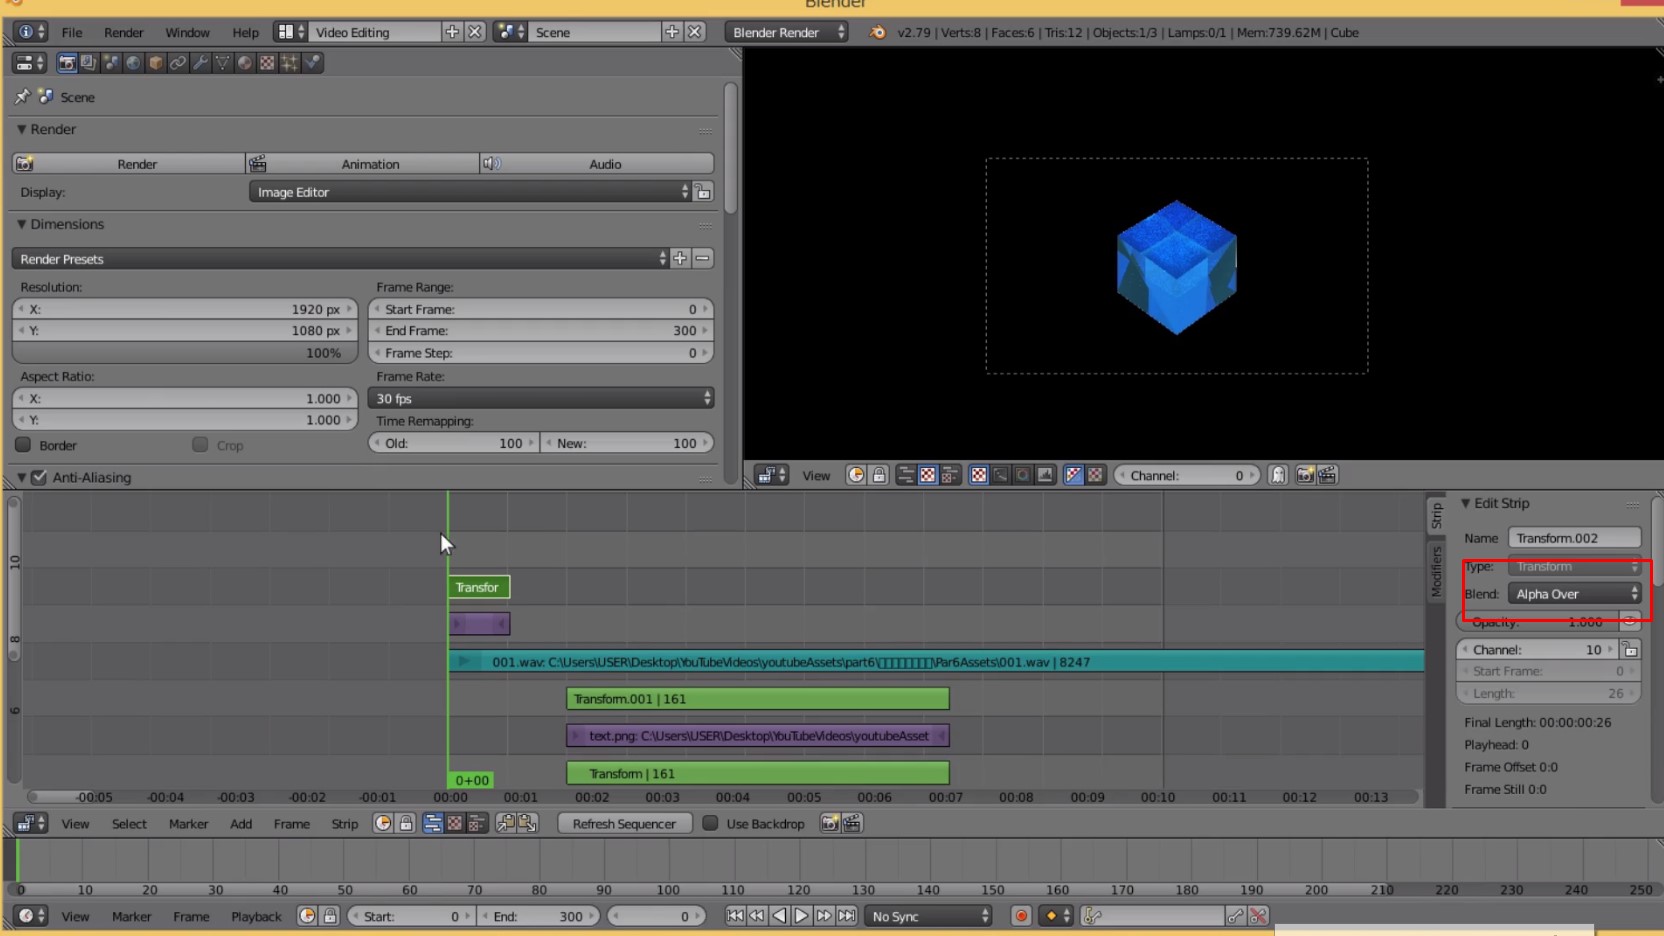
Addー>Effect Stripー>Transformー>Blendー>AlphaOverー>ScaleとPositionで大きさと位置の調整
Addー>Effect Stripー>Transformー>Blendー>AlphaOverー>Scale and Position to adjust the size and position
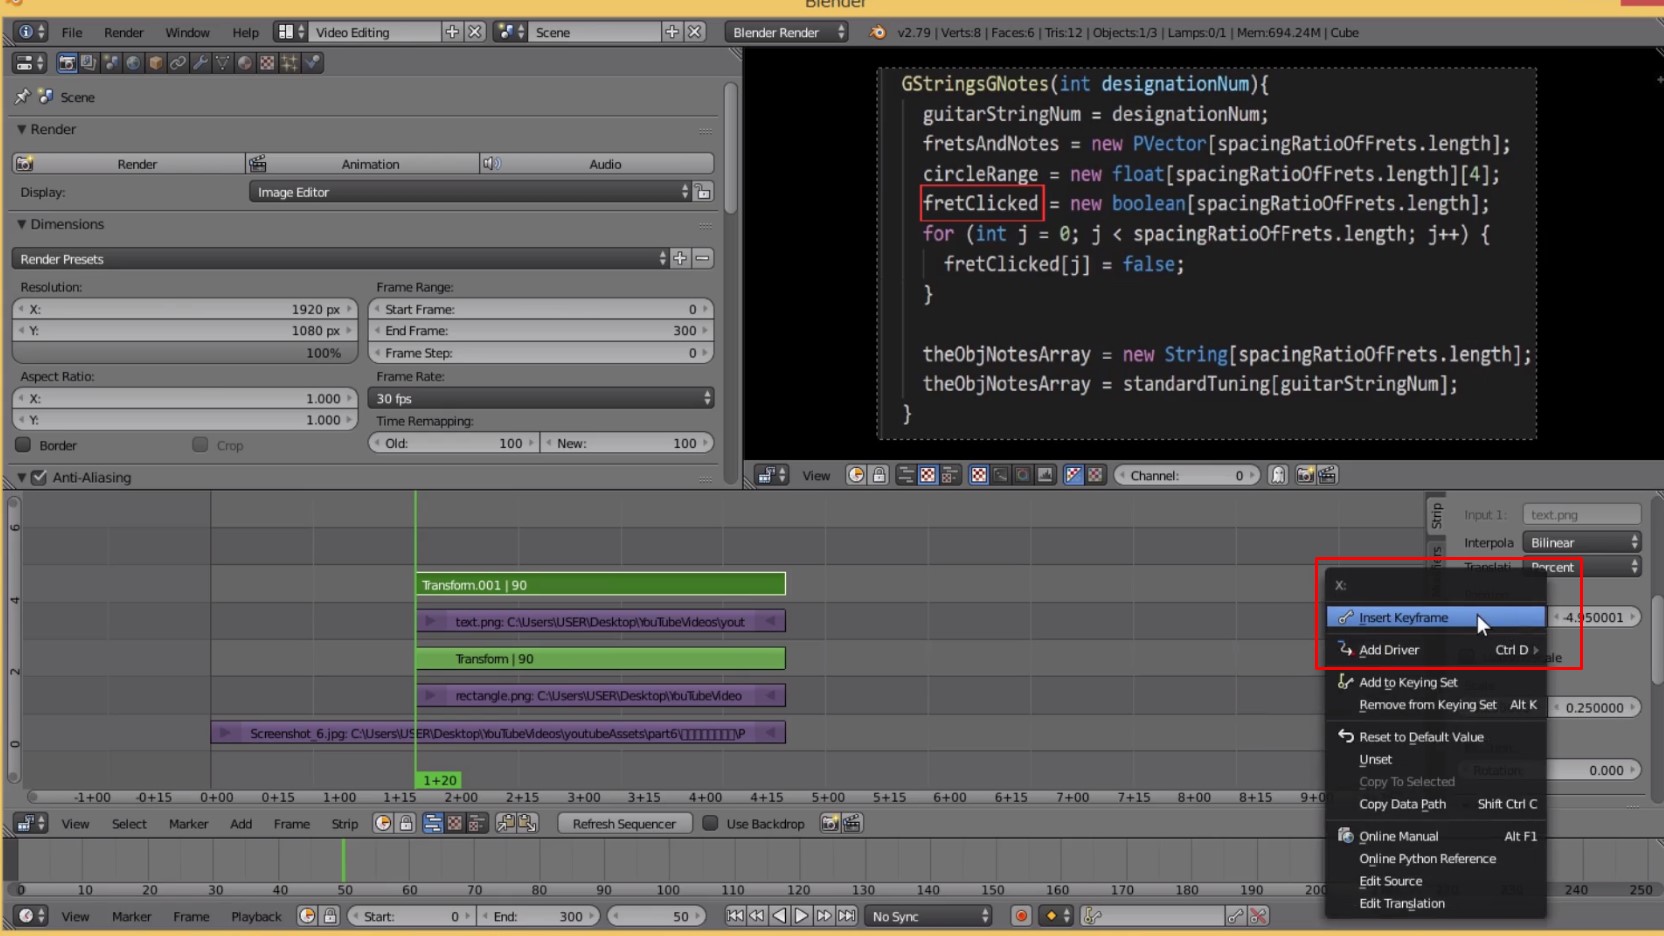

KeyFrameを使ってアニメーションを表現する (ショートカットでIキーでも選択可能)
Use KeyFrame to represent animation (You can also select by pressing the I key with a shortcut.)
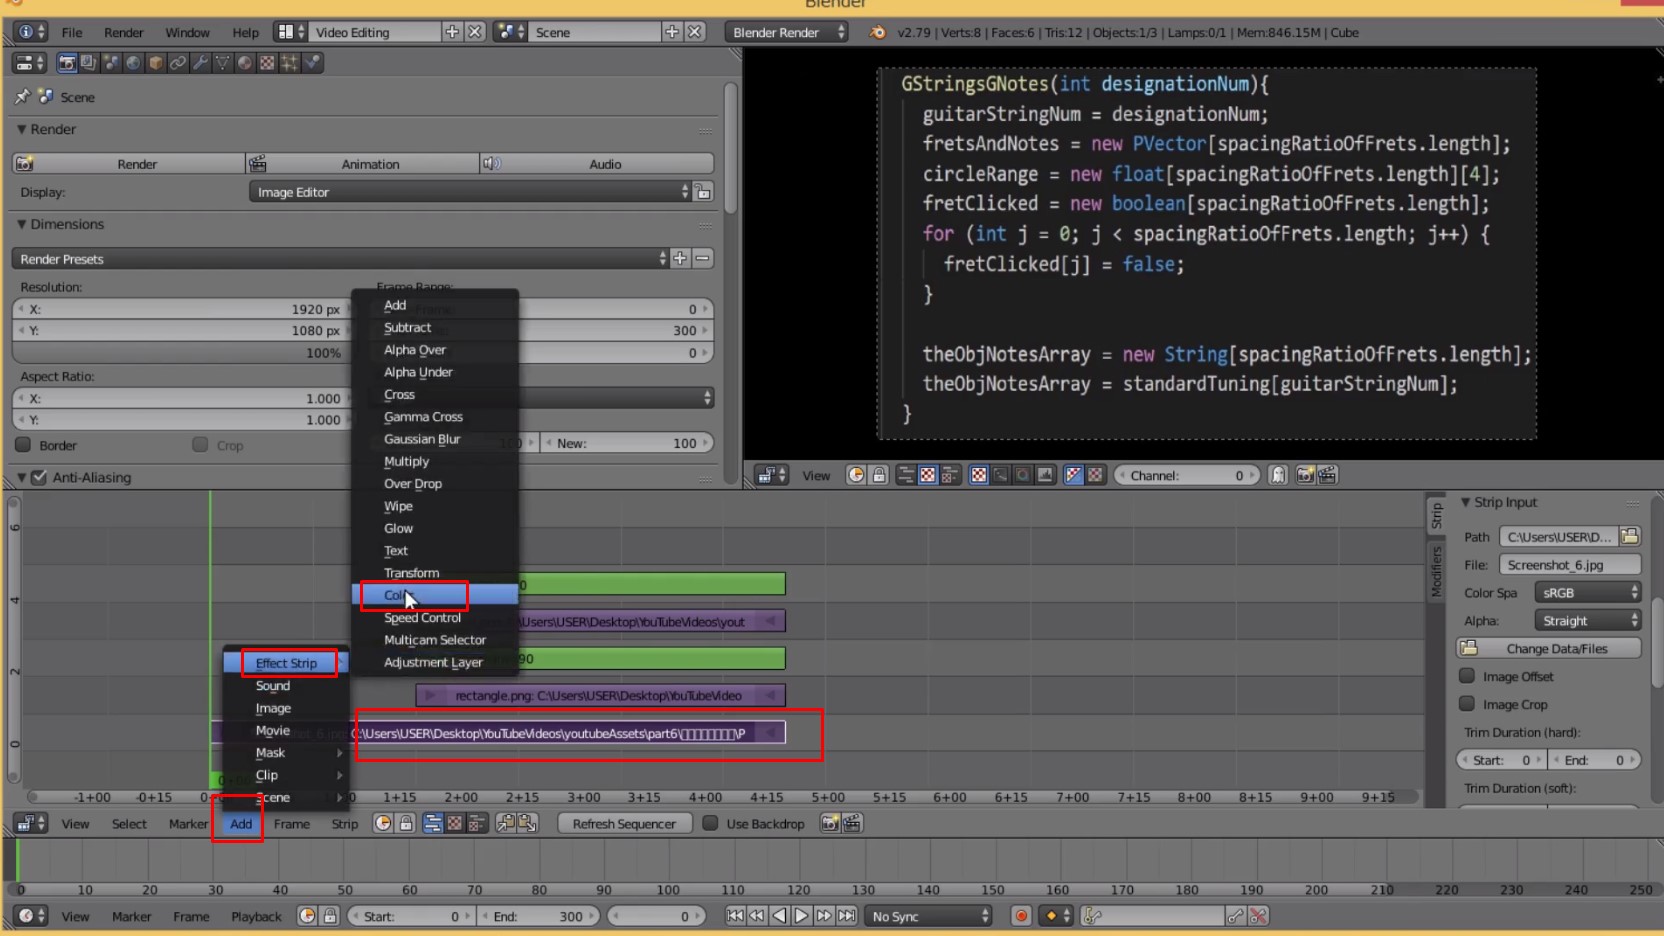
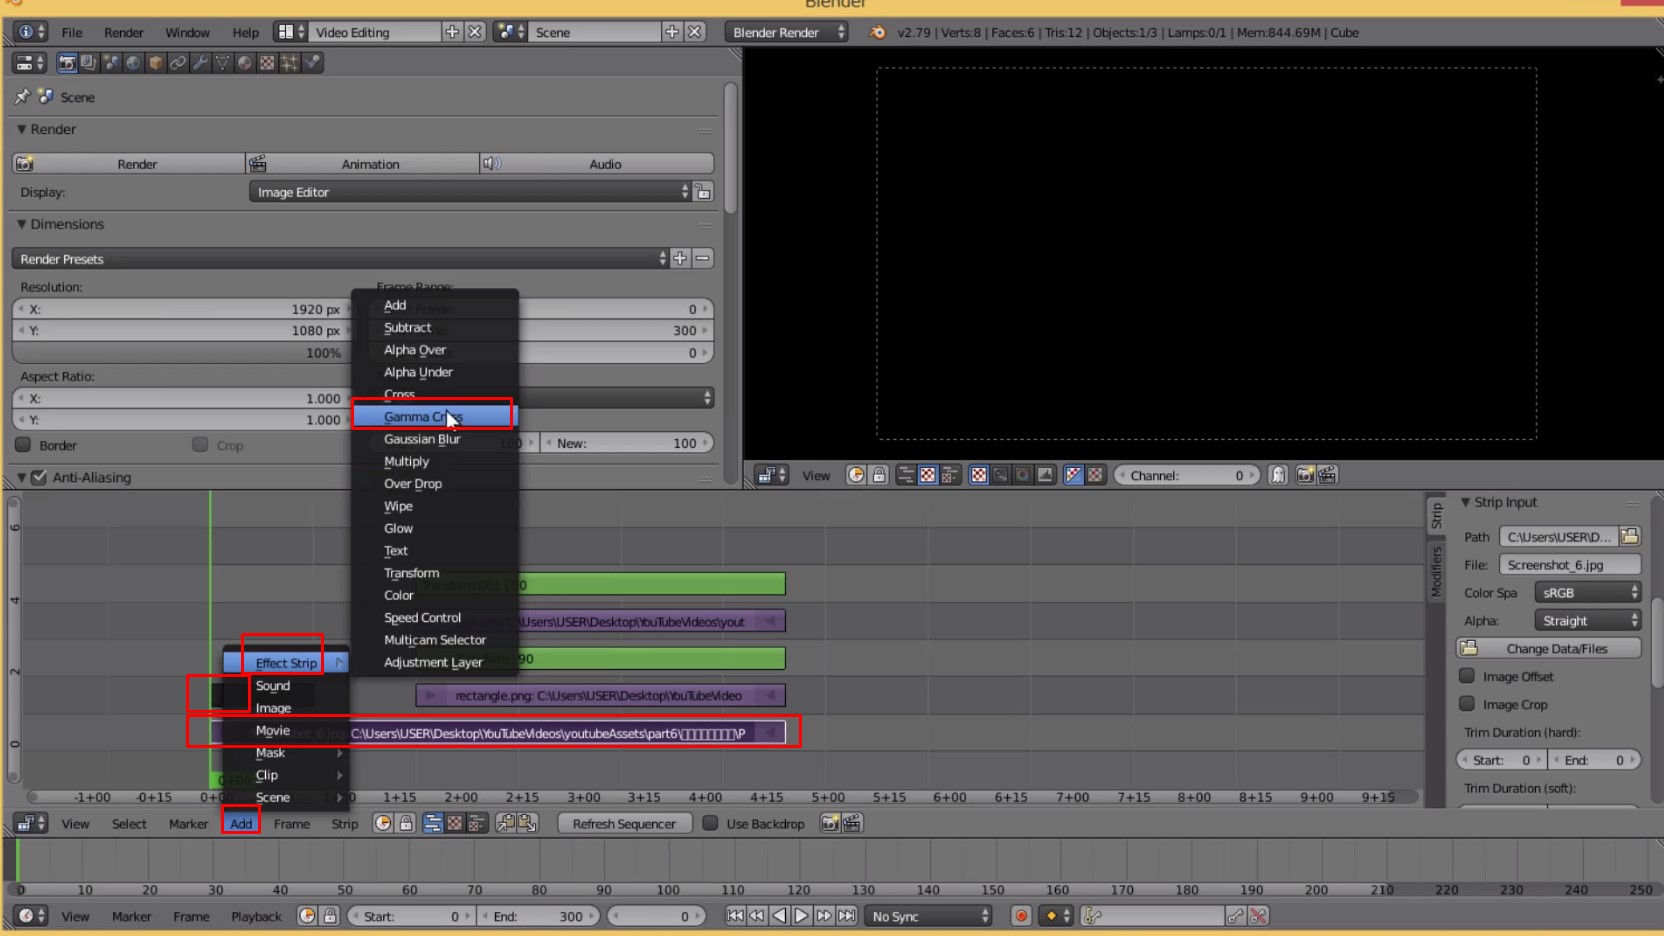
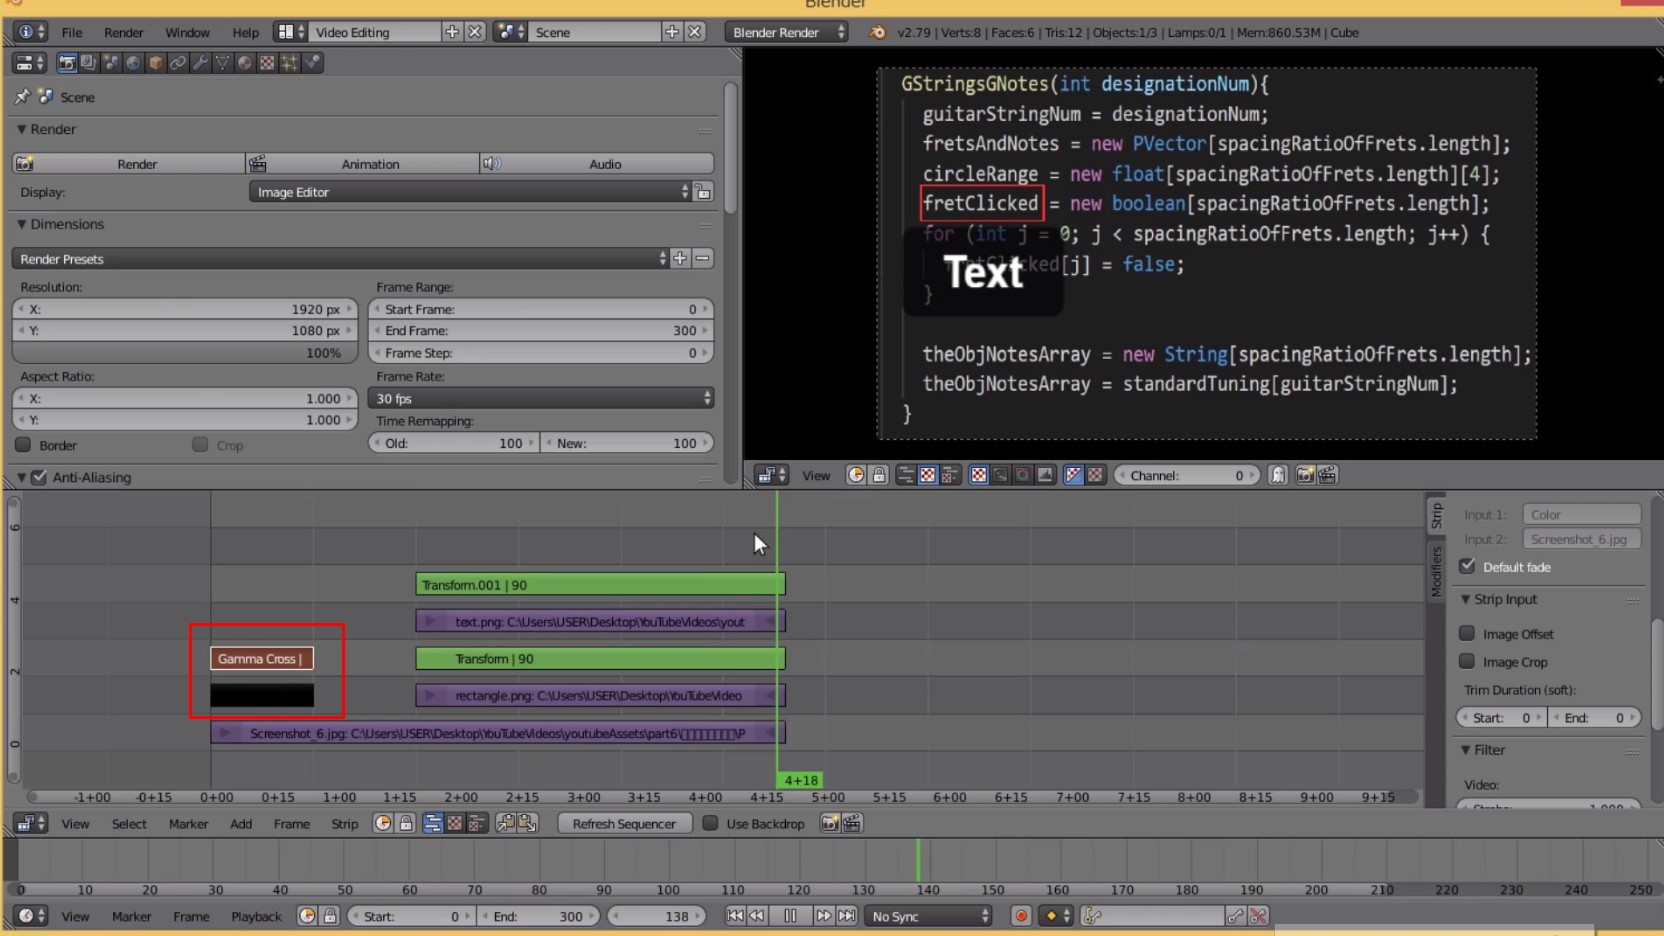
Addー>Effect Stripー>Color ::先にColorを選択 ::次にフェードインしたいファイルを選択 ::Addー>Effect Stripー>Ganma Cross ::選択する順番を逆にするとフェードアウトになる
Addー>Effect Stripー>Color :: Select Color first :: Select the file you want to fade in next :: Addー>Effect Stripー>Ganma Cross :: selection in reverse order fades out
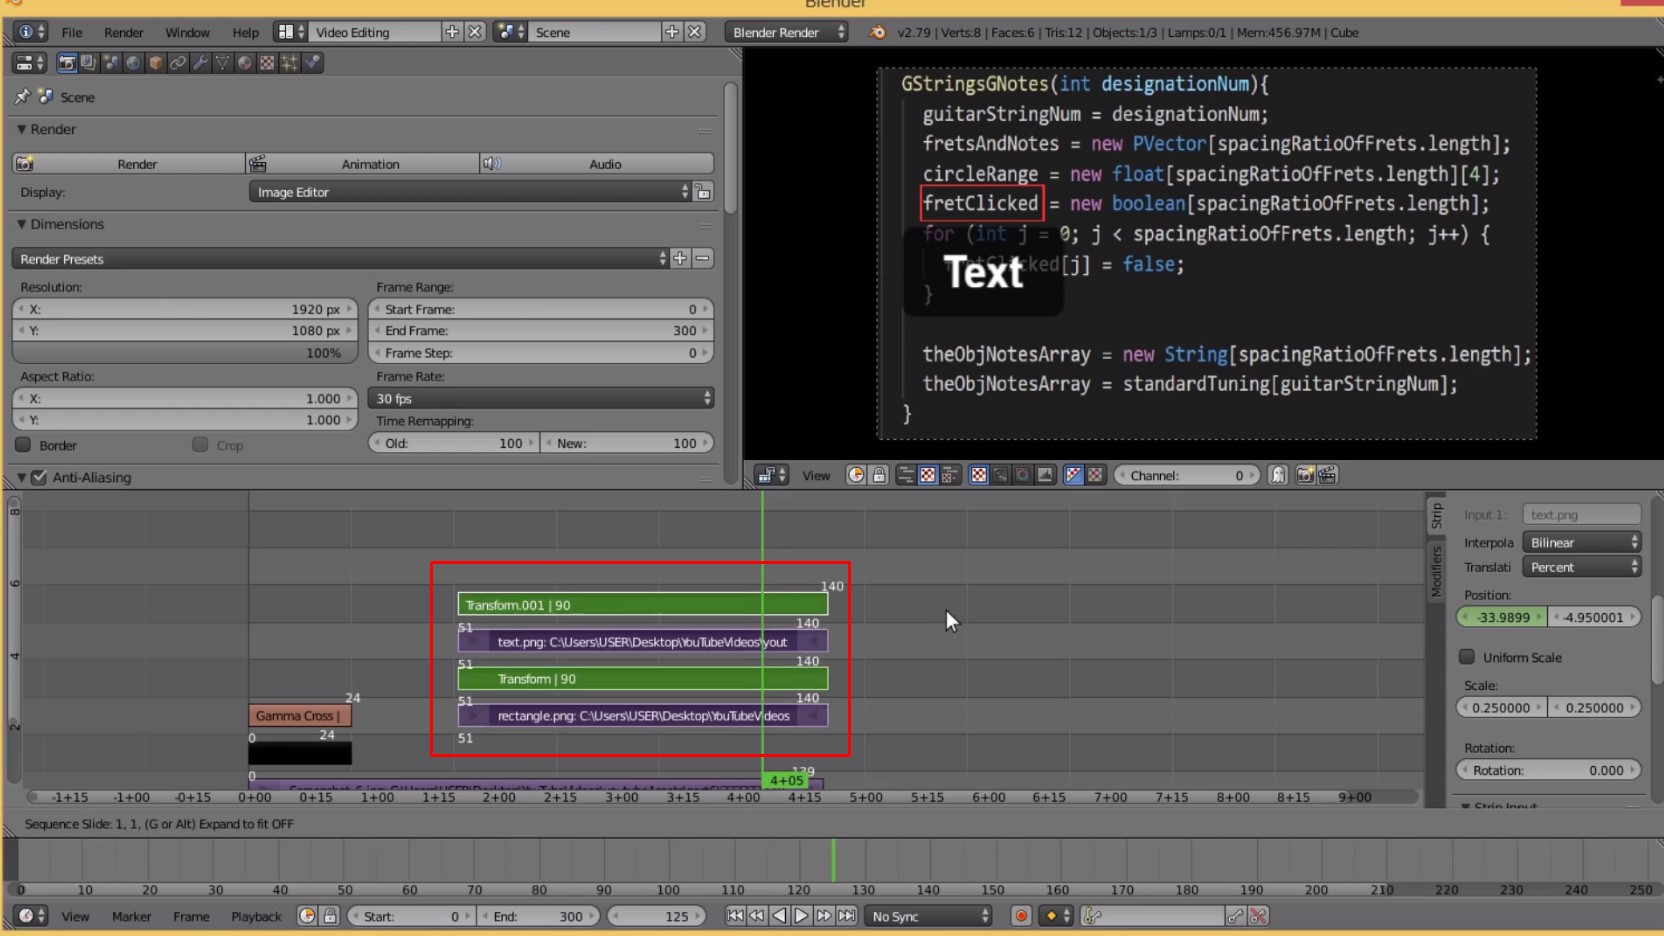
複数選択ー>SHIFT+右クリック ::Gキーを押して、アローキーかマウスで移動 ::Enterか左クリックで位置の確定
Multi-Select - > SHIFT + right-click :: Press G and move with arrow key or mouse :: Enter or left-click to confirm position
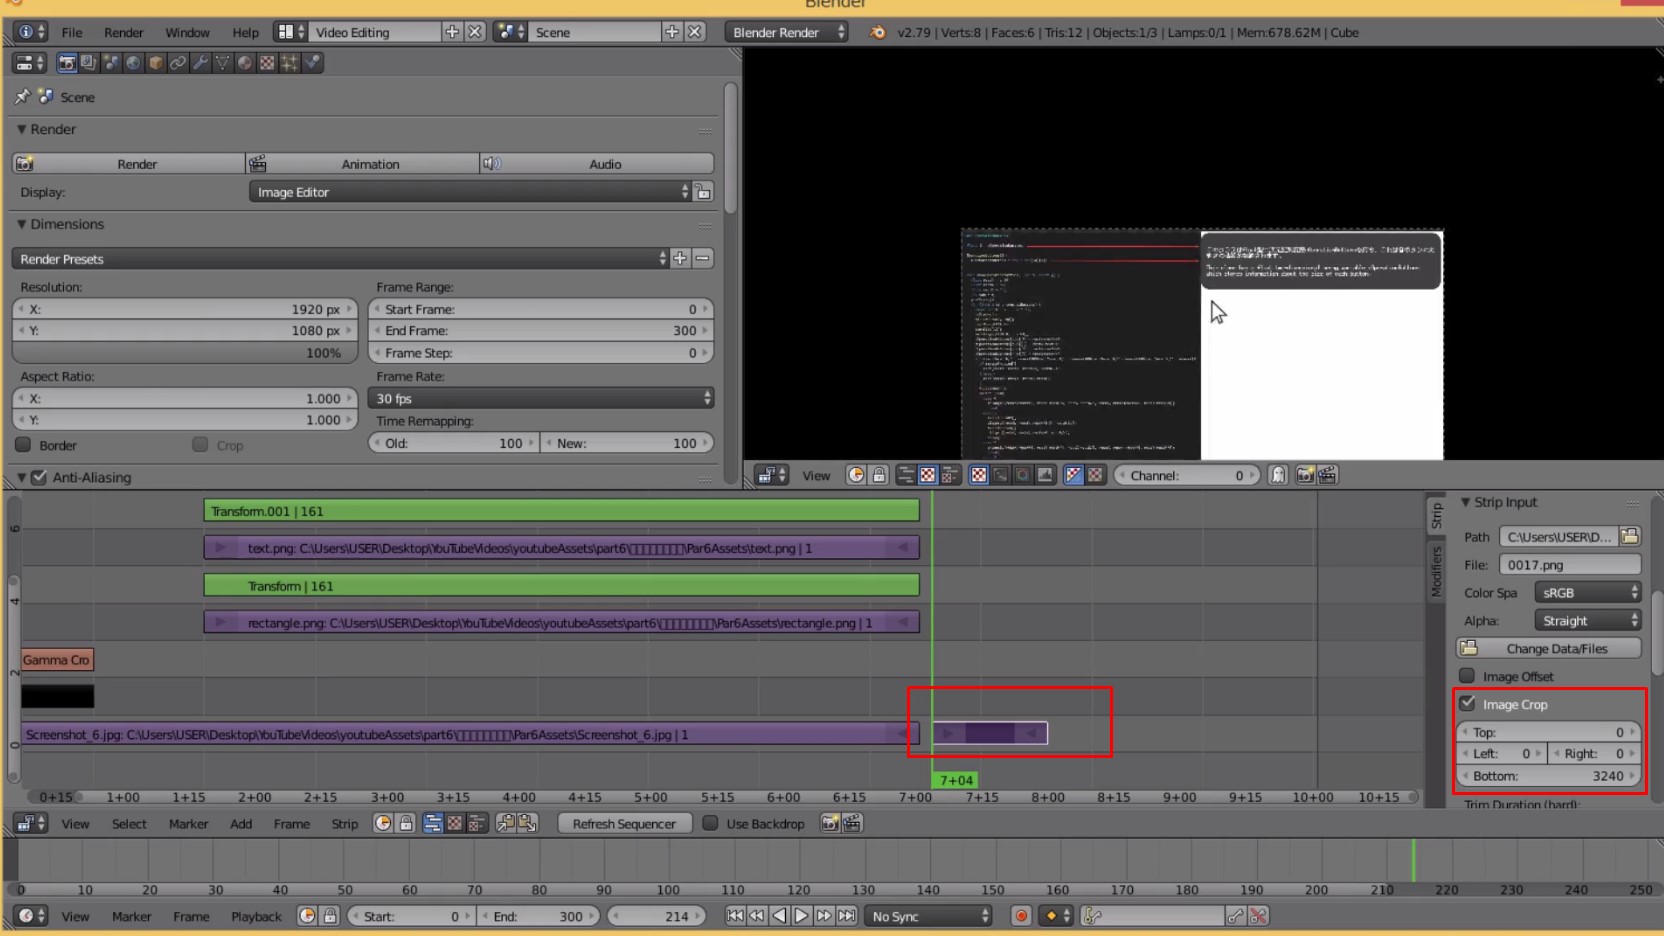
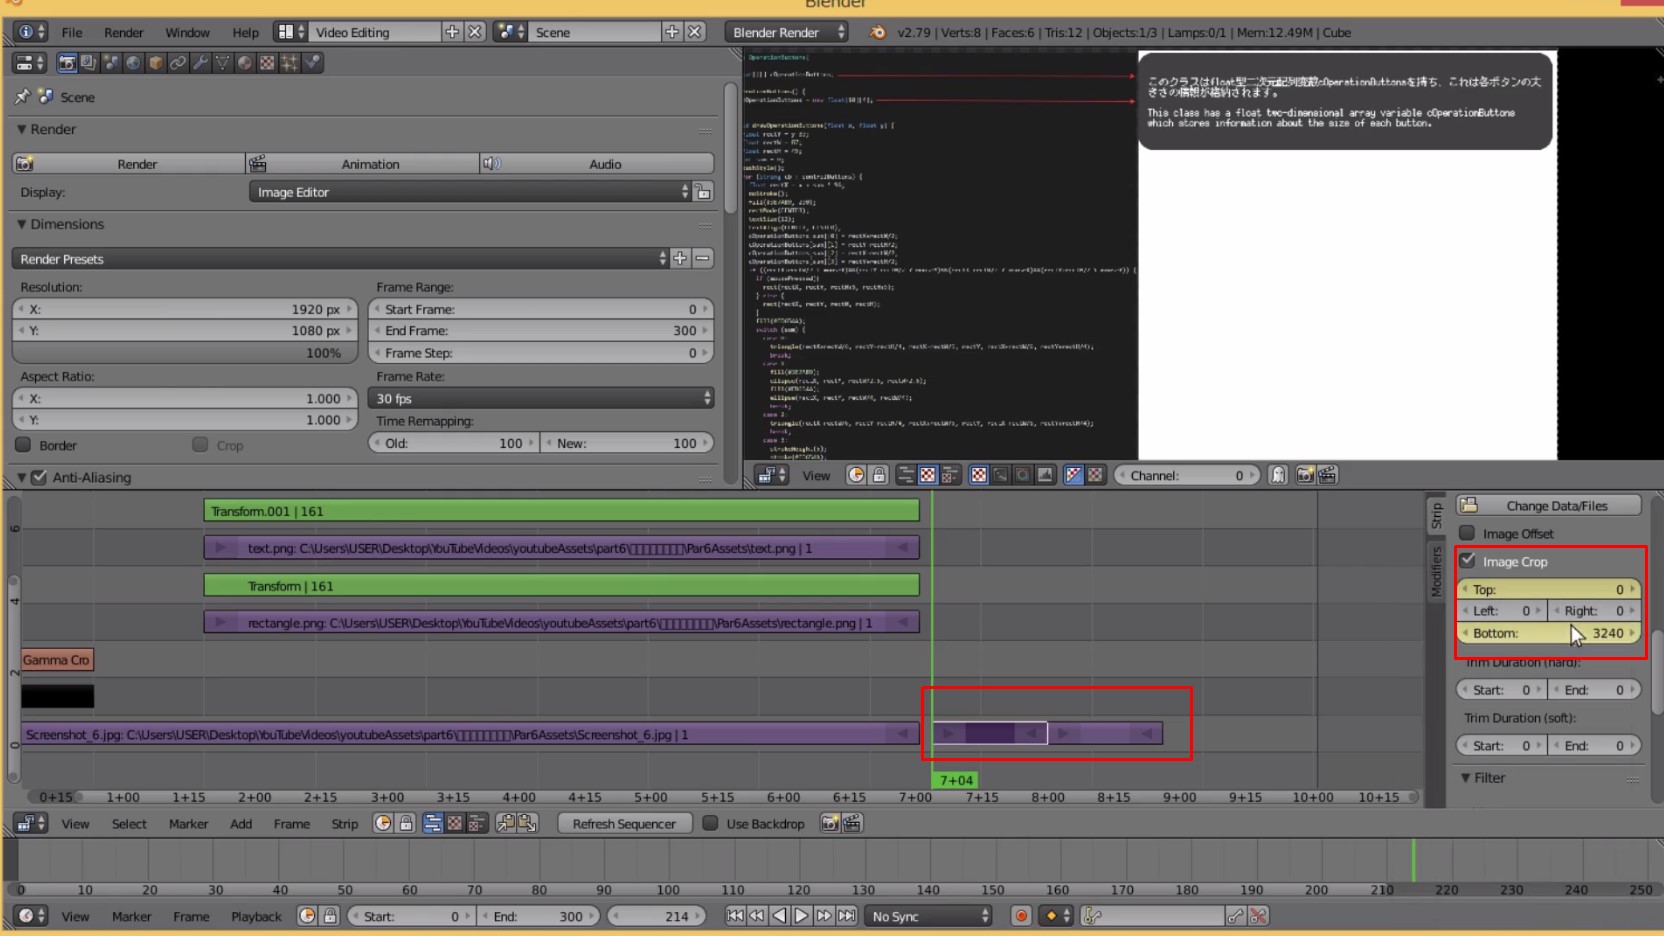
Image cropの値を動かして縦のスライドの動きをつける ::KeyFrameはDeleteやReplaceができる ::黄色ー>KeyFrameが有効になっている
Adjust the Image crop value to create a vertical slide. :: KeyFrame can be Delete or Replace :: yellow - > KeyFrame enabled
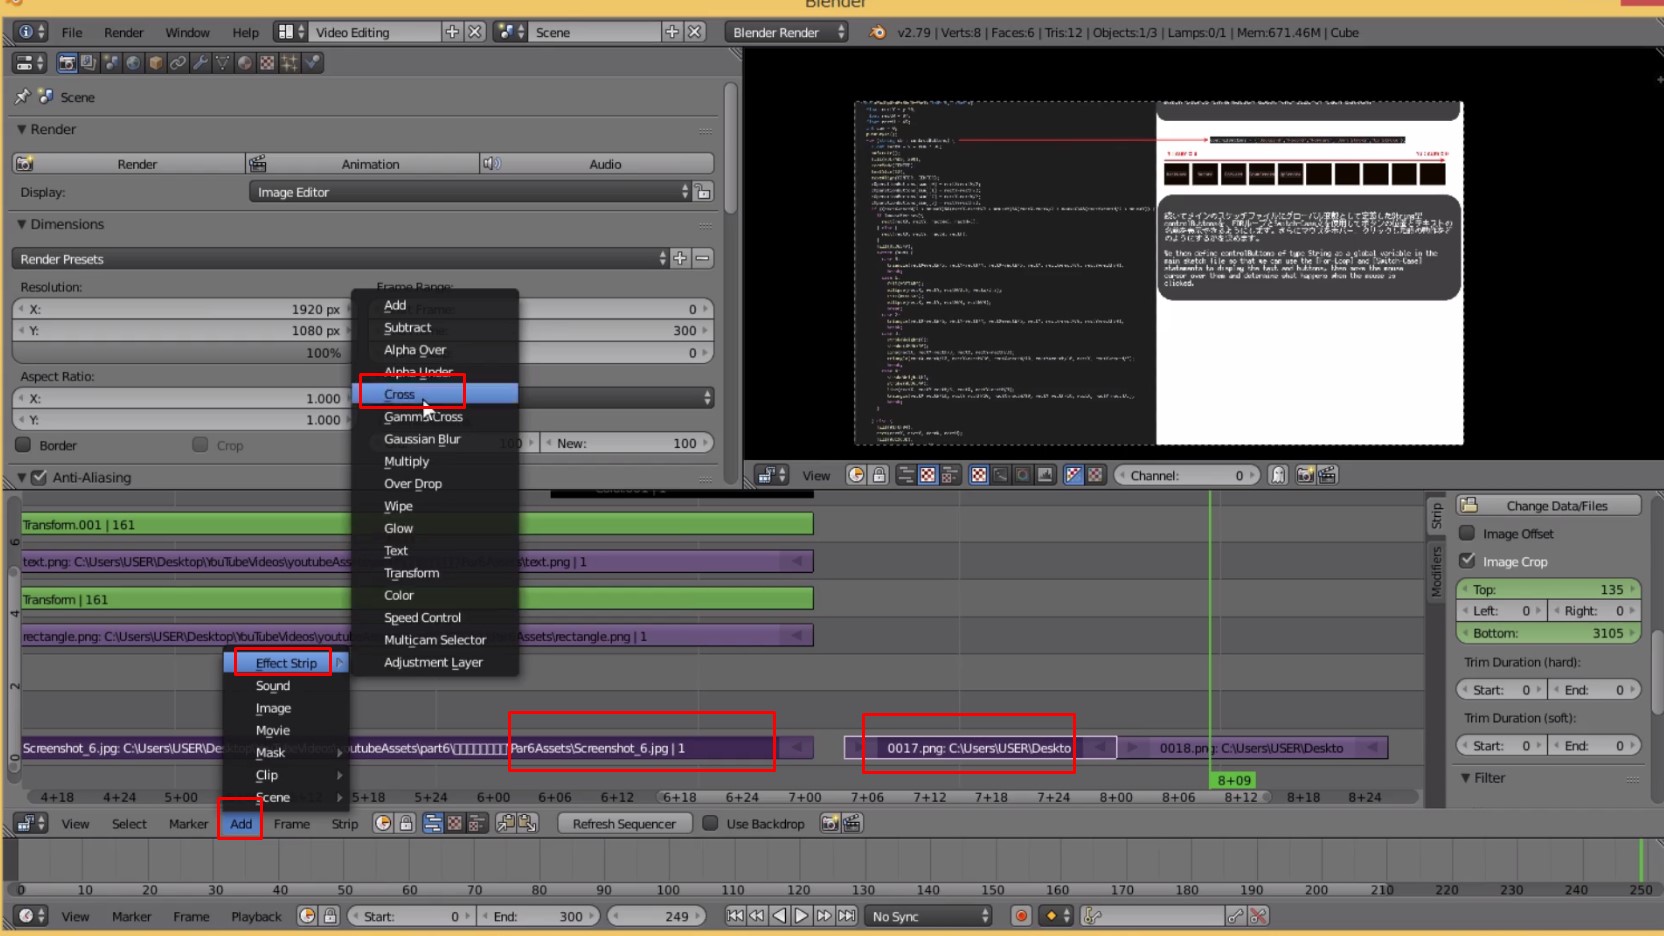
クロスエフェクトをかけたいファイル同士をSHIFT+右クリックで複数選択 ::Addー>Effect Stripー>Cross
Use SHIFT + right-click to select multiple files for which you want to apply cross effects. :: Add > Effect Strip > Cross
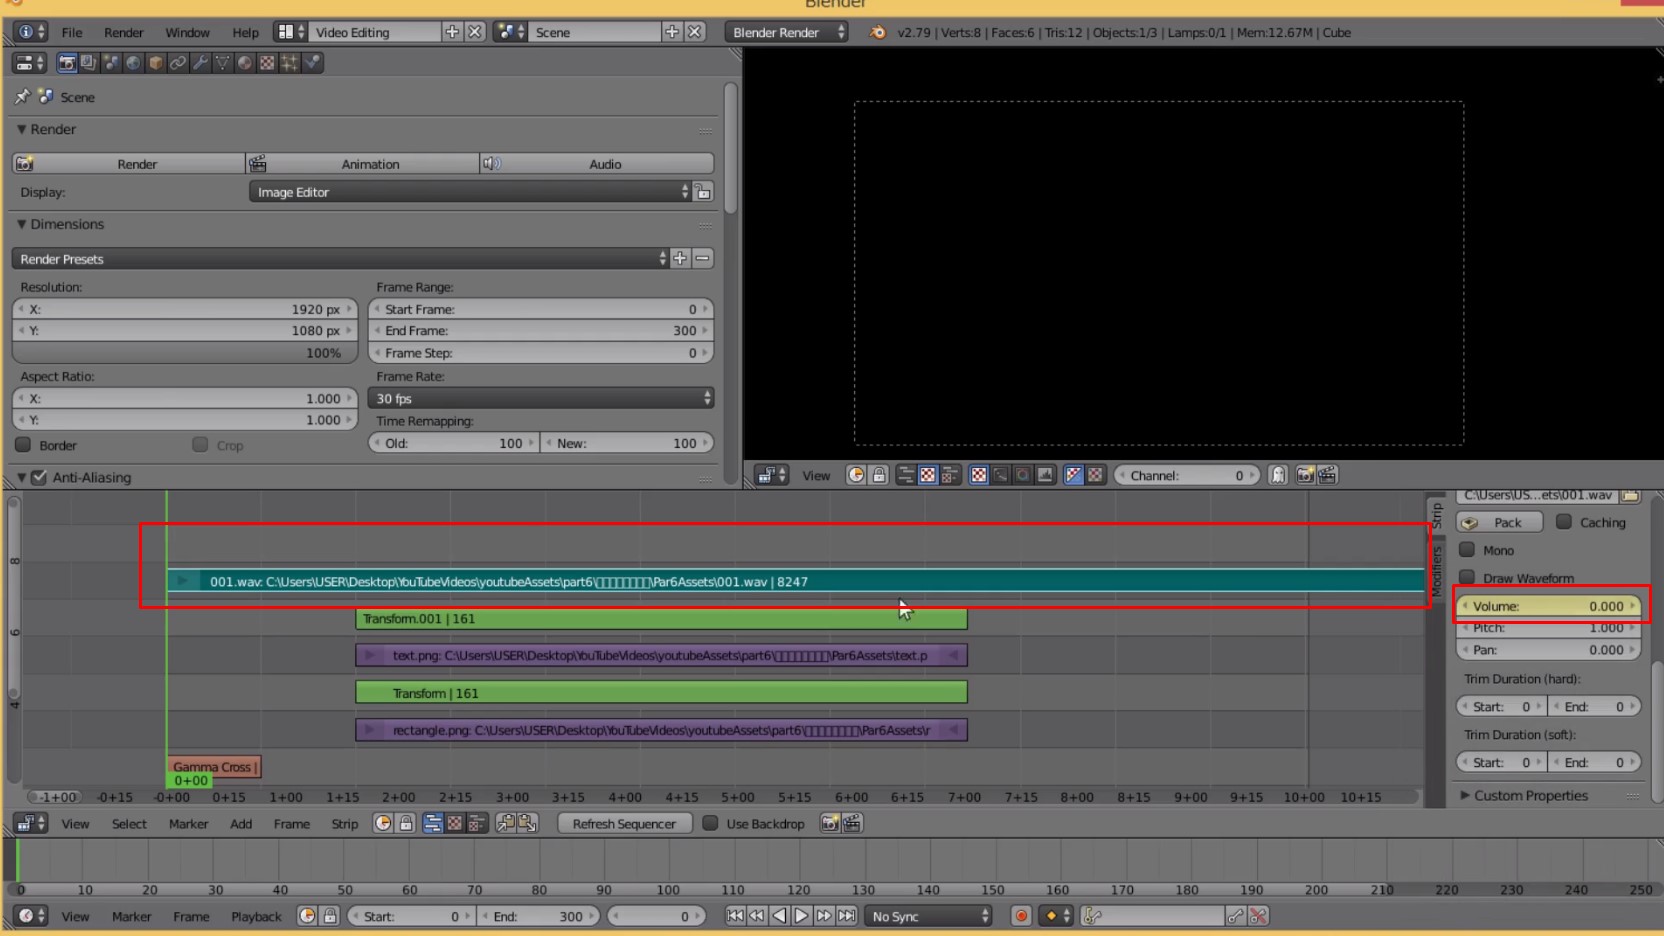
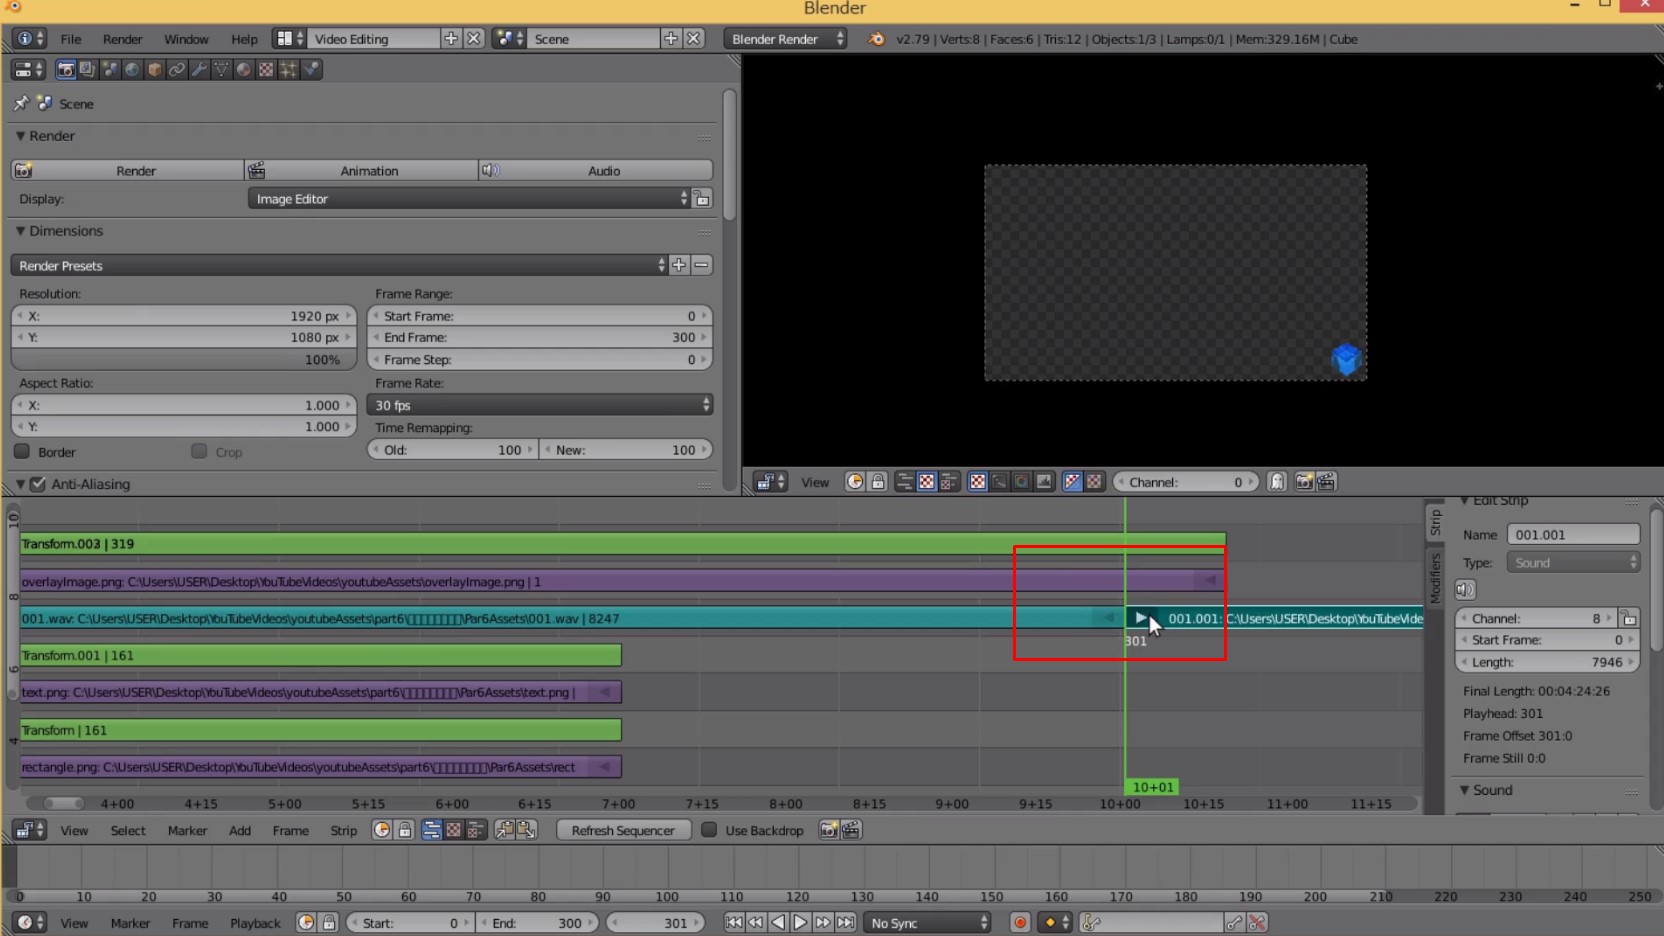
音のファイルをドラッグアンドドロップ ::Volumeを調整、KeyFrameで音の大きさを徐々に大きくする。
Drag and drop sound files. Use the KeyFrame to adjust the Volume value and gradually increase the volume.
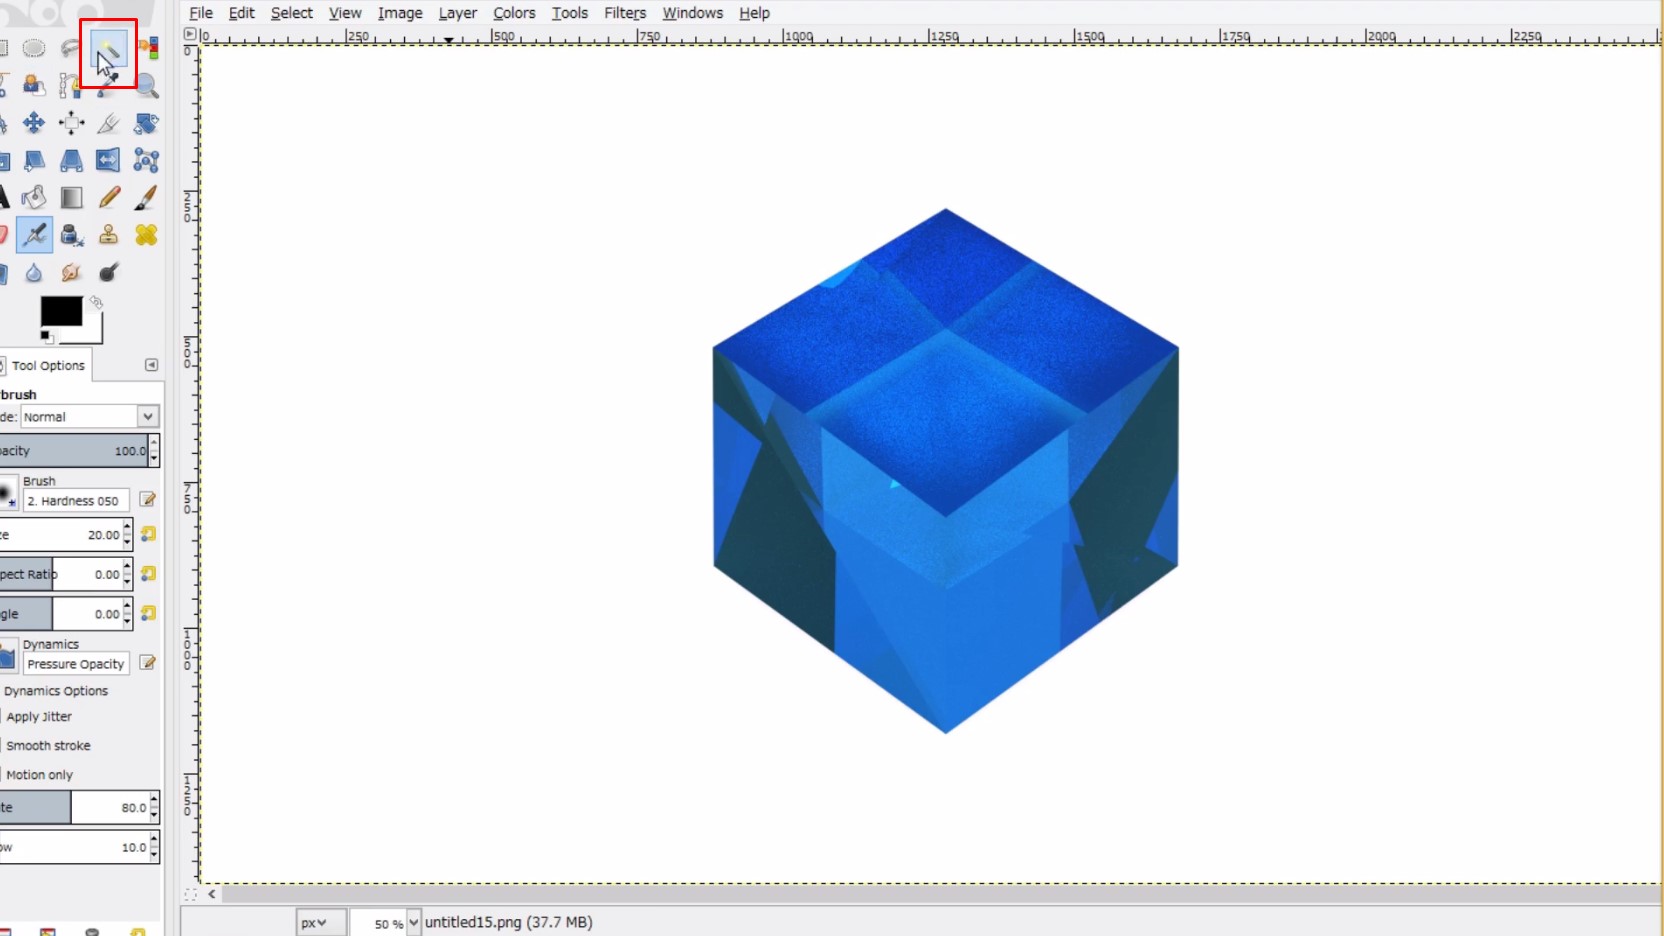
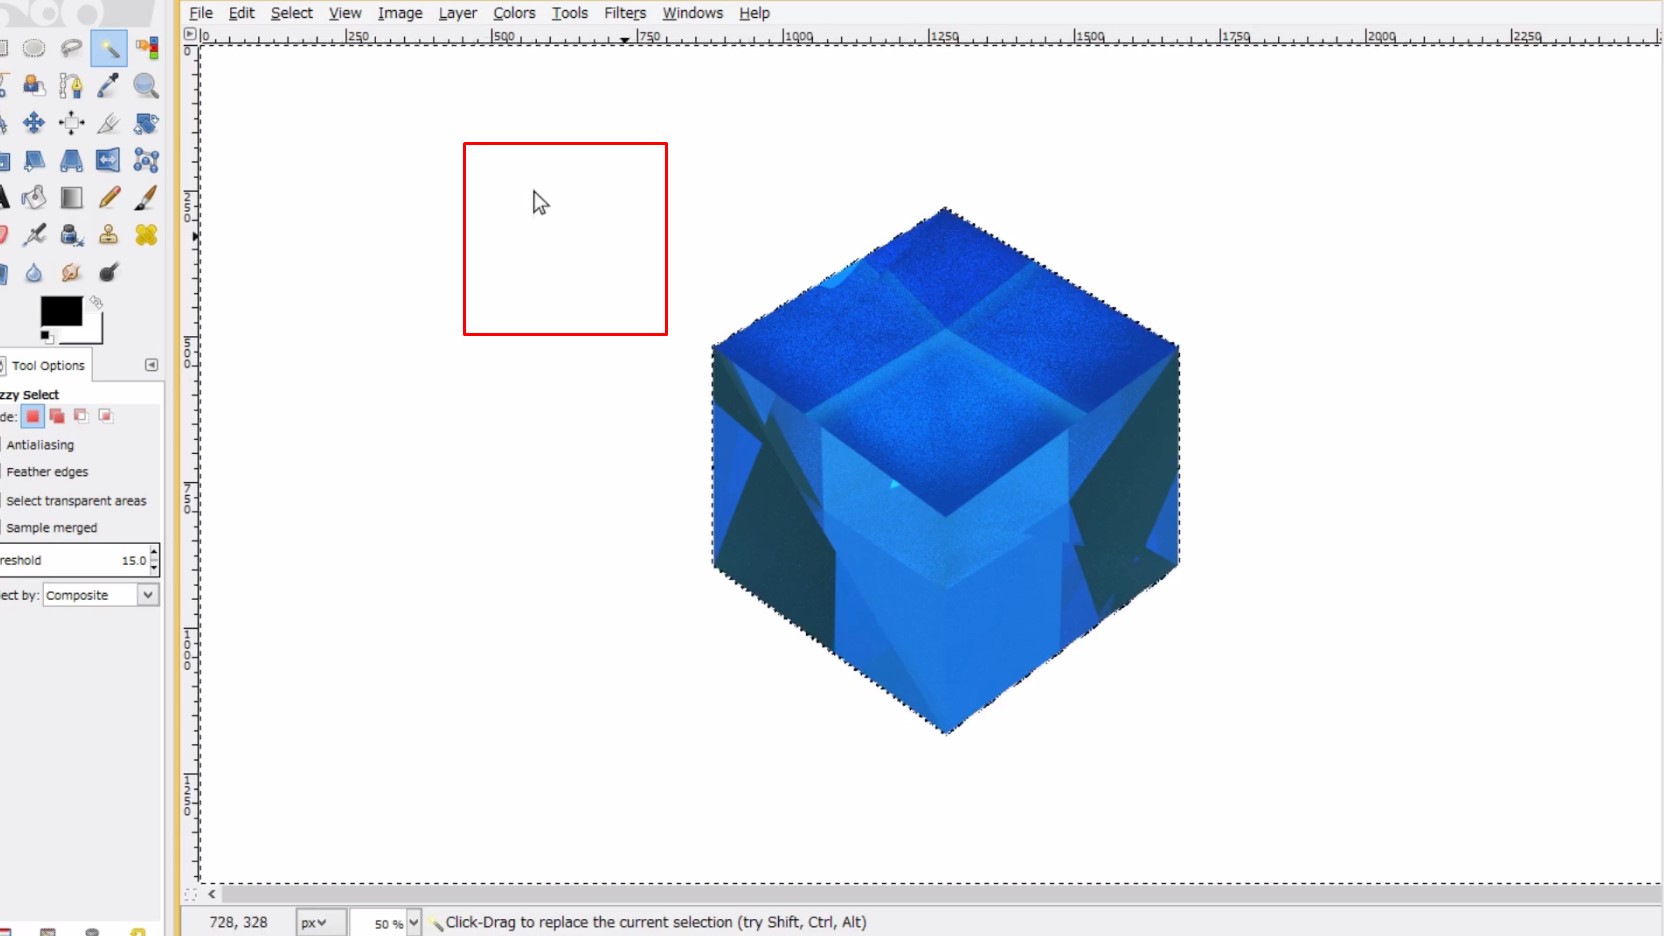
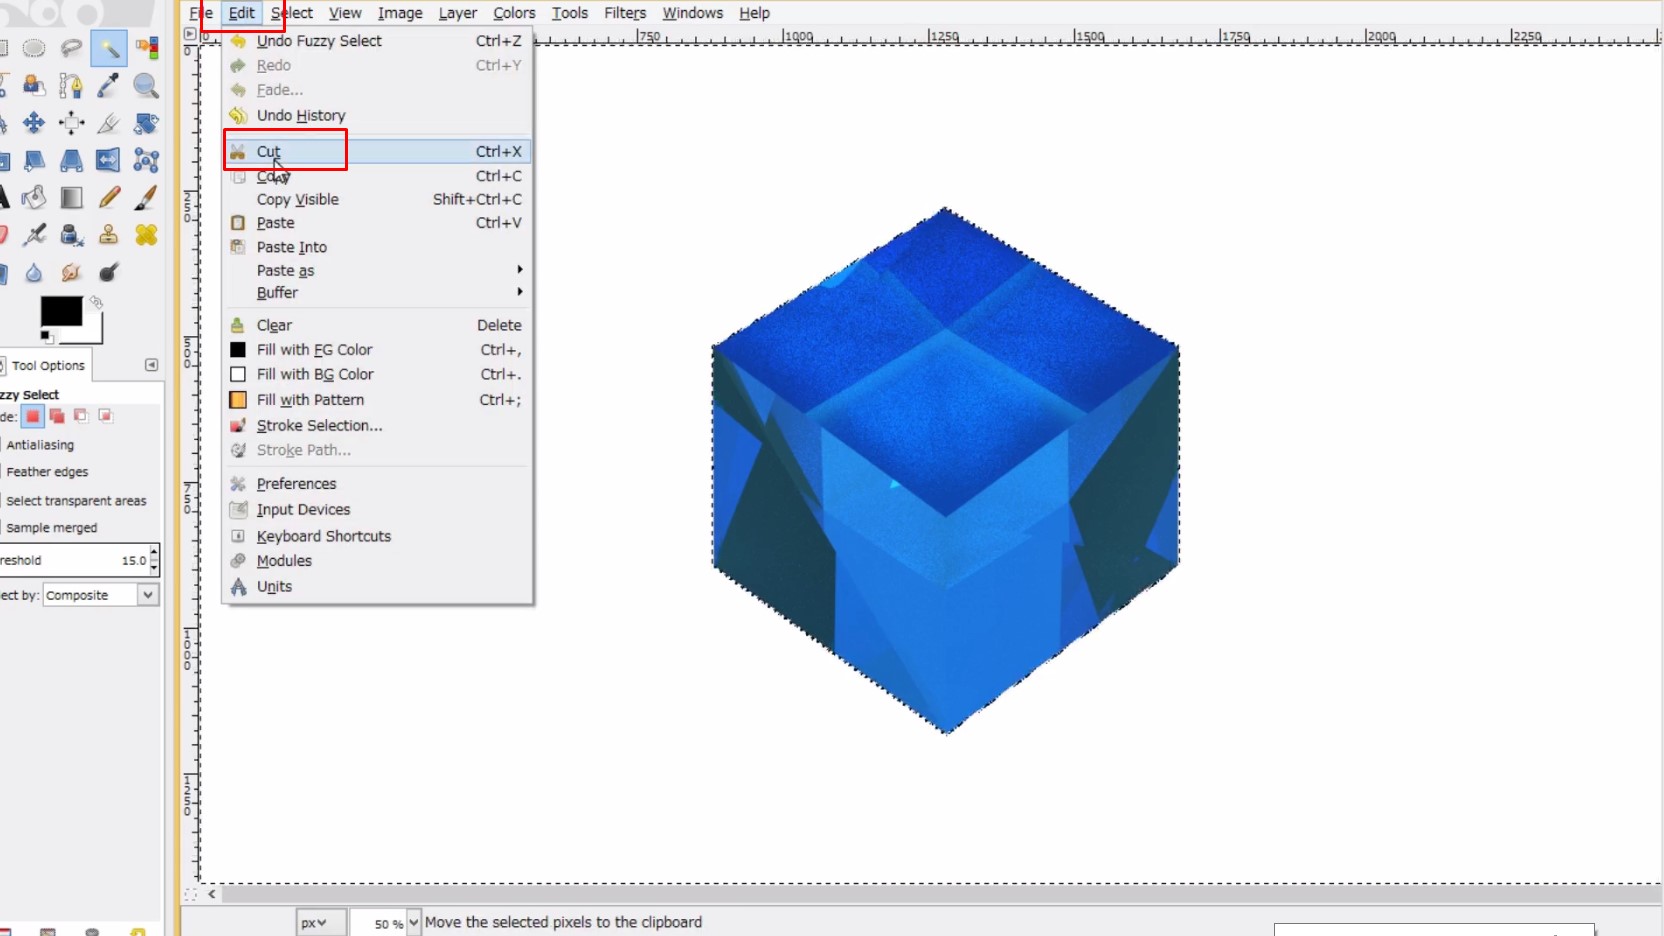
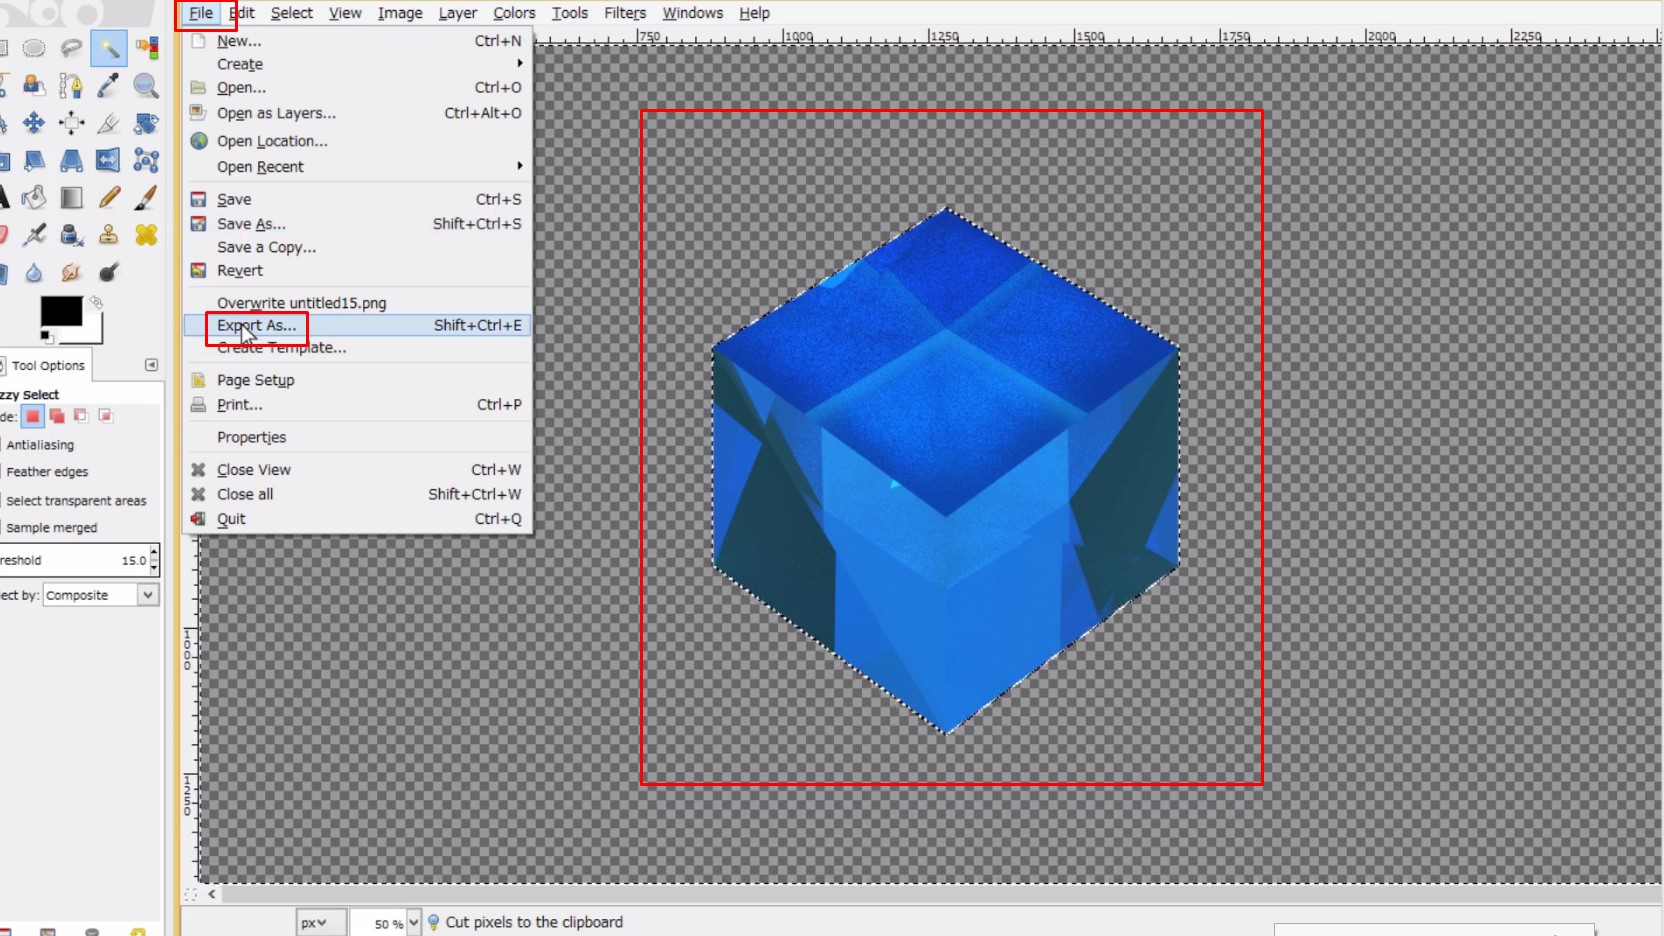
GIMPを使って透かしロゴを作成する ::ファイルをドラッグアンドドロップ ::左のツールボックスからファジーを選択 ::画像の外側をクリック ::Editー>Cut ::Fileー>Export As ー> Png ー> Save
Creating a Watermark Logo Using GIMP :: Drag and drop files :: Select Fuzzy from left toolbox :: Click outside image ::Editー>Cut ::Fileー>Export As ー> Png ー> Save
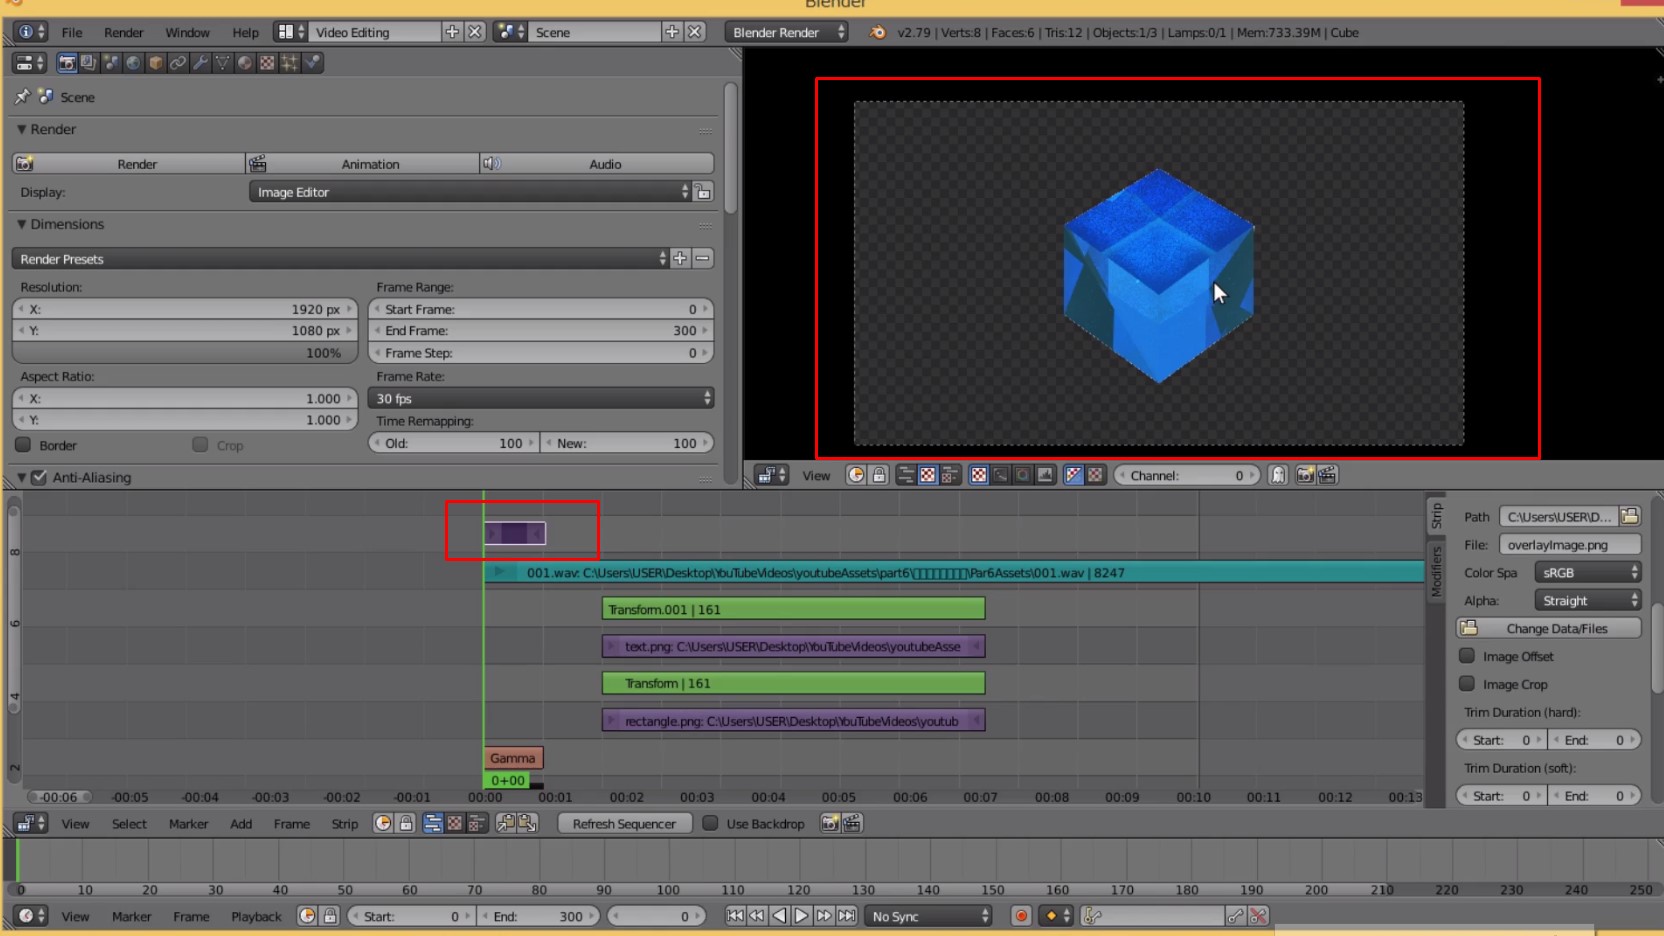
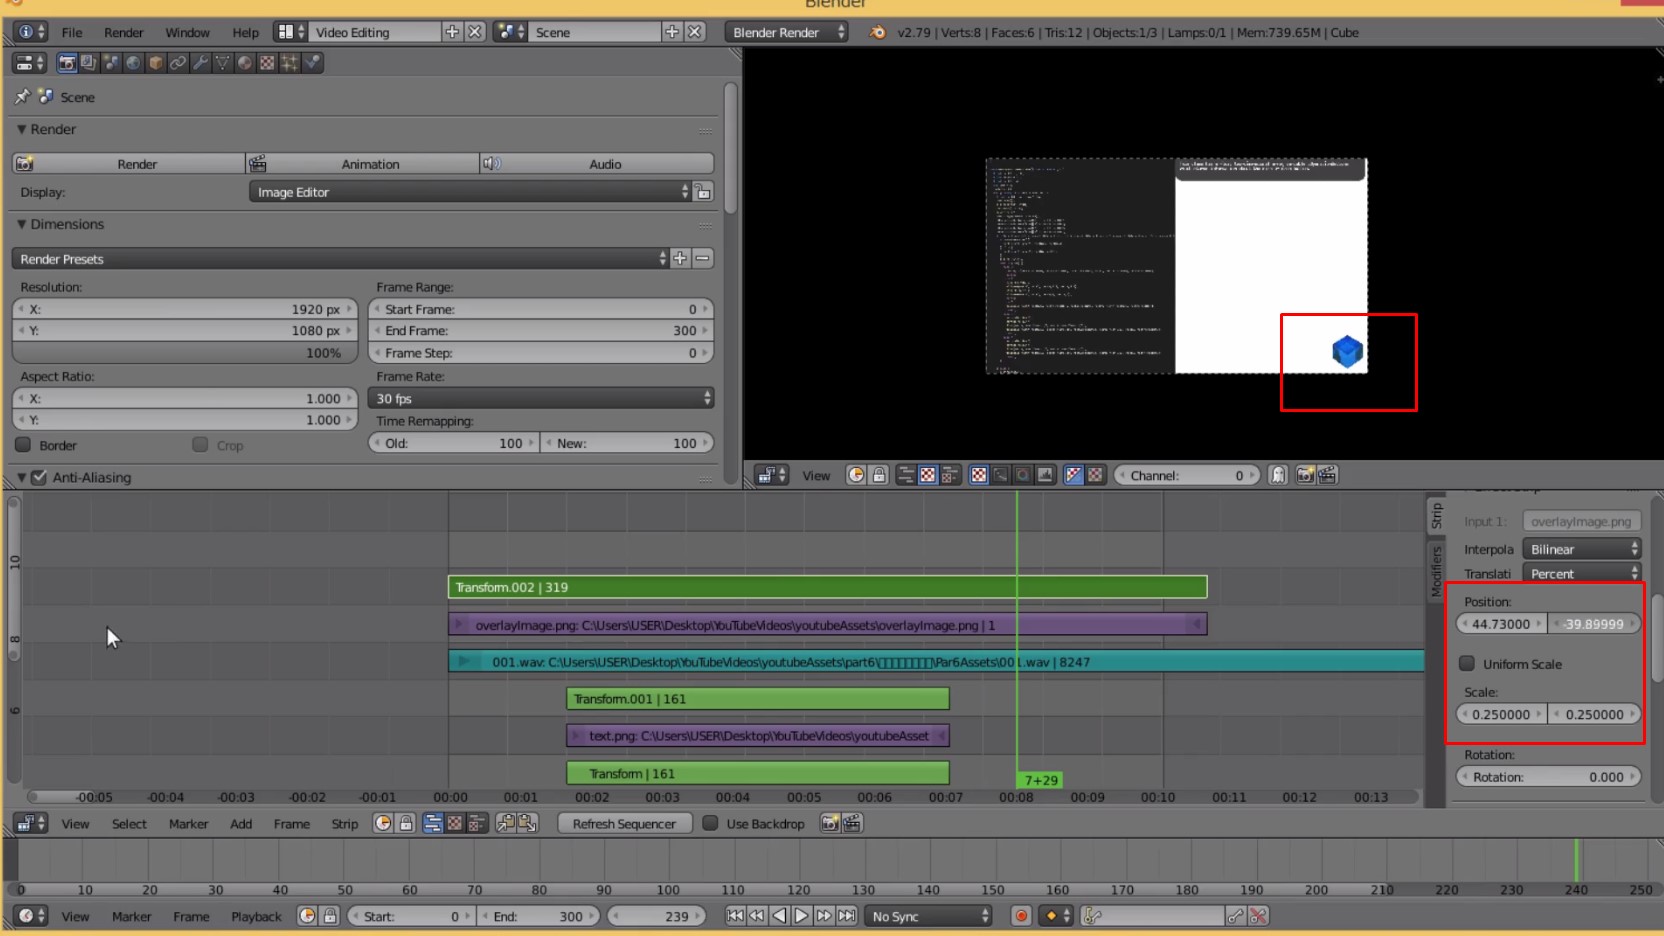
Blenderに画像をドラッグアンドドロップ ::Addー>Effect Stripー>Transformー>Blendー>Alpha Overー>Scale、Positionで調整
Drag and drop images into Blender ::Addー>Effect Stripー>Transformー>Blendー>Alpha Overー>Adjust with Scale and Position
Kキーを押せばファイルをカットできる
You can cut the file by pressing K.
Animationボタンを押したら動画のレンダリング開始。
Press the Animation button to start rendering the video.
次回はギターTABアプリ作りの続きをします。
Next time, I will write a blog post about the last guitar TAB application.