Published Date : 2020年5月4日16:10
【ネットショップ作成】カラーミーショップの導入方法
【Creation of an online shop】Introduction of COLORME Shop
This blog has an English translation
YouTubeにアップした動画、「【ネットショップ作成】カラーミーショップの導入方法」の補足説明の記事です。
Here's a little more about the 「【Creation of an online shop】Introduction of COLORME Shop」 video I uploaded to YouTube.
無駄な説明を省いて、忙しい時でも短時間で理解できるような動画です。
It's a video that can be understood in a short period of time even when you're busy, without any unnecessary explanation.
目次
Table of Contents
ショップを作成する Create your online shop |
商品を登録してみよう Let's register the item in your online shop |
その他の設定を軽く紹介 A brief introduction to other settings |
ページの最後へ Go to the end of the page. |
ショップを作成する
Create your online shop
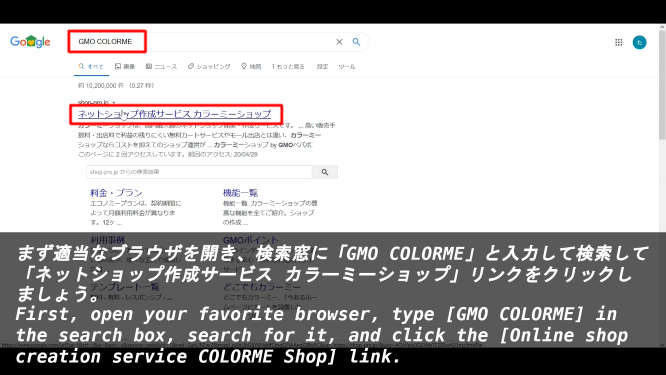
まず適当なブラウザを開き、検索窓に「GMO COLORME」と入力して検索して「ネットショップ作成サービス カラーミーショップ」リンクをクリックしましょう。
First, open your favorite browser, type [GMO COLORME] in the search box, search for it, and click the [Online shop creation service COLORME Shop] link.
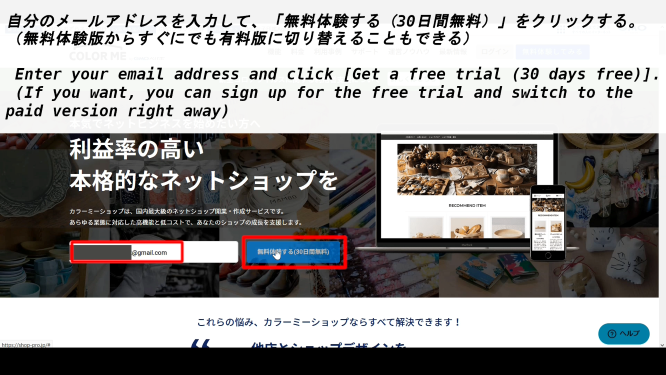
自分のメールアドレスを入力して、「無料体験する(30日間無料)」をクリックする。(無料体験版からすぐにでも有料版に切り替えることもできる)
Enter your email address and click [Get a free trial (30 days free)]. (If you want, you can sign up for the free trial and switch to the paid version right away)
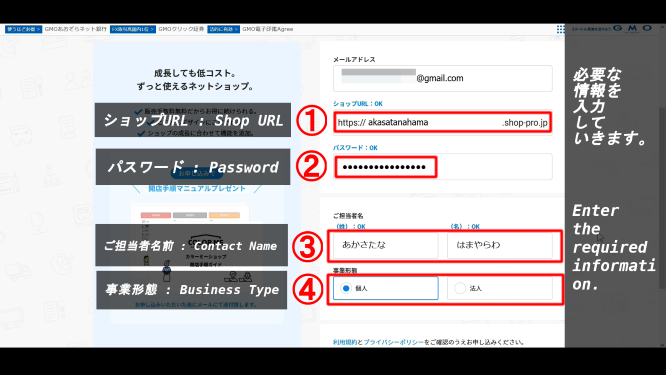
①ショップURLー>②パスワードー>③ご担当者名前ー>④事業形態(必要な情報を入力していきます)
①Shop URLー>②Passwordー>③Contact Nameー>④Business Type(Enter the required information)
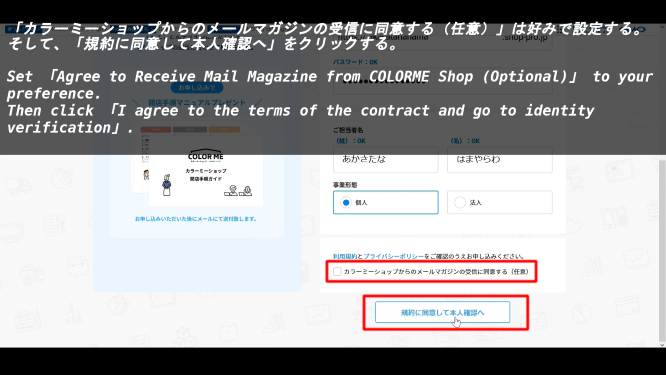
「カラーミーショップからのメールマガジンの受信に同意する(任意)」は好みで設定する。そして、「規約に同意して本人確認へ」をクリックする。
Set 「Agree to Receive Mail Magazine from COLORME Shop (Optional)」 to your preference. Then click 「I agree to the terms of the contract and go to identity verification」.
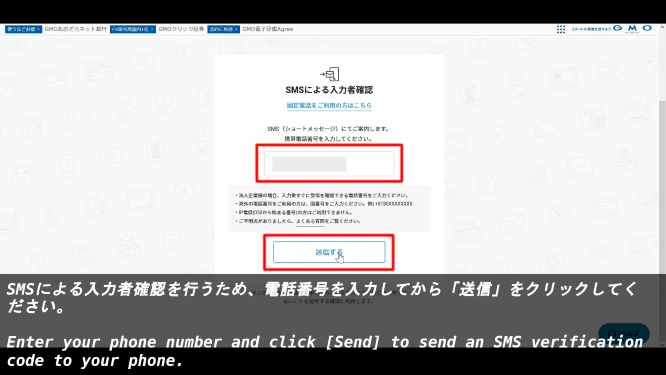
SMSによる入力者確認を行うため、電話番号を入力してから「送信」をクリックしてください。
Enter your phone number and click [Send] to send an SMS verification code to your phone.
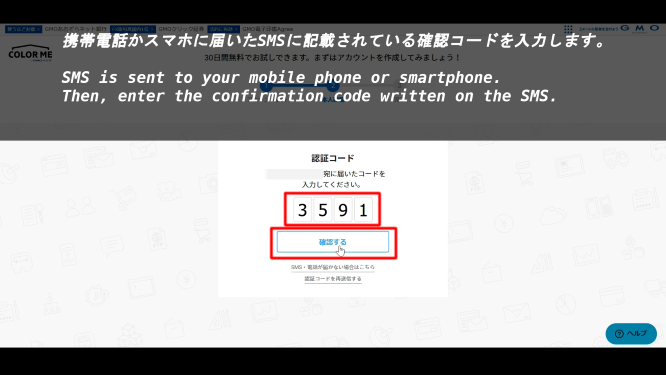
携帯電話かスマホに届いたSMSに記載されている確認コードを入力します。
SMS is sent to your mobile phone or smartphone. Then, enter the confirmation code written on the SMS.
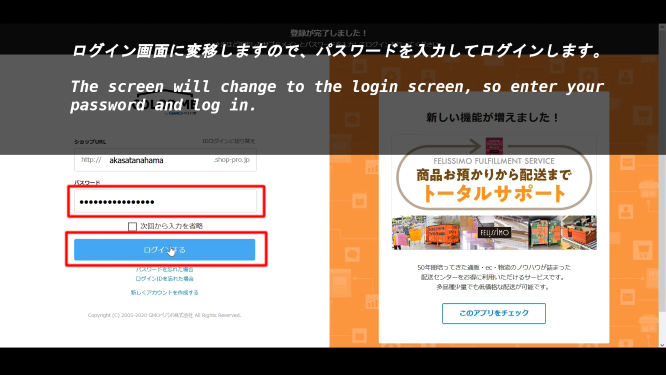
ログイン画面に変移しますので、パスワードを入力してログインします。
The screen will change to the login screen, so enter your password and log in.
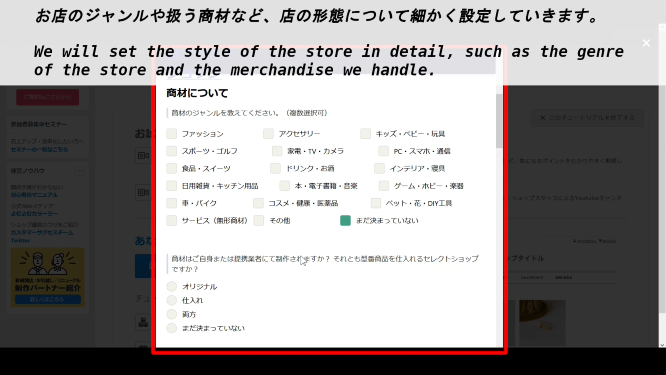
お店のジャンルや扱う商材など、店の形態について細かく設定していきます。
We will set the style of the store in detail, such as the genre of the store and the merchandise we handle.
商品を登録してみよう
Let's register the item in your online shop
続いて、商品を登録していきます。
Next, you will register the items for sale at your shop.
「商品を登録してみよう」をクリックします。
Click [Let's register the item].

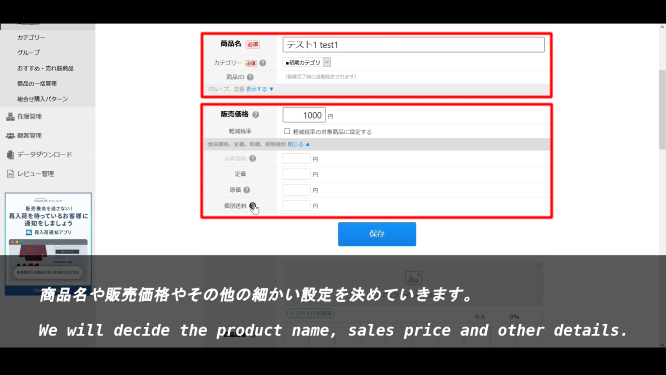
商品名や販売価格やその他の細かい設定を決めていきます。
We will decide the product name, sales price and other details.
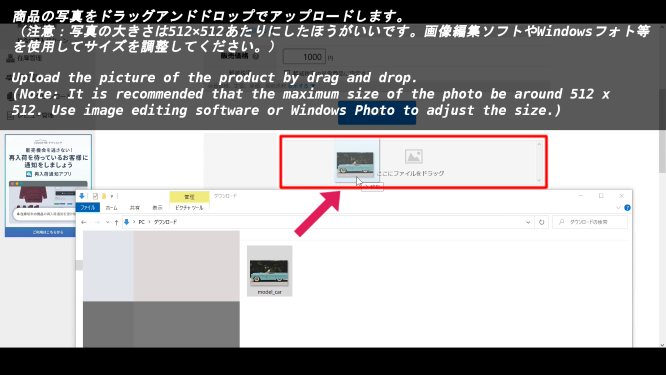
商品の写真をドラッグアンドドロップでアップロードします。 (注意:写真の大きさは512×512あたりにしたほうがいいです。画像編集ソフトやWindowsフォト等を使用してサイズを調整してください。)
Upload the picture of the product by drag and drop. (Note: It is recommended that the maximum size of the photo be around 512 x 512. Use image editing software or Windows Photo to adjust the size.)
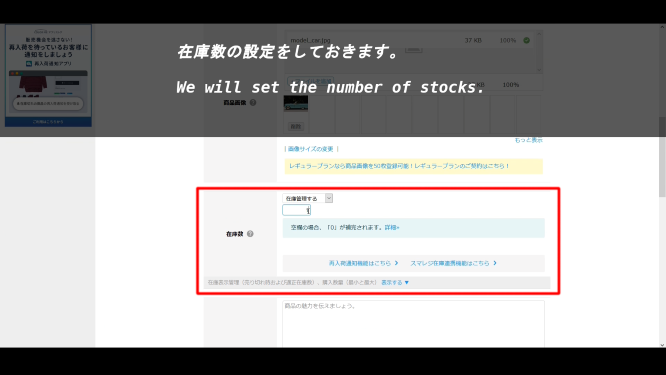
在庫数の設定をしておきます。
We will set the number of stocks.
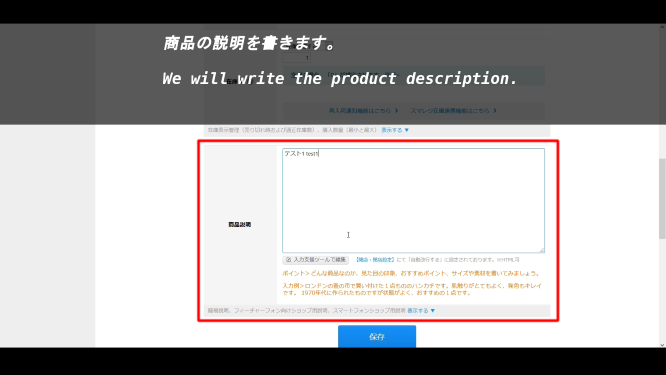
商品の説明を書きます。
We will write the product description.
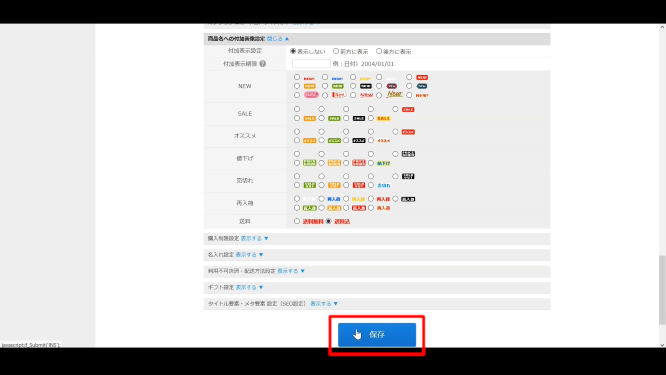
商品に関するオプションを設定していきます。(今回は「送料込み」にのみチェックを入れました。)
Set options for the product. (I checked only 「including shipping」 this time.)

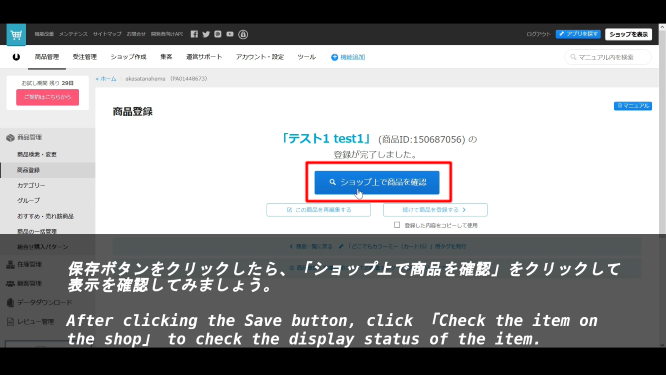
保存ボタンをクリックしたら、「ショップ上で商品を確認」をクリックして表示を確認してみましょう。
After clicking the Save button, click 「Check the item on the shop」 to check the display status of the item.
その他の設定を軽く紹介
A brief introduction to other settings
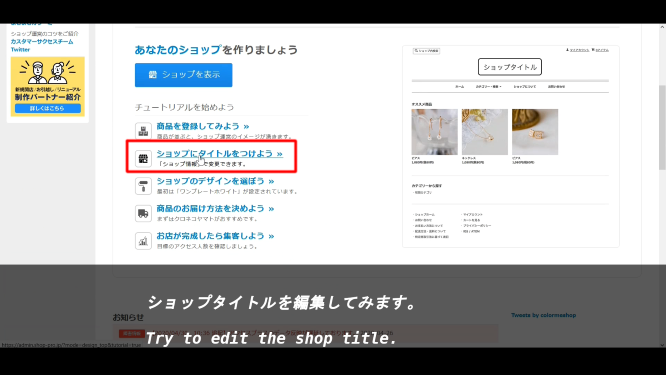
ショップタイトルを編集してみます。
Try to edit the shop title.
ショップデザインを編集してみます。
Try to edit the shop design.
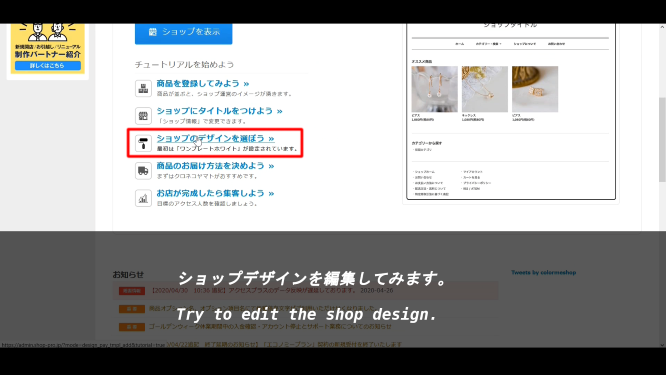
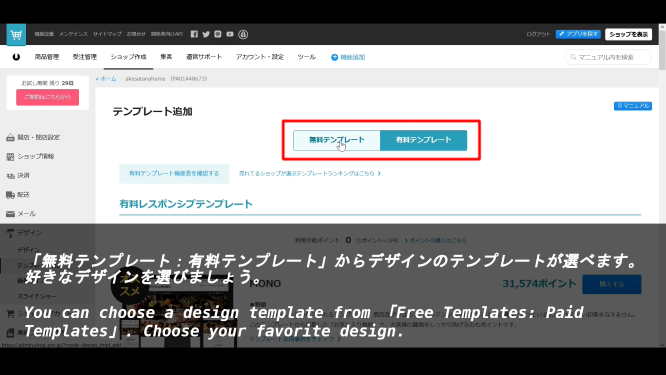
「無料テンプレート:有料テンプレート」からデザインのテンプレートが選べます。好きなデザインを選びましょう。
You can choose a design template from 「Free Templates: Paid Templates」. Choose your favorite design.
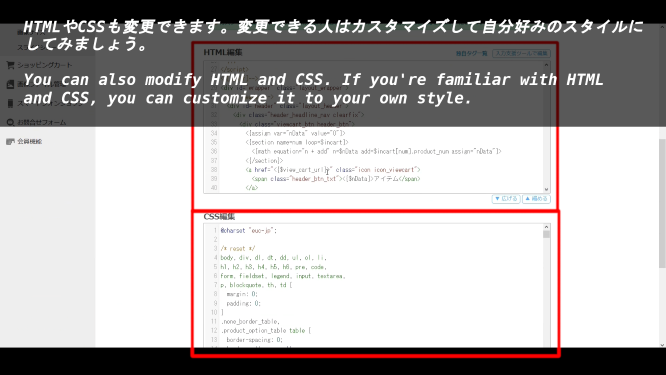
HTMLやCSSも変更できます。変更できる人はカスタマイズして自分好みのスタイルにしてみましょう。
You can also modify HTML and CSS. If you're familiar with HTML and CSS, you can customize it to your own style.
商品の発送方法を設定しなければ売ることができません。各自で設定しましょう。
I can't sell it without setting the shipping method. Let's set it up by ourselves.

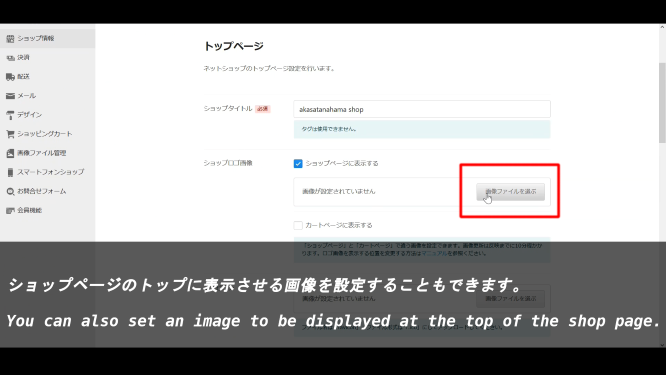
ショップページのトップに表示させる画像を設定することもできます。
You can also set an image to be displayed at the top of the shop page.
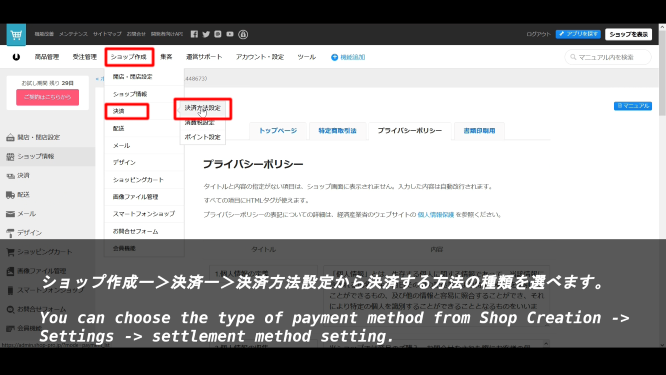
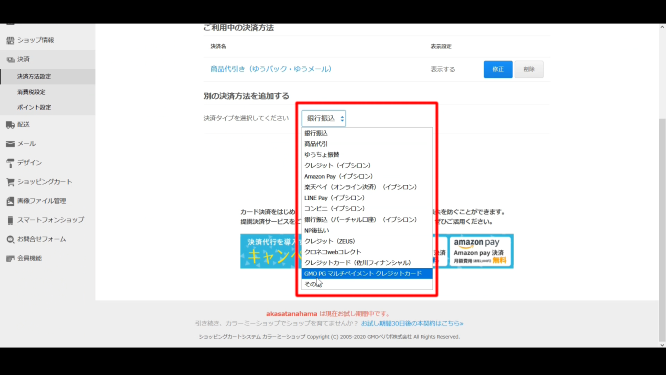
ショップ作成ー>決済ー>決済方法設定から決済する方法の種類を選べます。
You can choose the type of payment method from Shop Creation -> Settings -> settlement method setting.
以上で導入は終わりです。ここから実際に商品を販売するショップにするためには細かな設定を行う必要があります。 ですが、COLORMEはオンラインショップのめんどくさい導入部分、つまり「ドメインを買って、サーバーを借りて、 サーバーを立ち上げて、サーバーの設定をして、デザインを決めて、ユーザーの入力部分を作って、 商品の展示、発注、発送、決済システム等の様々なUIやバックグラウンド処理の表示と作成」 をする必要がなく簡単に10分ほどでオンラインショップを立ち上げることができる便利なサービスです。 もしオンラインショップを作ってみたいけど難しそうと思っている人は試しに利用してみてください。
This is the end of the introduction. From here, it is necessary to make detailed settings in order to make the shop actually selling the products. However, COLORME is a convenient service that you can set up an online shop easily in about 10 minutes without having to do the troublesome introduction of the online shop (For example, "Buying a domain, renting a server, starting a server, setting up a server, deciding the design, creating the user input part, displaying and creating various UI and background processing such as product display, ordering, shipping, payment system, etc."). If you want to create an online store but don't feel like it's going to be easy, try it out.